Creating templates
You can add one or more templates in DMPonline. Your template will be displayed to users in your oganisation when no funder template applies. If you want to ask questions in addition to funder requirements, use the option to ‘Customise funder templates’. This allows you to add section(s) with questions from your organisation.
A template can have one or more phases. For example, you may have an initial DMP that is created at the proposal stage and a full DMP which is completed during the project. Templates are usually divided into a number of sections, each with a few questions.
Select "Templates" from the Admin features dropdown menu and click the "Create template" button. You can create multiple templates depending on your local needs e.g. a generic institutional template and one for PhD students.

Enter a title for the template and optional description. We recommend not using "template" in the title as this will result in redundant use of the term where automated messages appear throughout DMPonline.

After saving your template details, click the second tab to "Add new phase." Most templates only have a single phase. If this is the case, we recommend using the title "Data Management Plan." Multi-phase templates are useful if a data management plan is required at different stages of a project (e.g. before a project begins and after data have been collected and deposited in a repository).

Once you have created a phase, you must add at least one section by clicking the header bar to "Add a new section" in the lower right. Sections are useful for grouping related questions (e.g. multiple questions about ethics policies) however the overall structure of your template is up to you.

If you want to add guidance at a section level, provide this in the 'Section description' field. This guidance will present before any questions for the section.
After creating a section, you will see a button on the lower right to "Add question." Clicking this button will open a series of text editors and other options where you can:
- Create question text
- Select the answer format (e.g., free text, radio buttons, check boxes with predefined options, etc)
- Provide a default answer (this will pre-populate the answer field for your users)
- Provide an example answer (this will display below the answer box)
- Provide additional guidance text and links (these will appear in the right-hand panel beside each question)
- Select one or more themes

Continue to add sections and questions as needed to complete your template.
While editing the template you can click the "Preview" button in the upper right of the phase area to see how it would appear to researchers. When you are satisfied with your template, the final step is to publish it.
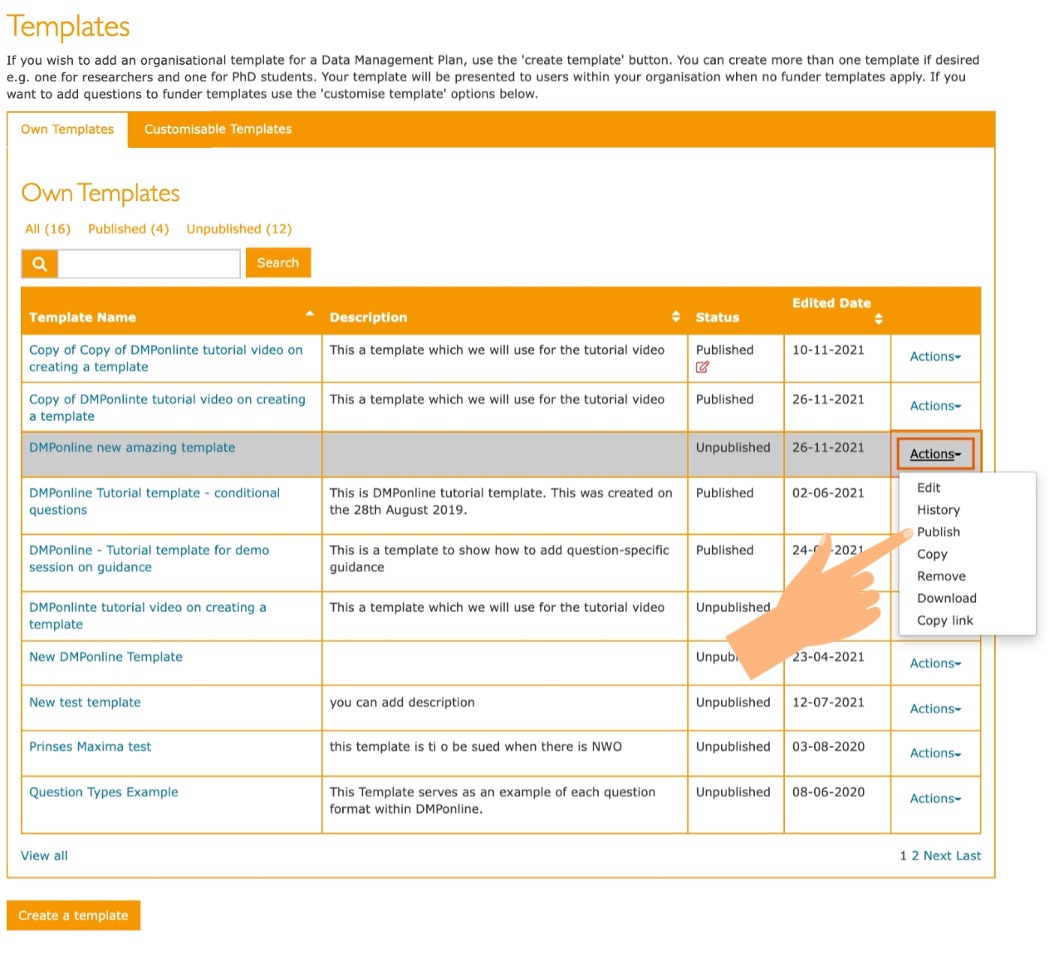
Click "View all templates" to return to the main Templates list. Select "Publish" or "Publish changes" from the Actions menu next to the appropriate template.
Once you have published a template, this will remain active and visible to end users until you unpublish it.
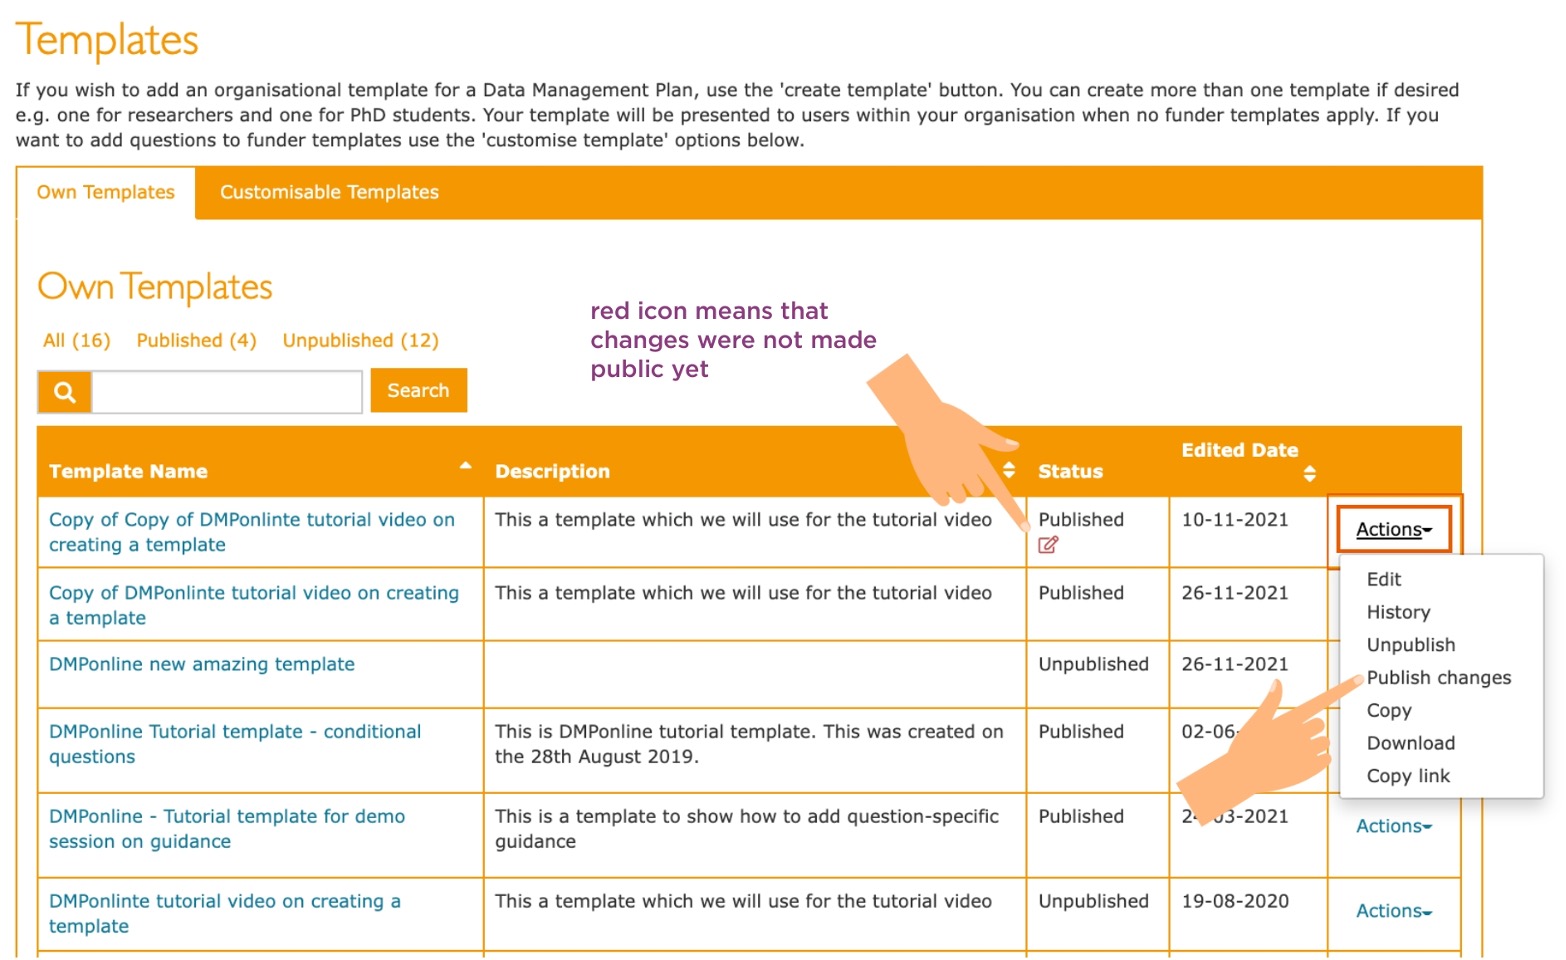
If you want to make changes, you can edit the existing template at any time. This will create a secondary unpublished version, but your original will remain active. When you are ready to publish the changes, the new version will replace the earlier one. You will have to go through the actions>publish changes in order for the changes to appear to your users. You can know that the changes were not published if there is a red icon with a pen next to the 'Published' status.
Users will always be provided with the latest published version of your template.
If you want to create a second template similar to another, you can "copy" template to generate a clone to edit rather than starting again from scratch.