Lab3 Laser Cutting and 3d Printing
For this week’s lab, we want you to experiment with digital fabrication tools. The methods that will be used are 3D printing and laser cutting.
- Complete the first Tinkercad tutorial. You’ll need to create an account.
- Create a new project (outside the tutorial file) and make a cylinder 5mm tall and 6.9mm that you’ll use as your button.
- Personalize the button to make it your own.
- Export the object as a
.stlfile. - Download and install the Makerbot Print
- Create a MakerBot account.
- Start the Makerbot Print Application and log in.
- Load the exported
.stlbutton into the printer. - Connect your laptop to the printer over USB.
- Once the Printer is connected hit "print".
- After the printer has started the USB cable can be disconnected from your laptop.
- Make sure you have followed the safety instructions from Niti.
- Download a vector editing program like Inkscape (free) or Adobe Illustrator (free for 30 day trial).
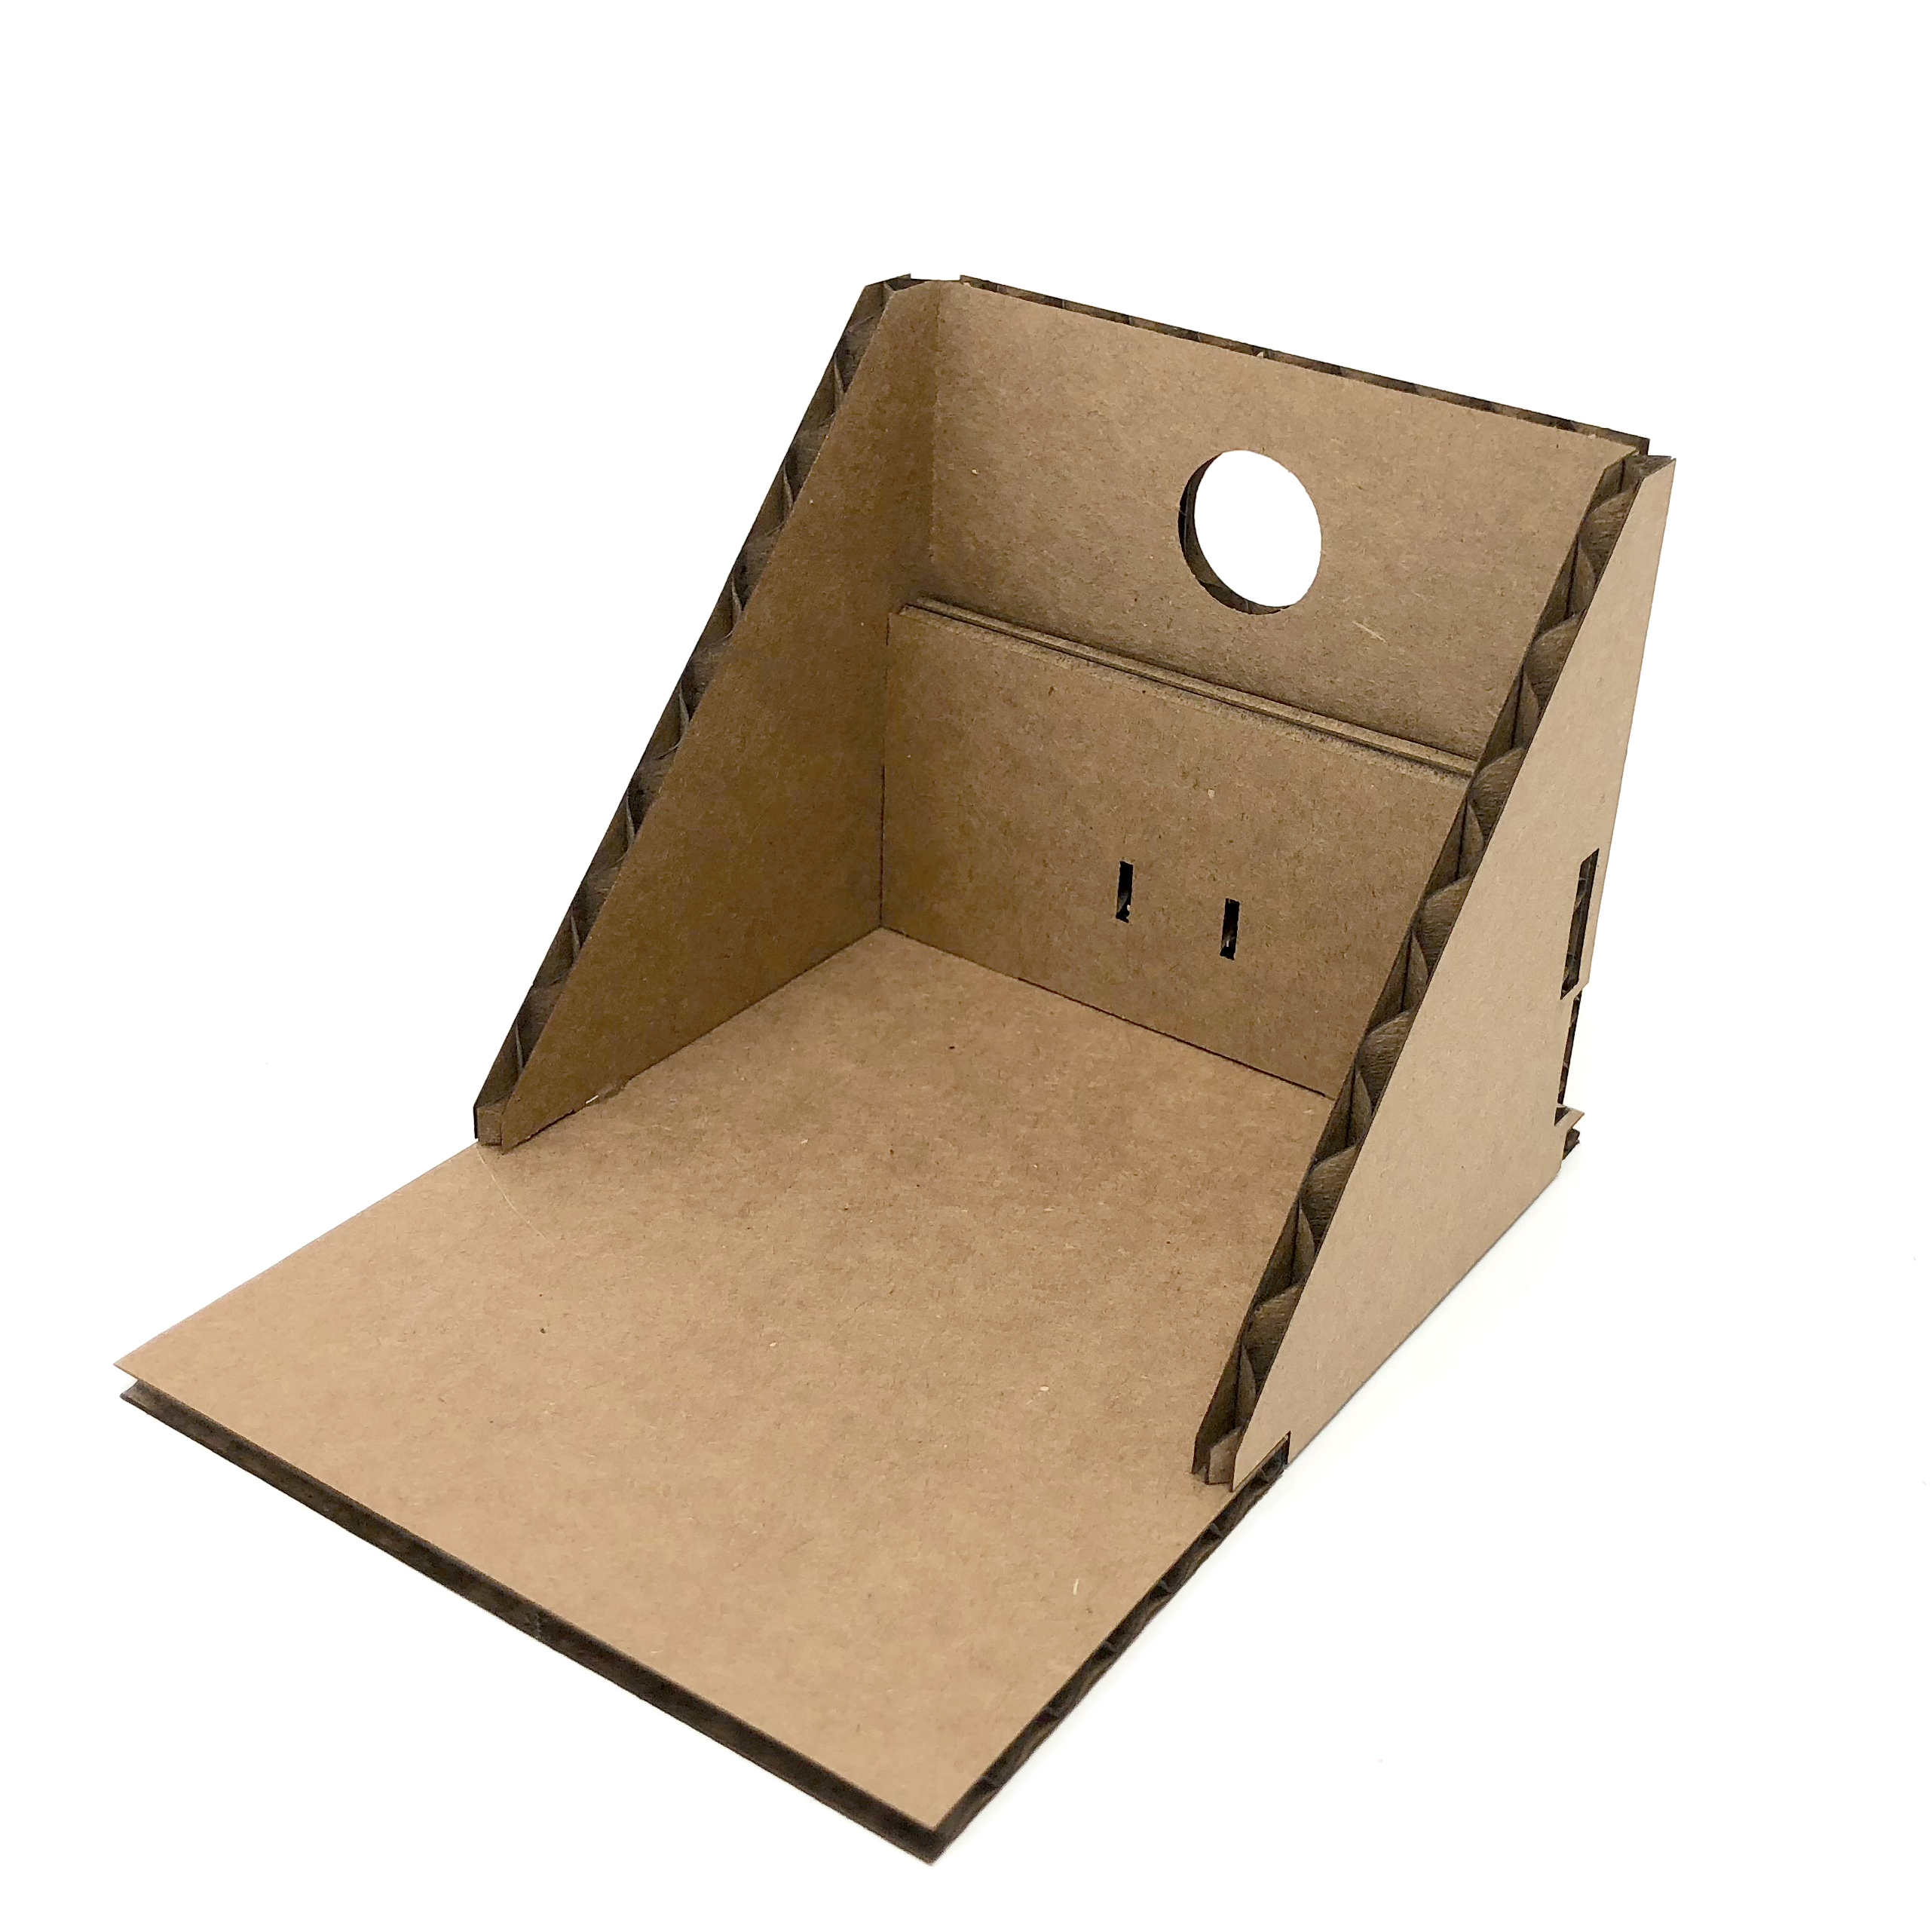
- Download the laser cutter template file for the CameraButtonStand.
- Try to understand how these cuts lead to the 3D object.
 -
-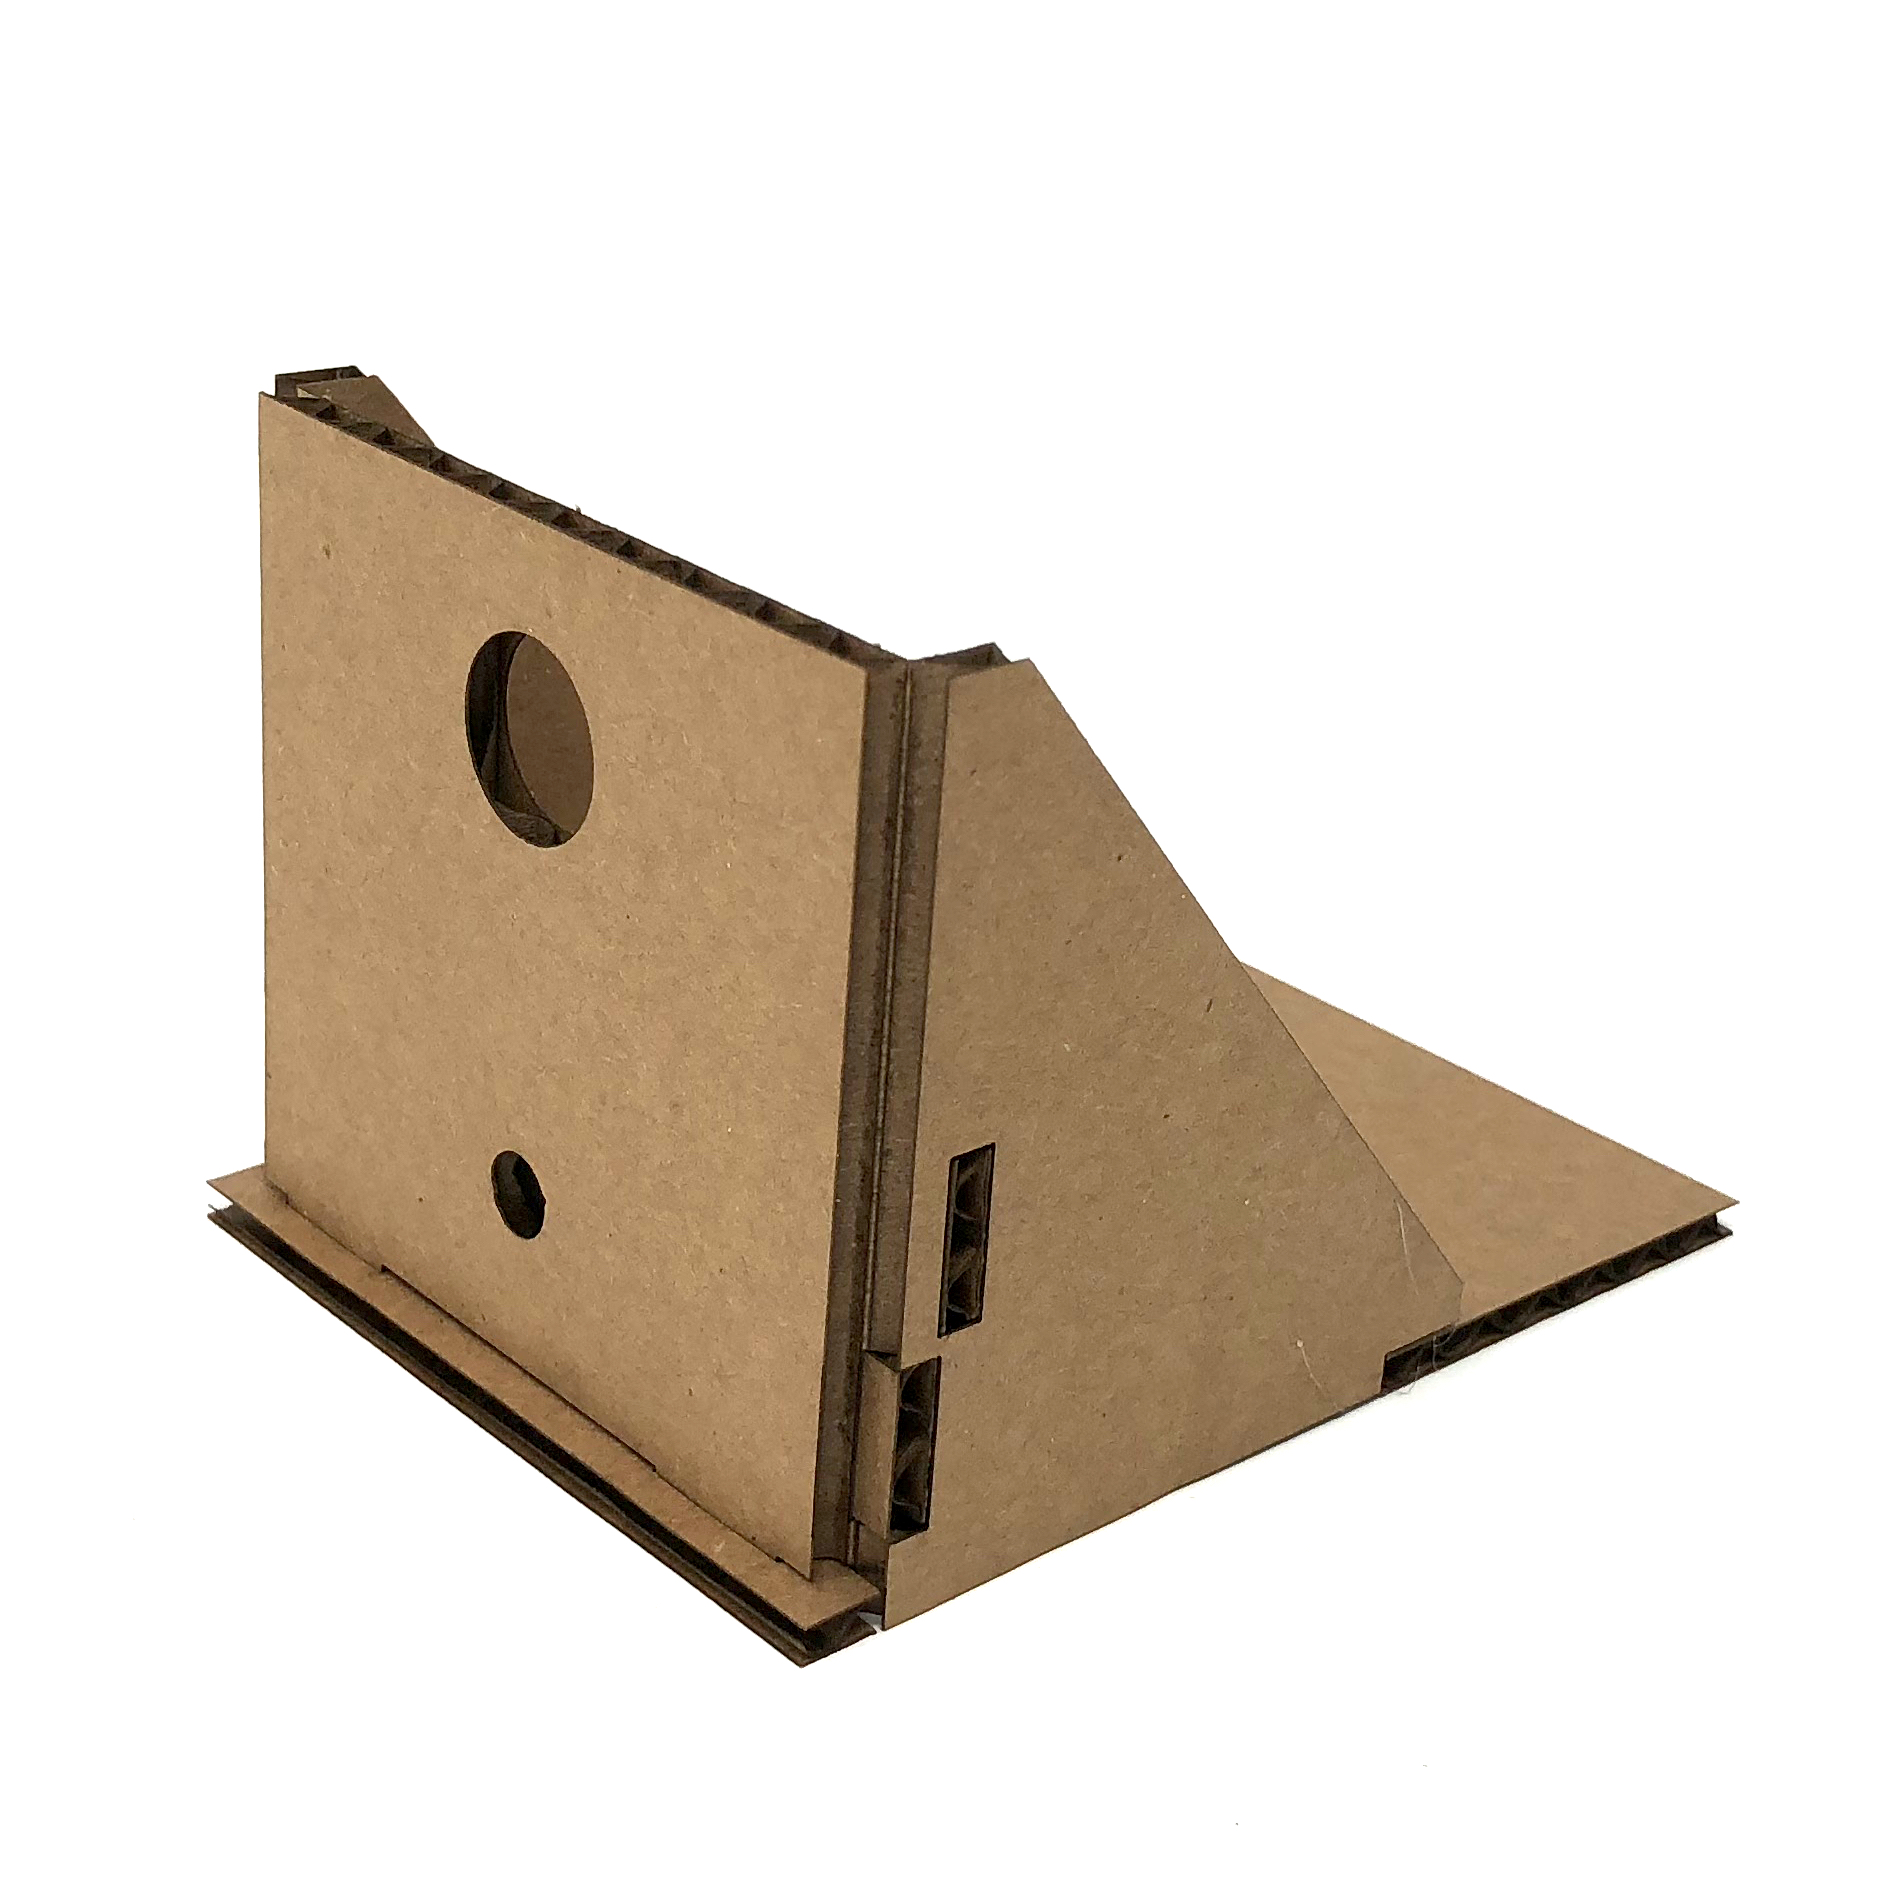
- Personalize the stand to make it your own by adding vectors to the template file.
- Save the file -> Move it to a USB drive. -> Connect the USB drive to the laser cutting computer.
- Open the file in Adobe Illustrator on the lab’s computer.
- Set the line-width to 0.001pt.
- Follow the instructions to cut:
- Load the machine with 4-millimeter cardboard.
- Disable X/Y.
- Move the laser to its starting position(top left corner of the material.
- Focus the laser. (Don't forget to put the focus tool up again!)
- Set home(button).
- Close the lid.
- Open the printer preferences.
- Make sure you set the different power levels for the normal cut and blue scoring-cut. See for values below.
- Turn on the air assist compressor on the floor and the suction system (big blue box).
- Print the job.
- Press 'go' on the laser cutter.
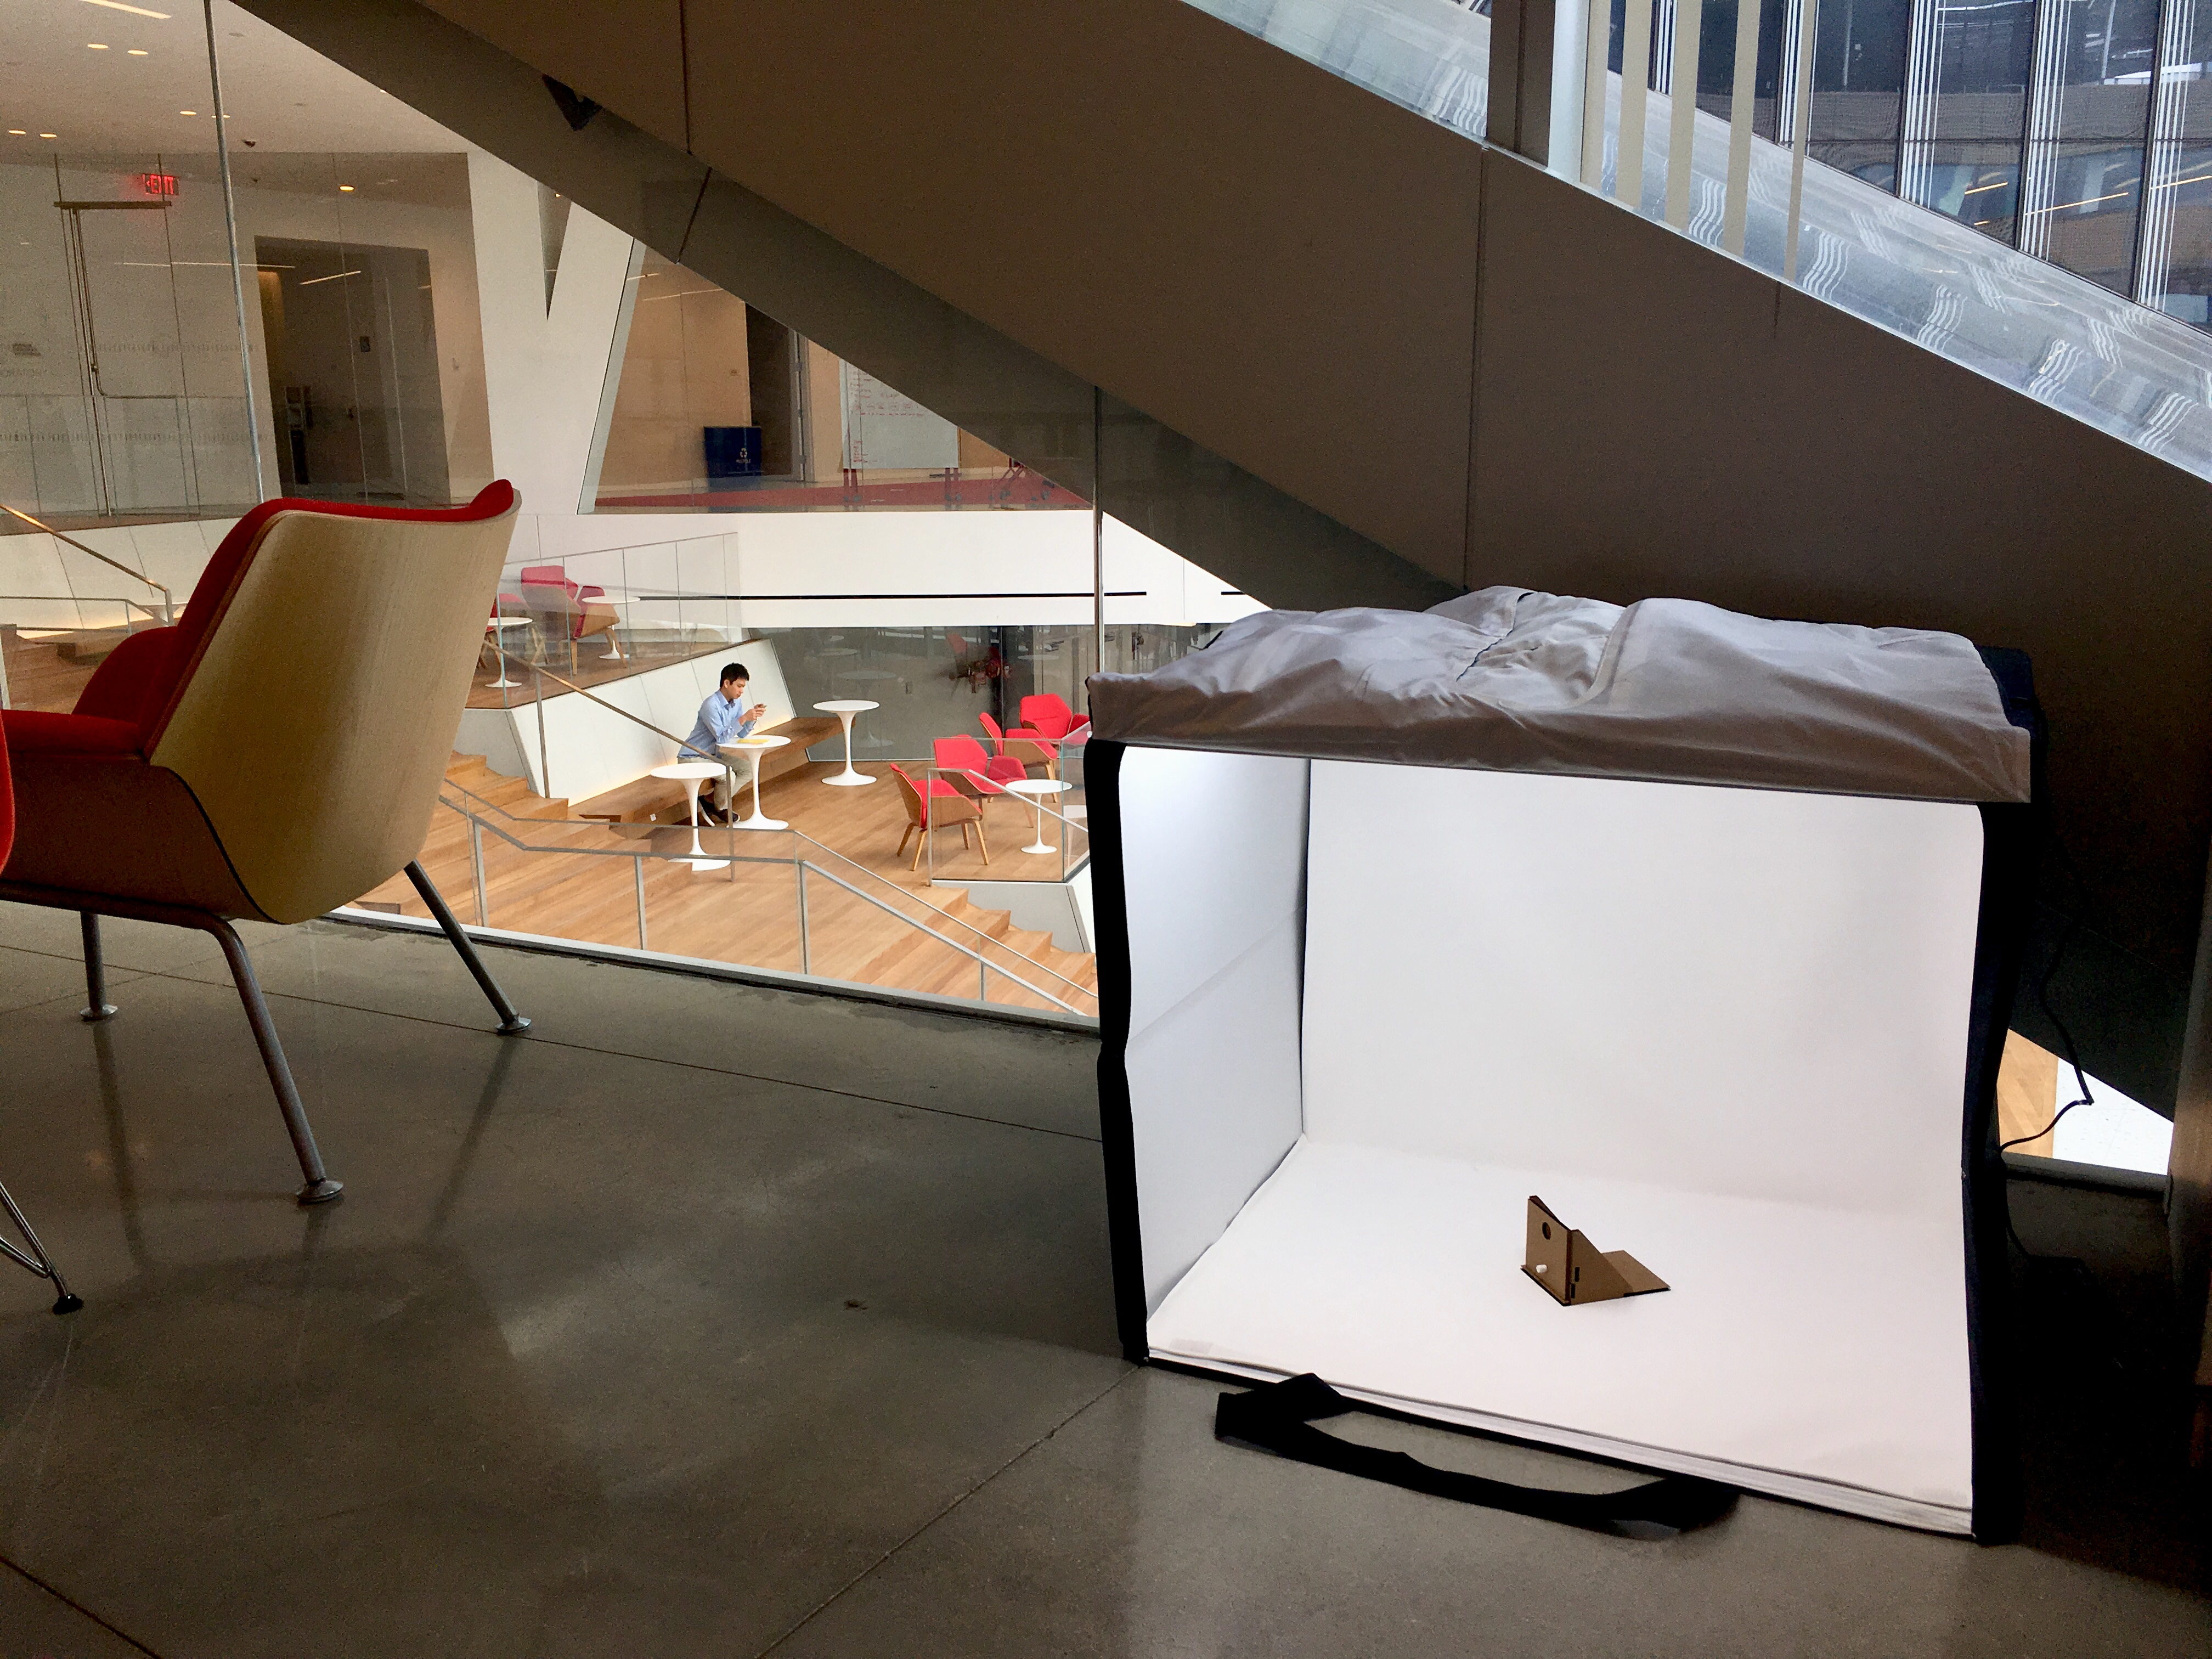
Post your files to GitHub. Make sure to include at least one photo of your final object. Consider using the lightbox in the MakerLab to take high-quality product pictures.
Post a link to your GitHub submission on your Slack channel with your photo, cross post to the #lab3 channel, and tag the TAs with questions/requests for feedback.
General resources:
- Tinkercad webinar this Friday!
- MakerLab Master document
- MakerLab spring schedule
- For anyone who had trouble with the programming assignments from last weeks. You can use the following weeks to catch up with these handy resources.
Power settings for 4mm cardboard
Cutting (Standard Black Lines): Speed: 45% Power: 65% Frequency: 500Hz
Scoring (Color code Blue Lines): Speed: 65% Power: 45% Frequency: 500Hz