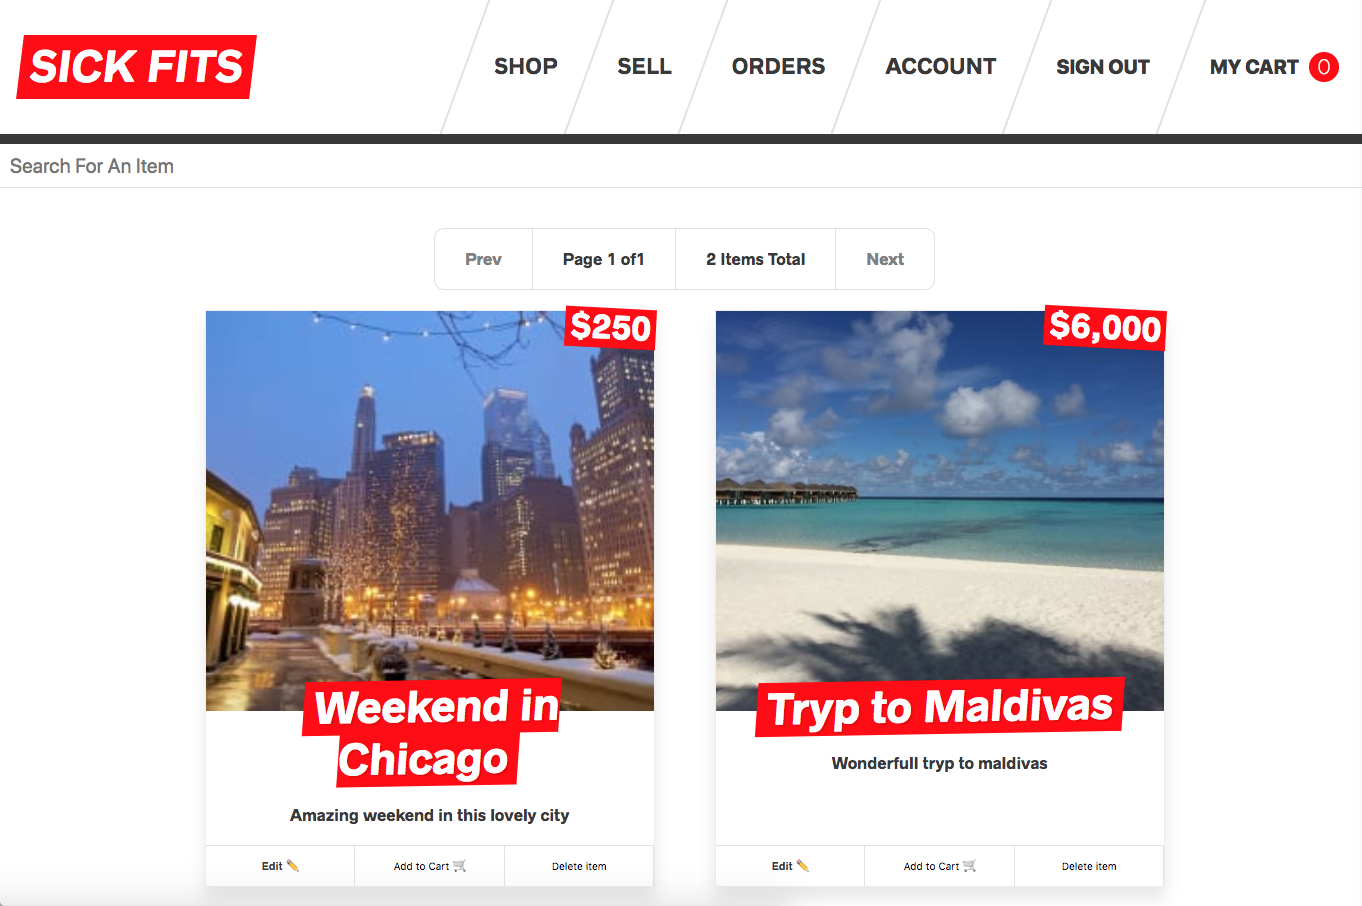
A complete web app where users are able to sell and buy products. It keeps a history of previous orders and items added to shopping cart can be paid using Stripe.
| NUMBER | BRAND | CVC | DATE |
|---|---|---|---|
| 4242424242424242 | Visa | Any 3 digits | Any future date |
| 4000056655665556 | Visa (debit) | Any 3 digits | Any future date |
You can visite the website Here link
- ReactJS
- Apollo
- Jest & Enzyme
- Styled components
- Next
- cloudinary [ for image manipulation make small and large images and add filter to images ]
- NodeJS
- GraphQL
- Yoga
- Prisma
- Docker
- Cloudinary Platform Powering Your Media · Image and Video API for Powerful Visual Experiences · Automatically optimize and deliver images and videos
Code to do this in my project[frontend/components/createitem.js] is :
uploadFile = async e => {
    console.log('uploading file...');
    const { files } = e.target;
    console.log(files);
    const data = new FormData();
    data.append('file', files[0]);
    data.append('upload_preset', 'sickfits');
    const res = await fetch(
      'https://api.cloudinary.com/v1_1/dgnyyo3a3/image/upload/',
      {
        method: 'POST',
        body: data,
      }
    );
    console.log(res);
    const file = await res.json();
    console.log(file);
    this.setState({
      image: file.secure_url,
      largeImage: file.eager[0].secure_url,
    });
  };


<label htmlFor="file">
                image
                <input
                  type="file"
                  id="file"
                  name="file"
                  placeholder="Upload an image"
                  required
                  onChange={this.uploadFile}
                />
                {image && <img width="200" src={image} alt="upload Preview" />}
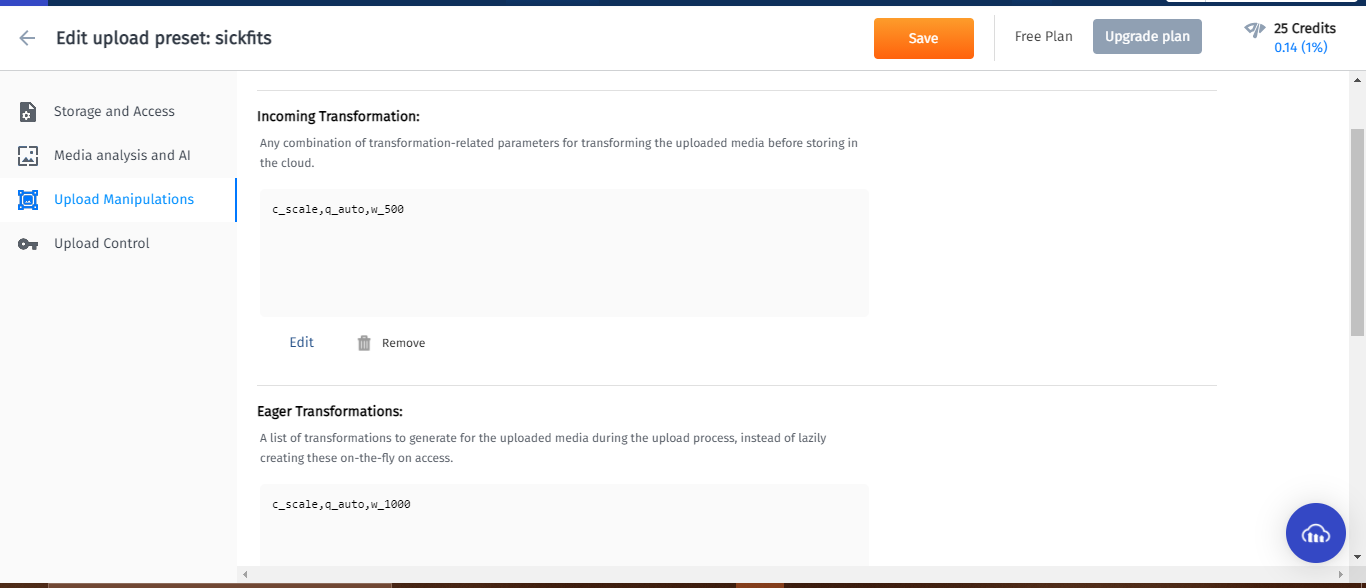
upload preset => this is the preset of this project which i created on cloudinary
data.append('upload_preset', 'sickfits');
This is my preset on cloudinary
- Create a type in datamodel.prisma
type User {
  id: ID! @id
  name: String!
  email: String! @unique
  password:String!
  resetToken:String
  resetTokenExpiry:String
  permissions:[Permission] @scalarList(strategy: RELATION)
  cart:[CartItem!]!
}
type Item {
  id: ID!  @id
  title: String!
  description: String!
  image: String
  largeImage: String
  price: Int!
  createdAt: DateTime! @createdAt
  updatedAt: DateTime! @updatedAt
  user:User!
}
- Deploy it to prisma [to update the db] to get the prisma schema (generated/prisma.graphql)
npm run deploy
- Write the type of mutation or Query [like function declaration in c programming] in schema.graphql
type Mutation {
  createItem(
    title: String
    description: String
    price: Int
    image: String
    largeImage: String
  ): Item!

  type Query {
  items(
    where: ItemWhereInput
    orderBy: ItemOrderByInput
    skip: Int
    first: Int
  ): [Item]!
  item(where: ItemWhereUniqueInput!): Item
  itemsConnection(where: ItemWhereInput): ItemConnection!
  me: User
  users: [User]!
}
- Write a query or mutation in the resolvers [like function implementation in c programming]
Query
 async users(parent,args,ctx,info){
    // 1. check if the user[who query users query] is logged in
    if(!ctx.request.userId){
      throw new Error('You must be logged in!');
    }
    console.log(ctx.request.userId);
    // 2. check if the user has the permission to query all users
    hasPermission(ctx.request.user, ['ADMIN','PERMISSIONUPDATE']);
    // 3. if they do, query all the users
    return ctx.db.query.users({},info);
  }


};
Mutation
async createItem(parent, args, ctx, info){
    //TODO: check if they are logged in
    if(!ctx.request.userId){
      throw new Error('You must be logged in to do that !');
    }
    //interface to prisma db
        //this ctx.db.*** return promise so i'm using async
    const item= await ctx.db.mutation.createItem({
      data:{
        //this is how we create a relationship between the user and items
        user:{
            connect:{
                id:ctx.request.userId,
            }
        },
        ...args
      }
    },info);  //this is from createserver.js
    console.log(item);
    return item;

  },
First, clone this repository into your machine
git clone https://github.com/FoushWare/Sick-fitsMove into backend folder
cd sick-fits/backendThen, install package dependencies
npm installCreeate a .env file to configure environment variables. Here is a list of needed variables and possible values:
FRONTEND_URL="http://localhost:7777"
PRISMA_ENDPOINT="http://localhost:4466"
PRISMA_SECRET="asdfawe4t43gnawrq234fh"
APP_SECRET="ertweydghfgh"
STRIPE_SECRET="sk_test_safasdfrtyut"
PORT=4444
MAIL_HOST="smtp.mailtrap.io"
MAIL_PORT="2525"
MAIL_USER="5234rte68799"
MAIL_PASS="t67568irt34"
Run Prisma container using Docjer
npm run dockerGenerate database schema
npm run deployLaunch backend
npm run devMove into frontend folder
cd ../frontendThen, install package dependencies
npm installLaunch frontend
npm run devI needed 3 apps on the cloud
- one for prisma
- one for yoga server for backend graphQL
- one for the frontend app [ React app with nextjs ]
I deployed it to heroku but i had some errors
-
CORS error
I tried all the answers on the internet, but you won't believe me
i put the FRONTENT_URL to Heroku like that
https://foushwaresickfits-next.herokuapp.com/But the correct one was the same URL without the ending slash
https://foushwaresickfits-next.herokuapp.comBackend config for cors
server.start(
  {
    cors: {
      credentials: true,
      // origin: process.env.FRONTEND_URL,
      origin: process.env.FRONTEND_URL,
      // origin: 'https://foushwaresickfits-next.herokuapp.com',
    },
  },
  deets => {
    console.log(`Server is now running on port http://localhost:${deets.port}`);
  }
);
for the frontend
return new ApolloClient({
    uri: process.env.NODE_ENV === 'development' ? endpoint : prodEndpoint,
    request: operation => {
      operation.setContext({
        fetchOptions: {
          credentials: 'include',
        },
        headers,
      });
    },
-
set cookie
how to set cookies when using CORS.
i didn't see cookie in the browser but you can know more info from the network tab in the developer tool in chrome that the cookie is send from the server but the browser block it so i need to make
sameSite: "none " && secure : true in the cookie setting process
ctx.response.cookie('token', token, {
      httpOnly: true,
      secure: true, // only transfer over https
      sameSite: "none",
      maxAge: 1000 * 60 * 60 * 24 * 365,
    });


