2022 Fall MCT Portal Documentation
This guide provides a detailed documentation of the audiovisual setup in the Portal. It is split into two sections: audio and video.
This section explains the audio routing within the Portal. The standard Portal scene 'MCT—Portal-2022' on the Midas M32 mixer is the reference for this wiki. This scene should load by default on startup, and provides a routing that works for most standard applications of the Portal, including Zoom and LOLA. Please note that alternative routing is required to use the spatial audio system.
A full audio routing diagram can be found below.
-
Mixers & boxes
- Midas M32 mixer - 32 input channels, 16 output channels
- 2 Behringer SD8 Stageboxes
- 1 for microphone/line inputs, connected to room mics and minijack by default.
- 1 for spatial array output, requires dedicated audio scene within the Midas mixer
-
Computers
- Zoom PC for connecting to Zoom
- LOLA PC for using LOLA software for network musical performances
-
Microphones & Input Cables
- 1 minijack cable
- 3 ceiling mounted shotgun microphones
- 2 tabletop gooseneck microphones
-
Speakers & Outputs
- Stereo pair of ceiling mounted Genelec speakers
- 8 speakers of spatial audio array
- RME audio interface and SSL connected to the LOLA PC
-
Other
- Logitech Group video conferencing system (connected to Zoom PC) for backup (see Troubleshooting)
Start up the audio components of the Portal in the following order:
- Turn on the Midas mixer using the power switch located on the back. Turn down the master fader on the far right of the main board. The default Midas scene called 'MCT-PORTAL-2022' should be loaded. If it is not:
- Press the View button in the Show panel of the Midas. On the screen select Scenes and the scroll to MCT-PORTAL-2022. Press the dial to select the preset, and then press the right arrow to confirm your selection. The default MCT-PORTAL-2022 scene is now loaded.


- Turn on the Stagebox SD8 located at the back of the room using the switch on the right-hand side.

- Turn on the main stereo Genelec speakers using the switches located on the back. Green LEDs will show on the fronts when the speakers are on. It is important this step is done last to avoid any pops and clicks when switching on the Midas. Failing to do so can result in damage to the speakers.
-
Inputs 1-8 receive from the Stagebox SD8 located at the front of the room, and contain the most frequently used cables and microphones in the room.
- Inputs 1-2: Stereo pair for the minijack cable. Connect your headphone out on your laptop during Zoom sessions to play audio.
- Inputs 3-5: Ceiling mounted shotgun microphones. These microphones require phantom power.
- Inputs 6-7: Tabletop gooseneck microphones. These microphones require phantom power.
- Input 8: Not used
-
Inputs 9-16 receive from the LOLA PC via the RME. These inputs allow us to receive up to 8 channels of low-latency audio through the LOLA network.
-
Inputs 17-24 contain only the audio received from the LOLA PC.
- Inputs 17-22: Not used
- Inputs 23-24: Stereo pair from the LOLA PC.
-
Inputs 25-32 are not used in the default Midas scene.
-
Outputs 1-8 are sent to the LOLA PC via the RME. These inputs allow us to send up to 8 channels of low-latency audio through the LOLA network. In the default Midas scene buses 1-8 are routed to outputs 1-8.
-
Outputs 9-10 are sent out to the Zoom PC. In the default Midas scene buses 9-10 are routed to outputs 9-10.
-
Outputs 11-14 are not used in the default Midas scene.
-
Outputs 15-16 are the main stereo Genelec speakers mounted at the back of the room. You can route input channels to these speakers by selecting the channels using the 'SEL' buttons and then pressing Main Stereo.
Below is the physical audio routing within the Portal. Please note this is does not include the routing within the Midas mixer i.e., which physical inputs go to which input channels and buses go to which physical outputs etc. This routing is part of the Midas scene, and therefore for most common use cases such as Zoom and LOLA, you do not need to change these settings. The Logitech systm is also not included (connected to the Zoom PC via mini jack).

The Zoom PC is connected into the Portal's audio system. On the Midas there are two dedicated channels each for both sending to and receiving from Zoom.


-
Input channels 23-24 receive from Zoom. On the default Midas scene these will be lit red and labeled 'FromZoom'. Send these channels to the main speakers by selecting either channel using the 'SEL' button and pressing Main Stereo in the Main Bus section. Inputs 23-24 are linked by default, therefore any action you perform on one will be mirrored on the other.
-
Buses 1-2 are sent to Zoom. On the default Midas scene these will be lit red and labeled 'ToZoom'. Press the Fader Flip button and select one of these channels. You can adjust the sliders in the inputs to send channels to Zoom. In most scenarios you will want to send Channels 1-7 (the room microphones and minijack) to Zoom. Buses 1-2 are linked by default, therefore any action you perform on one will be mirrored on the other.
The LOLA PC is connected to the Portal's audio system. There are 8 dedicated send channels and 8 dedicated receive channels for the LOLA PC.


-
Inputs 9-16 are received from the LOLA PC. On the default Midas scene these will be lit turquoise and labeled 'FromRME'. You can route these inputs as you would any other received channels. Unlike Zoom, each input is independent, therefore you must set the levels/routing of each separately.
-
Outputs 1-8 (via buses 1-8) are sent to the LOLA PC. On the default Midas scene these will be lit turquoise and labelled 'ToRME'. You can route any received audio to these outputs. Unlike Zoom, each output is independent, therefore you must set the levels/routing of each separately.
Note: in order to use the LOLA PC with the Midas, you must also turn on the RME audio interface and the SSL, both of which are located in the rack to the right of the Midas. To switch them on, press the switch on the extension cord located in the bottom of the rack.

-
I do not see any levels on the Midas from the microphones
- Ensure the Stagebox at the back of the room is switched on. This is required for the micrphones to be received at the Midas.
- Make sure +48V phantom power is on the shotgun and tabletop microphones. You can check this by selecting each mic with its corresponding 'SEL' button and pressing the +48V button in the top left section of the top panel, labelled CONFIG/PREAMP.
-
I see levels in the mixer but I don't hear anything in the room.
- Ensure the main stereo Genelec speakers are switched on.
- Make sure the required inputs (either from the Stagebox on channels 1-7, the RME on channels 9-16 or channels 23-24 from Zoom) are being sent to the main speakers. Select the relevant channel(s) using the 'SEL' buttons and press main stereo in the top panel.
-
I hear feedback on the main speakers or on my laptop speakers.
- Make sure you mute your laptop speakers and microphone in the Zoom room to avoid feedback loops.
-
The MIDAS malfunctions in another way.
- The default MIDAS preset (scene) for Zoom is called “MCT-PORTAL-2022”. Reload this scene by clicking the View button on the right of the console, scroll over to scenes, select the scene and hit load. You can check the wiki page for the MIDAS32 for more detailed information here.
- You can use the Logitech system for backup if the MIDAS fails to deliver completely. It is a remote system that has a speaker and two microphones directly connected to the Zoom PC. You can find it right under the NEC TV's. In the Zoom Room settings, change the speaker and microphone device to 'Logi Group Speakerphone' and enter the room passcode in order to use it. Do not forget to change it back after you used it to make life easier for troubleshooting the next time.
This section demonstrates the video connections, related information and some troubleshooting in Portal.
- NEC 4x TV
- Sony
- Projector
- 2 monitors
- PTZ
- Logitech 1, 2
- Huddly
- Zoom 1
- Zoom 2
- LOLA

Before setting up a video meeting, monitors and routing devices should be turned on. Turn on the monitors you would like to use by following the instructions below.
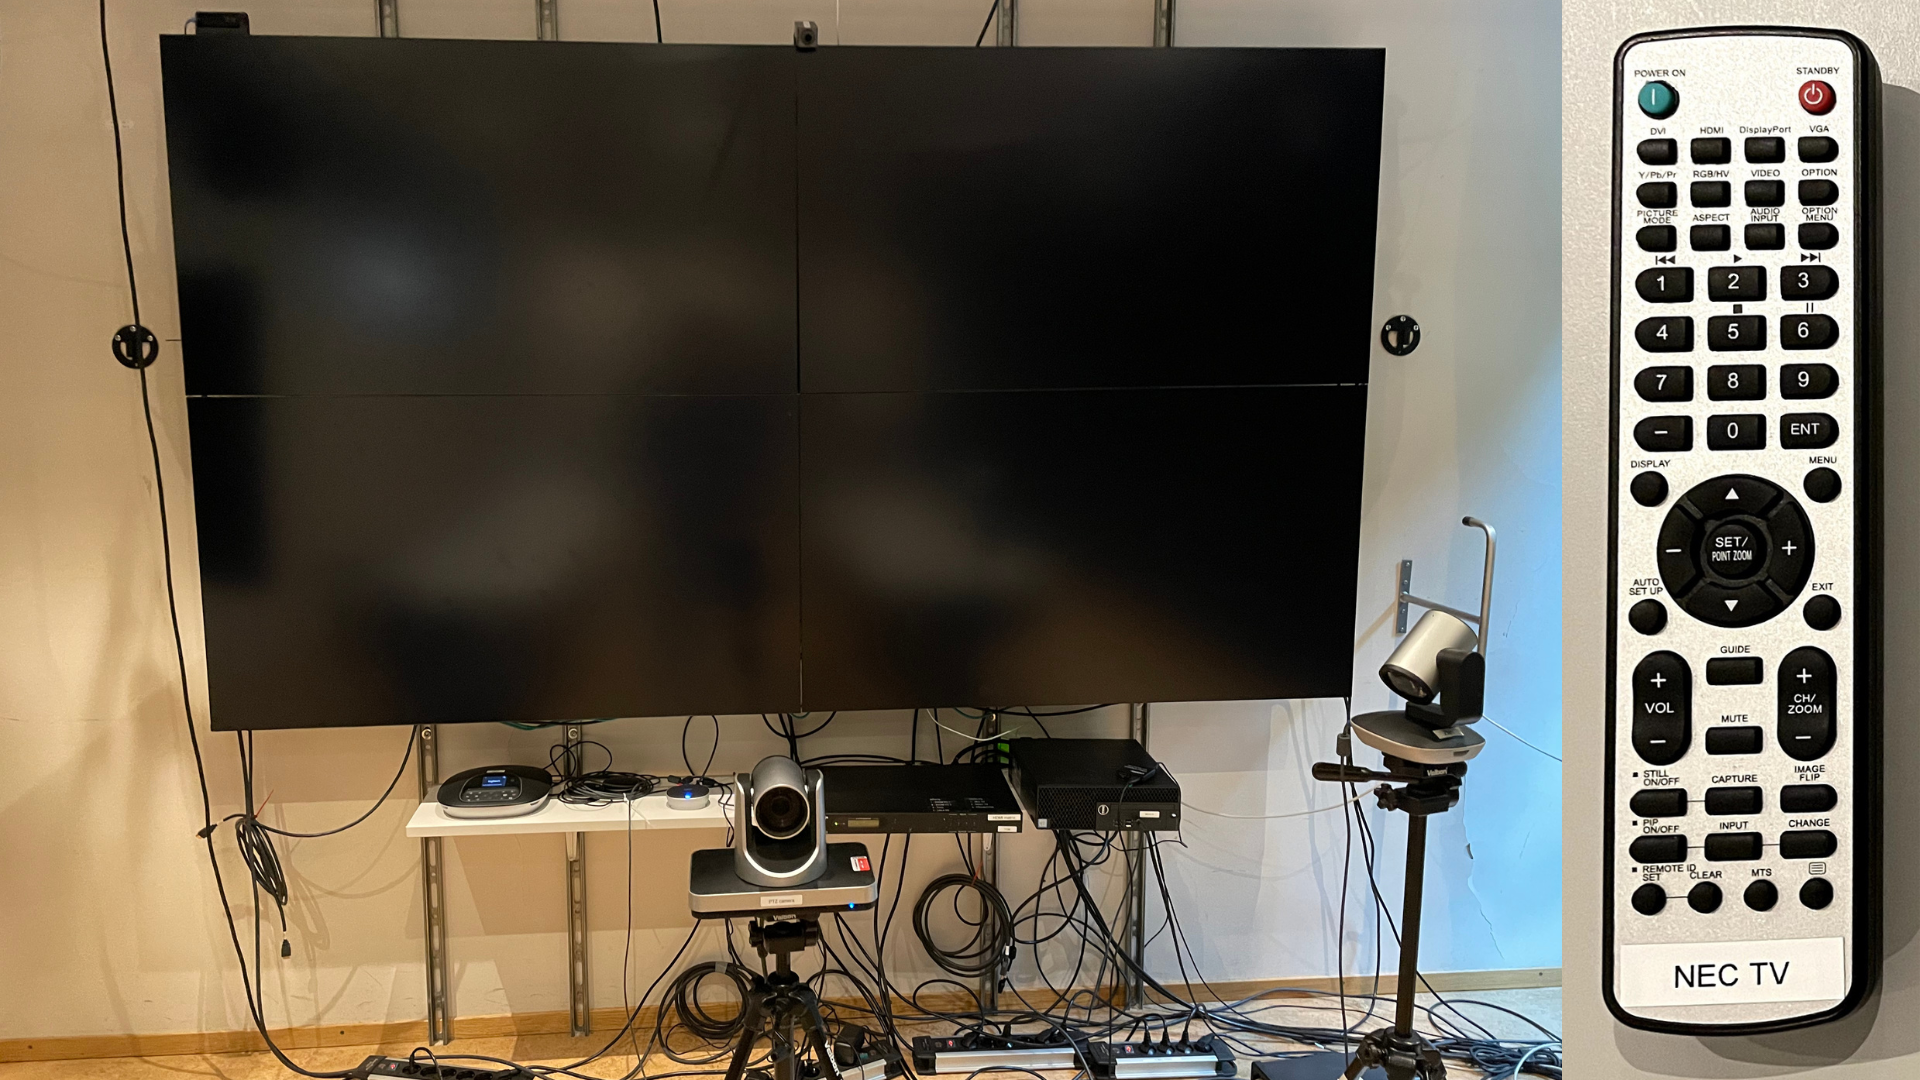
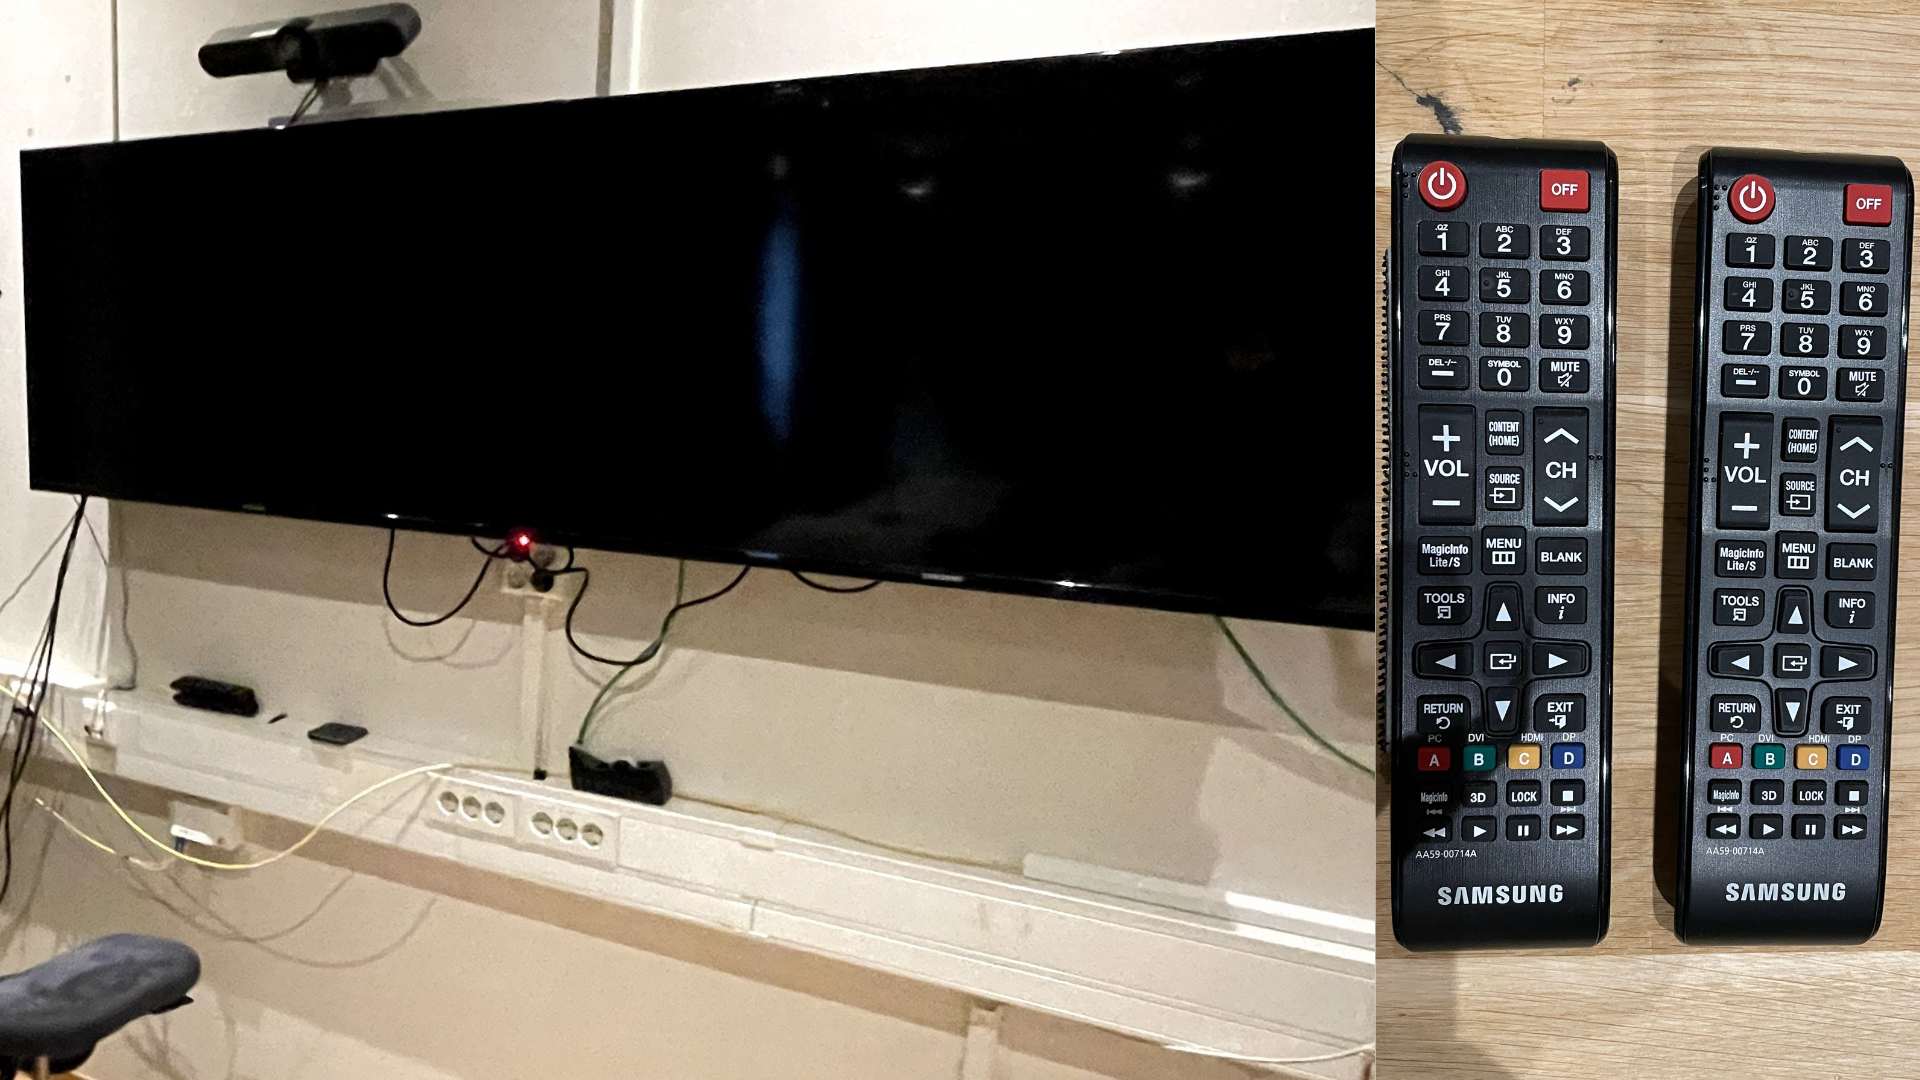
Turn on the NEC TV by using the remote.
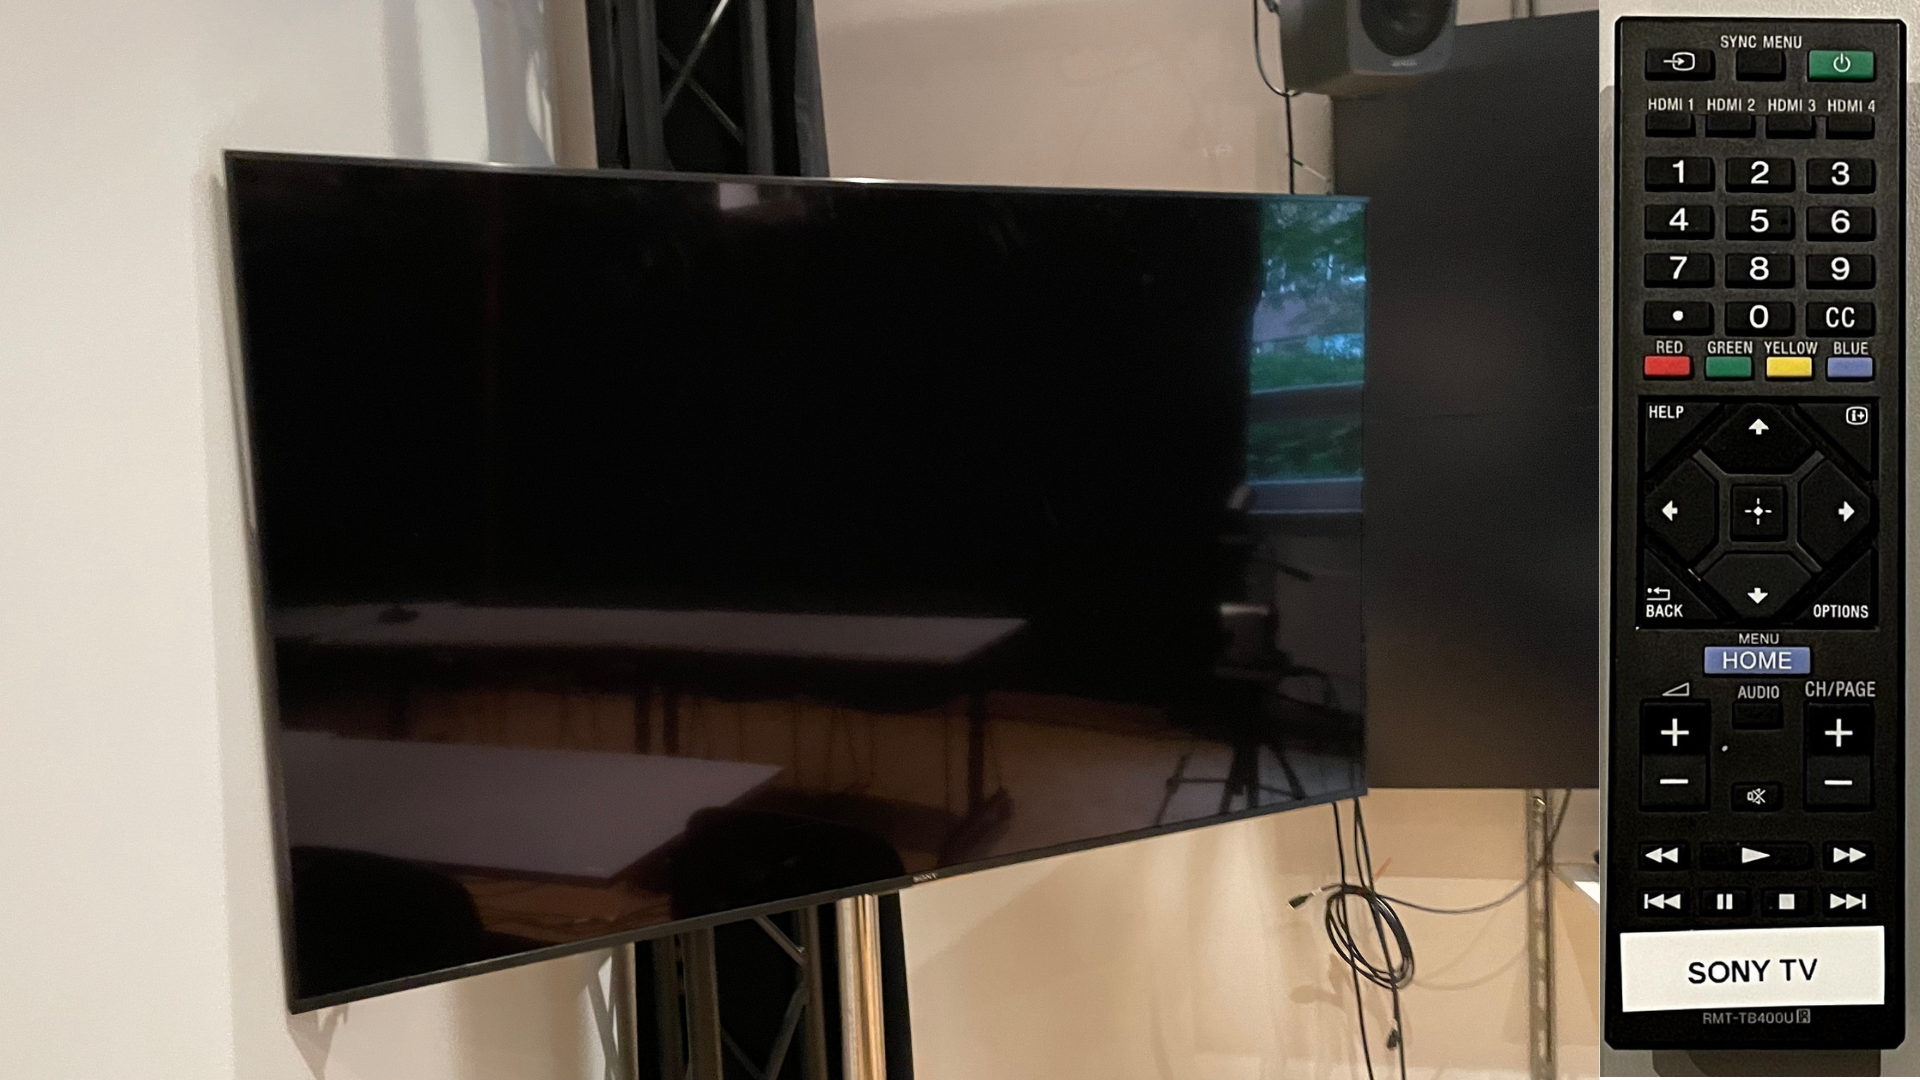
Turn on the Samsung TV by using the remote.
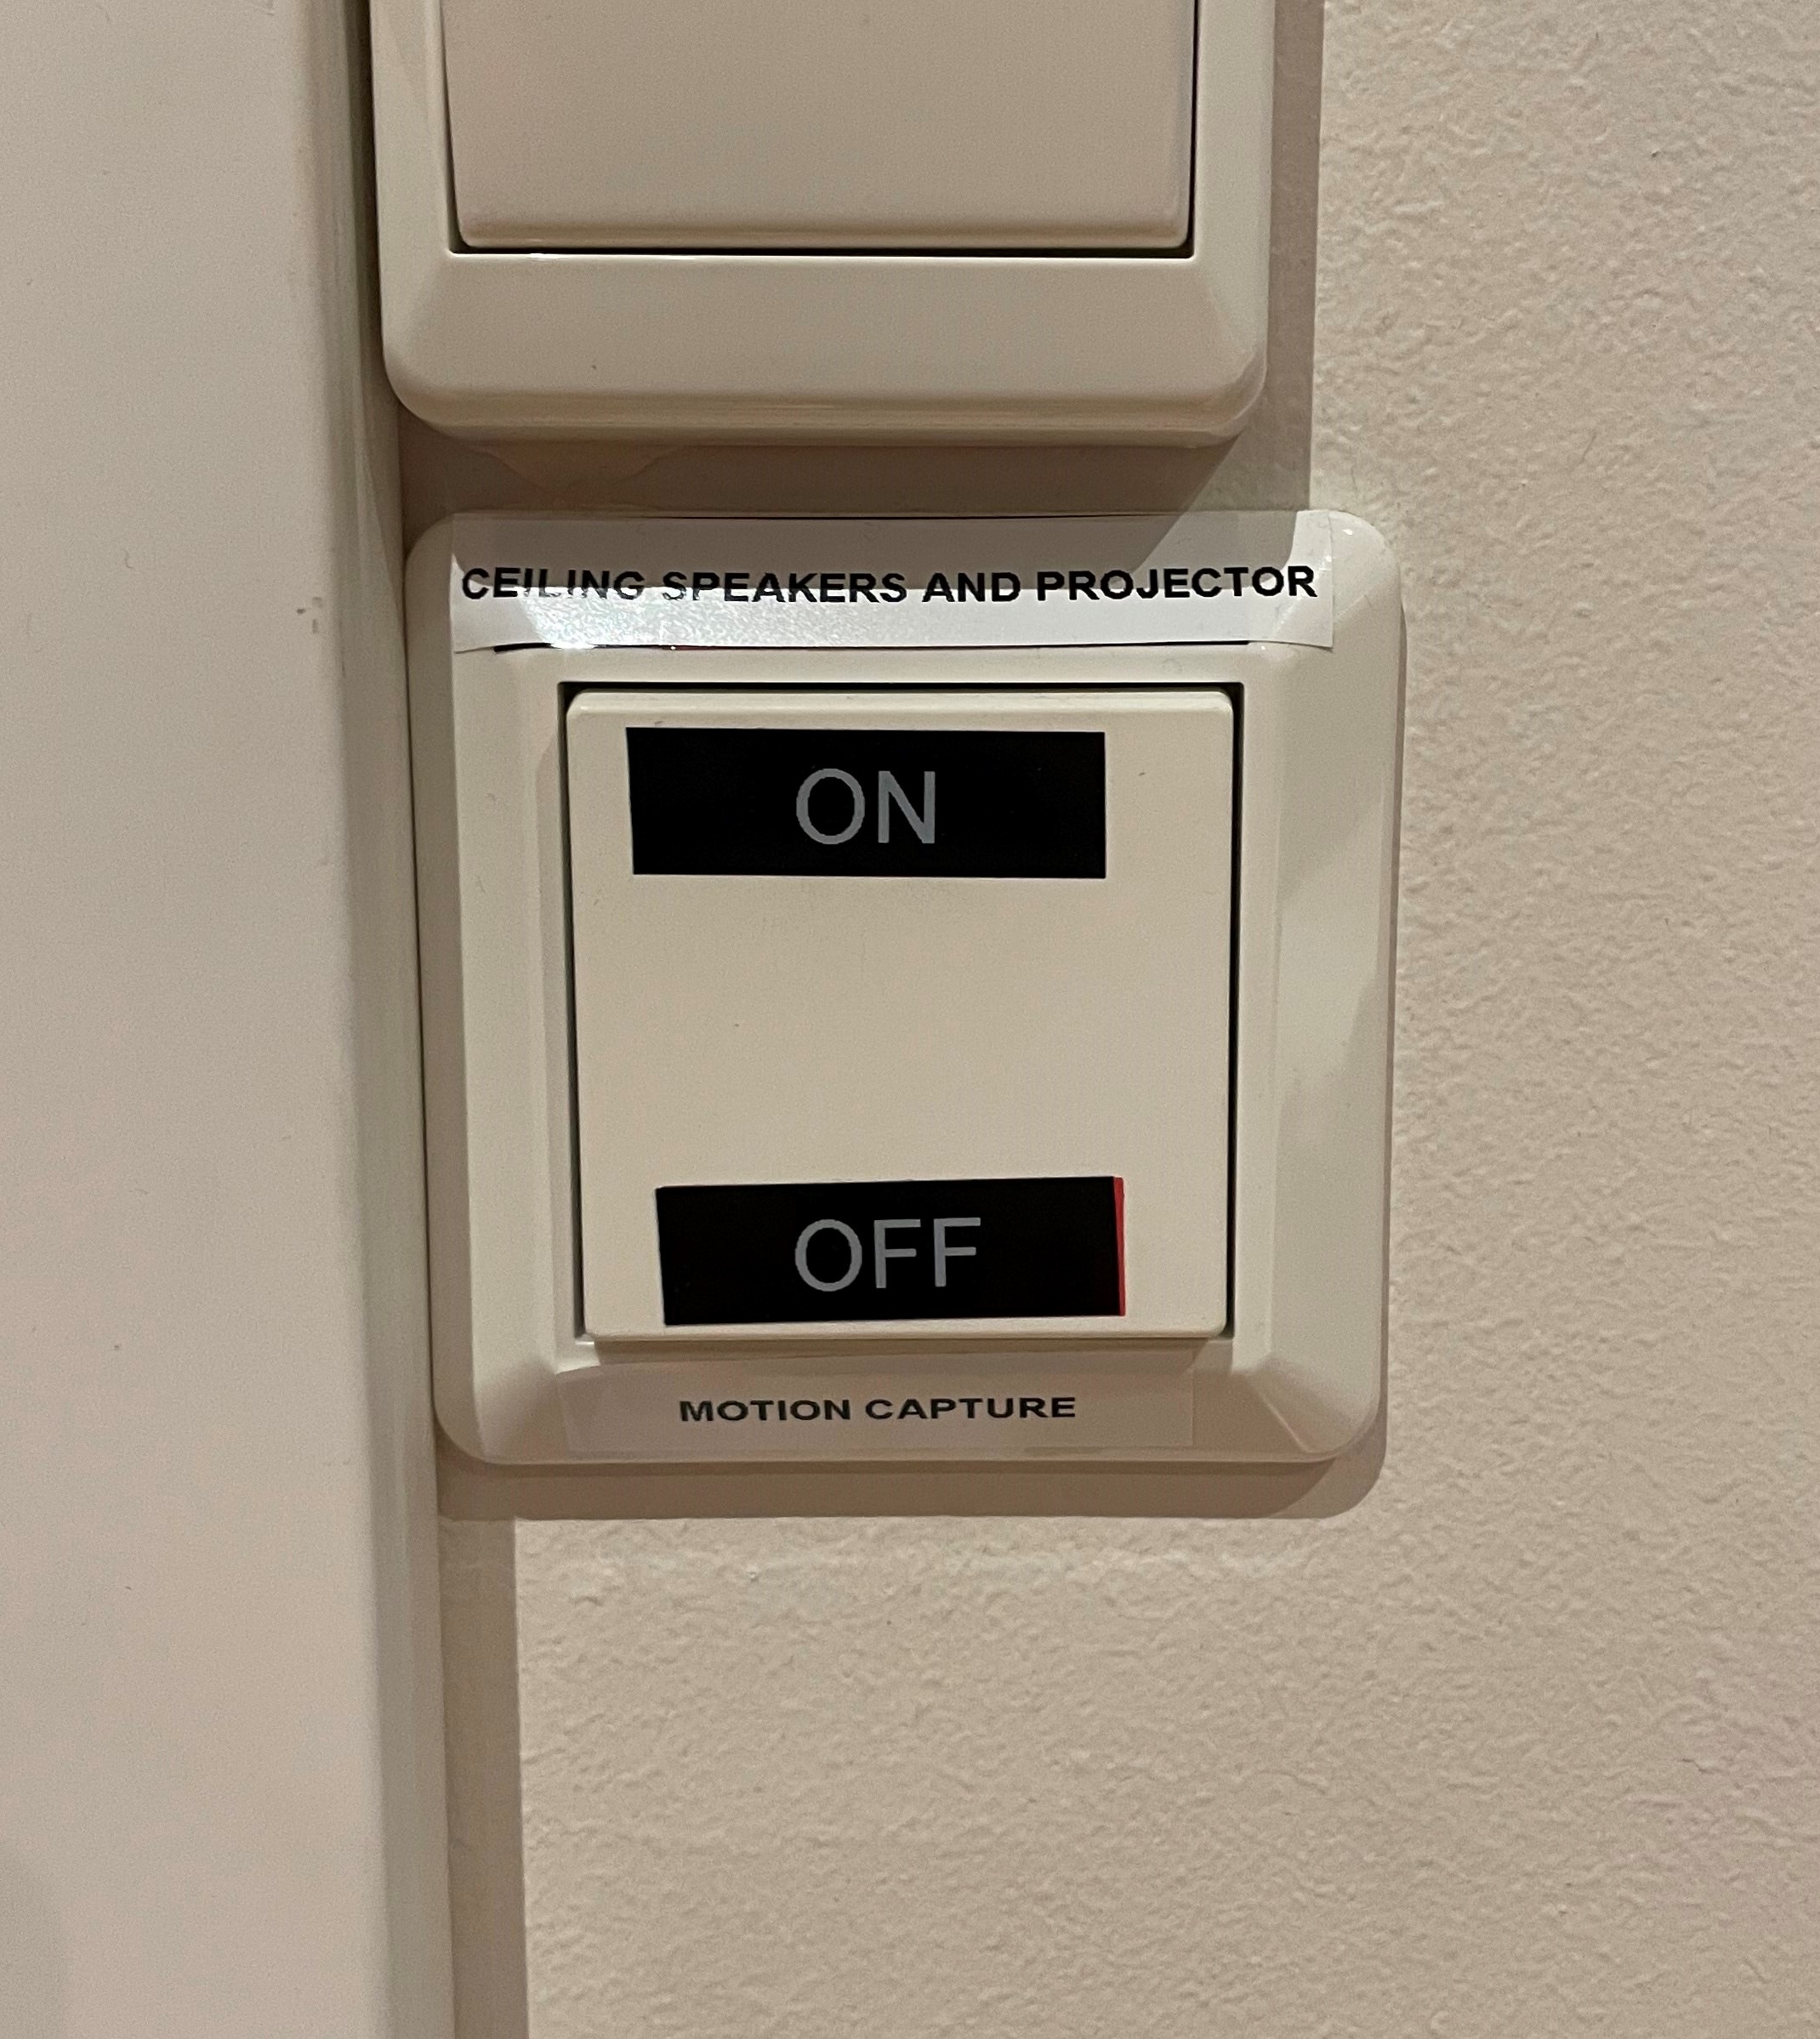
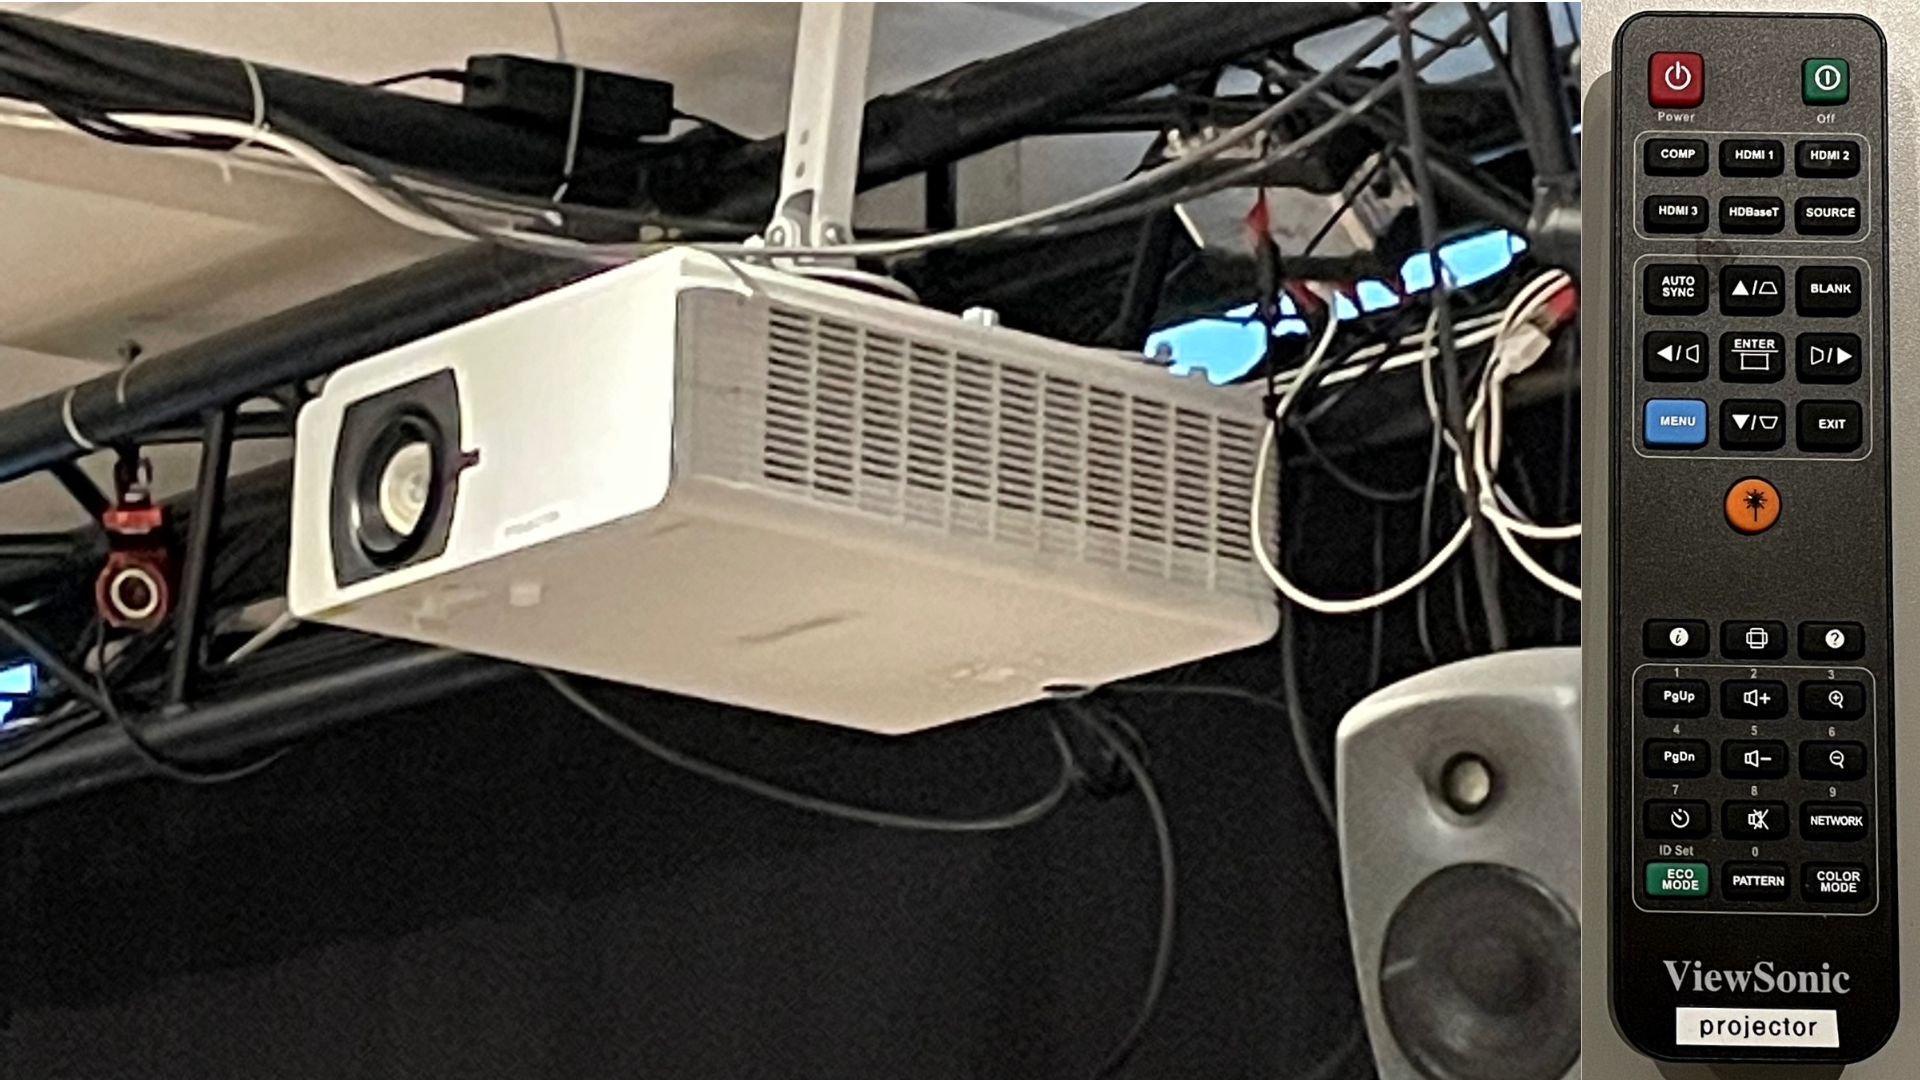
Turn on the projector using the main "Ceiling Speakers and Projector" switch, then by remote if necessary.
Turn on the two monitors behind the mixer using the remotes.
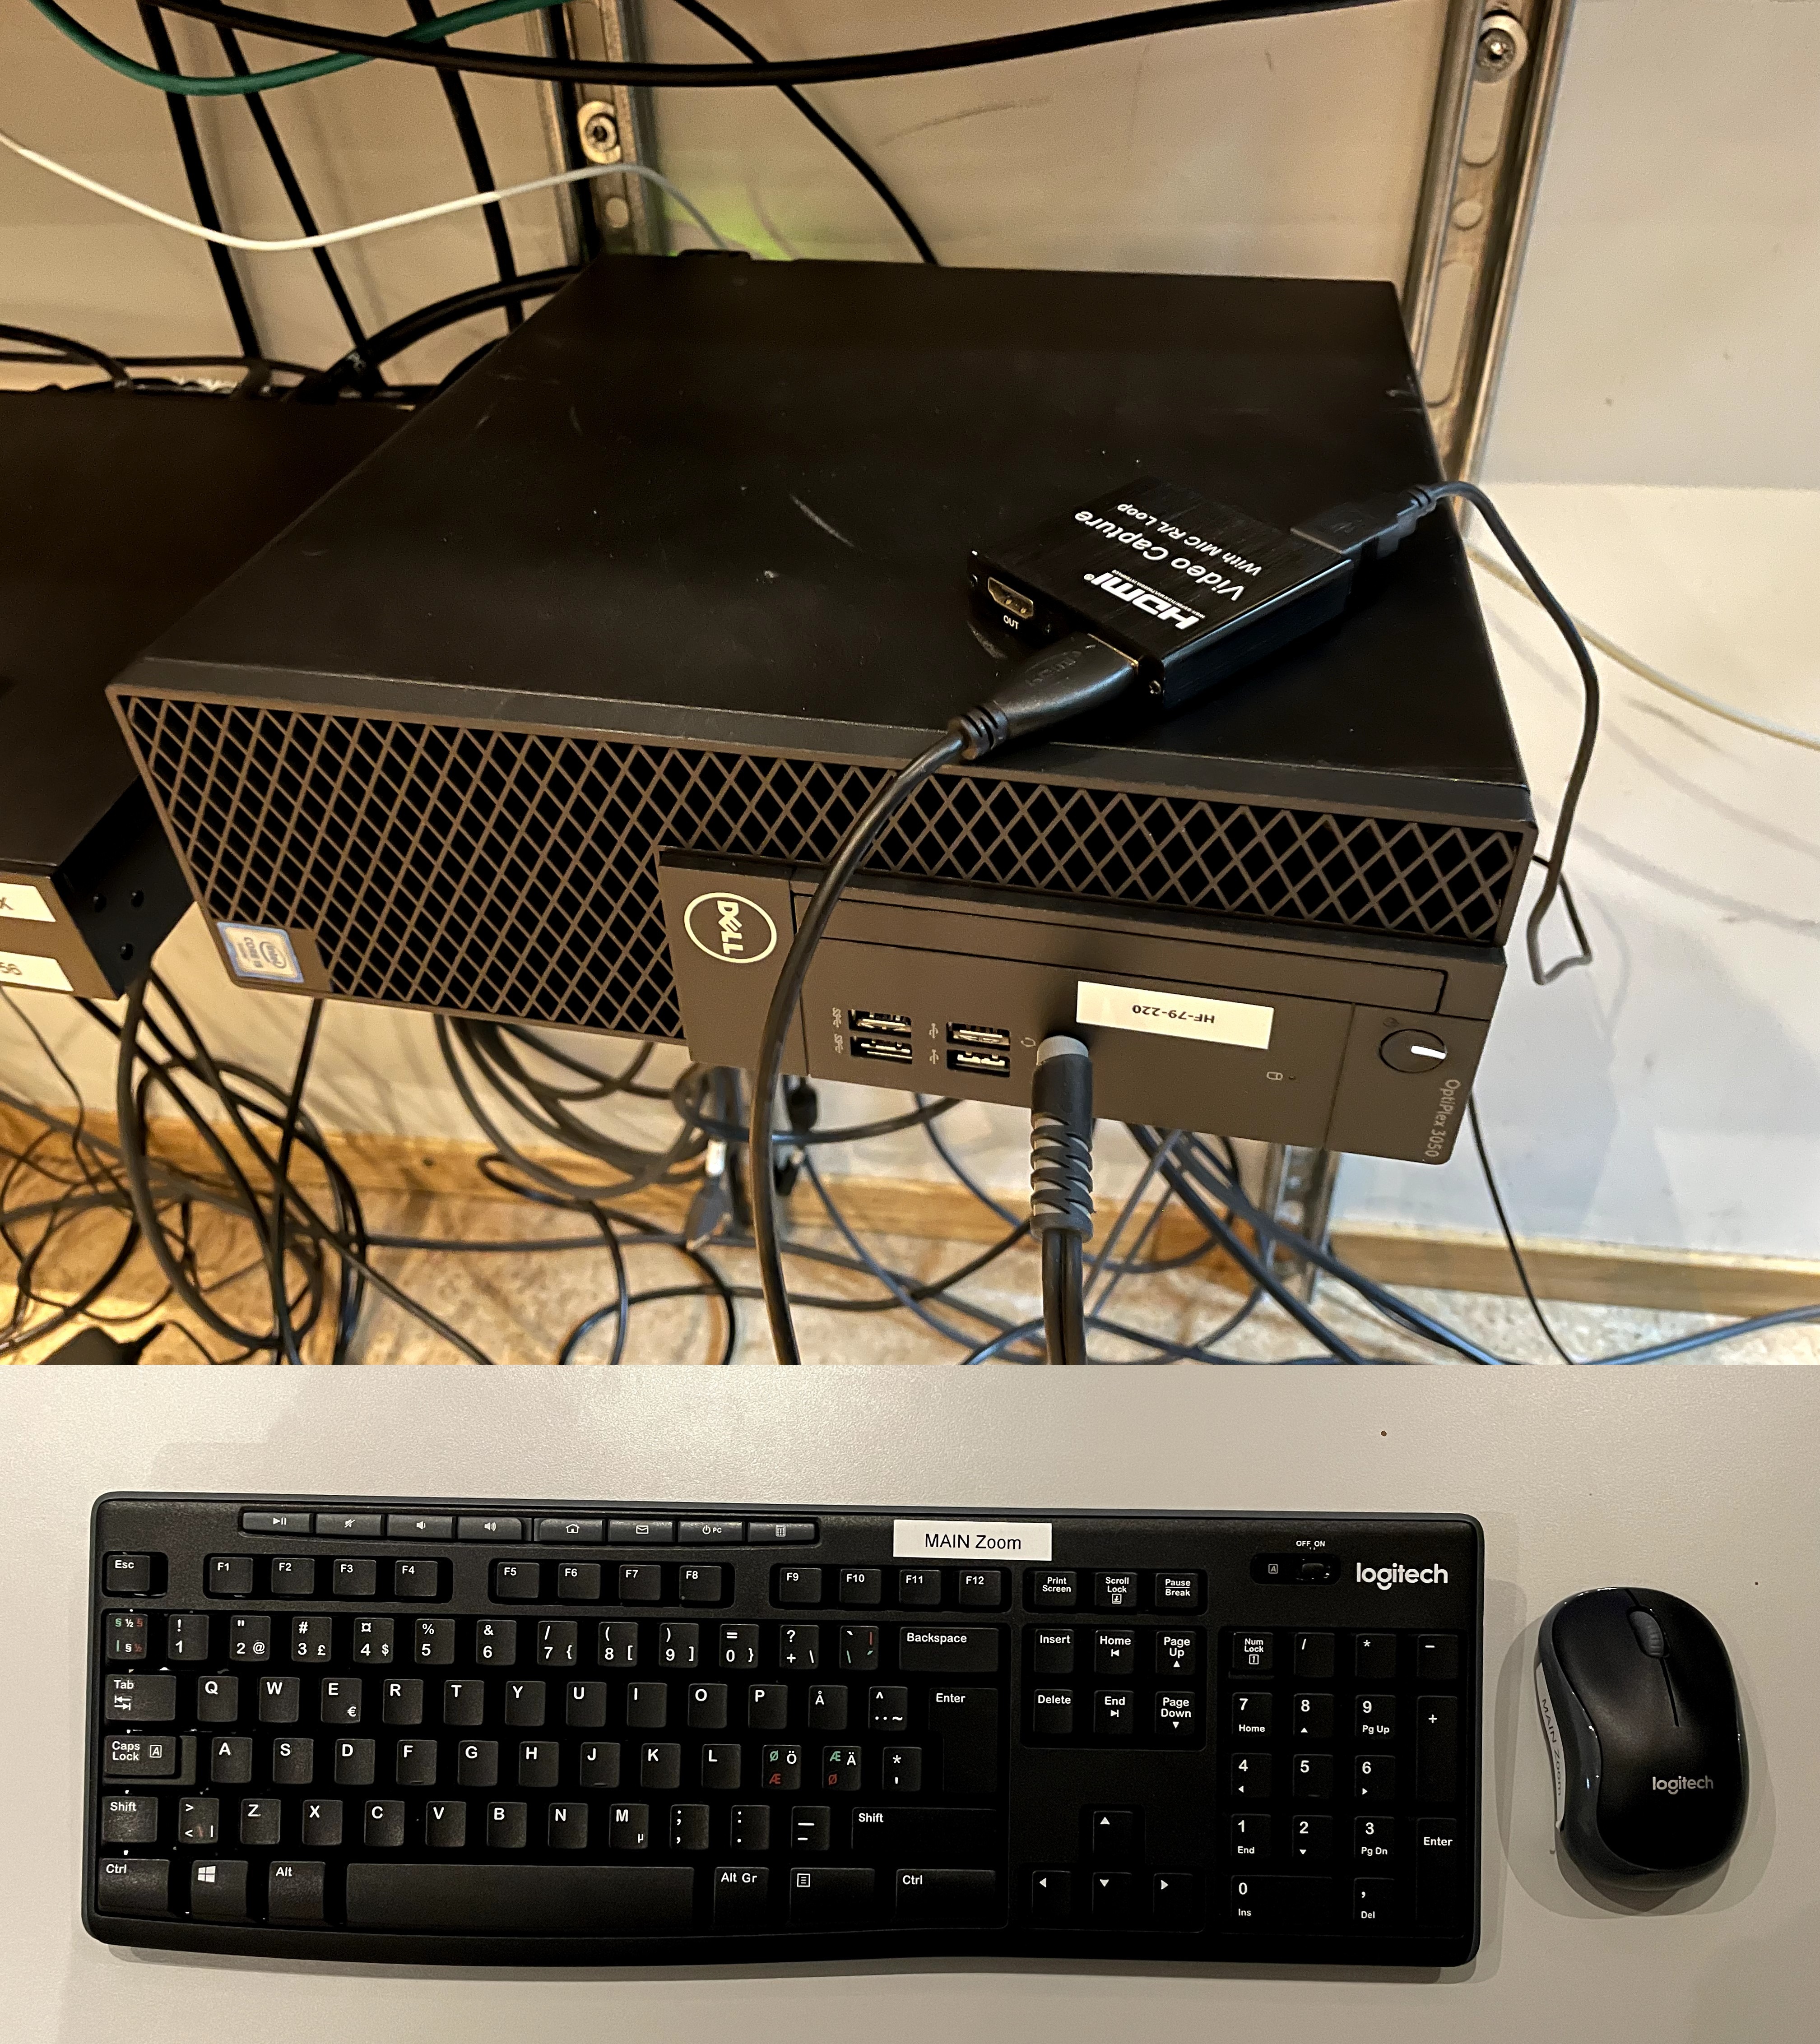
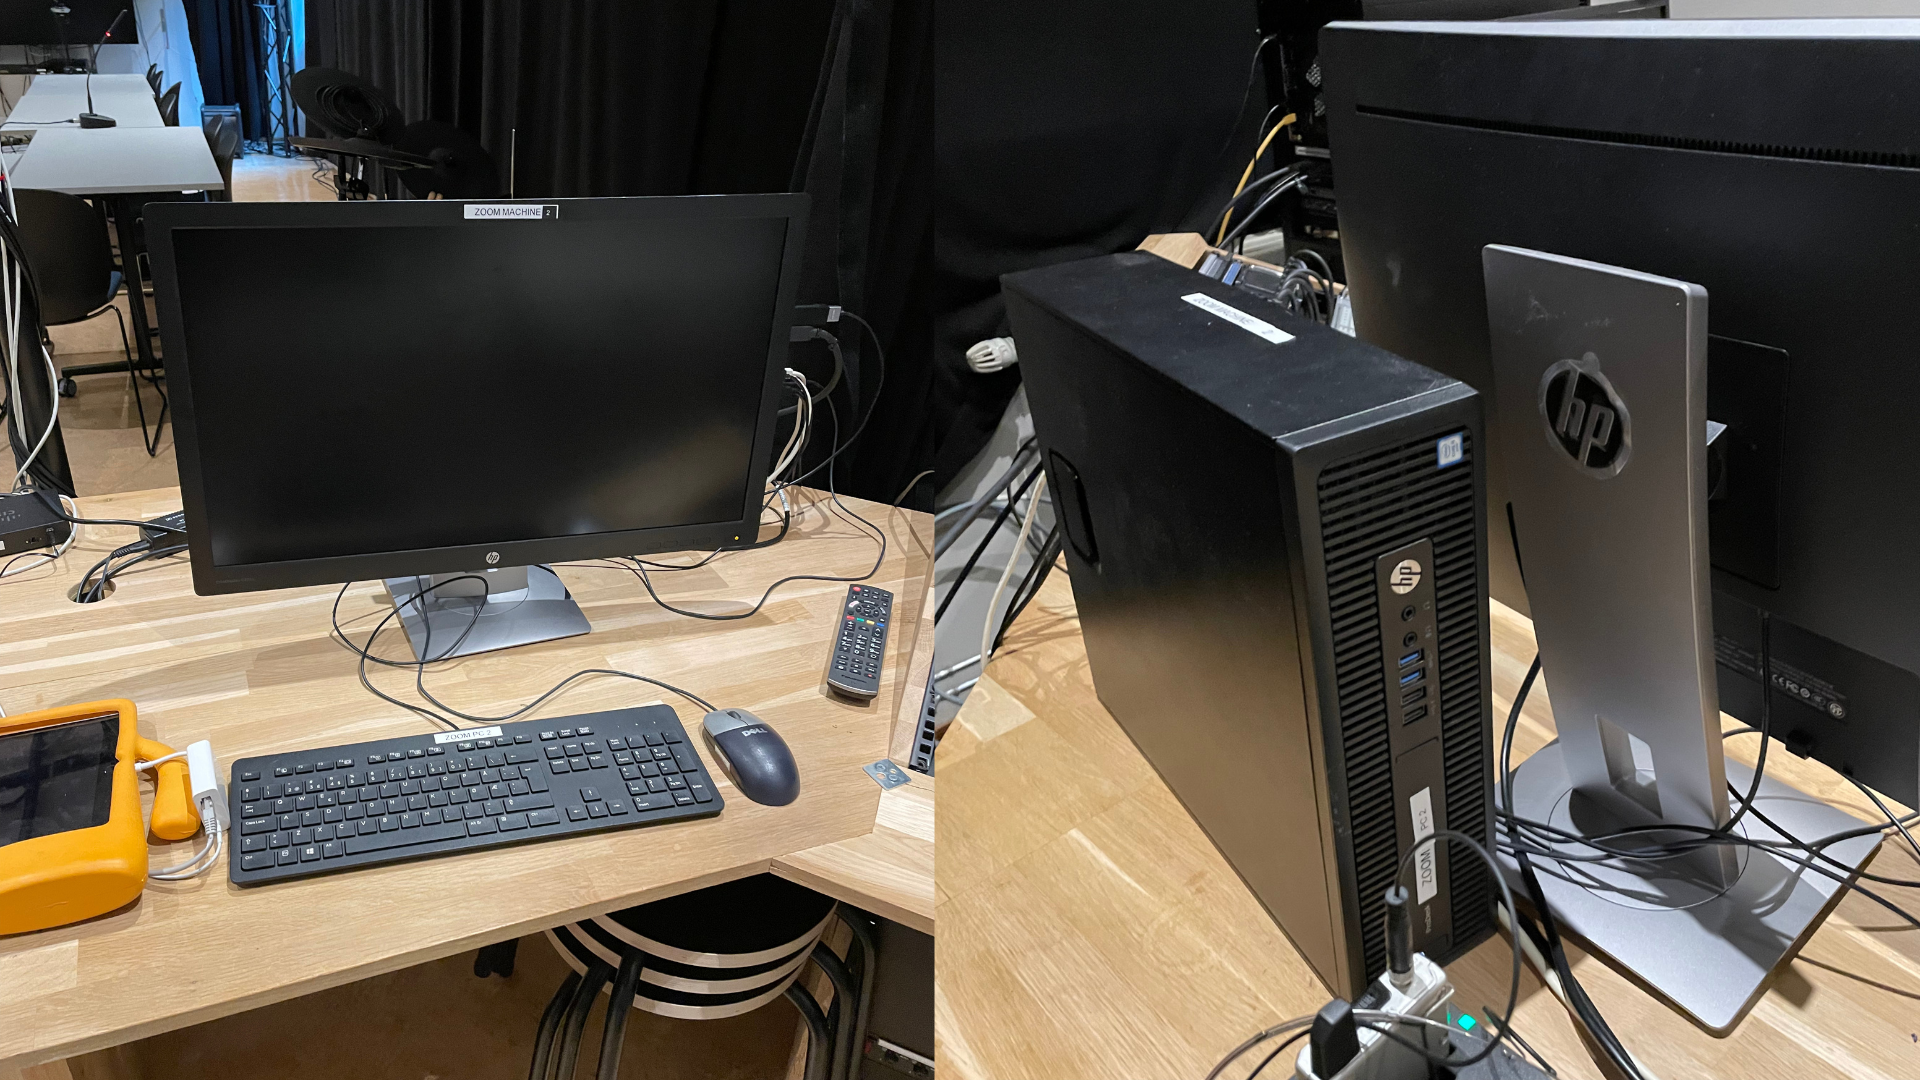
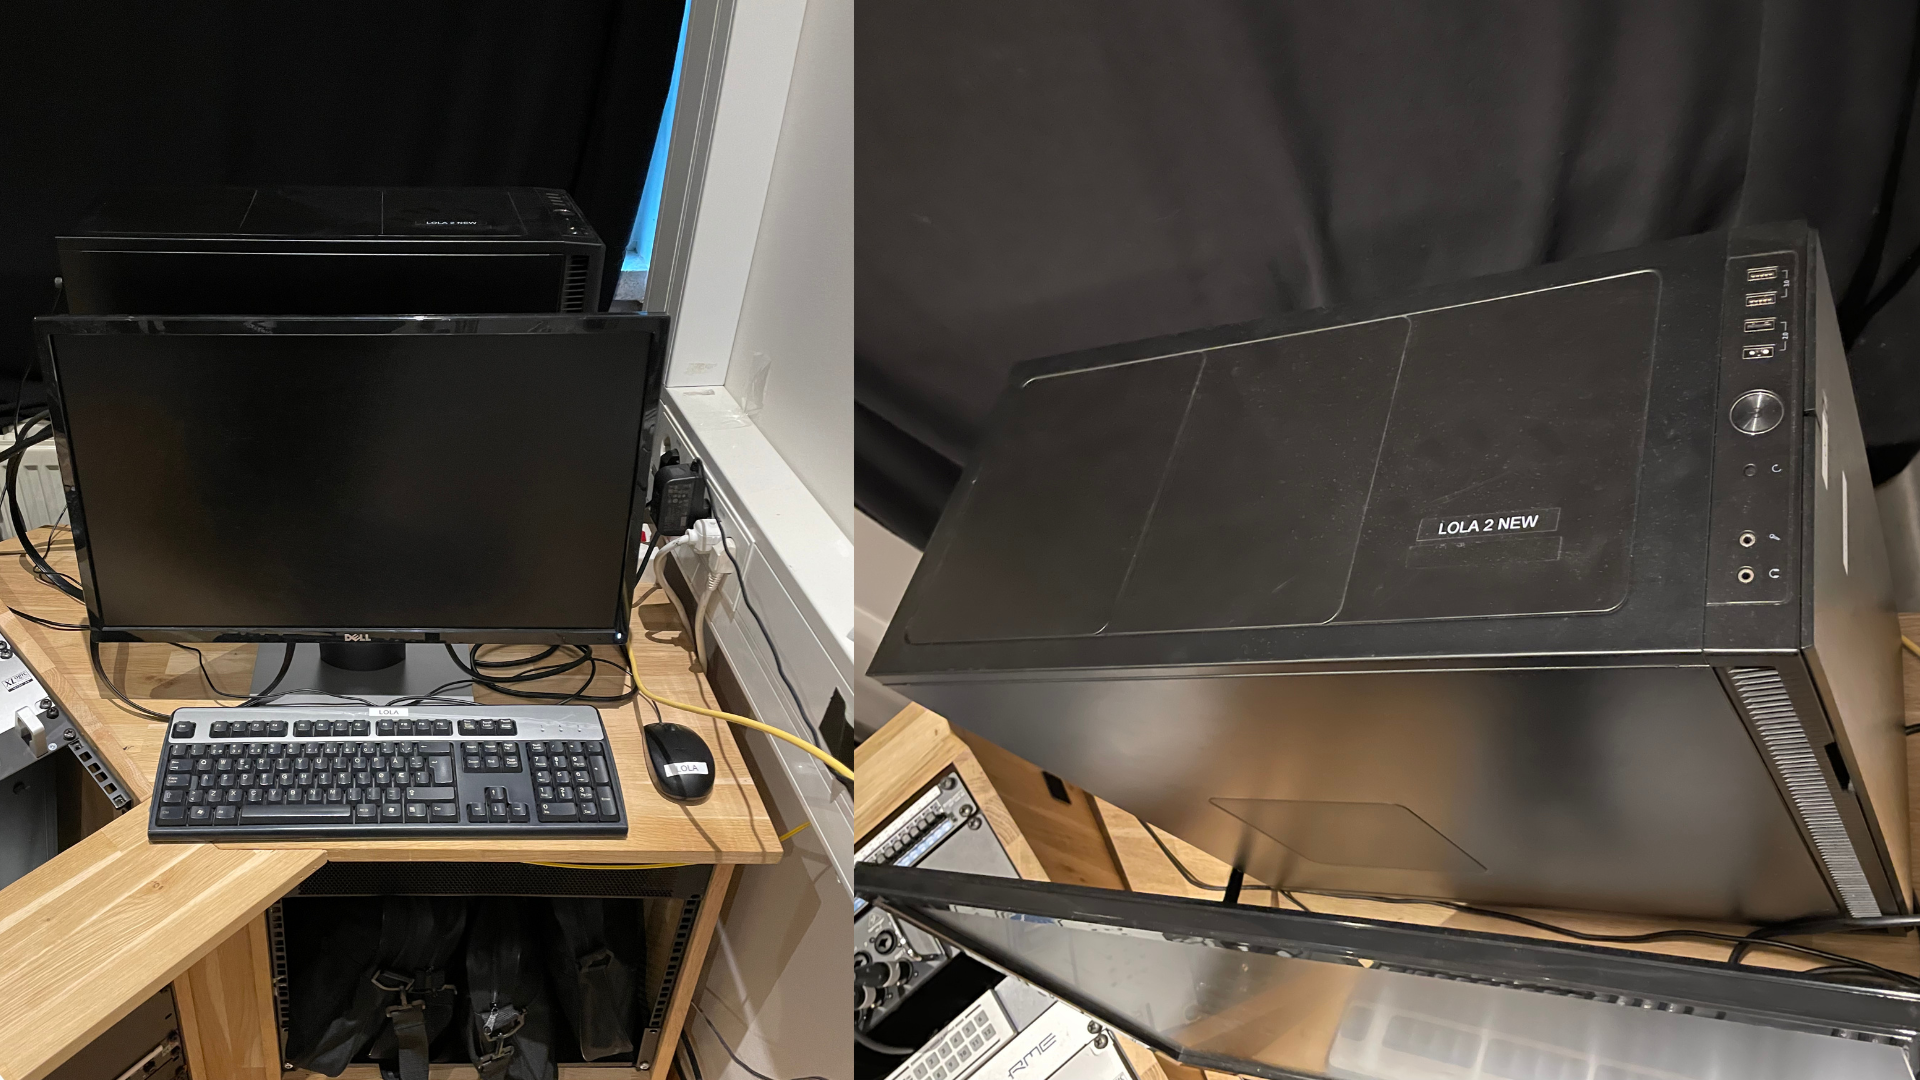
In the portal room, different computers are dedicated to different communication solutions. Below are the three computers that can be used to set up a video meeting. Make sure they are booted and logged in, depending on your communication solution. Please check the video routing flowchart to see how the monitors are connected to the computers.
• Zoom PC 1 (You will find its keyboard and mouse on the desk)
• Zoom PC 2
• LoLa PC
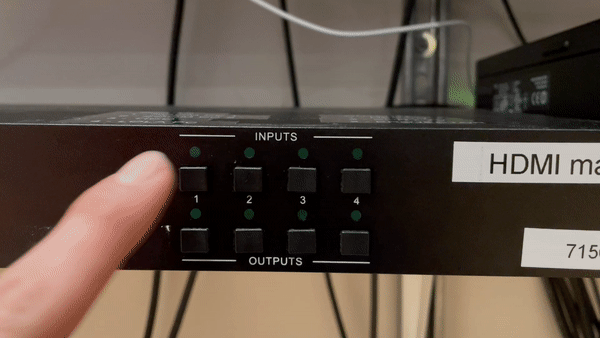
Turn on the HDMI Matrix using the remote.
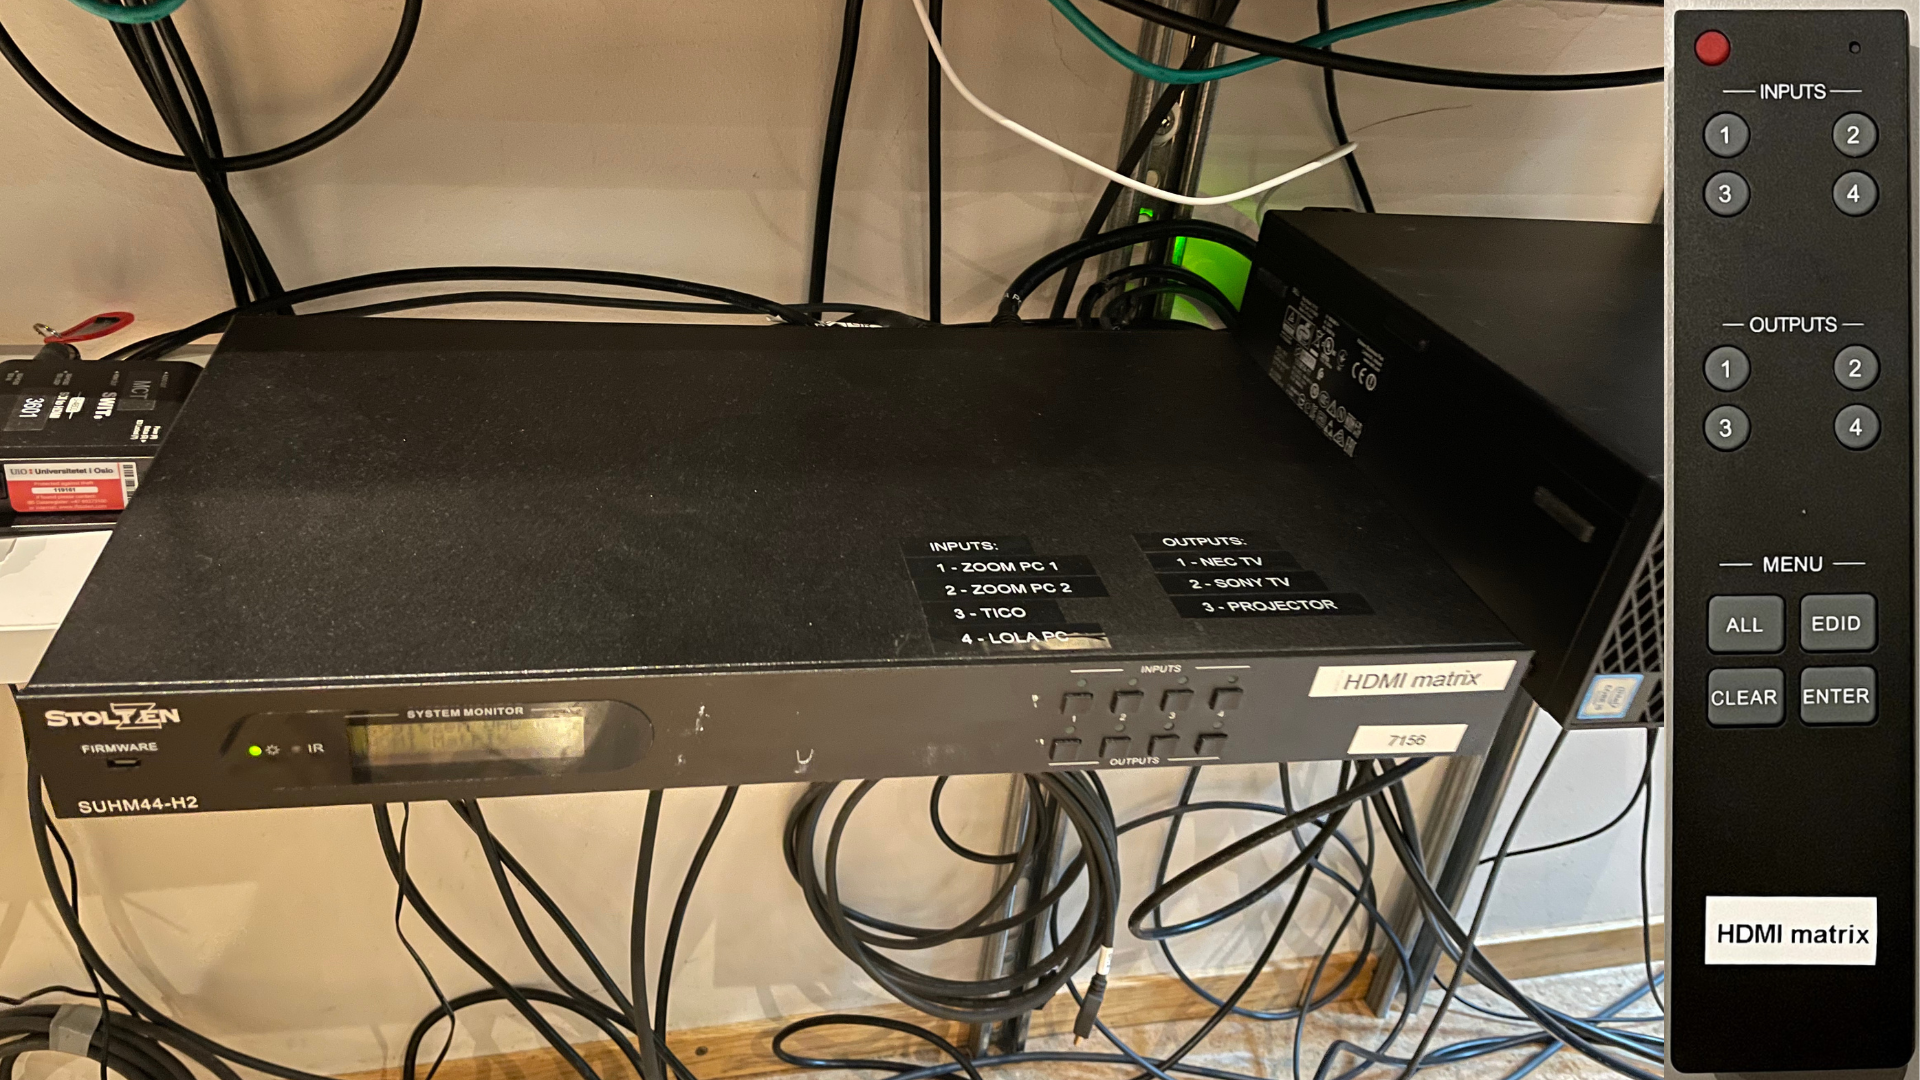
Route the input signals from computers to either of the monitors by pressing the corresponding numbers consecutively. The corresponding LED will illuminate green. You can also use the remote instead of the buttons.

Examples:
Routing Lola PC to NEC TV:
INPUTS 4 + OUTPUTS 1
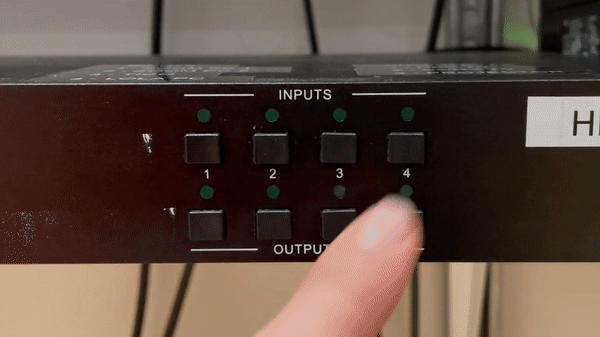
Routing Zoom PC 1st screen to NEC TV, Zoom PC 2nd screen to Sony TV:
INPUTS 1 + OUTPUTS 1 + INPUTS 2 + OUTPUTS 2
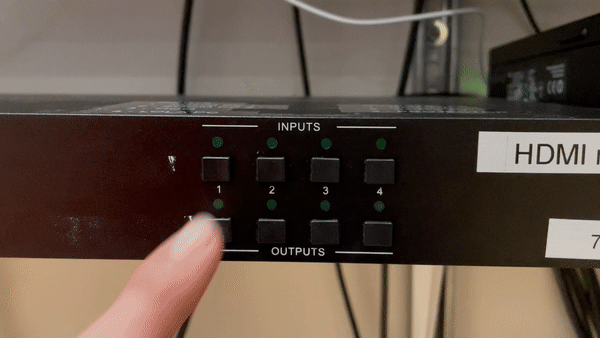
Routing Zoom PC 1st screen to both NEC TV and Sony TV, Zoom PC 2nd screen to the projector:
INPUTS 1 + OUTPUTS 1 + OUTPUTS 2 + INPUTS 2 + OUTPUTS 3
In the portal room, four cameras can be used in video communication. Please check the [DIAGRAM OF THE PORTAL ROOM] to see how the cameras are connected to the system.
As seen on the video routing flowchart, the Logitech camera-1 and the webcam are connected to the Logitech Group. This device turns on automatically when the computer starts. Ensure the cables are connected as shown in the video routing flowchart.
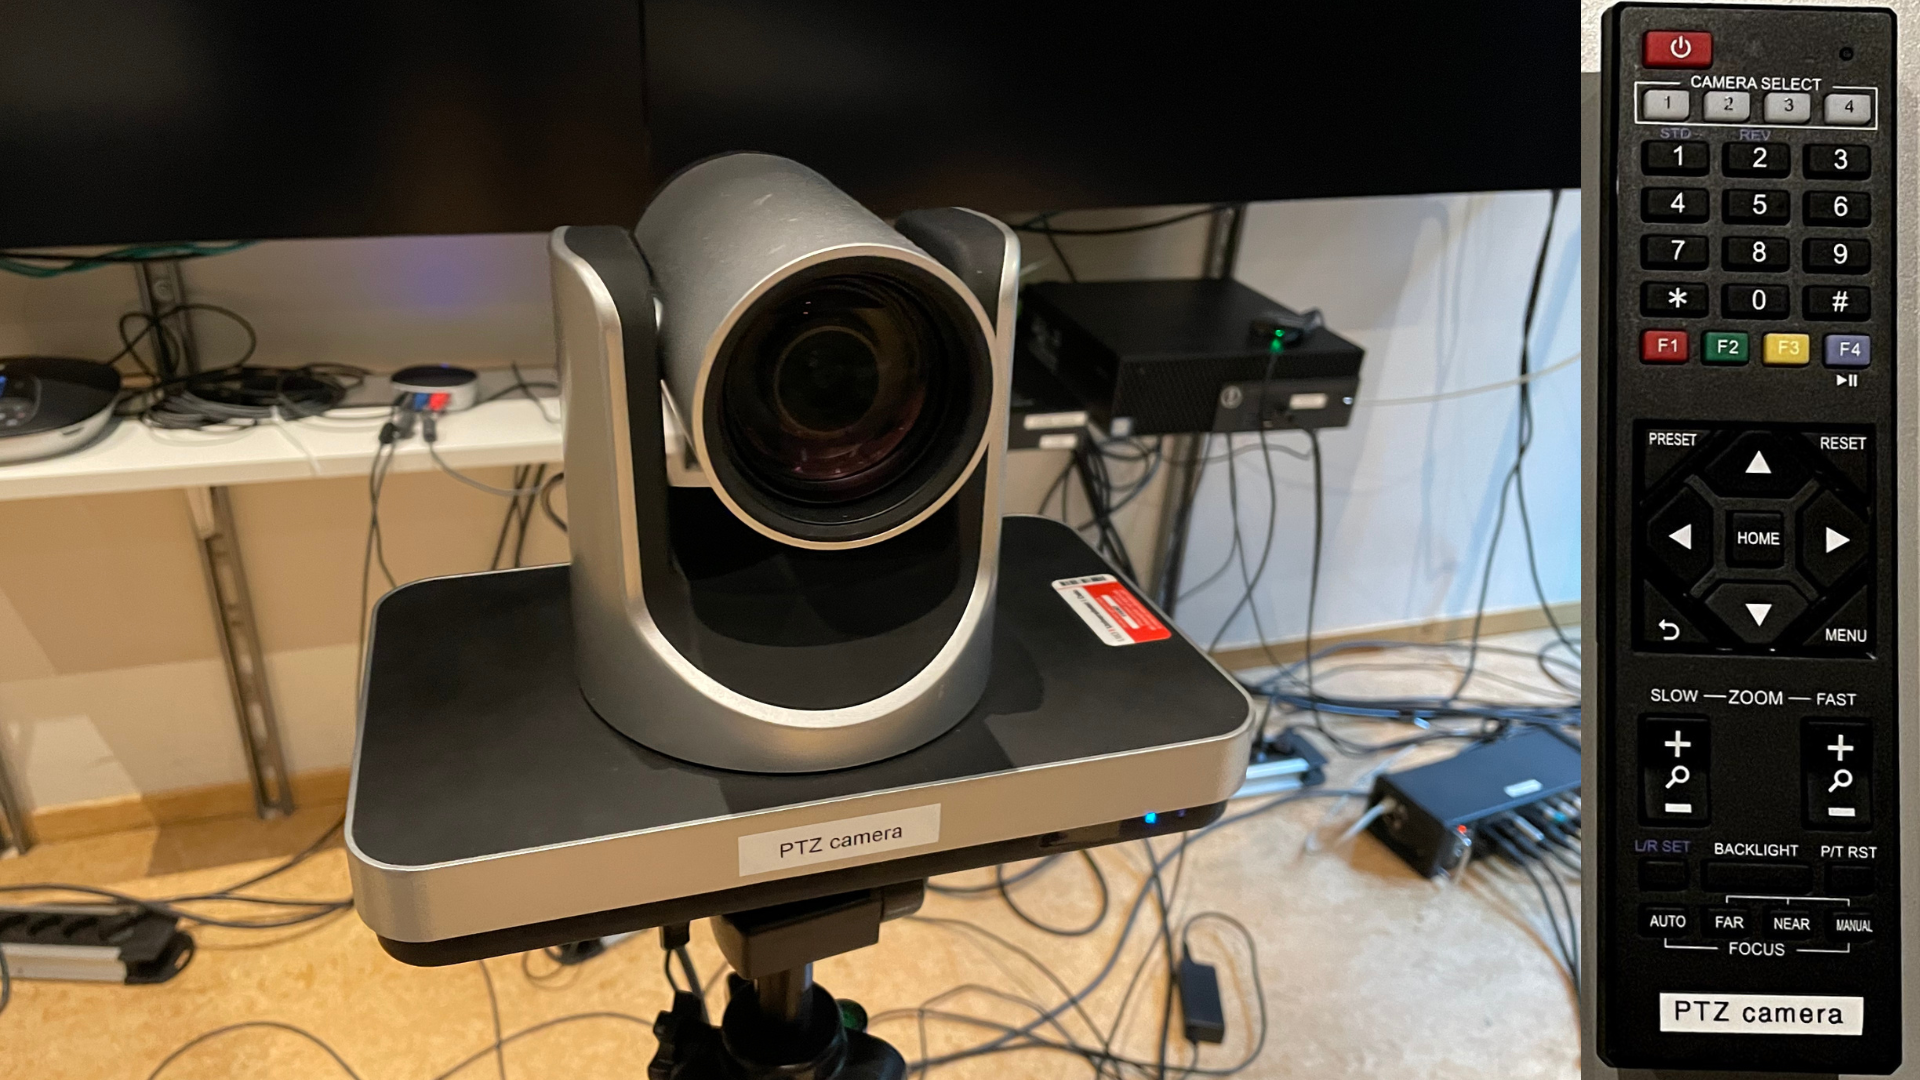
PTZ Camera
Ensure that the power switch on the backside is on.

Then, turn on using the remote. This camera can move over three axes. Change the lens angle using the remote.
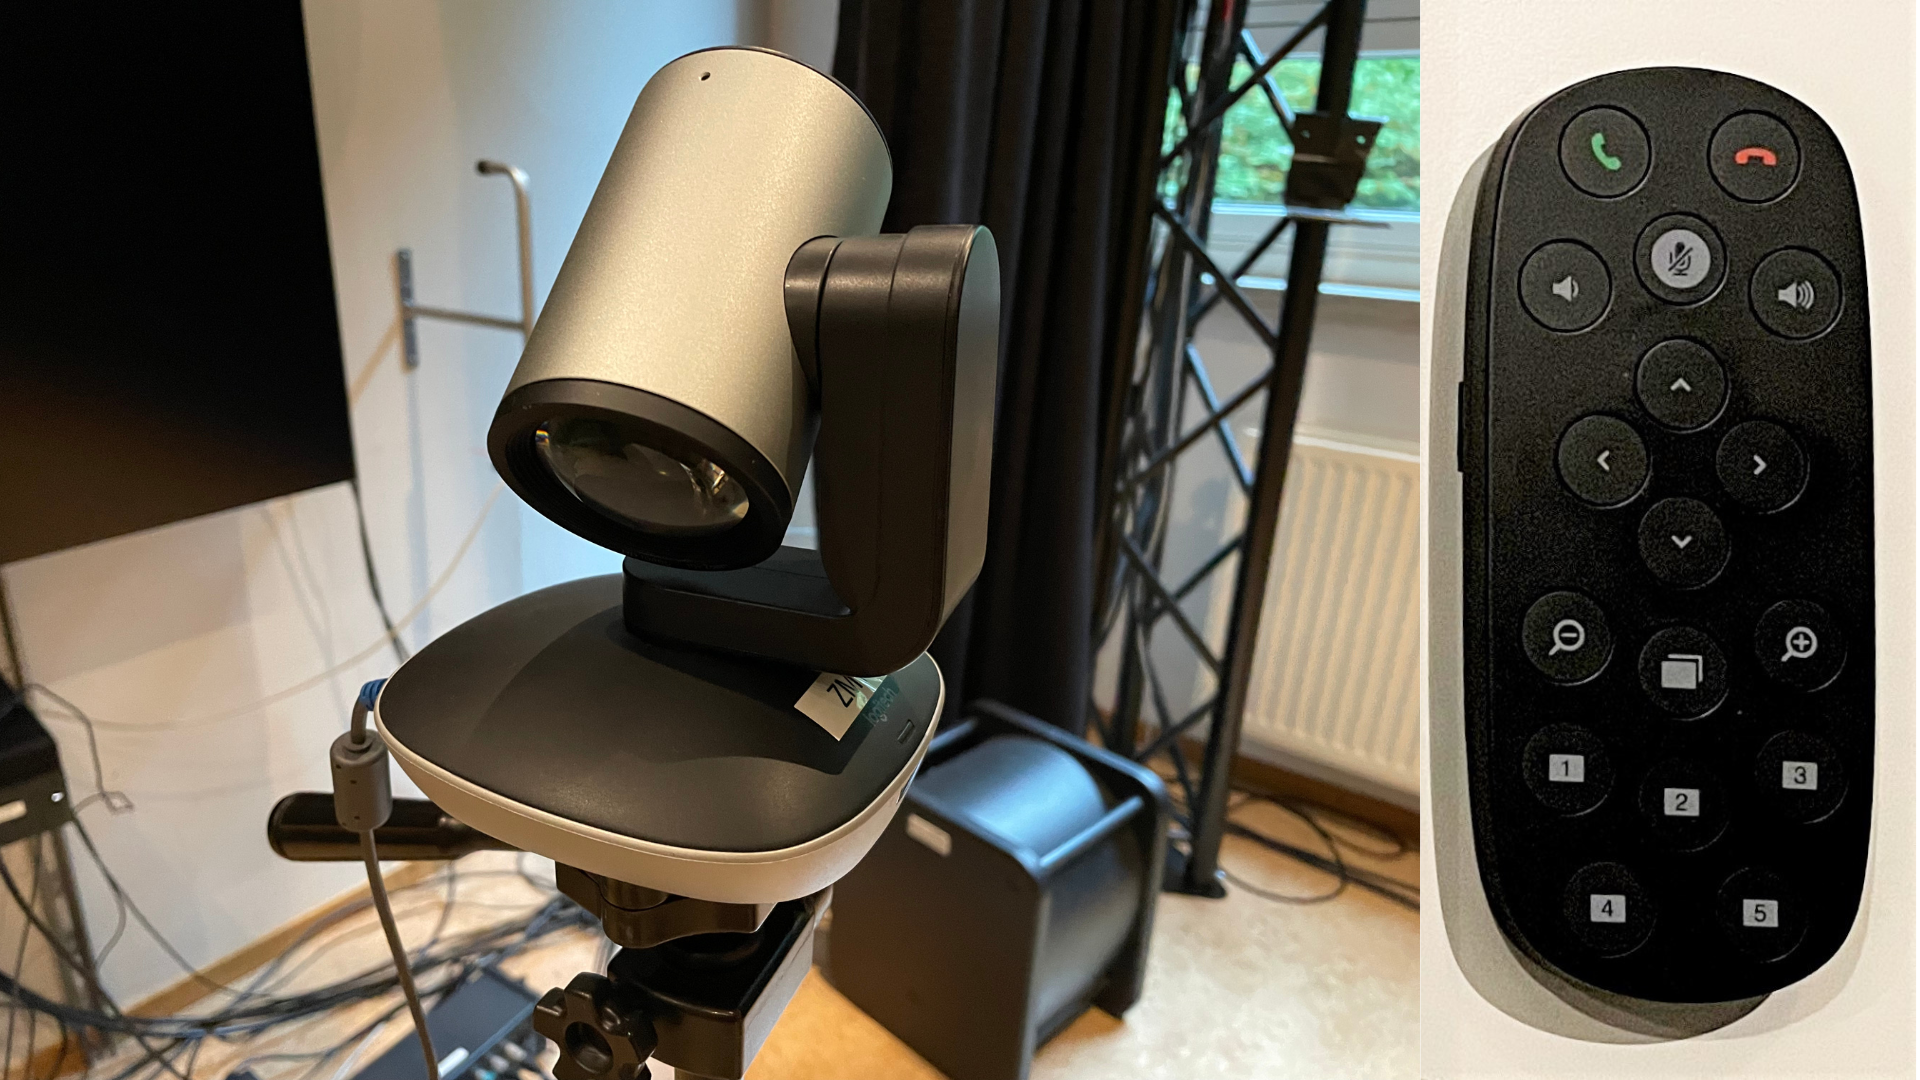
Logitech ZM 1
It automatically wakes up when you join a meeting. Use the remote to zoom in and out, mirror, and change the lens angle.
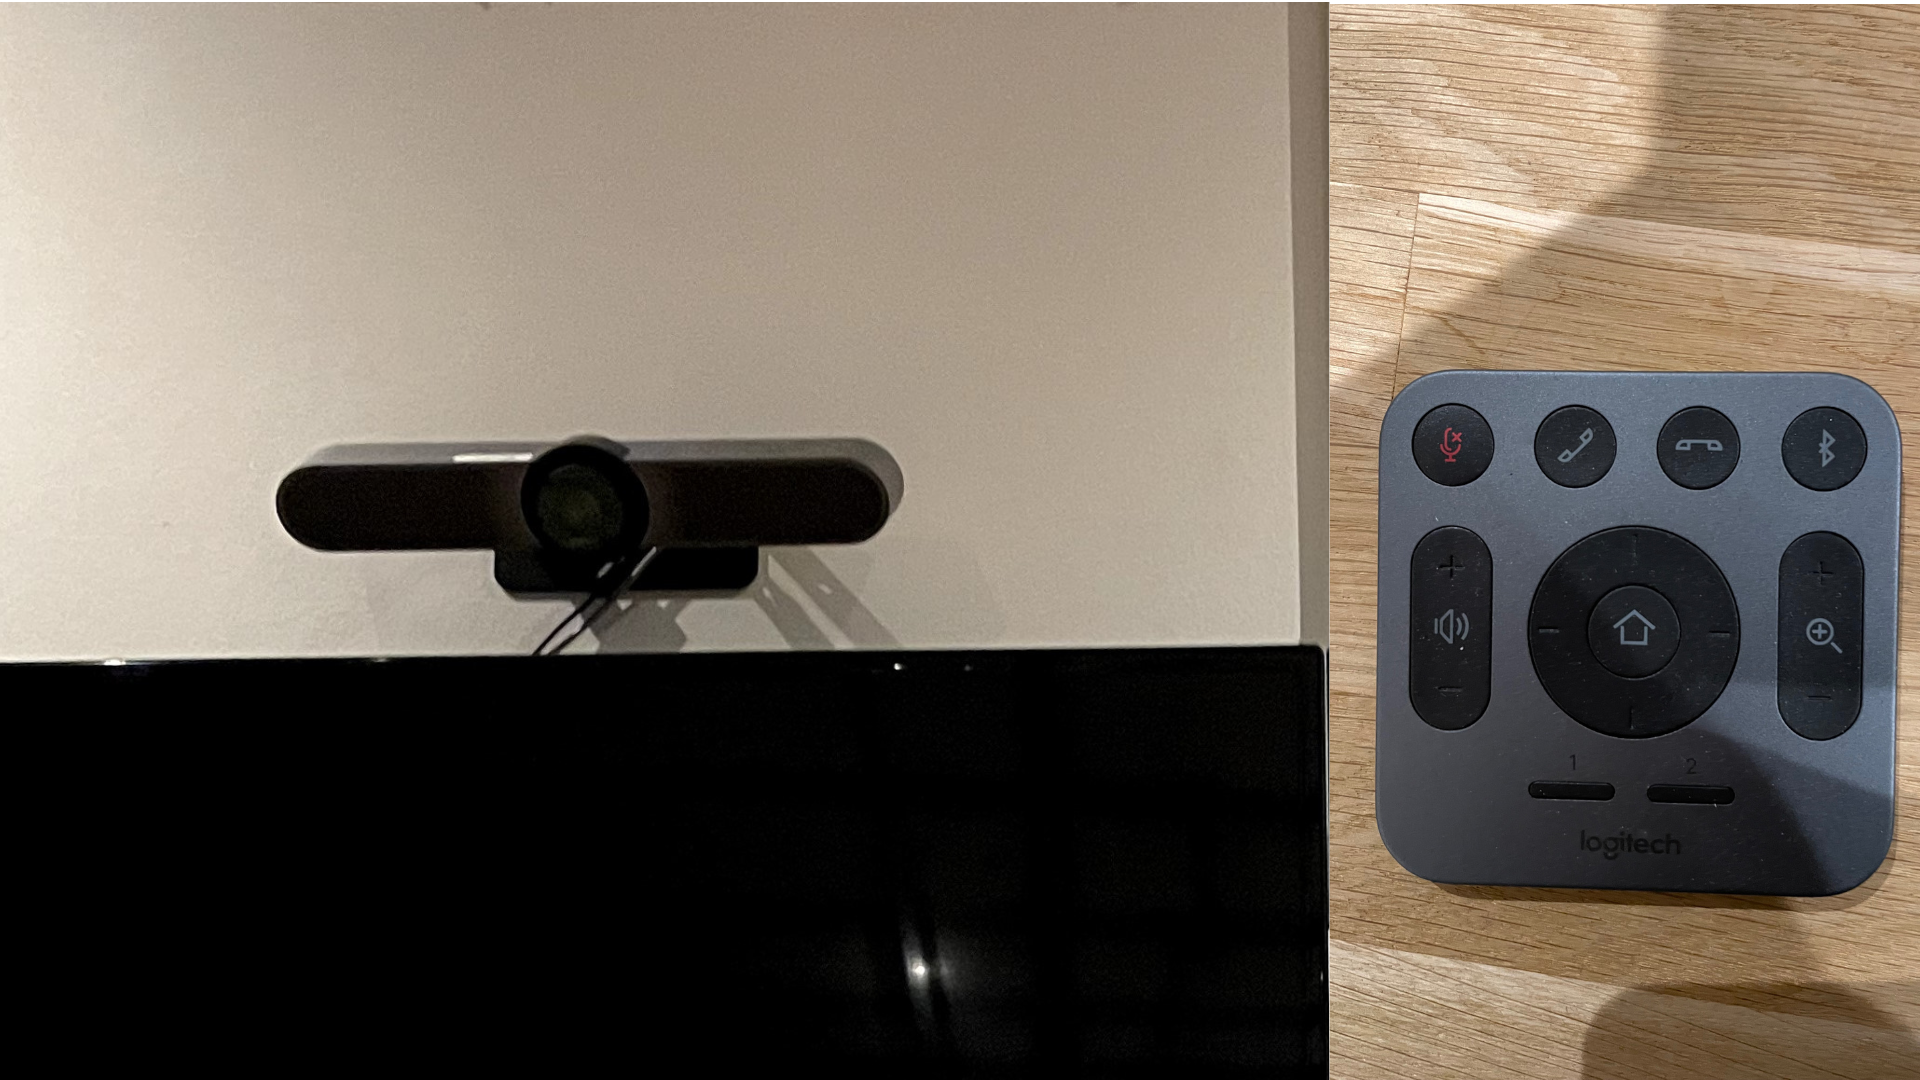
Logitech Zoom Camera (Back)
It automatically wakes up when you join a meeting. Use the remote to zoom in and out, mirror, and change the lens angle.
Using Other Cameras
If you want to add other cameras to the system, they need to either be connected to the computer or go through Logitech's system. Then' you can select your camera on the iPad. Make sure that necessary drivers are installed for that camera.
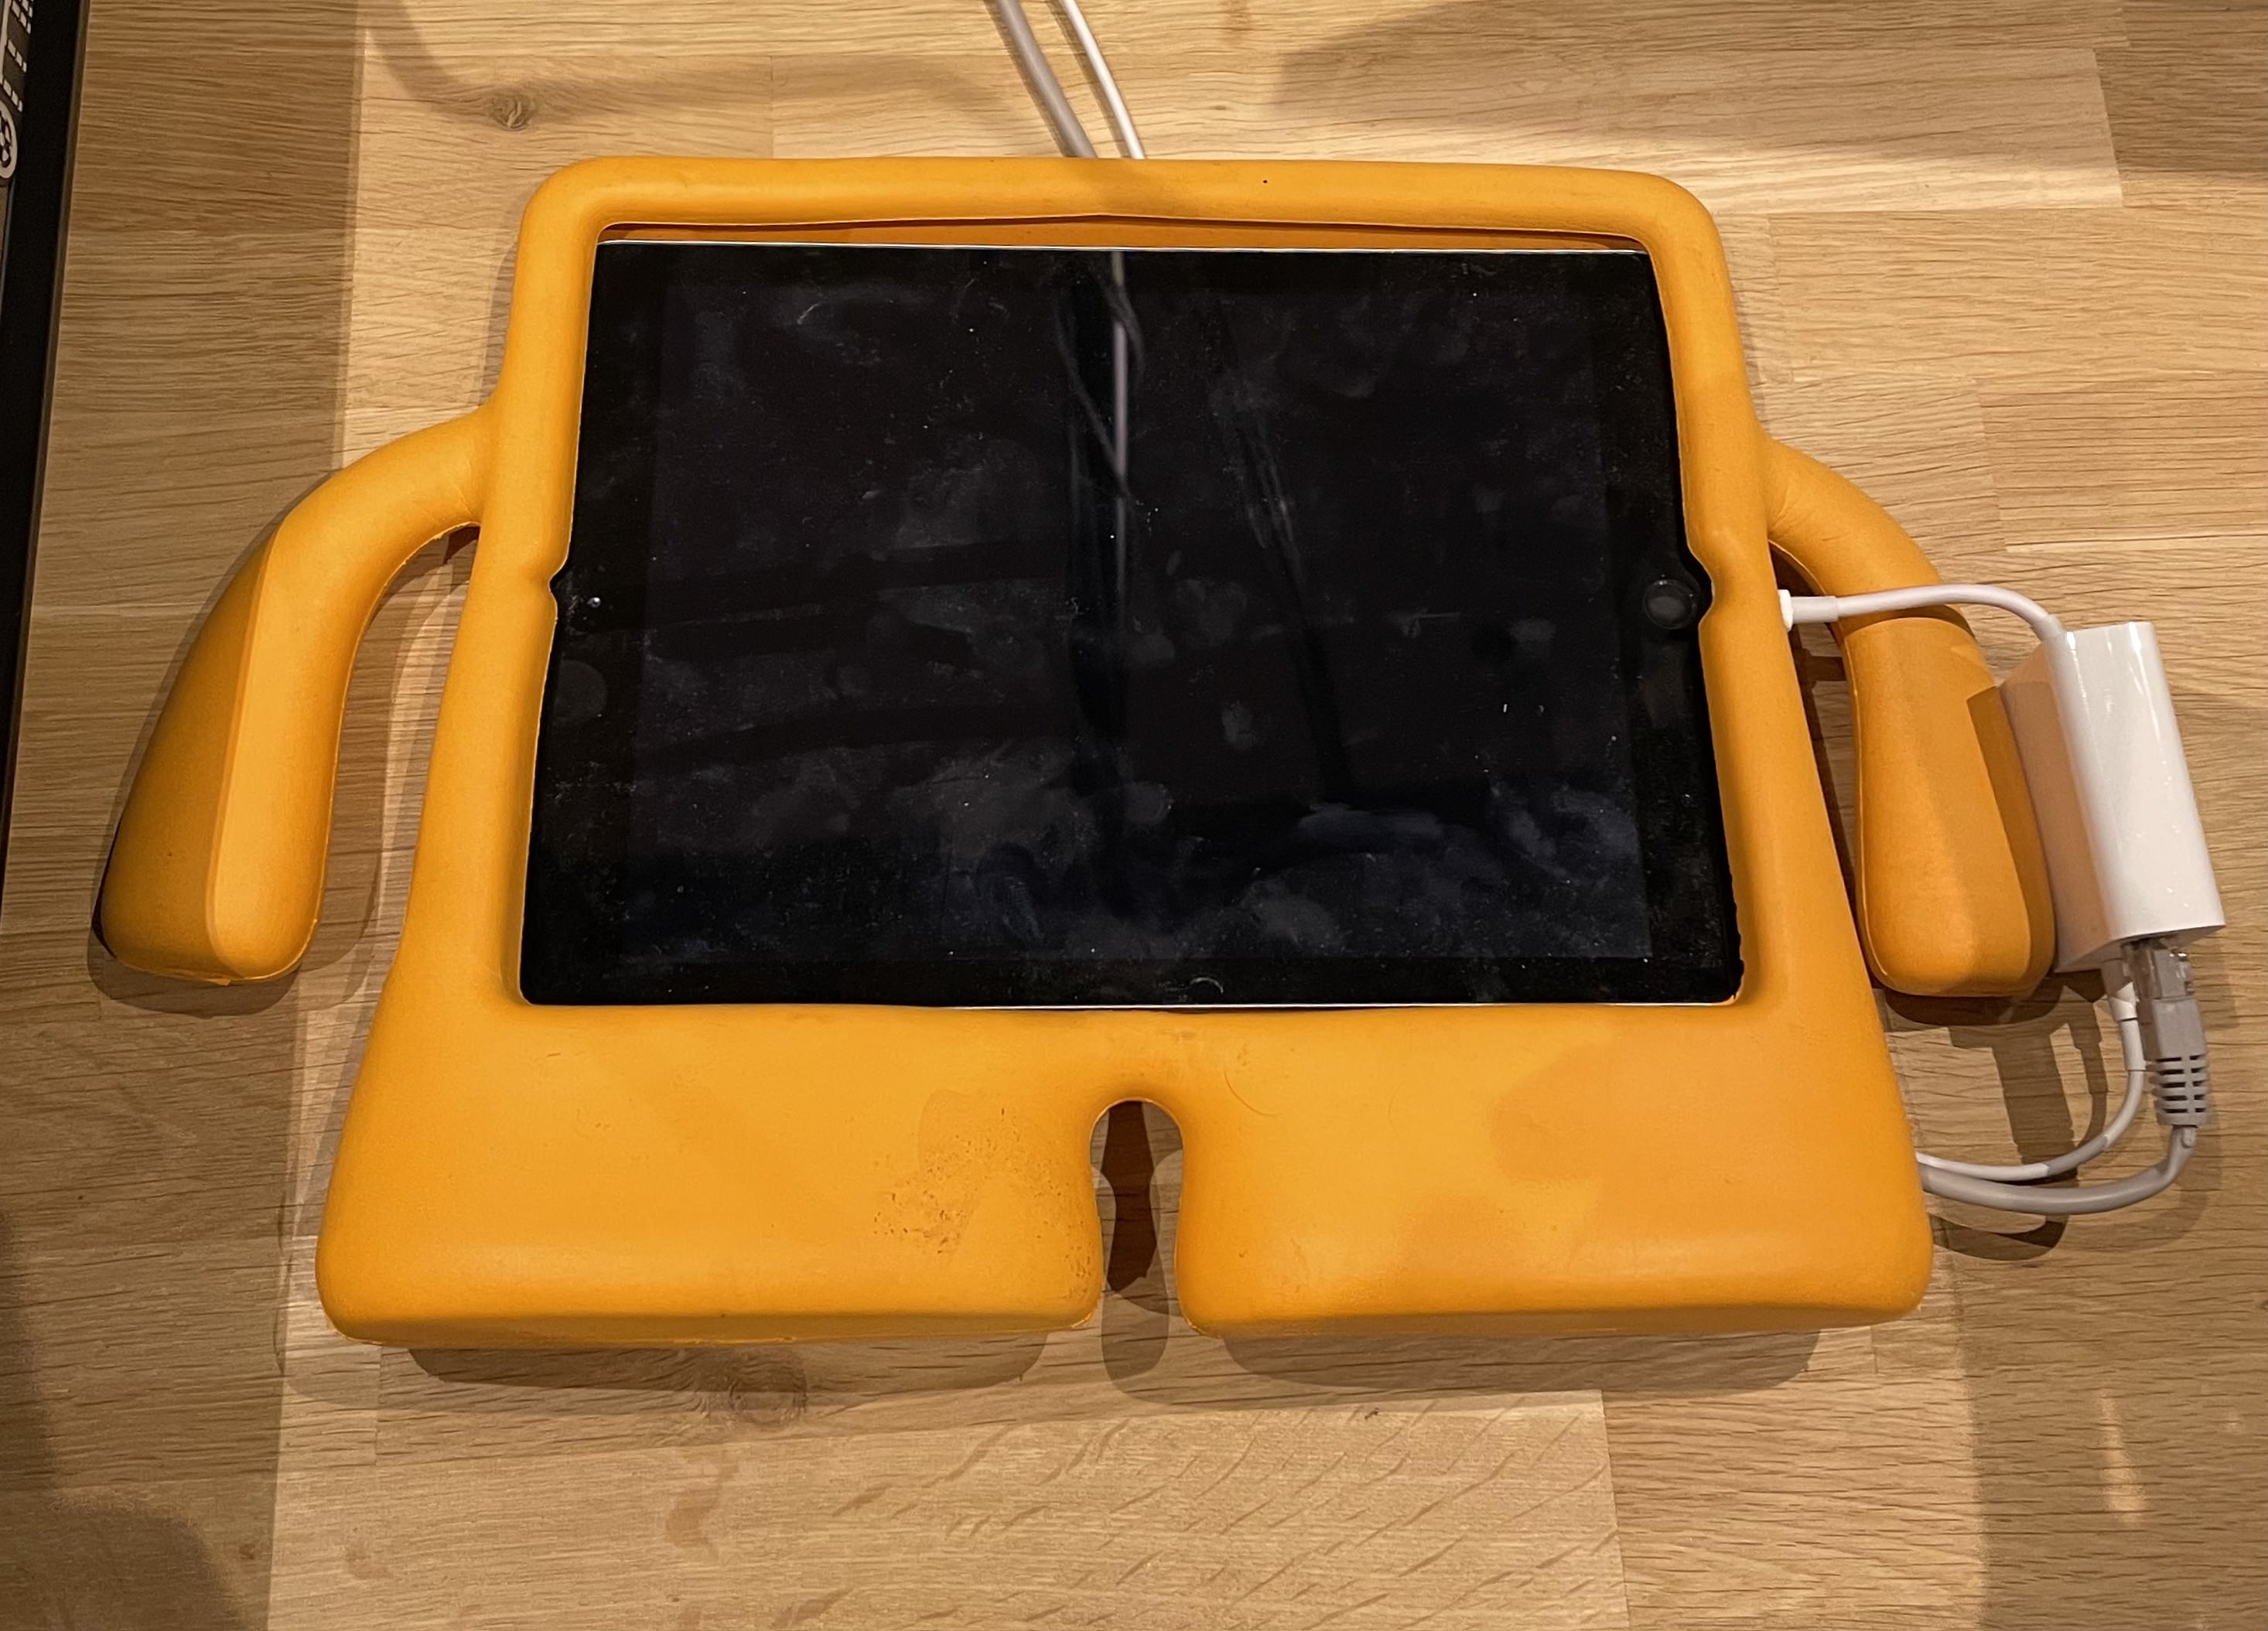
You can use the iPad on the desk to start meetings. It has an interface that allows you to control several things of a meeting.
In such a complex environment, it's ok if things doesn't work in your first try. Here are some troubleshooting steps on most probable scenarios.
- If the screens are not extended (but duplicated): Make sure that you did the video routing on the HDMI mixer correctly. Restarting may help at this pooint.
- If there is no internet connection on the iPad: The iPad is connected to the internet through an ethernet cable. Make sure that this ethernet cableis connected.
- If PTZ Camera doesn't start: Make sure that it's turned on using the remote, and it's switched using the button behind backside.
- If projector doesn't start: Make sure that the main "Projector and SPeaker Array" switch is on.