Test
This chapter explains how to use the network for driving in TORCS and test it's capabilities.
- The caffe framework from this repository is build and installed correctly.
- TORCS is installed and running as explained here. ToDo: Add link to Torcs setup description
- A training checkpoint is needed (a pre-trained checkpoint from the original DeepDriving project is stored at this branch in directory
<repository-root>/torcs/pre_trained).
For an easy start, a couple of environment variables can be defined:
-
DEEPDRIVING_CAFFE_PATHmust contain the path to the caffe-installation.
export DEEPDRIVING_CAFFE_PATH=<path-to-installation>
-
(optional)
DEEPDRIVING_MODEL_PATHmust contain a path to the caffe model (for example<repository-path>/torcs/pre_trained/driving_run_1F.prototxt). If this variable is not defined, the pre-trained model from this repository is used. -
(optional)
DEEPDRIVING_WEIGHTS_PATHmust contain a path to the trained caffe weights of the model (for example<repository-path>/torcs/pre_trained/driving_train_1F_iter_140000.caffemodel). If this variable is not defined, the pre-trained model from this repository is used. -
(optional)
DEEPDRIVING_MEAN_PATHmust contain a path to the mean-file which is used to normalise the input images for the network (for example<repository-path>/torcs/pre_trained/driving_mean_1F.binaryproto). If this variable is not defined, the mean-file from this repository is used (which has been generated out of the DeepDriving training data). -
(optional)
DEEPDRIVING_GPUmust contain the ID of the GPU which should be used for inference. On a single GPU system, this ID is normally 0. If this variable is not defined or contains the value -1, the CPU is used instead of the GPU, which leads to bad performance. Note, that Caffe must be compiled for GPU support with CUDA and cuDNN to allow the DeepDriving network calculating on GPU.
-
Please start TORCS before starting the application, since otherwise it cannot attach to the TORCS shared memory. A description how to install and configure TORCS is provided here. ToDo: Add link to TORCS description
-
Change to the torcs-script directory:
cd <repository-path>/torcs
-
Note: It is necessary to start the scripts from this directory, since otherwise the application cannot find some files, like the pre-trained model and the images for the GUI.
-
Start the application. As first parameter the number of lanes must be provided.
- Example: The track "chenyi-E-Track 6" uses 3 lanes, thus the first parameter must be 3.
./torcs_run.sh 3

- Select "Race" in TORCS
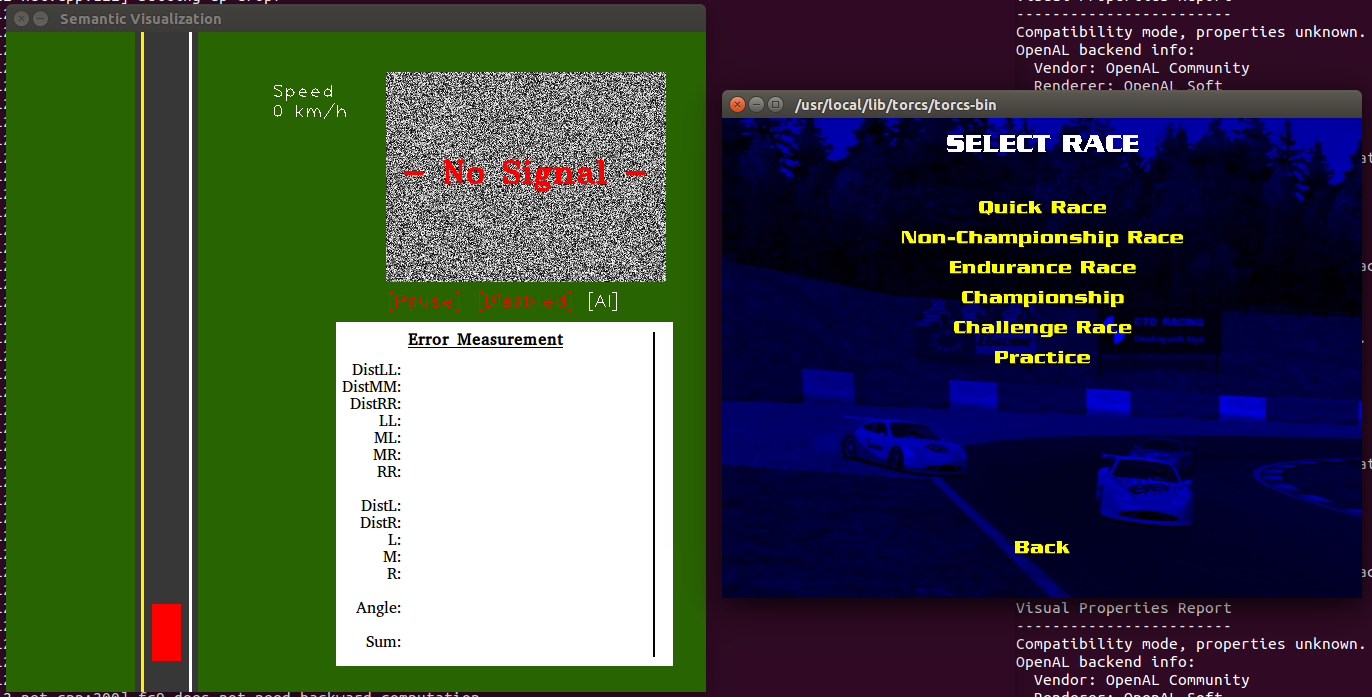
- Select "Quick Race" in TORCS
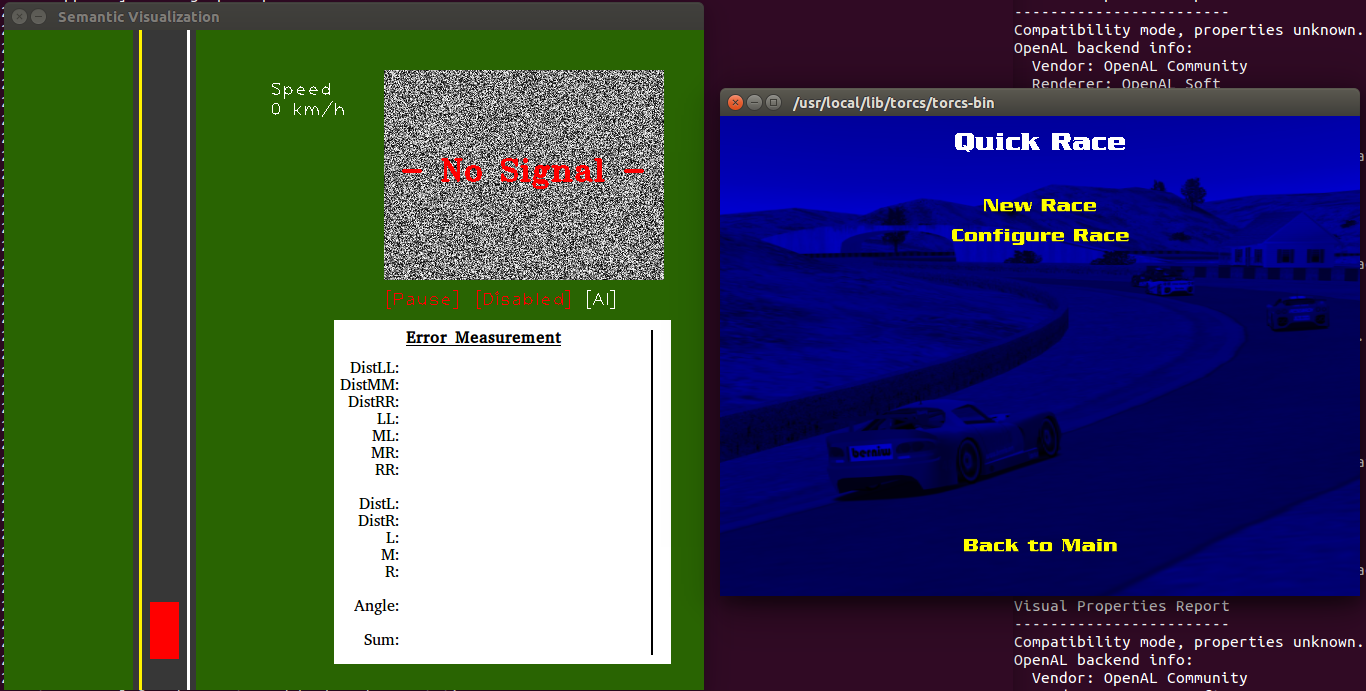
- Select "Configure Race" in TORCS (you can skip all configure steps, if you have configured TORCS before)
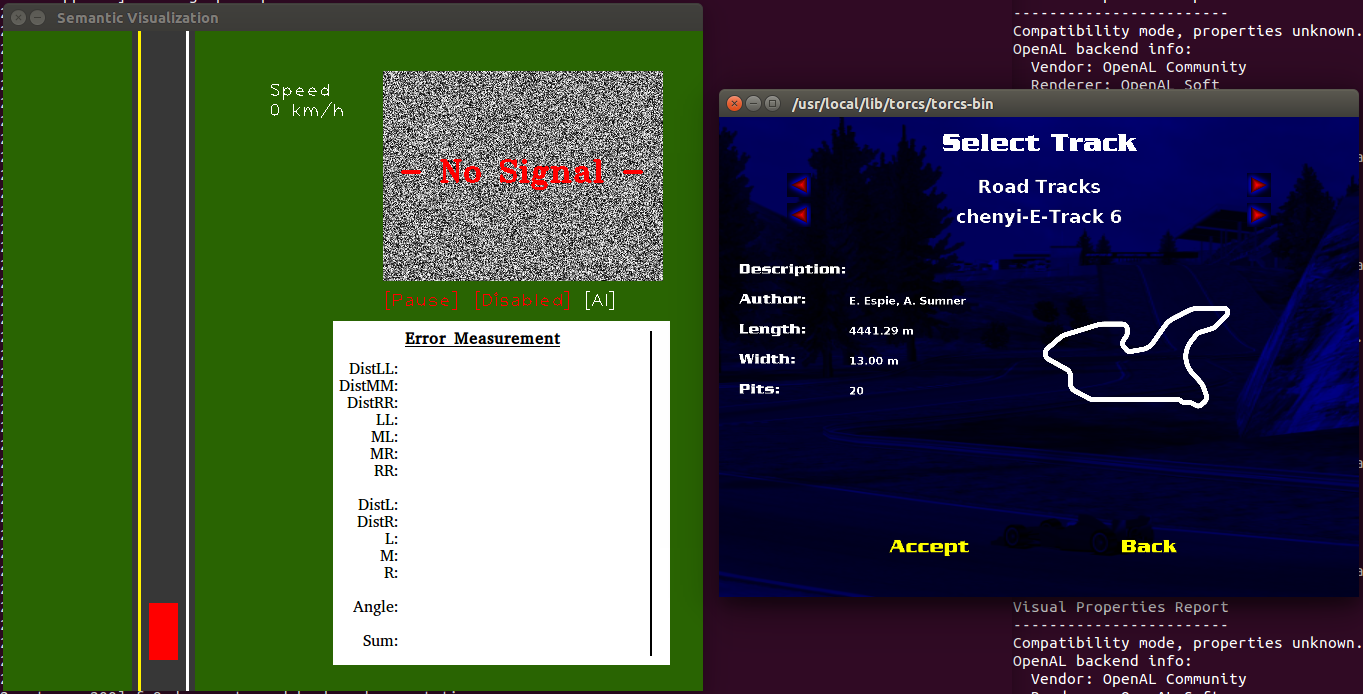
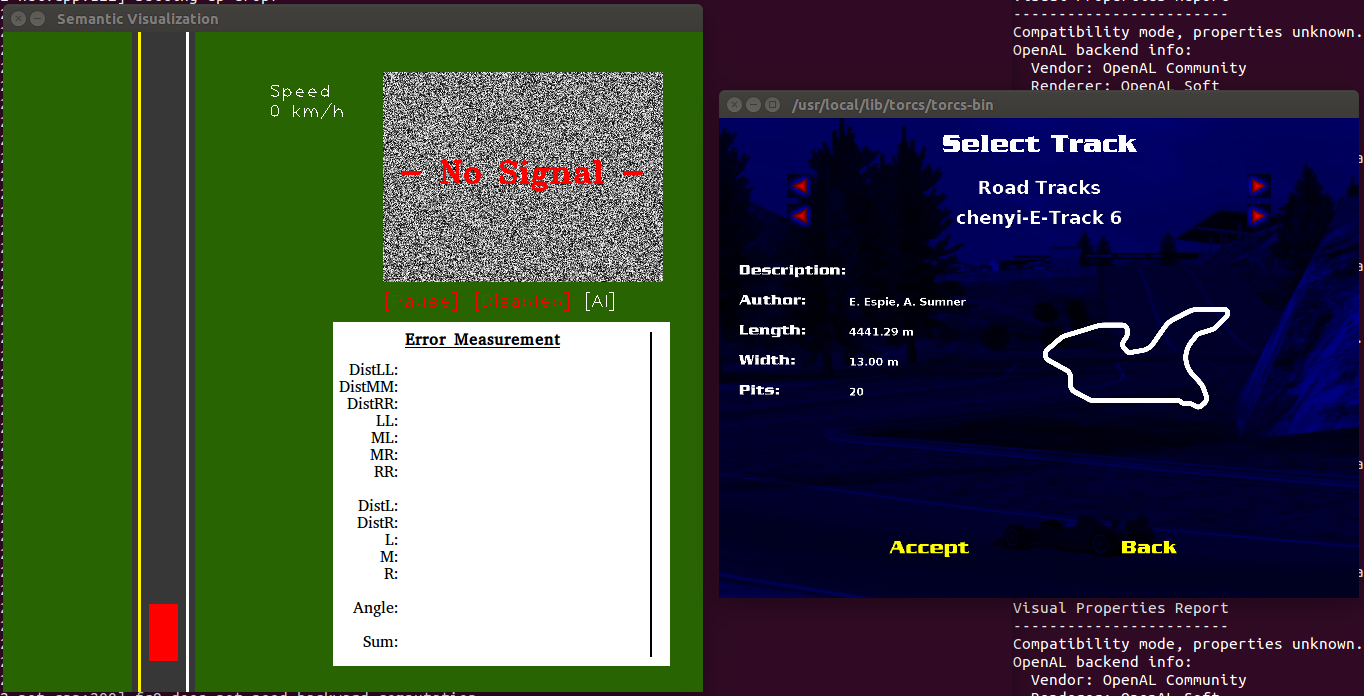
- Select as track type "Road Track" and the track you want to use. For tracks with US lane configuration, you have to use the chenyi tracks of the DeepDriving project. For example "chenyhi-E-Track 6" for 3 lanes. Press "Accept".
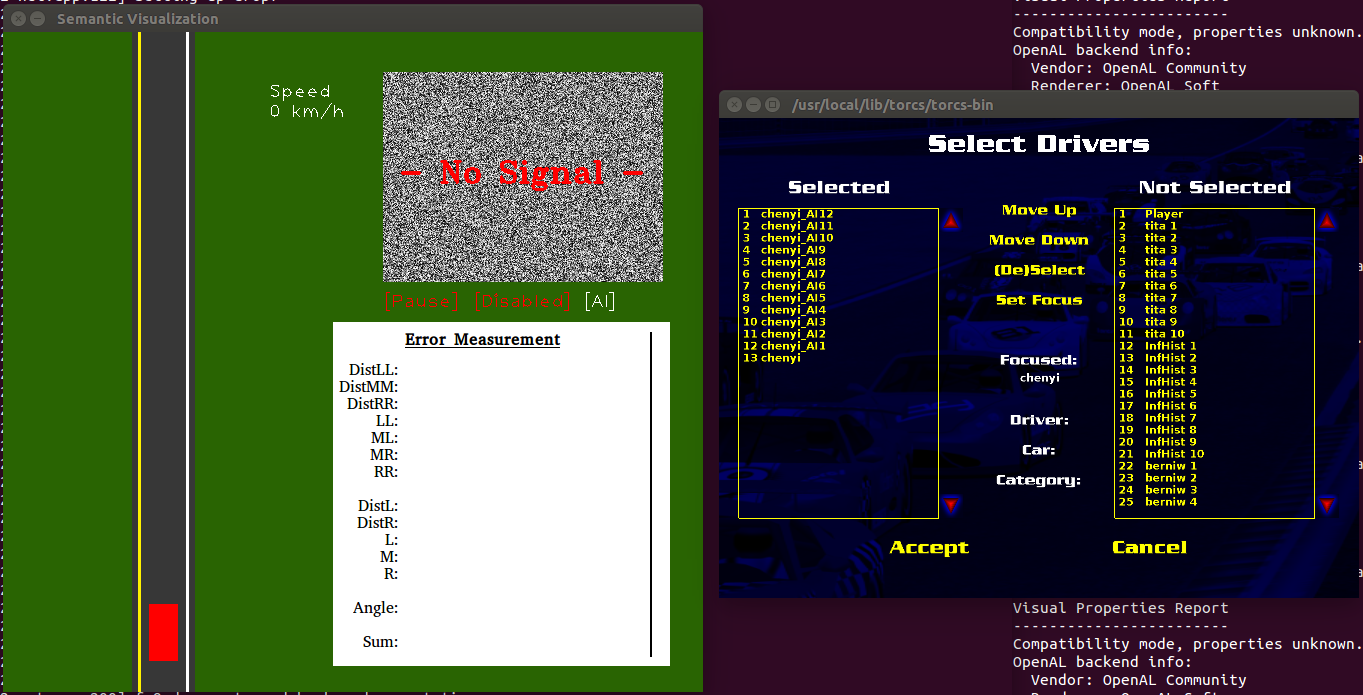
- Now select all chenyi cars. The car "chenyi_AI12" must be the first one and "chenyi_AI1" must be the last robot car. The 13th car should be "chenyi" which is controlled by the Caffe application. Press "Accept".
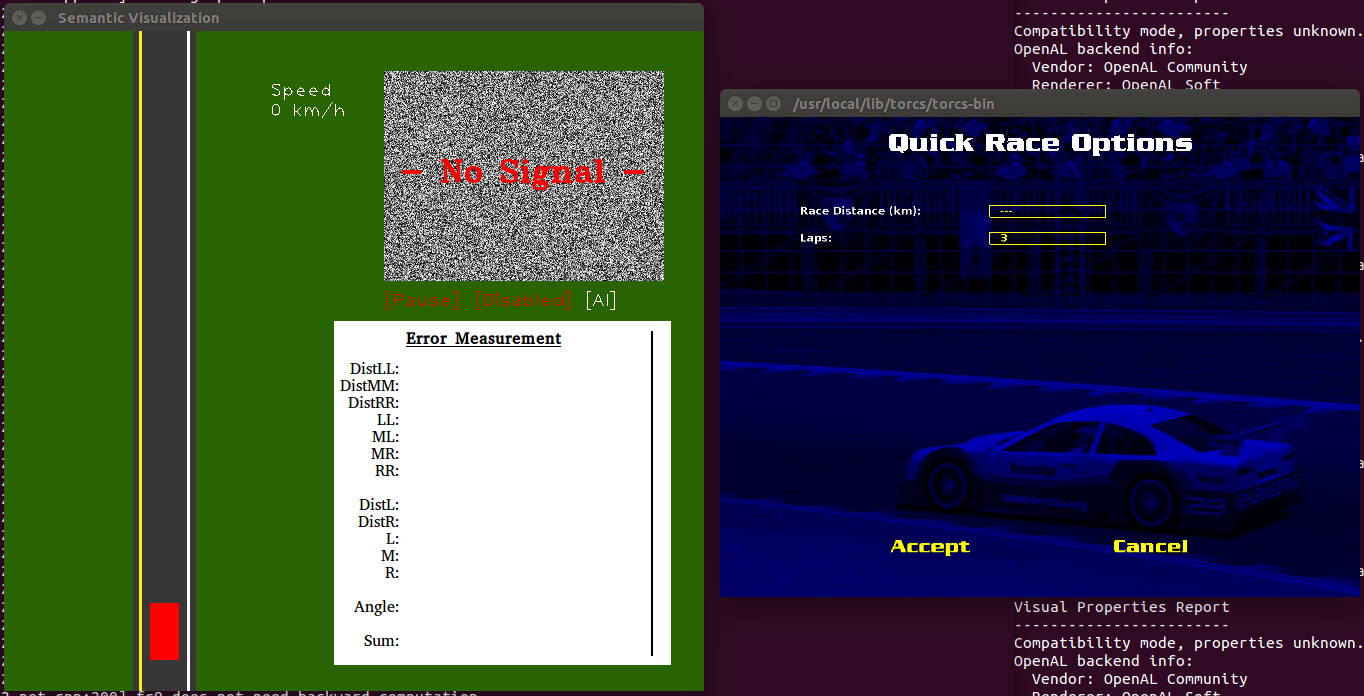
- Define the win condition (or just keep the default values) and press "Accept".
-
Press "New Race".
-
After the start of the race, press '1' to '6', '9' and 'M' (maybe several times) to disable all HUD elements. Press F2 to switch to the first person view. Sometimes you have to select the right car with 'Page-Up'.
-
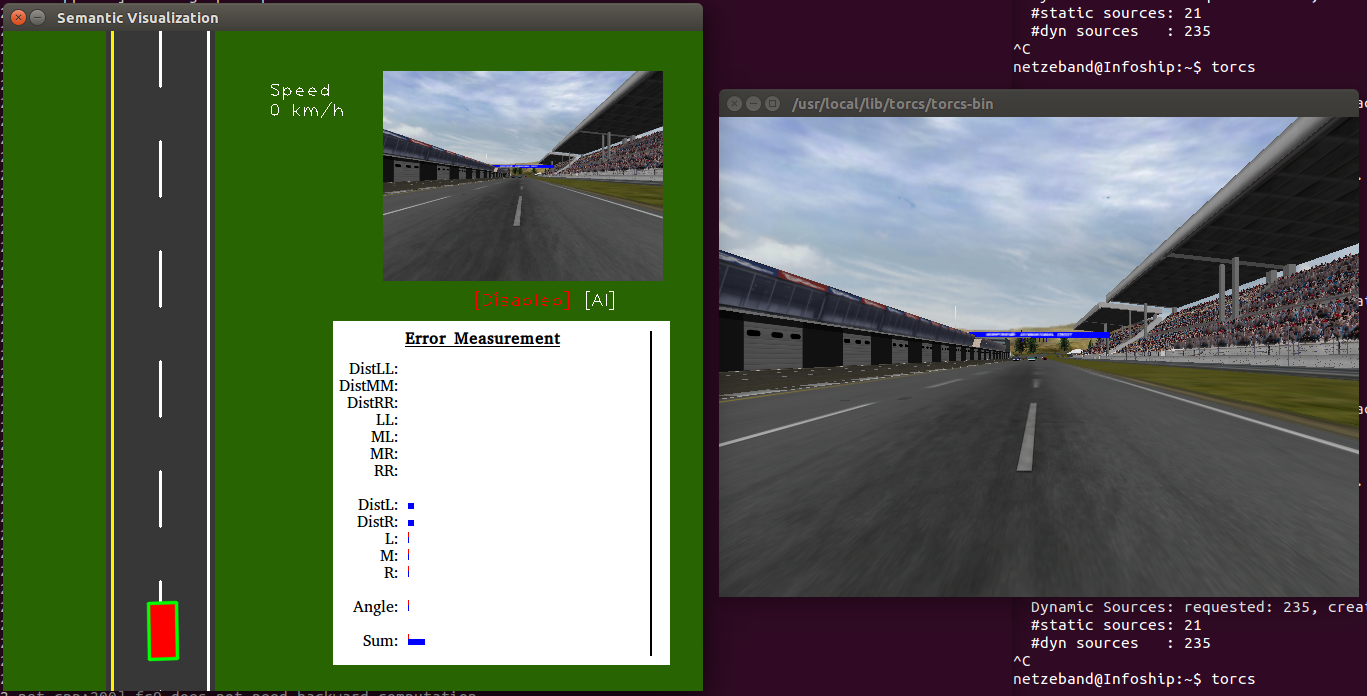
Afterwards, select the Semantic Visualization window (the window with the green background) and press "p" to enable data communication between TORCS and the Caffe application.
- Wait some seconds until the traffic cars leave the starting position and press "c" to enable the host car control.
-
Sometimes the car leaves the road, if it tries to change the lane inside a curve. Use a track without sharp curves to prevent those issues.
-
On some tracks the lane detection fails (also on the original project sources). For example at the track "chenyi-E-Track 3" it detects 3 lanes at the starting position when it drives at the right lane. This may lead to situations, where the host car tries to overtake a traffic car on the non existing lane right from the current lane. Switch to another track, to prevent those situations.
-
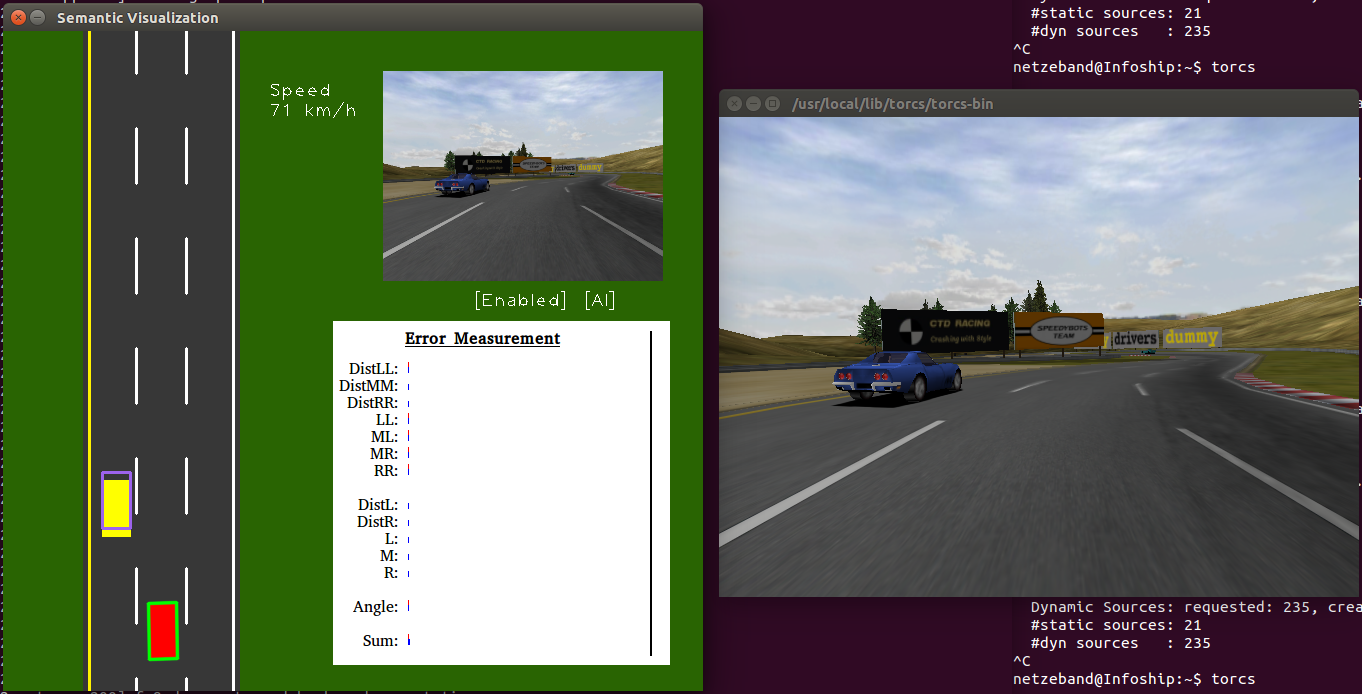
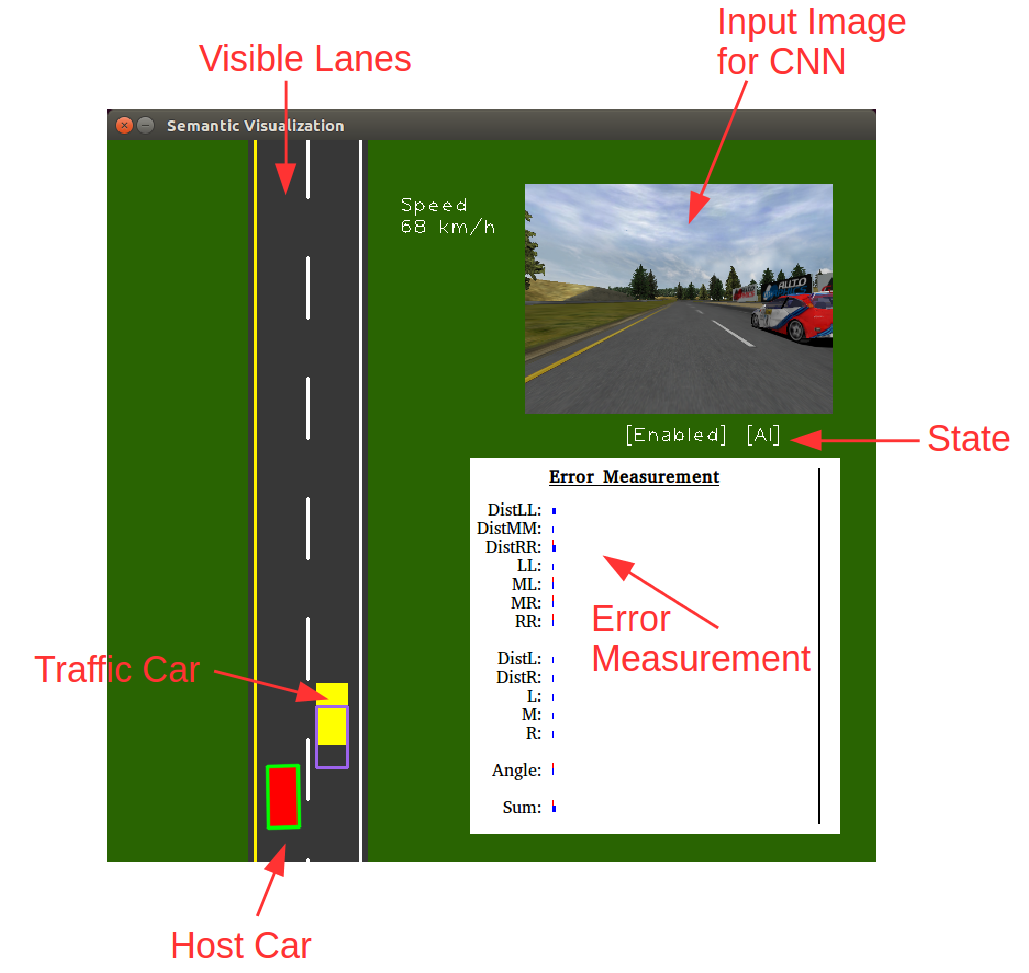
The lane view shows always the current lane and the adjacent lanes. Thus there will be at maximum 3 lanes visible, if the host-car is driving in the center lane. There are only two lanes visible, if the host-car is driving at the left or right lane. If the host-car is driving on the lane markings of the most left or right lane, only one lane is visible in the semantic window.
-
The host-car position and rotation is represented by the red box with green outline. The green outline is the estimated position, while the red box is the actual position provided by the ground truth.
-
Traffic car positions are represented by a yellow box with purple outline. Also here the outline is the estimated position while the box is the actual position.
-
The small image in the right top corner shows the image, which is provided to the neural network.
-
Below the image, the current application state is described by the following text:
- [Pause]: TORCS does not deliver new images to the application.
- [Disable]: The host car is not controlled by the application.
- [Enable]: The host car is controlled by the application.
- [AI]: The drive controller receives the indicators (e.g. lane positions) from the neural network.
- [no AI]: The drive controller receives the indicators from TORCS directly, no neural network is used for driving.
-
In the right bottom the error measure for every indicator is shown. The red bars represent the current error, while the blue bars represent the mean error for the whole application run-time. The errors are calculated as absolute difference between the estimated indicators and the ground truth.
-
The error bars just provide a qualitative feeling for the error measure. After the application is stopped by hitting "ESC", the quantitative error values are printed to the terminal.
- The application can be controlled by the following shortcuts:
-
p: Enables or disables the PAUSE mode (is on by default). -
c: Enables or disables the host car controlling by the application (is off by default). -
a: Switches between driving control by indicators from the network or by the ground truth (network driving is enabled by default). -
ESC: Exits the application. -
v: Enables or disables the output of the ground truth in the semantic visualization (is on by default). - Arrow-Keys: Allow to drive the car manually (just for emergency)
-
The following script arguments are possible:
- The number of lanes (1, 2, or 3)
- The path to the model (optional)
- The path to the pre-trained weights (optional)
- The path to the mean-file (optional)
- The GPU ID (-1 for CPU) (optional)