HowToGuides
 |
is brought to you by |  |
Because of the conversion from Google Code to GitHub, there are likely cross-wiki links that may be broken. Please report to support@yozons.com any errors you find in the documentation and we'll get it fixed ASAP. Thank you!
- Concepts, Tips & Tricks (this guide)
- User's Guide (Read first)
- System Administrator's Guide
- Point & Click Programming Guide
- Reports and Transaction Setup Guide
- Point & Click Programming Integration API Guide
- Point & Click Programming Tutorial
Thank you for using Yozons eSignForms™ by Yozons™. We hope this and related guides will make it easy to learn how to use the various features this powerful, web-based electronic contracting software provides -- all at your fingertips through our point & click programming interface. No programmers are needed, yet you get a fully branded and customized solution!
See our YouTube video for a 15-minute overview tour. Or check out our selection of How-To Videos on YozonsHTV. Check out our Programming Tutorial for a step-by-step learning approach.
With eSignForms:
- E-Contracting on Purpose™(SM)
- Free forms to get you started
- You stay in control
- Conduct business using your brand with your documents and your data
- No vendor lock-in to protect your investment
- Standard, universal formats for long-term viability: HTML documents, XML Digital Signatures, with XML, CSV and Excel data
- No long-term commitments
- No pressure sales
- Easy to budget: no variable per-user or per-transaction charges
- No crippled or limited versions to avoid free-bait-then-pricy-upgrade schemes
- Freedom of choice: fair, uniform, commercial subscription pricing with our hosting or on your own server
- Privacy is built-in: SSL/TLS over the Internet, AES on disk, RSA+SHA XML digital signatures
- Remain independent: no mixing of your users and your data with other customers
- Do-it-yourself or hire a professional partner to help
- Package one or more documents to be processed by one or more parties
- Reselling opportunity with multi-company branding across your documents and easy grouping of users at no extra charge
- Easy integration: add a link to your existing web site or emails; post the data from existing applications; have your users start it directly from the application
eSignForms is based on over 10 years of experience building thousands of custom electronic signature solutions across a wide variety of industries and company sizes, from our start in 2001 with the Fortune 1 company to myriad 1-person companies. Our target market is primarily small businesses and departments of larger corporations that have 1-500 users who need to process documents repeatedly. Very small users are certainly welcome, but there are a multitude of free services for those individuals who need to do only 5 or fewer documents per month.
Our users have streamlined their processes with sales agreements, HR and employee documents, federal and state W-4, I-9, W-9s, property rentals, school applications, financing documents, debt consolidation, non-disclosure agreements, licensing agreements, partnership documents, stockholder communications, student loans, pretty much any document you have and want to make available for rapid completion and easy searching.
Hosting services are available on a shared server, or a private web server using your domain name, or we can install it on your own Linux server in your data center. These all come with a traditional commercial license, technical support services, priority enhancements, and are only available from Yozons with pricing shown on the Yozons electronic signature web site.
The concept of Production versus Test is used throughout eSignForms. This is a simple, but powerful, mechanism that allows you to keep Production transactions (those your business relies upon) separate from Test transactions (those you create while testing new documents, making changes, etc.). Reports and To Do allow you to view one type or the other, but they are never mixed together.
Test and Production transactions have distinct retention values so you may decide you want to keep your test transactions around for only 7 days, but you might keep your production transactions forever, or at least for as many years as you think you'll need them.
By default, all new documents, packages and transactions are configured for testing purposes. This allows you to program the document and flow before it's put into production, and it also allows you to create the next version and test it while also allowing the original production version to be used at the same time, without mixing them up. This is allows for a straightforward version control system all within a single application. Documents and related configuration go from Test mode, to Production mode, to the next version in Test mode, to Production mode, and so on as your documents change over time.
When running a Test transaction, it will be obvious because the page will show this alert at the top:
Also, while not visible, the HTML document will show a Transaction Mode of "Test" in the document header:
You do not want to use Test mode for production transactions. If you do, your customers will be confused and they will be able to successfully contest it as not legally binding.
A transaction is created as an instance of a given transaction template, which itself is tied to a given package of documents, albeit with an optional branding library to control logos and properties that alter the branding that appears.
A transaction starts off in the In progress state. It remains in this state as long as it is actively in use. Normally, it will enter the Completed state once all parties have processed all documents. It is also possible to Cancel a transaction so that its considered to be ended, but not successfully. Typically, a canceled transaction is done by a user who has decided that a given transaction is no longer valid, or if it fails to complete before a set auto-cancel date has arrived. Furthermore, a transaction may be Suspended if there's a reason to prevent further processing of the transaction, but you do not want to cancel it. You may later Resume a suspended transaction. While you may also Re-activate a canceled transaction, this is atypical as once a transaction is canceled, you usually mean for it to stay that way.
Transactions that are active are either In Progress or Suspended. They are inactive when Completed or Canceled.
You can control the transaction status from the Reports or General tran search functions.
In eSignForms, we use the term "user" to mean a user who has a login account to the application.
The term "all users" means all users who have a login to the application and are visible to you (meaning that you can see the users in a list of users). This is important because, for example, when you run a report across "all users," it's not literally all users who have a login, unless you are the system administrator who can see all such accounts, but just across all users who you are authorized to know about. So if you create a group and put 5 users in that group, and then you create a manager group who can see "all users" in that group, the manager will see just those 5 users, no matter how many actual users there are. From the manager's perspective, that is "all users."
The term "external users" means all parties who fill out and process the documents you have, but do not have a login. These are typically your job applicants for an HR application, or your customers, clients, partners, etc. who you are doing business with and are signing your documents.
Always remember to click the Save button after you are done making any changes. If you are configuring a complex record that has popup windows, you will need to click Ok on those windows, then close them, and still click Save on the main record.
Click on an object to select it. Often, if you do it again, it will unselect it.
To select multiple items when allowed, click the first item, then CTRL-click to add additional items, or CTRL-click a selected item to unselect it. You can also click the first item, then SHIFT-click another item to select all items in the range between those two clicks.
You can open any menu item feature by clicking on it, and it will open it in a tab in the main part of the application screen. Or the menu item may simply display additional options, such as when clicking on the Programming item.
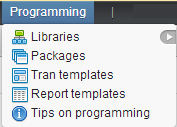
Also, in this case, you can also see that Libraries has an arrow indicating there are even more options if you click on the arrow. If you just click on Libraries it will allow you to configure permissions on your libraries, while the arrow allows you to program the contents of your libraries.
As you click items in the menu (except when starting new transactions), they open in tabs listed right below the menu bar. New tabs always appear on the far right. When you start a new transaction, the document opens in its own window and not in a tab.
Just click on any tab to revisit that screen.
To close a tab, position your mouse over the tab until the (X) appears in the upper right corner of the tab (as in the 'User sessions' tab below). Click on the (X) to close that tab and release the resources associated with the view. Closed tabs use less memory in your browser as well as on the server, so it's a good idea to close them when you no longer expect to use them.

You can drag and drop tabs to reorder them. For commonly used tabs, this is useful so you can keep them in an order you become comfortable with.
When you logoff, the currently opened tabs will be remembered and re-opened in the same order when you login the next time.
If you have more tabs open than can be displayed, tab navigation buttons appear on the far right side that will let you scroll tabs to the left or right as shown below:

Often, data is presented as a list in table, with column headers such as:
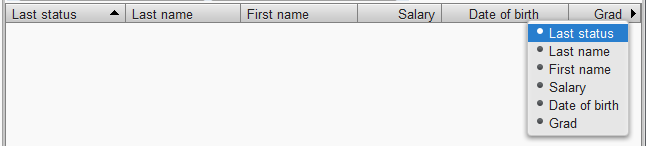
- Click on a column name, such as 'Last name' in this example to sort the list by that column. Click it again to reverse the sort order.
- Click on a column and drag it to another position to re-order the columns.
- Click on the black right arrow in the far right side to display a list of all column names, and click on any column name to make that column disappear from the list. You can do this again to make that column appear again.
- Put your cursor over the vertical separator bar next to a column name and drag it to change the size of a given column.
Currently, such changes are not remembered, though, so each time you run a query, the default columns and order, as well as the sort order, will return to the default.
When data is listed by name, it's generally in alphabetic order. When listing transactions and log records, generally the order is reverse time order so the most recent is at the top.
When in doubt, if you hover your mouse over a field or label, a tooltip will appear with helpful information; for example:

And finally, often items are hidden and only open when you click on the arrow next to it's name:

When the arrow points down, that item is "opened" and any elements it contains are displayed. When the arrow points to the right, that item is "closed" and any elements it contains are not displayed. If you click on the arrow multiple times, will will alternate between being open and being closed.
Here is that same element opened:

If there are no elements (or at least no elements you have List permission to) when you open an item, the arrow will change, but nothing will appear. This generally means you do not have permission to any items under it, or perhaps none have been created yet (such as for menu items Reports, or Start transaction), or if some exist, they are disabled and so do not appear in the listing.
For programmers and power users, we recommend you run this application with your browser maximized on a Full HD monitor/screen (1080 height) or greater.
The application has various horizontal and vertical bars that allow for fields to be resized. Just put your cursor over them, and if it is allowed, the cursor appearance will change to indicate that you can resize the areas with a click and drag to move it left and right, or up and down. This is true for the columns listed in table headers as well as various panels on the main application window.
Popup windows can be moved by clicking on the title bar and dragging it. Popup windows also can be resized using the handle displayed in the lower right corner.
EsfName and the related PathName are used throughout to name objects in eSignForms. An EsfName is 1-50 upper and lowercase letters, starting with a letter, having no spaces, but allowing an underbar. The names must be unique for each object type, and names are not case sensitive, so ESFNAME and EsfName and esfname would be considered duplicates. Examples of valid EsfNames are: ExampleName, example_name and Example_1.
Some objects support a PathName, which is a series of one or more EsfNames separate by the slash character: / Examples of valid path names are: Simple_pathname, Company1/ExampleName, This/Is/Also/Valid.
We use this format because it's a semi-universal valid naming convention for Java programming variables, JavaScript variables and functions, CSS class names, HTML names, SQL names, etc.
eSignForms makes extensive use of standards-based, globally unique identifiers that are 16 bytes long. All records/objects are assigned such a ID and are often displayed for debugging purposes on various screens. A typical looking UID is: 6dfe4d5e-7be6-425c-b083-be5223d032f0. As part of the UID is randomly generated, you will not see any pattern in IDs as they are assigned. The ID is mostly used for finding the related record in the database when some issue arises that requires debugging the platform code.
Most records are updated using a common look and feel: a list or table of records shown at the top, with a form for viewing and editing that record below. There is an adjustable slider that appears between the list and the form, so you can adjust the space for each by putting your cursor over the bar that separates them, waiting for the cursor to change indicating it is over the split panel line, and the click and drag the line to change how much space is allocated to each.
To view or edit a record, just click on it in the list. If you click on it again, it will unselect the record and remove it from the form.
Here's an example that describes common fields you will find on most forms:
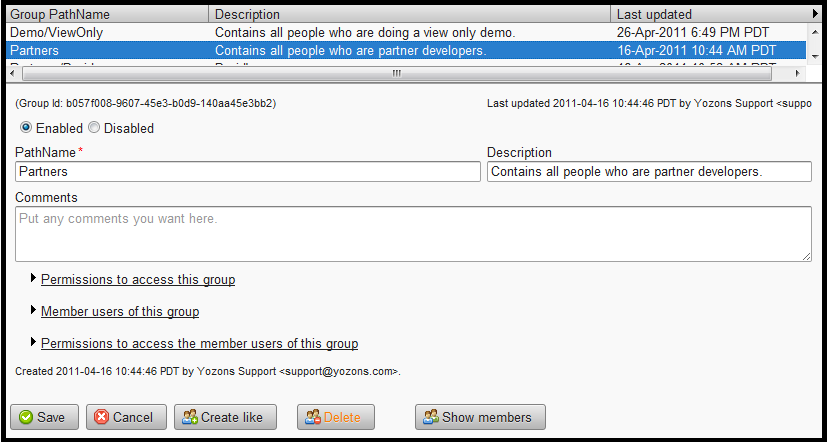
In this case, note that the Partners group record is selected in the upper list of records and the details appear in the Form below.
All records show an **Id*) that uniquely identifies this record. There is usually a Created date and user that shows when the record was created, as well as a Last updated date and user that shows when the record was last modified.
Enabled records are actively used and listed. When it is Disabled, it is not used by the system, just as if it were deleted. We recommend you only delete unused records. Once the record has been used in your operations, we recommend you just disable it if you no longer want it so that any references to that record can be maintained.
Most records have either an EsfName or a PathName that uniquely names the record of its type. When path names are allowed, we generally recommend that you prefix the name with the company, department or group that it belongs to, such as Company1/W4 and Company2/W4 to distinguish between the W4 transaction for Company1 verses the one for Company2. Note that the path name prefix has no real distinction (it does not enforce grouping, for example) other than to help you identify it's purpose and organization.
The Description field is provided for a short reminder tip about what the purpose of the record is.
The Comments field is provided to maintain historical or other reference information you want to maintain about the record.
The Permissions section generally defines access control permissions for the record itself, including List, View Details, Create/Create like, Update and Delete permissions.
Most forms also include common buttons:
- The Save button will save any changes made. You must have Update permission to save changes.
- The Cancel button will discard any changes made since the last Save, and will put the form into read-only mode. If you have Update permission, an Edit button will appear allowing you to re-enter edit mode so you can update it again.
- The Create like button allows you to create a new record like the current record. If your record has permissions, and you are targeting the new record for a different company or department, remember to update the permissions to use the target group instead of the original groups. You must have 'Create like' permission to do this.
- The Delete button allows you to delete a record you no longer want. Please delete with caution, and just disable the record when in doubt. Once you delete the record, it will not be recoverable, and any logs or other references and associations to that record will be lost.
Remember to click Save after changing any configuration.
There are various places where date ranges may be entered. They will include a From date and a To date:

Leave the From date blank to include the oldest records. Otherwise, put in the oldest date to use for matching records.
Leave the To date blank to include the newest records. Otherwise, put in the most recent date to use for matching records.
You may use the calendar button to bring up a calendar where you can select a date from it.
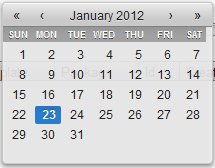
Use the << button to jump to the previous year. Use the >> button to jump to the next year.
Use the < button to jump to the previous month. Use the > button to jump to the next month.
Click on any date to select that date.
Fields that allow text field searching, such as Reports, are case insensitive.
By default it will perform a 'contains' search, meaning that data matches if what you enter is anywhere in the data. So searching for cat would match cat, catamaran, scatter and fatcat.
Use a '=' prefix for exact email match. Searching for =cat would match cat, but nothing else. If nothing follows the equals sign, it will search for blank values.
Use a '^' prefix for a starts with match. Searching for ^cat would match cat and catamaran, but not scatter or fatcat.
You may start with a '!' prefix to negate the search value
Generally, you can hover your mouse over such a field for a tips reminder. If it doesn't show these options, it is limited to only a default 'contains' search.
PDF is a document format used by many legacy applications. While it has nice traits, the files are substantially larger than the native, HTML standard documents.
To support legacy applications and provide an easy independent copy for users to download and keep for themselves, agreements can be exported in PDF format. All PDF files are digitally signed using the eSignForms deployment's self-signed X.509 digital certificate that represents the same public key as used for XML digital signatures on the original HTML documents.
Because the PDFs are digitally signed using your deployment's public key, Adobe Reader will not automatically trust your signing keys.
The first time you view a digitally signed PDF from your deployment, Adobe PDF will reports a "problem" with the digital signature. This is just because PDF doesn't know about your signing keys yet.

If you click on the PDF Signature Panel and display the signing keys, you will see that the PDF is shown to be the original (not tampered with), but the key simply hasn't been added to your trusted list:
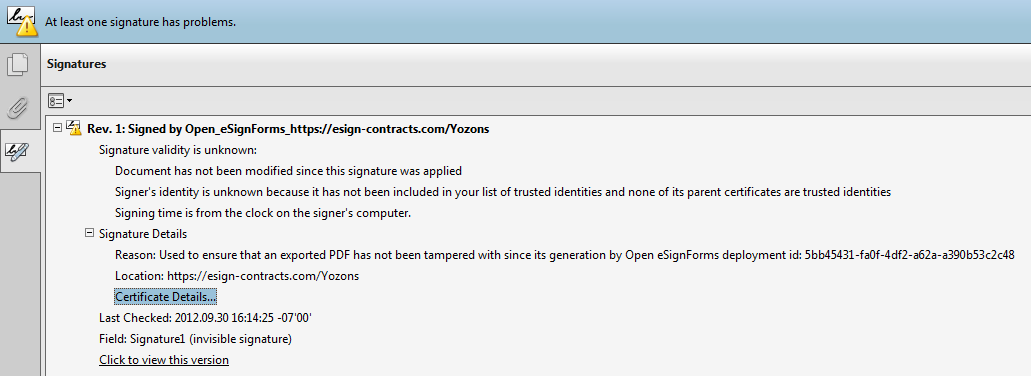
Click on the "Certificate Details..." link under "Signature Details" section to open up the PDF Certificate Viewer:
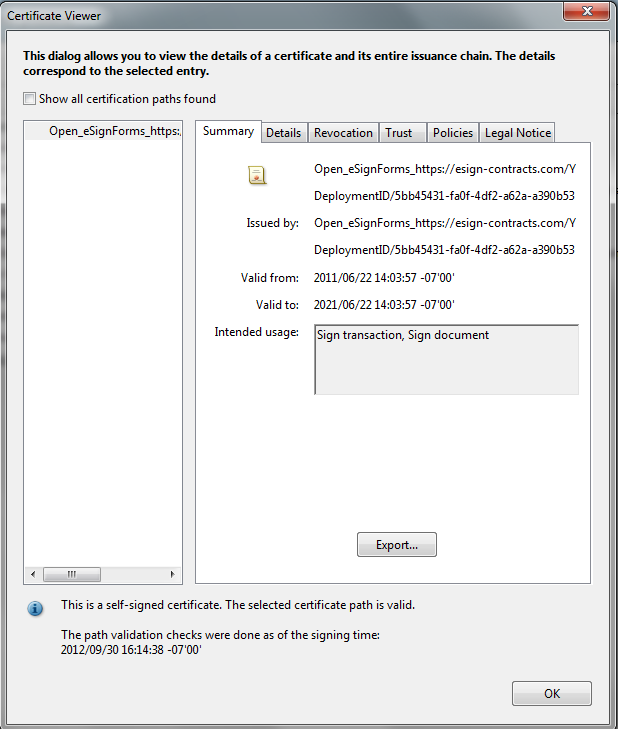
Note that it shows that the intended usage for the keys is to "Sign transaction, Sign document" which is precisely what eSignForms is using it for.
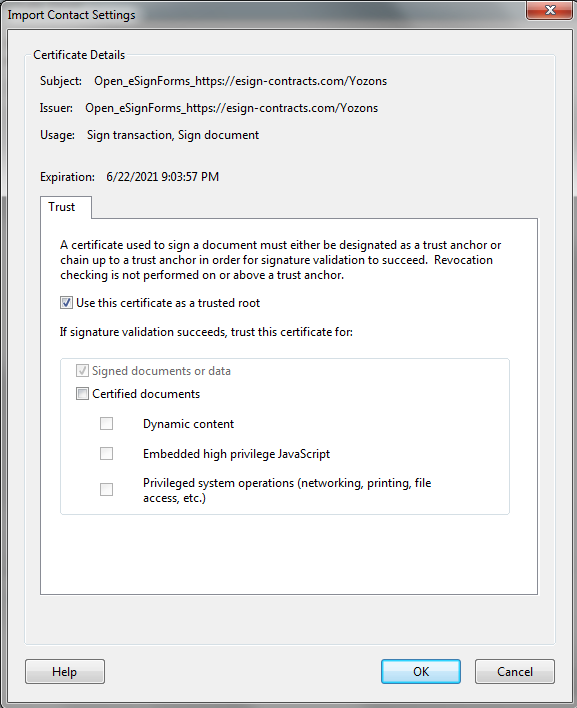
Feel free to examine the other tabs on the Certificate Viewer, but to add the certificate to your PDF trust store, click on the Trust tab and then click the Add to Trusted Identities... button, then the OK button to import the certificate:
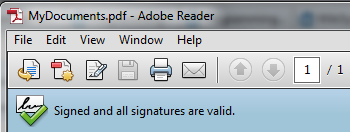
Click the OK button twice and either re-open the PDF or click the button to revalidate the signatures. It will now show this document, as well as all future PDFs exported from the system to be valid (unless of course the PDF has been tampered with or your deployment has a new signing key in the future in which case you need to import that key as well).
Come and see our list of How-To Videos on YouTube on our YozonsHTV Channel.
Feel free to contact Yozons for inquiries regarding pricing or professional services.
Please use our Forum to view previous questions and answers or to ask your own question or even answer questions as you gain expertise. It takes a community to continually improve eSignForms, and we appreciate your help in making eSignForms the most useful electronic contracting platform available.
We really do appreciate all of our users who help make things better with positive comments and feedback that help improve the technology.