ProgrammingTutorial
 |
is brought to you by |  |
Because of the conversion from Google Code to GitHub, there are likely cross-wiki links that may be broken. Please report to support@yozons.com any errors you find in the documentation and we'll get it fixed ASAP. Thank you!
- Concepts, Tips & Tricks (Read first)
- User's Guide (Read first)
- System Administrator's Guide
- Point & Click Programming Guide
- Reports and Transaction Setup Guide
- Point & Click Programming Integration API Guide
- Point & Click Programming Tutorial (this guide)
This tutorial assumes you have "programmer" access to Yozons eSignForms, so you have permission to update a library, create a package, transaction template and report. Programming is primarily about document layout and point & click configuration and can be done by anybody. There is no traditional programming involved, so you do not need to be a software developer.
Of course, if you do not, this is also a useful guide to just read and see how it's done step-by-step. Note that some screens have changed since this was created, but the procedure remains the same.
You are going to build a simple, custom contract that allows supporting documentation to be uploaded and attached. You'll learn how to build the document all the way through seeing it in a custom report and then moving it from Test mode to Production.
Please login now and we'll get started. It's all pretty easy.
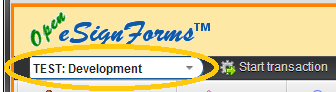
After you login, but before you begin, be sure to put yourself into TEST: Development mode using the drop down in the upper left corner:
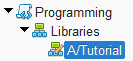
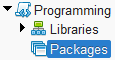
Click on Programming->Libraries->YourLibrary where 'YourLibrary' is the name of the library you can program in. For most initial setups, a library was created for your company using your company's name.
Click on Documents since you are first going to build the document. Note that our library is currently empty, but you may already have documents in your library.
Click on the Create new button 
In your case, call this document Tutorial, give it a display name of "Contract" and set the short description to "Our tutorial document", then click the Save button and note that the document now appears in your document list, along with your first version:
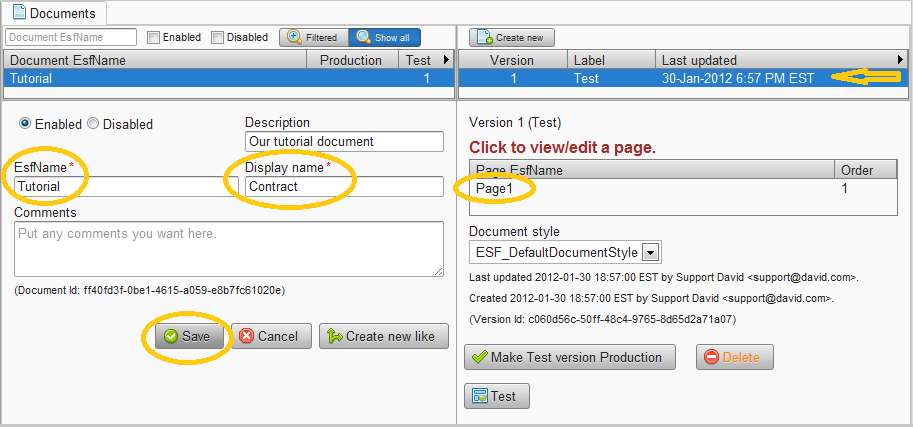
Click on Page1 in the lower right hand side to edit the page. There are no fields or images defined yet, but a "FirstParty" party was automatically created for you.
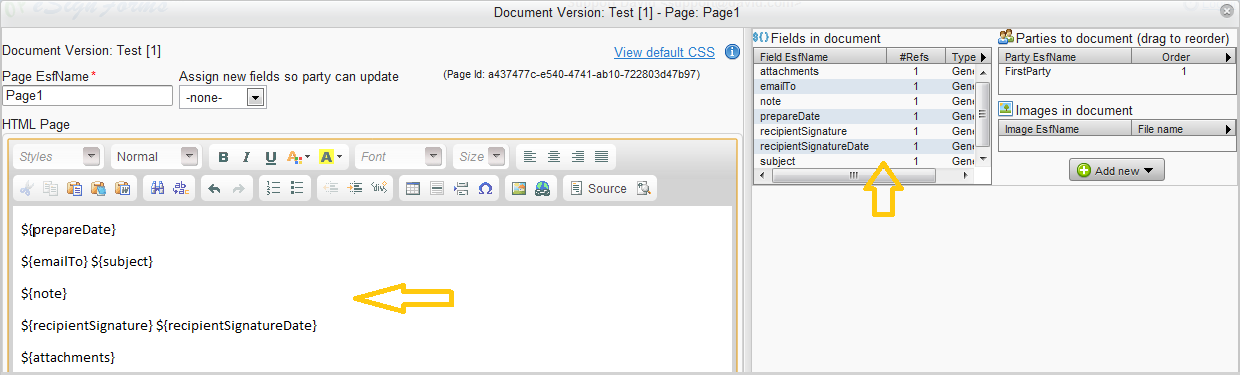
To get you started, just copy the following 5-line document text between the lines below and paste it into your HTML page editor:
----
${prepareDate}

${emailTo}   ${subject}

${note}

${recipientSignature}    ${recipientSignatureDate}

${attachments}
----
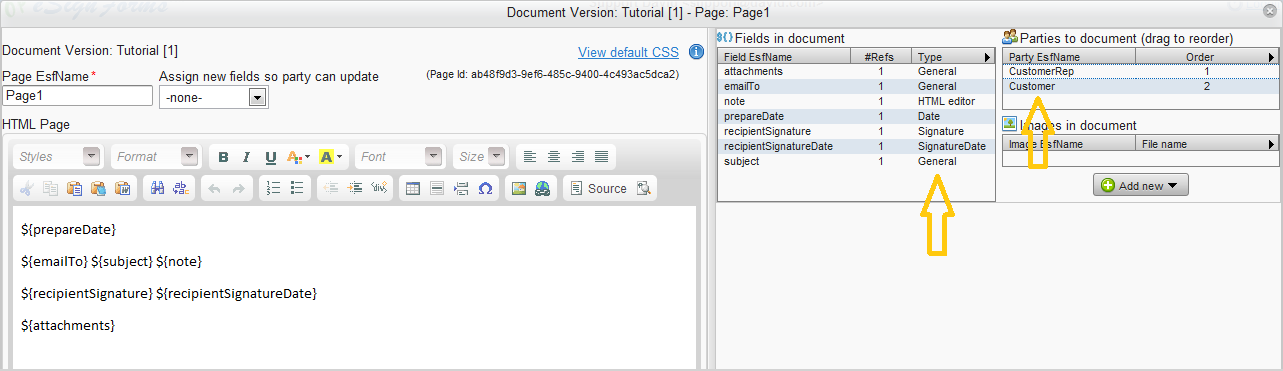
Click the Save button. Note that fields where parties can enter data are defined within ${ } notation, so this document is made up entirely of such fields. When you click the Save button, all new fields are detected and then populated in the right side panel. It should look like this now:
Tip: When building a document yourself, do it line-by-line and test every step of of the way. It makes it easier to determine where a problem was introduced so it can be fixed. Also, if you know which party will enter the data in the fields you are defining, you can select that party in the Assign new fields so party can update drop down so when you click Save, all new fields will automatically be associated to that party.
In this tutorial, you will fill out the contract and send it to another party to read and sign.
First, change the party "FirstParty" and call it "CompanyRep", then add a second party called "Customer". Also set which party updates which fields.
Click on FirstParty on the right side under "Parties to document" to bring up the party editor. Change the EsfName (this name must not have spaces) to "CompanyRep" and Display name to "Representative". Select all fields listed in Fields party can view except for the "recipientSignature" and "recipientSignatureDate" fields and click the >> button to move them to the Fields party can update column. It should look like this before you click the Ok button:
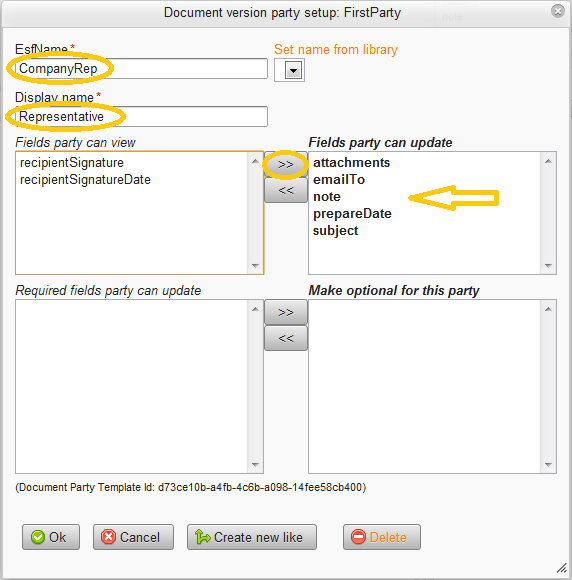
If so, click the Ok button to save your changes.
Let's now create a second party as follows, to represent the customer who will sign your agreement. The customer will just update the recipient signature fields.
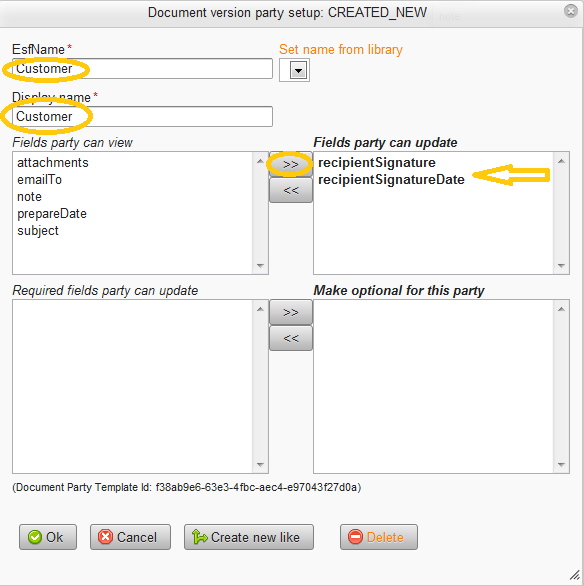
Click on the Add new button, then Add new party
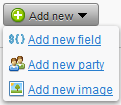
Change both the EsfName and Display name to "Customer". Select the two recipient fields from the Fields party can view and click the >> button to move them to the Fields party can update column. It should look like this before you click the Ok button:
If so, click the Ok button to save your changes. Next we'll update all of the fields to have the types and labels we'd like.
Click on attachments in the Fields in document list on the right side.
Change the Type from "General" to "File upload" since you want the attachments to be a place where you can attach supporting documentation when needed. Also tweak the Label to show a bit by putting parentheses around the plural 's'. Note that the default label is created from the field name. It should look like this before you click the Ok button:
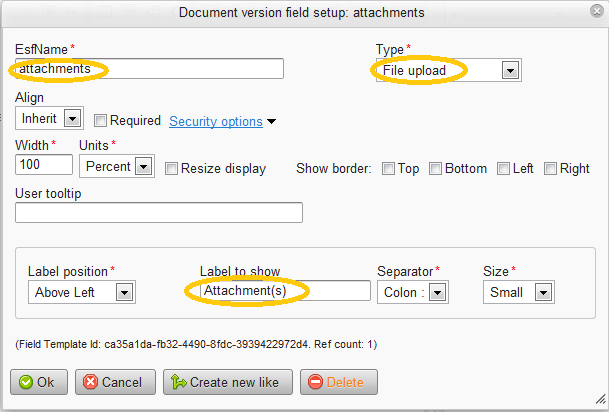
If so, click the Ok button to save your changes.
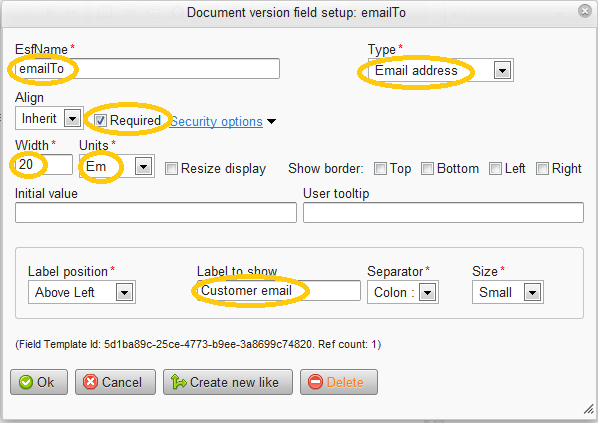
Click on emailTo in the Fields in document list on the right side.
Change the Type from "General" to "Email address" since you want to specify the customer's email address. You need an email address to send the invitation to sign to the customer, so check the Required box. Change the Width to "20" and Units to "Em" so it doesn't go across the page. We'll also tweak the Label to show to read "Customer email". It should look like this before you click the Ok button:
If so, click the Ok button to save your changes.
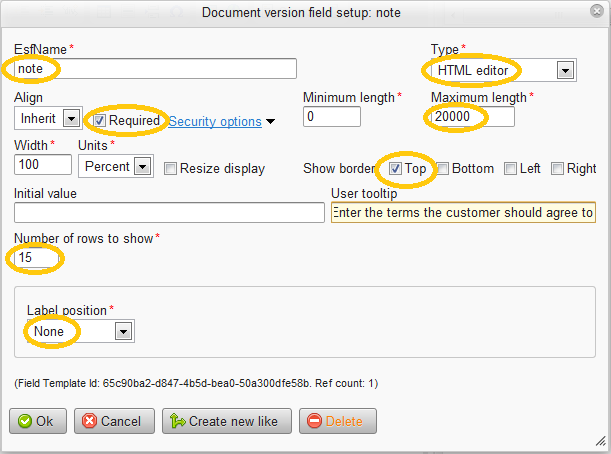
Click on note in the Fields in document list on the right side.
Change the Type from "General" to "HTML editor" since you want to be able to enter your contract terms here, perhaps even pasting the terms from a Word document. Some contract terms are required, so check the Required box. Change the Maximum length to "20000" so it can hold a lot of contract language should you need it. Also check Show border "Top" to separate the contract terms from the customer email and subject. Set the Number of rows to show to "15" to give a good sized editor window when filling out the contract. You don't want a label for this field, so change Label position to "None". It should look like this before you click the Ok button:
If so, click the Ok button to save your changes.
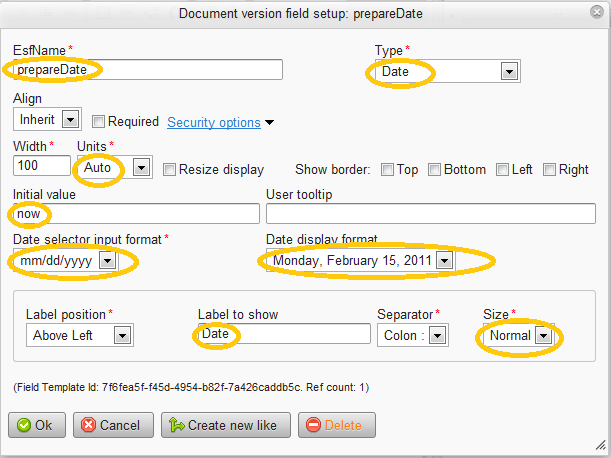
Click on prepareDate in the Fields in document list on the right side.
Change the Type from "General" to "Date". Change the Units to "Auto" since it should size "naturally" (as big as the date field is). Set the Initial value to "now" (or you can use "+0") so it will show today's date. (If you hover over most fields, a tooltip will give you hints like this one about a date's initial value.) Change the Date selector input format to "mm/dd/yyyy" and set the Date display format to a full date and day. Then change the Label position to "Left", set the Label to show to just read "Date" and set the Size to "Normal". It should look like this before you click the Ok button:
If so, click the Ok button to save your changes.
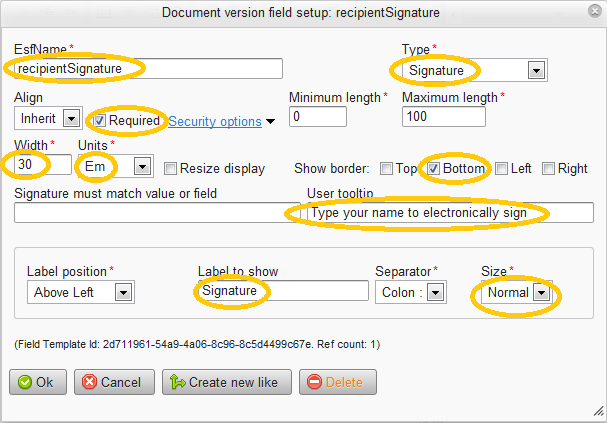
Click on recipientSignature in the Fields in document list on the right side.
Change the Type from "General" to "Signature" since you want the customer to put type their signature here. Check Required since you'll require the customer to sign. Set the Width to "30" and Units to "Em" so it has a fixed size in the document. Set Show border as "Bottom" to create a signature line, and add a tooltip for the customer. Change the Label to show to just read "Signature" with a Size of "Normal". It should look like this before you click the Ok button:
If so, click the Ok button to save your changes.
Click on recipientSignatureDate in the Fields in document list on the right side.
Change the Type from "General" to "SignatureDate" since you want the date the customer signs to appear next to the signature. Set the Width to "10" and Units to "Em" so it has a fixed size in the document. Set Show border as "Bottom" to create a signature date line. Set the Date display format to show a full date. Change the Label to show to just read "Date" with a Size of "Normal". It should look like this before you click the Ok button:
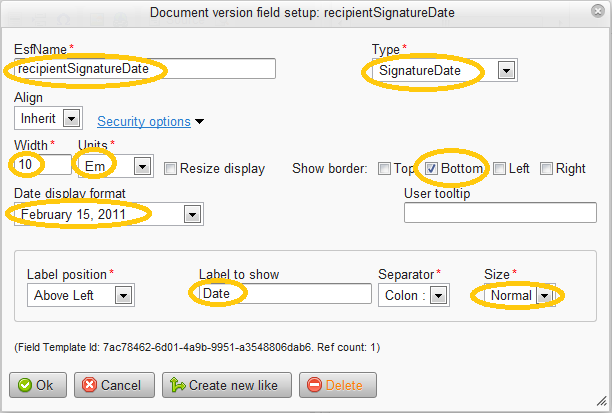
If so, click the Ok button to save your changes.
Tip: The signature date is associated with its corresponding signature field by naming convention, adding "Date" to the name of the signature field. So in this case, "recipientSignatureDate" is linked to the field "recipientSignature".
Click on subject in the Fields in document list on the right side.
Set the Width to "20" and Units to "Em" so it has a fixed size in the document. Check Required since we'll use this subject in the email notification sent to the customer. It should look like this before you click the Ok button:
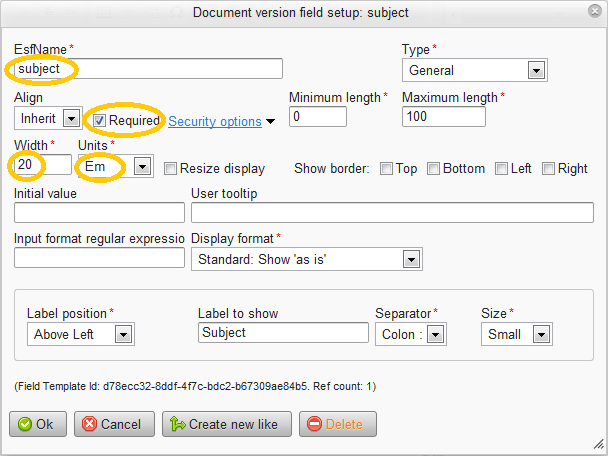
If so, click the Ok button to save your changes.
Click the Save button to save all your changes and it should look like this:
When you are creating your own document, we recommend you do this basic testing step repeatedly as you change your fields and document so that you can see the changes right away. For example, the reason we knew to change the label sizes, widths, etc. above is that when we tested, the results are not quite right and need those values to be tweaked.
Click the Test button at the bottom left of the editor area. The Test button will also do a Save first, then show you your document in action, set to the first party defined so it shows you how the document will look at the first step.
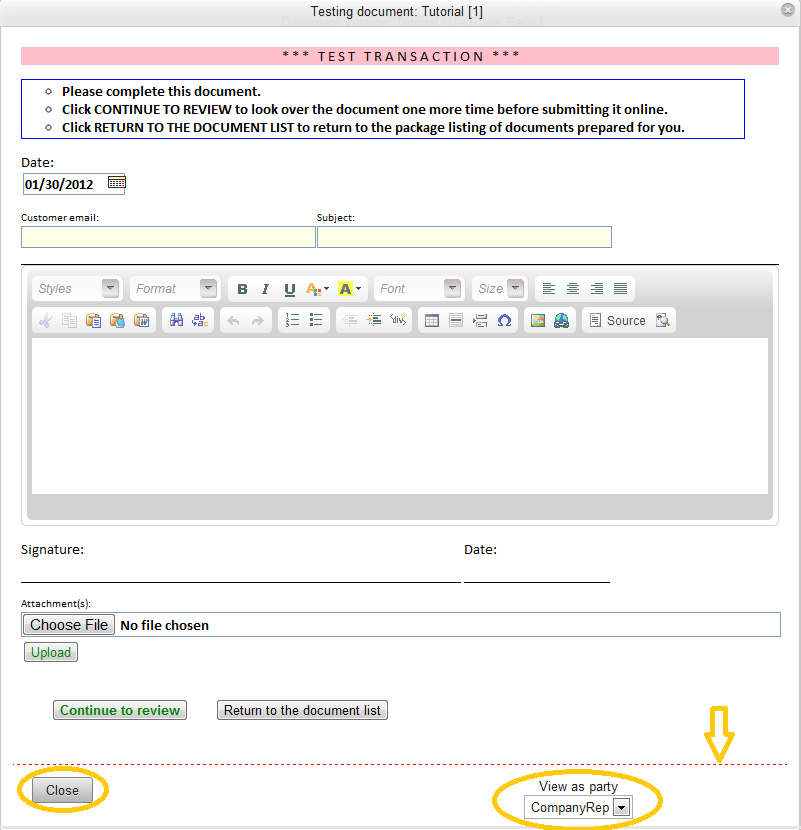
Note that the document ends at the red dotted line, and you may need to scroll to see it all. Below the red dotted line is a Close button that will close the testing window, and a View as party drop down to let you see how the document will look for either party.
The document input fields with a yellow background are required. Note that for the CompanyRep (first party), all fields are open for input except for the signature and signature date fields.
Feel free to play with the document, including uploading an attachment, setting values, click the Continue to review button, etc.
At the bottom of the test window, select "Customer" from the View as party drop down. It should now appear like this:
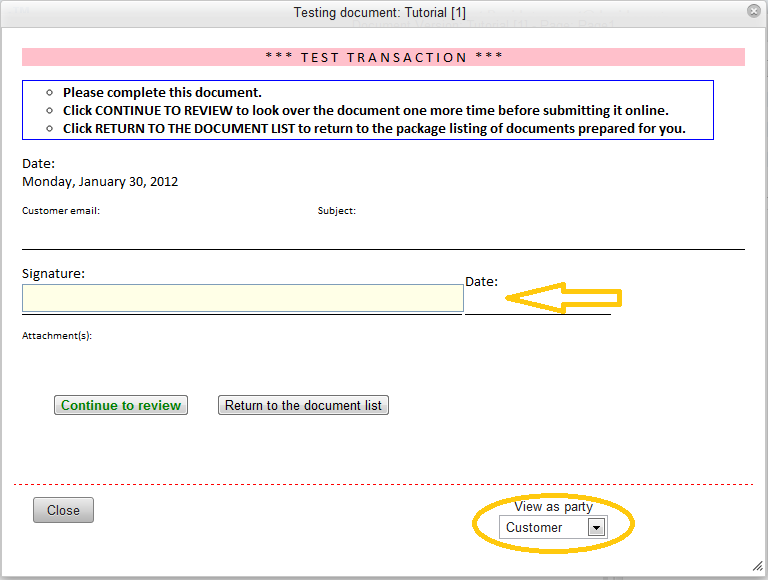
Note that only the customer signature field is open for editing. If you type a name and click Continue to review you will see the signature date and electronic signature process record automatically appear.
Click the Close button at the bottom to exit the document test view.
Then click the Close button on the page editor since you are happy that the document appears to be working as expected. Next, you'll create a package that holds this document for processing.
Click on Programming->Packages and select the package template from the list so it appears in the form below. The package template has no documents or parties defined, but the permissions are set for your company or group, so you always start with a template and then "create new."
You don't want to change the template, so first click the Create new like button 
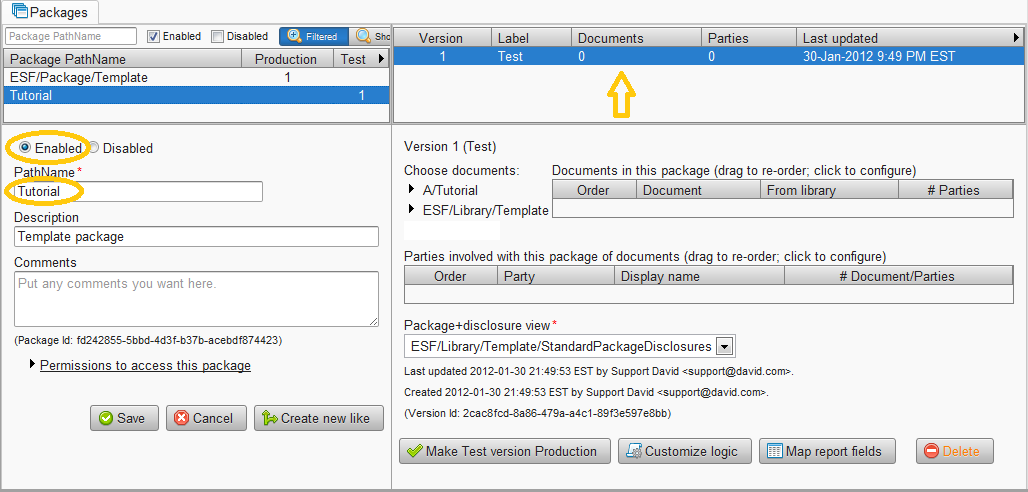
Change the PathName to "Tutorial", ensure the Enabled radio button is selected and click the Save button. It should look like this:
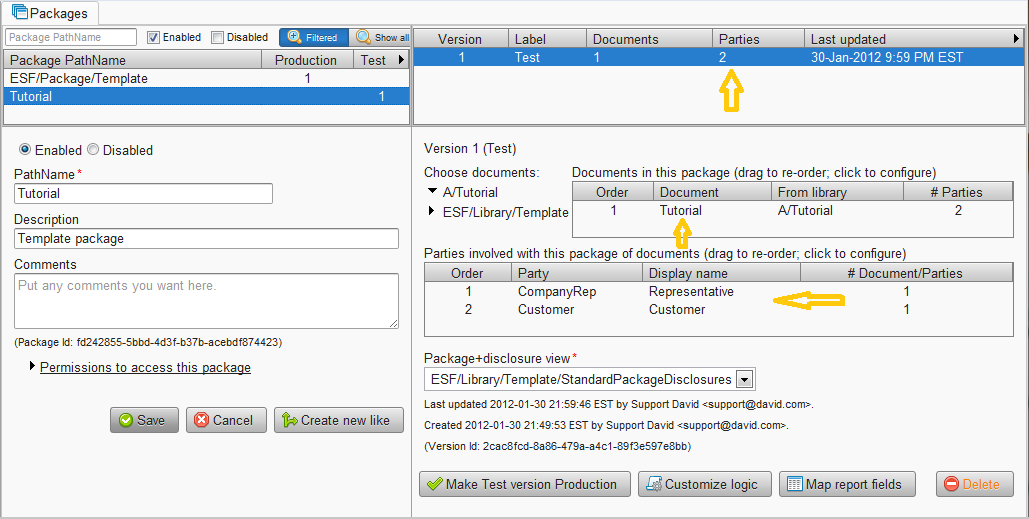
On the lower right side, under Choose documents: open the library where you created your document. In our case, we opened the library A/Tutorial and it showed the Tutorial document. Drag Tutorial and drop it into the Documents in this package list. Note that the two parties defined in the document are pre-populated in the package.
Click Save and it the package should look something like this:
Package parties are similar to document parties, but they have more configuration associated with them. This allows a document to be as simple as possible, and then tweaked in various packages to be useful in different scenarios.
Click on the CompanyRep party in the Parties involved with this package of documents list. Since this party is a user in your company, we'll make the following types of changes. First, let's change the Landing page to "First document" since your employees don't need to see the E-Sign Disclosures (required by law for consumers) and package list and can go straight to the first (and only, in this case) document. Check Must be logged in so that the person who starts the transaction is logged in. Also, check Allow delete tran if no signatures so that if you start a transaction using this package and decide not to send it out, you can delete the transaction entirely. It should look like this before you click the Ok button:
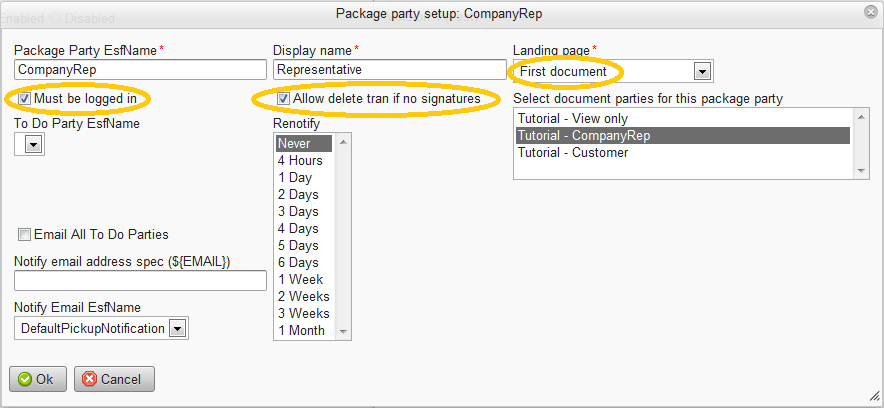
If so, click the Ok button to save your changes.
Tip: If the user starts a transaction, doesn't delete it and fails to send it one to the customer, it will appear in that user's To Do listing so he or she can resume from there.
Click on the Customer party in the Parties involved with this package of documents list. Set the Notify email address spec (${EMAIL}) to the form field that contains the customer's email address, in this case this was the "emailTo" field, so enter "${emailTo}". If you want, you can set up automatic email renotifications if the customer does not complete it, so select Renotify values of "1 Day" and "5 Days". It should look like this before you click the Ok button:
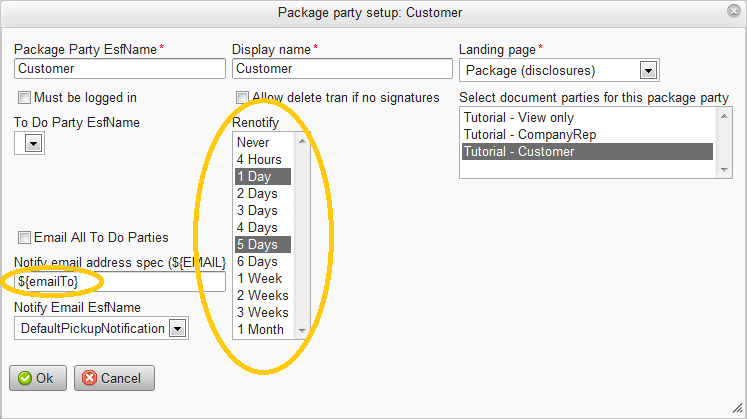
If so, click the Ok button to save your changes.
Because you know you'll create a custom report later that can show details about your transactions, go ahead and map fields in your document so that they are available for reporting later.
Click on the Map report fields button 
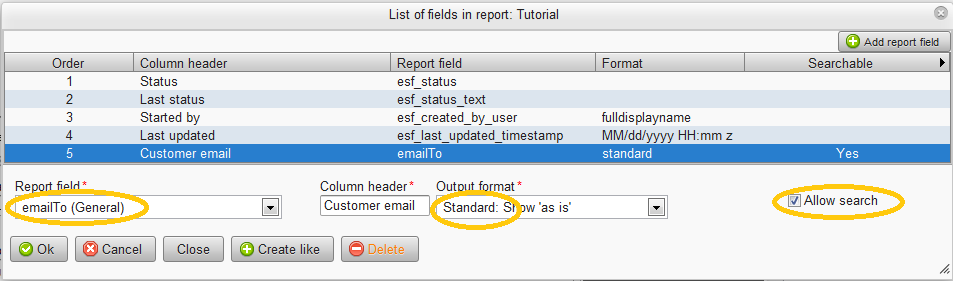
Click the Map new report field button 
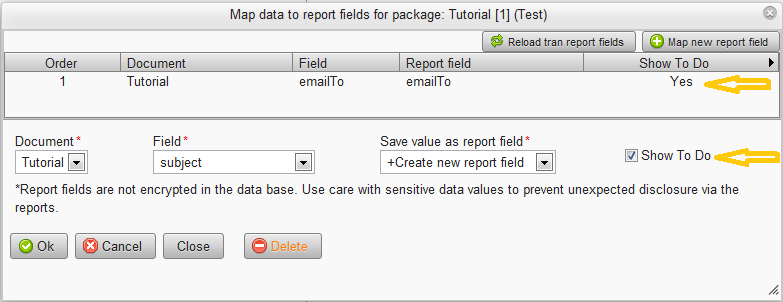
Select the Field "emailTo" and check Show To Do (so that if you start a transaction, but don't send it out, when you return via the To Do listing you will know who it was to). It should look like this before you click the Ok button:
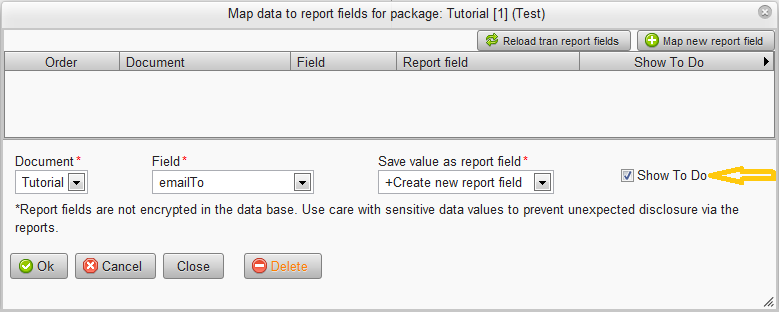
If so, click the Ok button to save your changes.
Tip: If you have other packages already built, you may want to check the Save value as report field drop down list to see if an appropriate field already exists to use in reports. If not, use the "+CreateReportField" value.
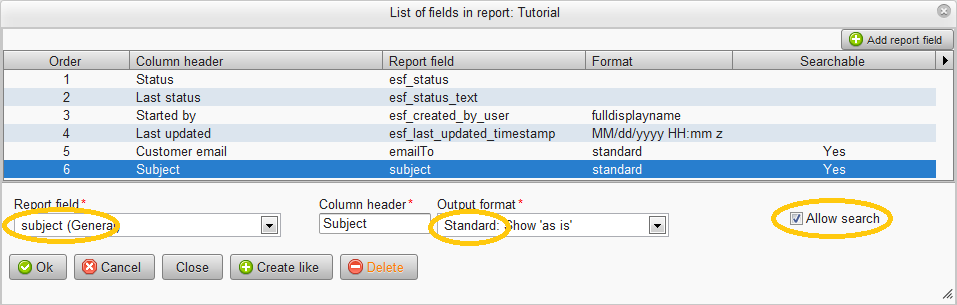
Click the Map new report field button
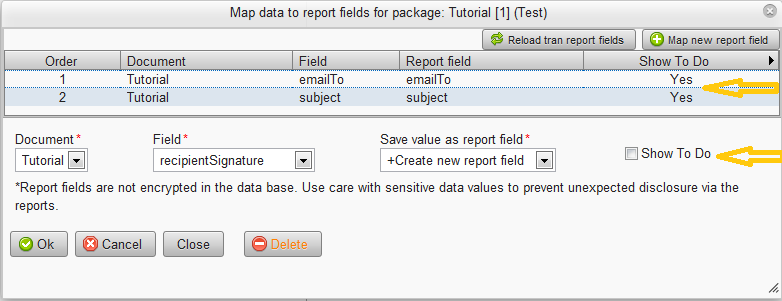
Select the Field "subject" and check Show To Do. It should look like this before you click the Ok button:
If so, click the Ok button to save your changes.
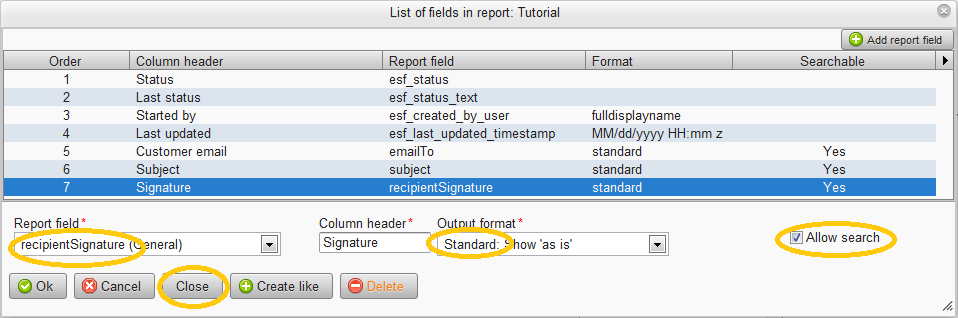
And finally, click the Map new report field button
Select the Field "recipientSignature". There is no need to check Show To Do since in this case since this field will not be set by the time it leaves the user's To Do list (it leaves when the user completes it and the customer is notified to sign). However, it will be useful to see in your reports for completed transactions. It should look like this before you click the Ok button:
If so, click the Ok button to save your changes.
Click the Save button to save your changes to the package. Next, we'll create a transaction template that uses this package.
= Step 4: Create a transaction template
Click on Programming->Tran templates and select the transaction template from the list so it appears in the form below. The transaction template has no package or branding library defined, but the permissions are set for your company or group, so always start with a template and then "create like."
You don't want to change the template, so first click the Create like button 
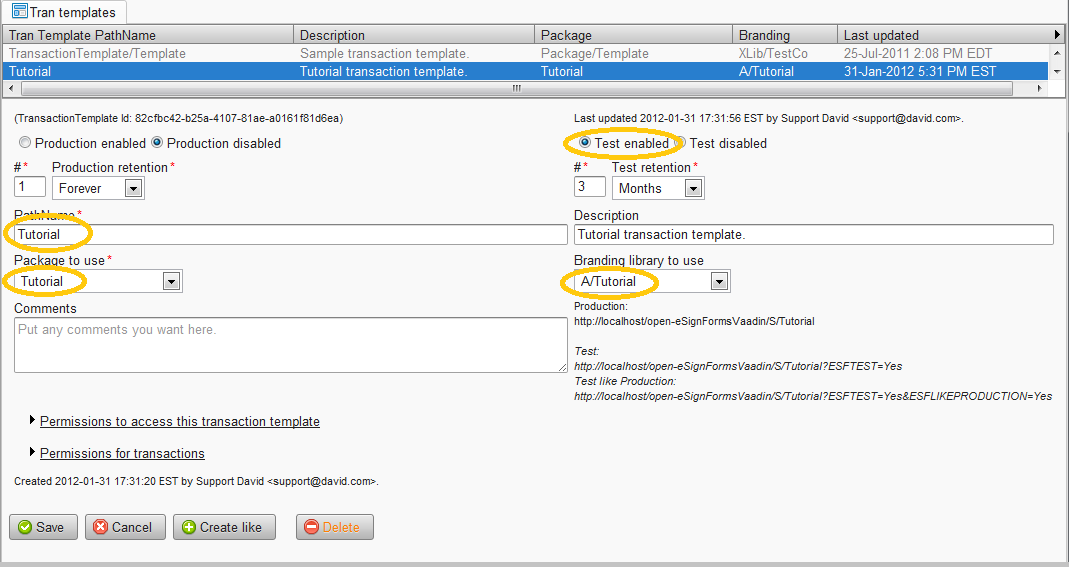
Change the PathName to "Tutorial", ensure the Test enabled radio button is selected, choose your "Tutorial" package for Package to use, choose your library for Branding library to use, and click the Save button. It should look like this:
You should now see your tutorial transaction listed under the Start transaction menu. If not, it is possible that you are not in TEST: Development mode, as the 'Start transaction' menu only lists transactions you are authorized to start in test mode.
A Test transaction will not get mixed up with your Production transactions, and it will also use any components (document, image, property set, drop down, etc.) that are marked at the Test level.
Tip: If you do not see a new popup window, most likely your browser is blocking popups, so look for such errors or warnings and then tell your browser to allow popups from your web site domain.
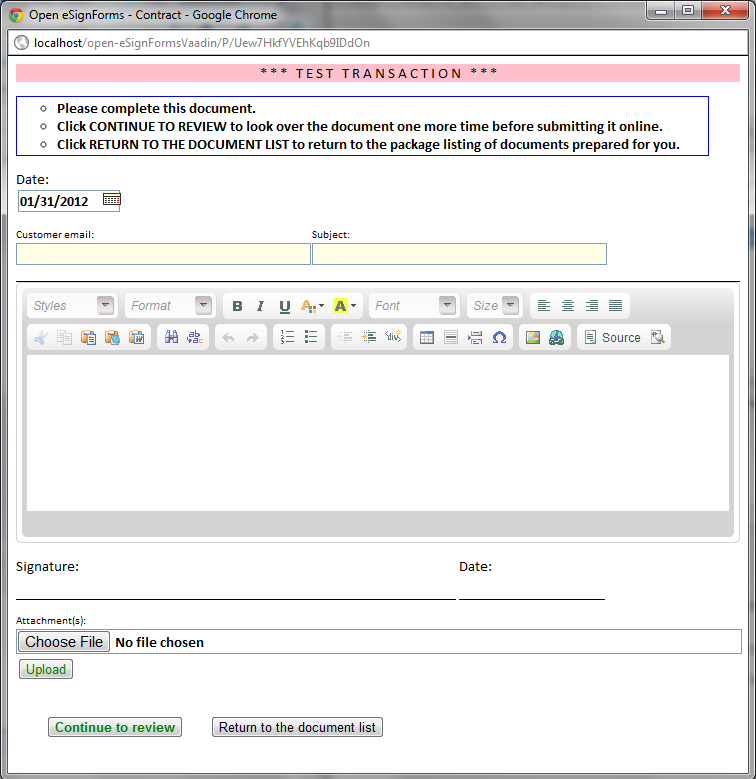
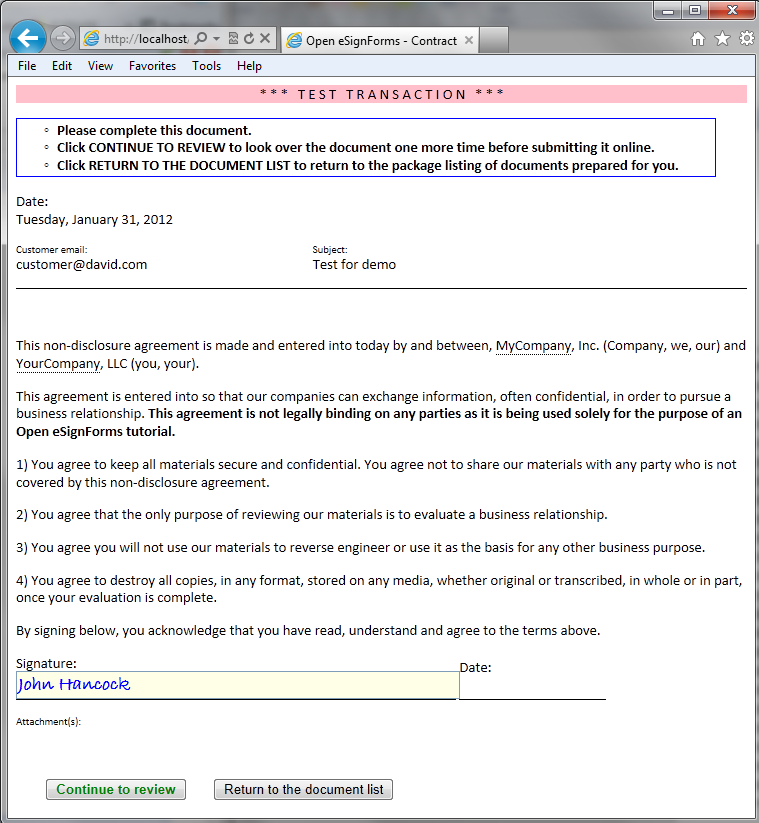
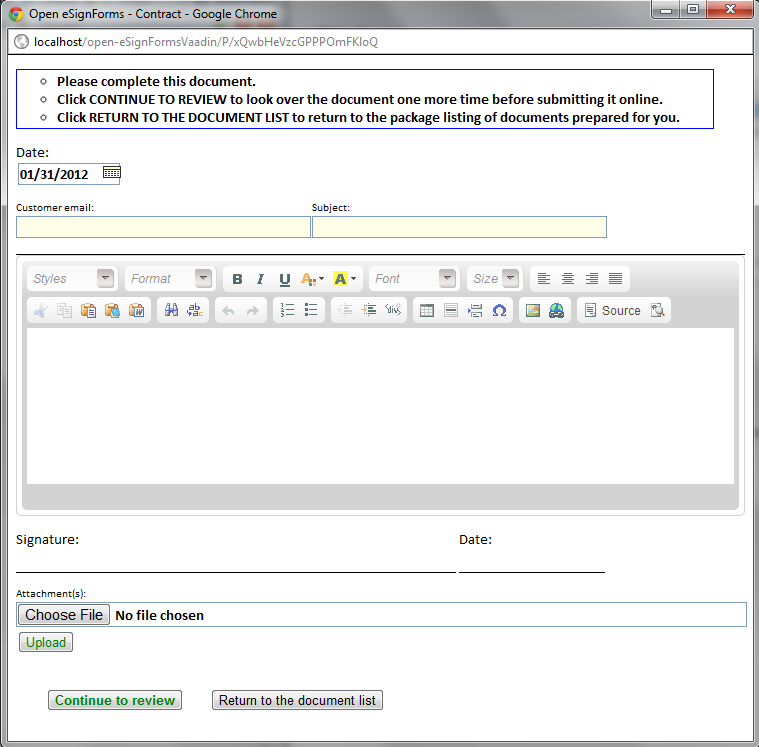
If your configuration was done as specified, you will see your document ready for initial input by the customer representative party (our first party) like this:
Enter your email address into the Customer email field, and enter "First test" into the Subject field.
Tip: We recommend you use an email address that differs from the one you login with to reduce any confusion since you will be playing both parties while testing. It's easy to create free web-based email accounts for your testing purposes, like GMail, HotMail or Yahoo Mail. We also recommend having at least two different browsers installed so that you can use one browser when you are acting as an eSignForms user, and the other browser when you are playing the other party. Fortunately, all browsers are free to install. We recommend Chrome and Firefox, but Safari, IE and Opera all work well, too.
You can copy and paste the following pseudo-agreement into the editor window:
----
This non-disclosure agreement is made and entered into today by and between, MyCompany, Inc. (Company, we, our) and YourCompany, LLC (you, your).

This agreement is entered into so that our companies can exchange information, often confidential, in order to pursue a business relationship. **This agreement is not legally binding on any parties as it is being used solely for the purpose of an eSignForms tutorial.**

1) You agree to keep all materials secure and confidential. You agree not to share our materials with any party who is not covered by this non-disclosure agreement.

2) You agree that the only purpose of reviewing our materials is to evaluate a business relationship.

3) You agree you will not use our materials to reverse engineer or use it as the basis for any other business purpose.

4) You agree to destroy all copies, in any format, stored on any media, whether original or transcribed, in whole or in part, once your evaluation is complete.

By signing below, you acknowledge that you have read, understand and agree to the terms above.
----
If you want, feel free to upload a file, but this is not required for your testing.
Click the Continue to review button.
Assuming it looks fine, click Submit completed document to complete the first party step. You can close the popup window when you are done.
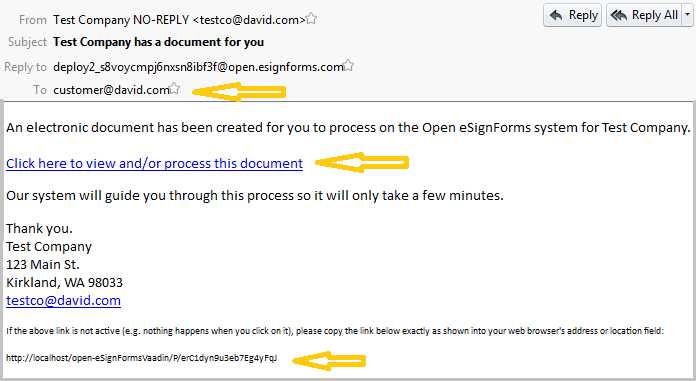
An email should have been sent to the email address you provided in Customer email.
The actual text of your email will vary some, but the key point is that it should have been sent to the customer with a unique link that allows them to complete the contract.
If you are logged in using your default browser, copy the URL from the email and paste it into the other browser so you can act as the Customer role. If you are logged in using the other browser, then you can just click on the Click here to view and/or process this document link in the email and it will automatically launch your default browser to that URL.
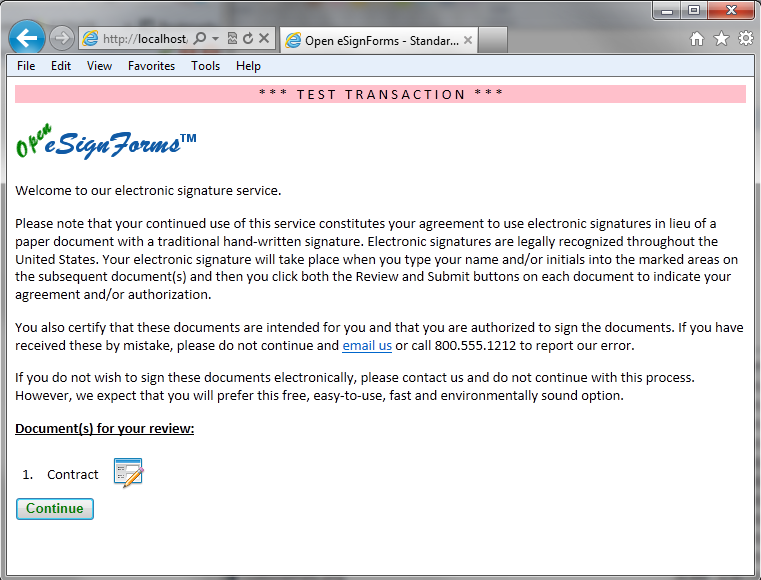
When the customer clicks on the link, the E-Sign Disclosures and Package Listing page will be displayed first. This page is designed to give a welcome message, but most importantly, to include an E-Sign Disclosure statement, which is required by law for consumers, and is recommended for all parties outside of your company. It also lists all documents the party is expected to complete.
The E-Sign Disclosure and Package page is defined when you set up the Package. Note that you can create your own disclosure+package pages to read however you want.
Click the Continue button to see the contract you prepared earlier.
Tip: Test transactions have the TEST TRANSACTION banner at the top to make them obviously distinct from Production transactions you'll use with your customers.
The customer will see the custom contract you prepared, will read it, and then will sign by typing their name into the Signature field at the bottom:
Click the Continue to review button.
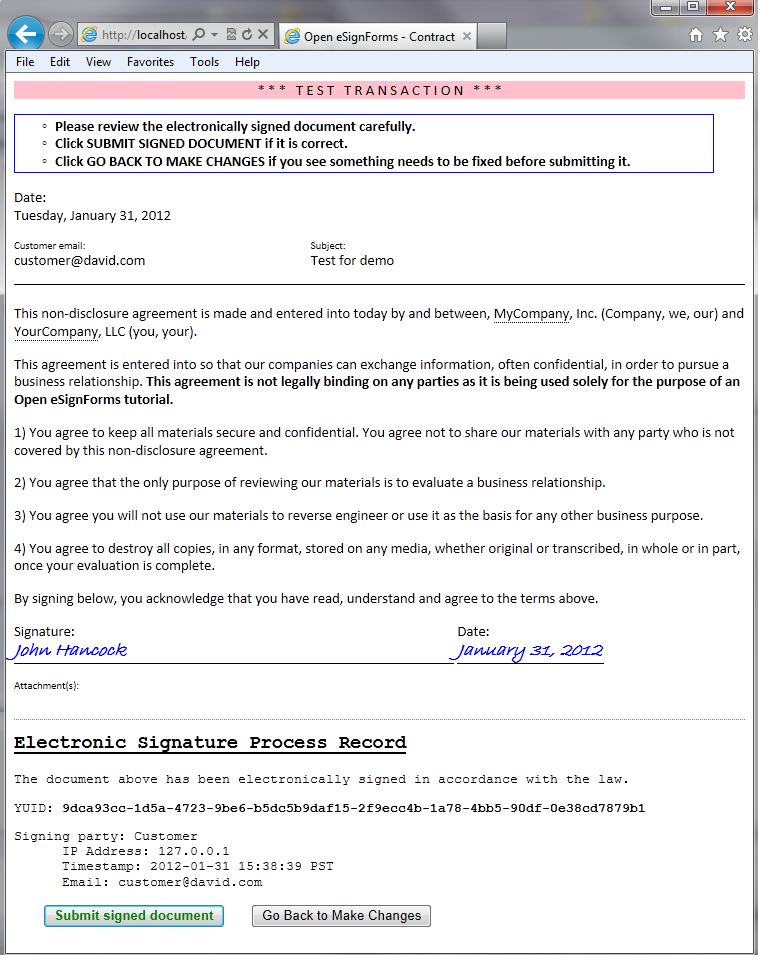
The customer will see the finalized contract with the signature and electronic signature process record. The customer can click the Go Back and Make Changes button to make any corrections, or if all is good, the signed agreement can be submitted by clicking the Submit signed document button.
Tip: The customer can use the link in the original email received at any time to return and see the signed agreement.
To see the status of all of your tutorial transactions, you need to create a report. Of course, the General tran search function can be used to search for any transaction, but it lacks the ability to show field values right from your documents.
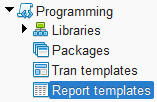
Click on Programming->Report templates and select the report template from the list so it appears in the form below. The report template has no transactions associated with it and no report fields defined, but the permissions are set for your company or group, so always start with a template and click "create like."
You don't want to change the template, so first click the Create like button
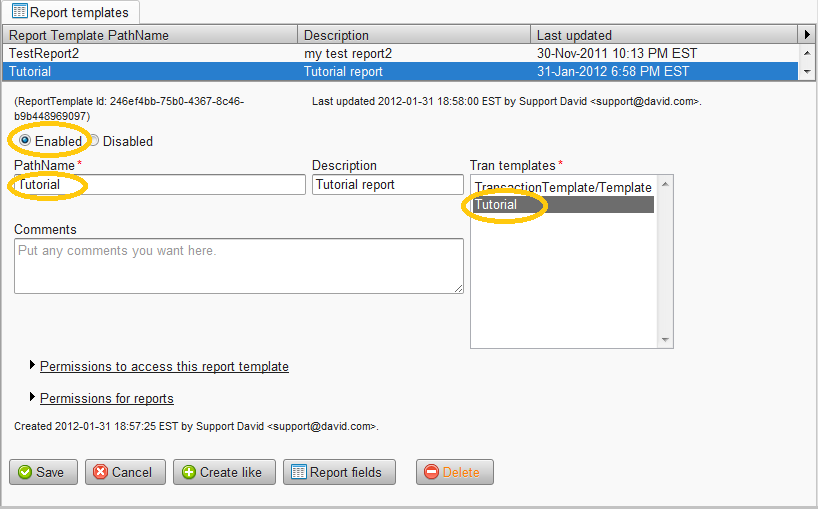
Change the PathName to "Tutorial", ensure the Enabled radio button is selected, choose your "Tutorial" transaction template for Tran templates, and click the Save button. It should look like this:
Click on the Report fields button 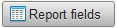
Click on the Add report field button 
The esf_status built-in field is one of: In progress, Completed, Canceled, Suspended.
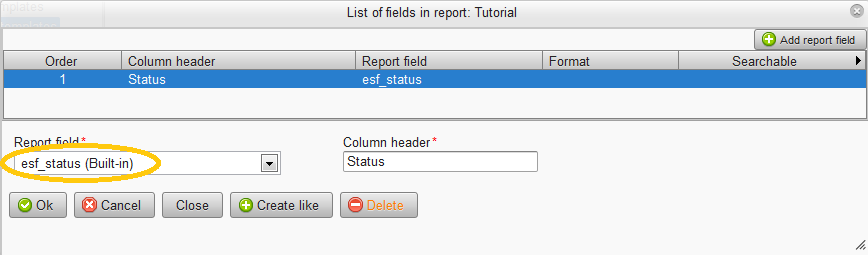
Click on the Add report field button
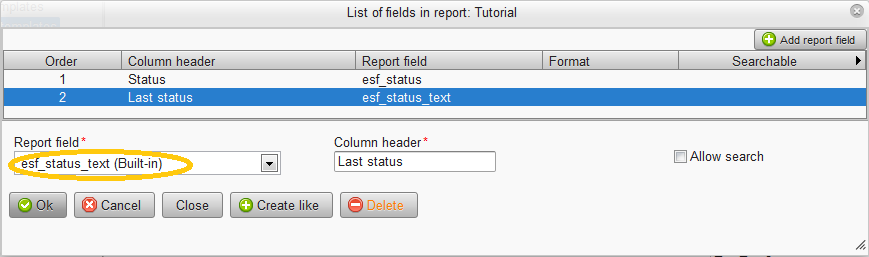
Click on the Add report field button

Click on the Add report field button
Click on the Add report field button
Click on the Add report field button
Finally, click on the Add report field button
Click the Close button when done.
Click the Save button back on the report page to save your changes.
Tip: You can drag and drop the report fields to change the order they will appear in the report.
Select Reports->Tutorial to run your new report.
Put yourself in TEST: Development mode to search for Test transactions. Then click the Find matching button 
You should see your record, including the three data fields that were otherwise embedded in the document. After you run a search and there are matching transactions, you can click the Export to Excel button to download that data for an Excel spreadsheet, or you can click the Download CSV button to download it as CSV (comma-separated-value) data.
If everything looks good and you are ready to use the new document for Production transactions with your real customers, you need to promote the various components at the Test version to Production.
Click on Programming->Libraries->YOURLIB to select the library where you created the tutorial document.
Click on the Documents item.
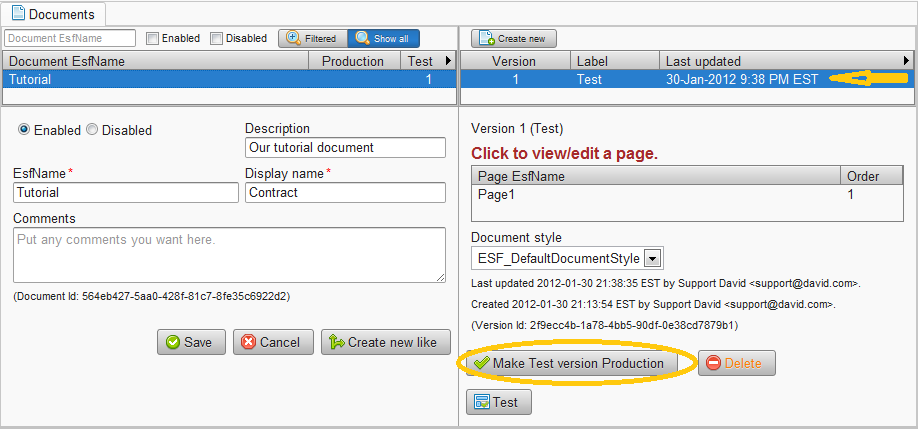
Click on the Tutorial document listed.
Click on the Make Test version Production button.
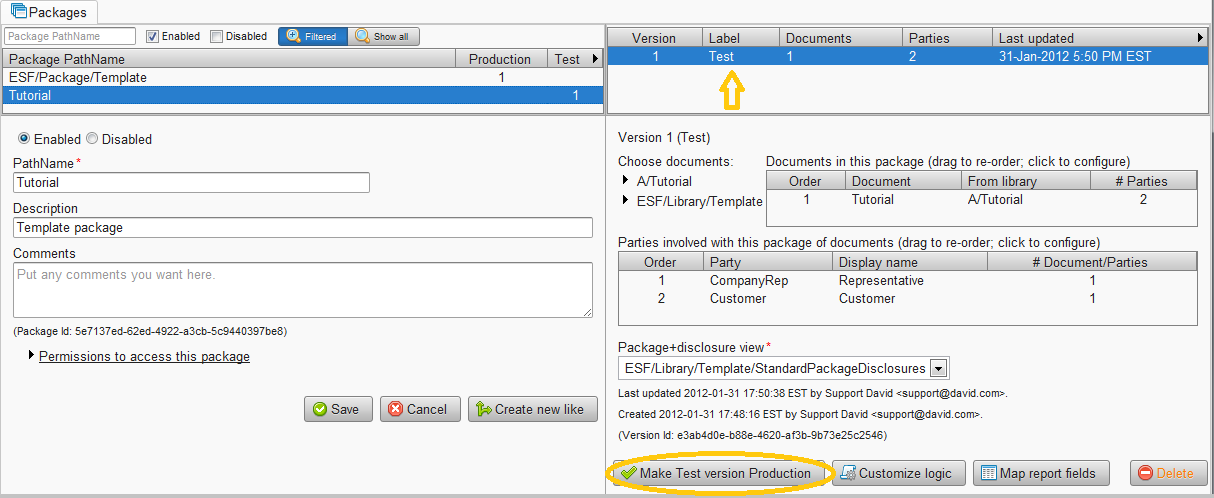
Click on Programming->Packages to select the Tutorial package.
Click on the Make Test version Production button.
Click on Programming->Tran templates to select the Tutorial transaction template.
Click Production enabled radio button.
Click the Save button.
Tip: Note that there is a document retention value for Production transactions and one for Test transactions. By default, Test transactions are kept for 3 months, which allows you to accumulate test data for reports, etc., and Production transactions are kept forever. You are certainly free to select values that make sense for your needs.
At this point, your Tutorial transaction is ready to run in Production mode. However, since you just updated the components, you should run one more Test Like Production transaction, which is a Test mode transaction, but using only Production-level components, just like a real Production transaction would. If you were to find any problems, you would correct them and try again. After a successful "Test Like Production" run, you would then be free to run real Production transactions with your customers.
Just change your mode to TEST: Like Production mode.
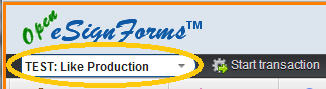
Because the transaction template allows production now, it will be listed under the 'Start transaction' menu when in TEST: Like Production as well as PRODUCTION: Live modes.
Now, when you click 'Start transaction' you will only see transactions that can be run in production mode, though it will start it as a test transaction to keep it separate from your real production transactions.
Assuming that the "test like production" worked as desired, you are now ready to run real production-level transactions with your customers.
Just change your mode to PRODUCTION: Live mode.

Just click on Start transaction->Tutorial to start a regular, production-level transaction.
Note that the document no longer will show the "*** TEST TRANSACTION ***" banner at the top.
Congratulations!
Tip: If you don't want to run an actual production transaction, click the Return to the document list button, then click the Delete this transaction button. Remember, you set that up when you configured the company rep party in the package.
We will go a bit faster now since you should be somewhat familiar with programming the document.
Remember to go back to TEST: Development mode before you test your changes.
Click on Programming->Libraries->XXXXX to select your library.
Click on Documents to select the documents.
Click on the "Tutorial" document, which is currently at the Production level.
Click on the Create next Test version button to create your next version, which will be in Test mode. Note that this will not affect Production-level transactions which will continue to use the previous version until this latest version is promoted back to Production.
Click the Save button to save the new Test version.
Click on the "Page1" page under the Click to view/edit a page list to bring up the document editor.
In this scenario, you want to add a client name field between the email address and the subject. This will allow you to track transactions by your client's name.
Since this field will be done by the "CompanyRep" party, select that in the Assign new fields so party can update drop down.
Then, before the ${emailTo} line, add: ${clientName} and hit SHIFT-RETURN to put a it on its own line, but without extra line spacing so the lines read:
${clientName}
${emailTo} ${subject}
Click the Save button to auto-create the new "clientName" field, as well as assign that field to the "CompanyRep" party for update. (You can click on the "CompanyRep" party in the listing on the right to confirm that the new field is listed in the right-hand Fields party can update list.)
Click on the "clientName" field from the Fields in document list and change the Width to "20", the Units to "Em" and the Label to show to "Client". Then click the Ok button. (Feel free to adjust the layout as you see fit. Normally, you might put these fields in a table, or stack them, or even put the clientName and emailTo on one line, and the subject on the next.)
Click the Test button to see how it looks. If you want, you can also make the clientName field required.
You may want your logo to appear at the top of your contract. To do so, put your cursor at the top of the document before the ${prepareDate} specification. Click on the Image button of the editor (hover over the buttons to see what they all are).

This will pop up an image properties dialog. Click on the Browse Server button to view images already uploaded to your system. Normally, a logo has already been uploaded, so click on it. Then click the OK button in the dialog.
Click the Test button to see if it looks how you want it.
If you need a logo or other image that is not already there, you have two choices.
If the image is really only for this particular document, click the Add new button on the right side of the document editor and then click the Add new image link. You can then give the image a name, click the Set the image file button to choose an image from your computer and upload it:
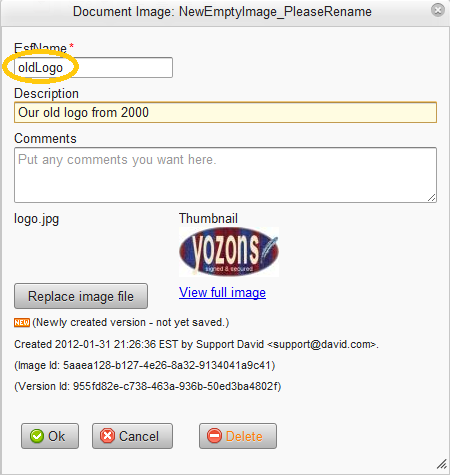
If you upload the wrong image, you can click the Replace image file button to change it. Click the Ok button. Then to save the uploaded image, click the Save button. You should then be able to select that new image.
If the image, like a logo, will be used in other documents, save your document and close it. Then click on the Images/Logos item in your library. The process to upload an image for the library is the same.
Once it's in your library, you can return to your document and select that new image. When in the document editor, you can double-click on the image to bring up the image properties dialog to browser the server and select a new image. Alternatively, you can right-click on the image in your document editor, then click on "Image Properties".
In the tutorial document, you created a "subject" field, but it only appears in the document. It is not used as the email subject. If you'd like to do that, you need to create an email template in your library and specify the ${subject} field is used as the email subject.
Click on the Emails item in your library to list your email templates.
Click on the Create new button and name it "ClientTutorial" so you know this is the email to be sent to the client for the tutorial.
Using the "DefaultPickupNotification" email template defined in the ESF/Library/Template as a guide, we'll make the following changes. You can make other changes to meet your needs when it matters, but these are good values to use for the tutorial.
In Send email FROM: put: ${property:ESF.SendEmailFrom}
In Send email TO: put: ${EMAIL}
In Subject: put your field from your tutorial document: ${subject}
In Text version: copy from below and paste in it:
----
An electronic document has been created for you to process on the eSignForms system for ${property:MyCompany.InformalName}.

To view and/or process this document, please click:

${LINK}

Our system will guide you through this process so it will only take a few minutes.

If the above link is not active (e.g. nothing happens when you click on it), please copy it exactly as shown into your web browser's address or location field.

Thank you.
${property:MyCompany.FormalName}
${property:MyCompany.MailingAddressStreetAddress}
${property:MyCompany.MailingAddressCity}, ${property:MyCompany.MailingAddressState} ${property:MyCompany.MailingAddressZipCode}
${property:MyCompany.UserSupportEmail}
----
In HTML version: copy the HTML code from below and paste it in. However, because this already is in HTML, you'll want to click the Source button in the editor (it will highlight when in Source mode) first and then paste the HTML in.
<p>An electronic document has been created for you to process on the eSignForms system for ${property:MyCompany.InformalName}.<br />
<br />
<a href="${LINK}">Click here to view and/or process this document</a></p>
<p>Our system will guide you through this process so it will only take a few minutes.</p>
<p>Thank you.<br />
${property:MyCompany.FormalName}<br />
${property:MyCompany.MailingAddressStreetAddress}<br />
${property:MyCompany.MailingAddressCity}, ${property:MyCompany.MailingAddressState} ${property:MyCompany.MailingAddressZipCode}<br />
<a href="mailto:${property:MyCompany.UserSupportEmail}">${property:MyCompany.UserSupportEmail}</a></p>
<p><span style="font-size: 10px;">If the above link is not active (e.g. nothing happens when you click on it), please copy the link below exactly as shown into your web browser's address or location field:</span></p>
<p><span style="font-size: 10px;">${LINK}</span></p>
Click the Save button to save the new email template.
Now click on the Programming->Packages and select the Tutorial package. Click the Create next Test version to create a new test package. Click Save.
Click the "Customer" party from the party list. Click on the Notify Email EsfName drop down and choose your new "ClientTutorial" email. Click the Ok button. Click Save.
Again, be sure you are in TEST: Development mode.
Now, if you run a test "tutorial" transaction, you should see the new document with the clientName field and logo. When you complete it, the new email should arrive with the subject you specified in the form.
Assuming all worked as expected, you'll need to promote your components back to production.
In your library, click on your tutorial document and click the Make Test version Production.
If you uploaded an image in your library, click on that image and make it production too.
Do the same for the email template you created in the library.
Then return to the package and make it production.
Finally, change to Test: Like Production mode to run a test transaction using the production versions to ensure it's all good, and if so, then the next version is ready to be used in production.
Congratulations again!