2.3.1 Case Fan
With the new powerful CPU more heat is getting created which the original case fan can't handle. The goal is to remove the old fan and replace it with the one we bought. (Note: always test the new fan if it works fine beforehand! The motherboard has another CPU-fan header that you can use for that.)
During our teardown we should also came across a part that holds the powerbotton as well as the original case fan. This is a sort of case fan chassis.
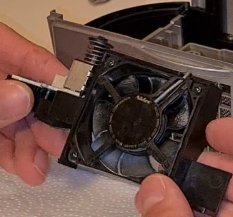
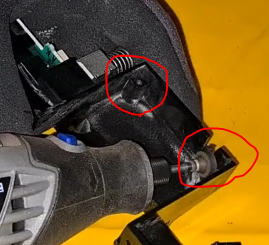
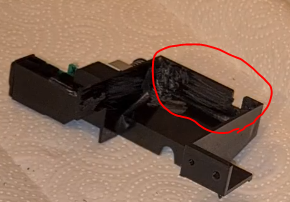
We remove the four screws from the fan so we can remove the fan itself. Unfortunately we cannot screw the new fan in as the new fan does not support this kind of mounting mechanism. Therefore, we need to Dremel the plastic standoffs/mounting holes off from the case chassis as we want to glue the new fan into it.
Once we done that, the new fan should fit perfectly in. Now we only have to glue it to the fan chassis. To do this we use some sandpaper on the fan and the chassis so the glue sticks better. Afterwards we use some isopropyl to clean both sandpapered parts from dust.
Now we can use the two-component glue (epoxy) without granule to glue it together. Be very careful here that the glue does not get onto the fan itself. If that happens the fan won’t spin anymore as it sticks to the fan housing. I recommend using a vice for gluing the fan so the fan and the chassis have a tight contact with enough pressure. Take a look at the following picture to get the orientation right! The fan needs to blow the hot air out.
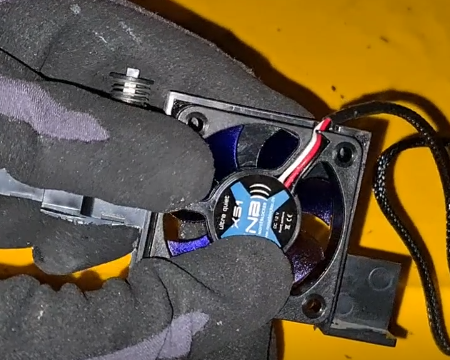
Make sure the new fan does not stick out of the chassis in which it belongs as it would interfere with the gamecube case. (So make sure the fan sits inside the black chassis!)
We now have a new working fan glued into the original fan chassis.