5 IaC
-
1.1. Terraform
1.2. Vagrant
-
3.1. Prerequisites
3.2. Docker Provider
3.3. Vagrant Provider
3.4. GitHub Provider
3.5. AWS Provider
The core terraform workflow consists of 3 stages:
-
Write: represent infrastructure as HCL declarative code. The syntax is built around two constructs: arguments and blocks (i.e., line-separated arguments and blocks).
- HCL supports common programming concepts such as variables, types (string, numeric), functions (built-in), and expressions.
- An existing and supported infrastructure can be imported into terraform to start managing it from code.
- Plan: terraform creates an execution plan describing actions (e.g., create, modify, or destroy resources) that will be taken based on existing infrastructure state (stored in the backend) and current workspace configuration.
-
Apply: interact with the service/platform-specific API through their providers (published on registry) to execute the plan.
- Named values are used for working with API keys or other configurations to allow re-usability and avoid hard-coding.
- Modules are used to group resources that are used together as a reusable package.
-
Vagrantfileis used to describe an environment (of VMs/containers with networking) as declarative ruby code that can be used to set up the environment, test scripts or configuration management tools (e.g., Chef, Ansible, or Puppet), then halt and destroy the environment or recreate it on the cloud. - A box (pulled from the cloud) is typically used as the starting point for running ready-to-use environments or as a template for creating custom ones.
-
Providers allow writing
Vagrantfiles for different types of virtualization systems. Support for Virtualbox, Hyper-V, and Docker works out-of-the-box. Other providers should be installed as plugins.
Getting familiar with terraform by:
- Experimenting with the Docker provider following this tutorial.
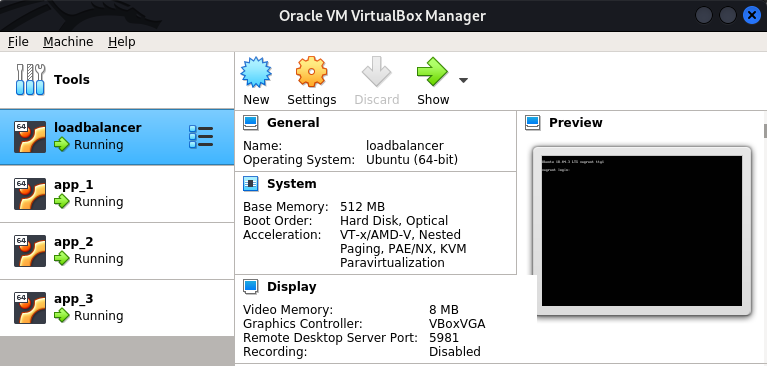
- Using Vagrant provider to provision a test infrastructure (3 VMs serving the application with an NGINX load-balancer in front of them).
- Using GitHub provider to manage an existing GitHub repository from code.
- Using AWS provider to provision an EC2 instance.
- Install VirtualBox, Terraform CLI, and Vagrant CLI
- Create
terraformdirectory with 4 subdirectories (modules) forvagrant,github,docker, andaws.
-
Write main.tf that uses docker provider kreuzwerker/docker to create resources of types
docker_imageand adocker_container. -
Parametrize
container_namein variables.tf and define outputs inoutputs.tf -
Use terraform to run
sh3b0/app_pythondocker pull sh3b0/app_python docker tag sh3b0/app_python app_python terraform init # Prepare workspace and download providers terraform validate # Check configuration for validity terraform fmt # Format source file terraform plan # Show execution plan
-
Apply plan with the custom value:
terraform apply -var 'container_name=app_python'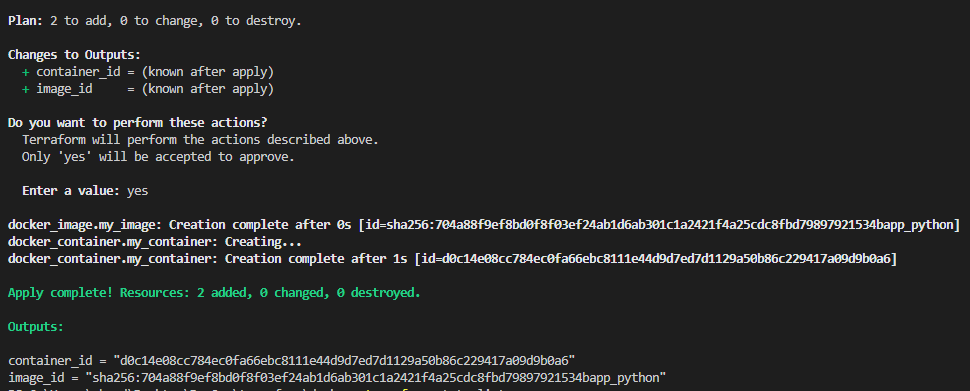
-
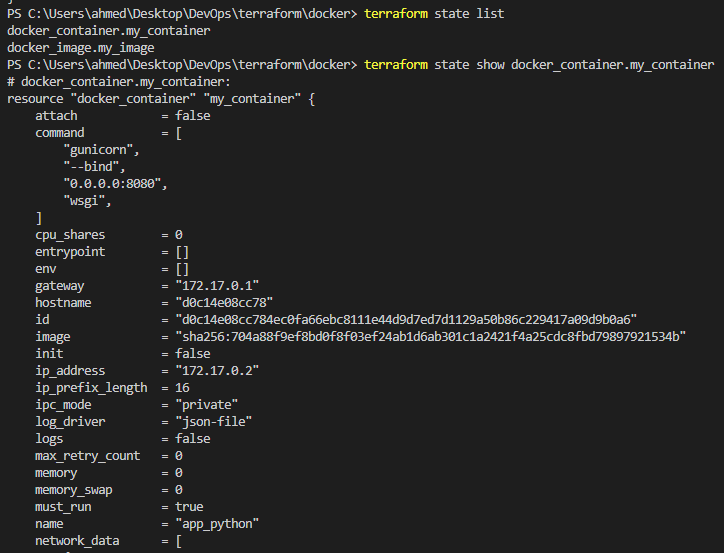
Show state
-
Write Vagrantfile that uses hashicorp/bionic64 box to create 3 VMs for app and a fourth one for the load balancer.
vagrant up       # Start and provision environment
vagrant halt     # Stop the VMs
vagrant destroy  # Destroy the environment.
-
Write main.tf that uses vagrant provider and outputs.tf that shows forwarded ports.
terraform init      # Prepare workspace and download providers
terraform validate  # Check configuration for validity
terraform fmt       # Format source file
terraform plan      # Show execution plan
terraform apply     # Execute the plan
-
On success, 4 VMs should be visible in VirtualBox GUI.
- Default credentials for testing: vagrant:vagrant
- Private keys for connection are stored in
.vagrantdirectory.
-
Run
terraform destroyto destroy the created infrastructure.
-
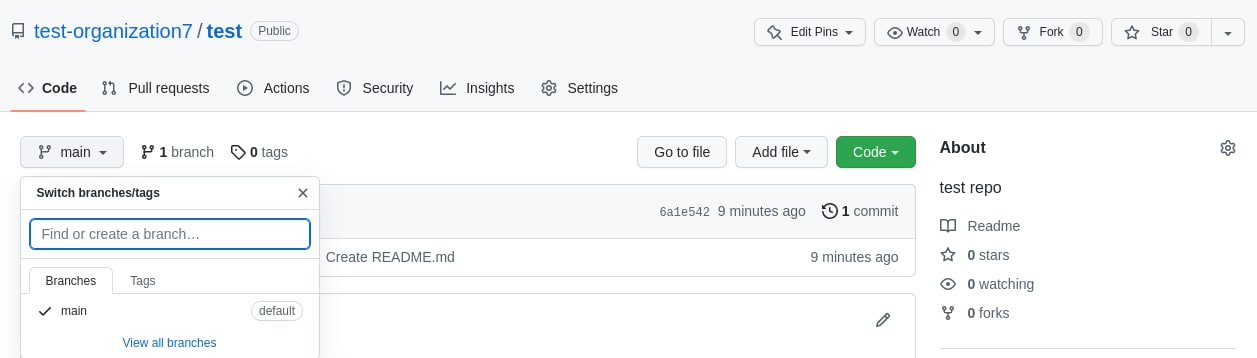
Write main.tf that uses
integrations/githubprovider. -
Configure
githubprovider withtokendeclared in variables.tf and assign the value from command line or.tfvarsfile. -
Declare resources of types
github_repository,github_branch,github_branch_default, andgithub_branch_protection_v3with the desired configurations. -
Import the remote repo to use the existing configuration
terraform import github_repository.<resource_name> <repo_name>
-
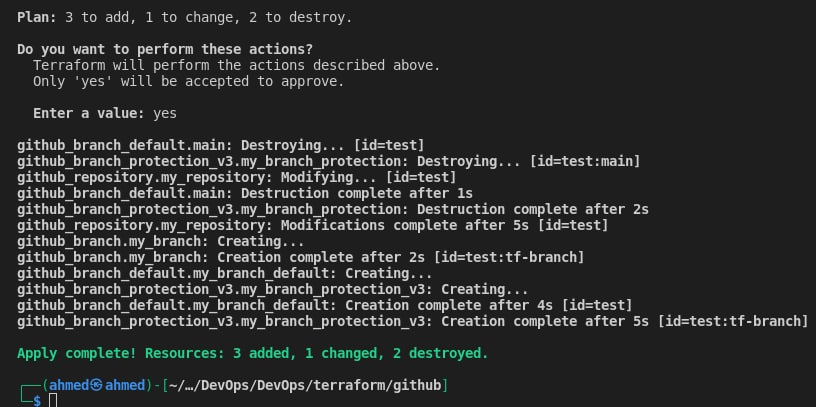
Use the same terraform commands as above to manage the repository configuration from terraform.
-
Test repository created manually
-
Terraform configurations applied
-
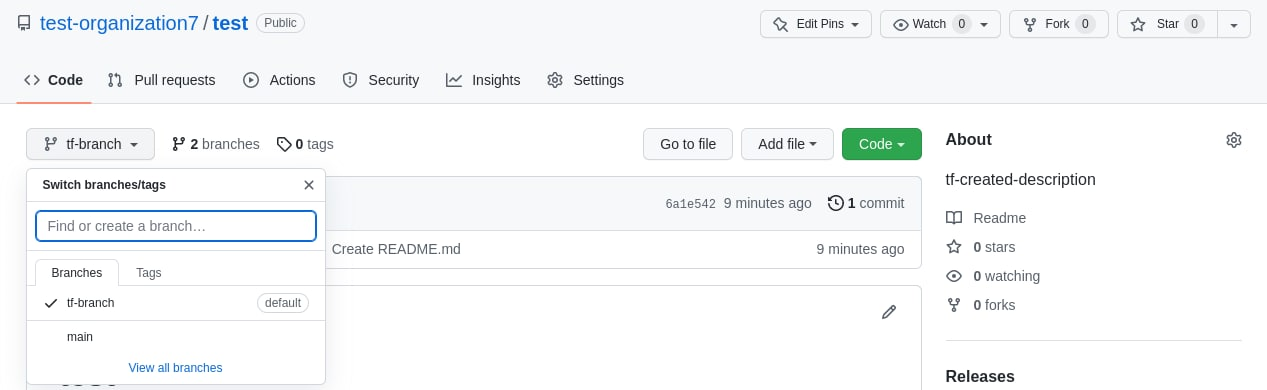
Description and default branch changed
-
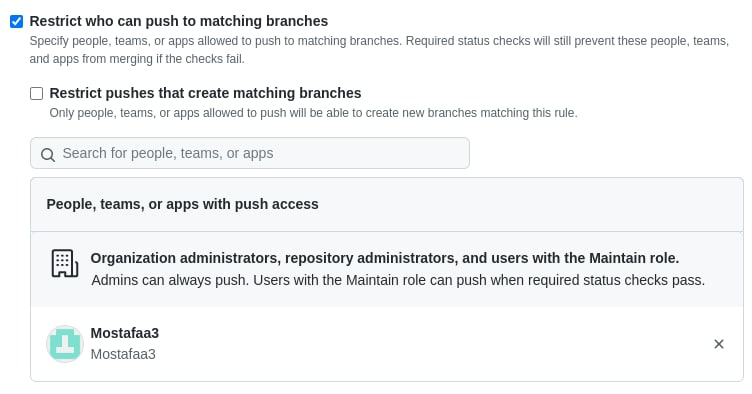
Branch protection rules applied
-
Write main.tf that uses
hashicorp/awsprovider to provision an EC2 instance by creating anaws_instanceresource. -
Specify the OS to run using its corresponding AMI (Ubuntu examples).
-
Run
export AWS_ACCESS_KEY_ID=<iam_access_key>
export AWS_SECRET_ACCESS_KEY=<iam_secret_key>
terraform init
terraform validate
terraform fmt
terraform plan
terraform apply
-
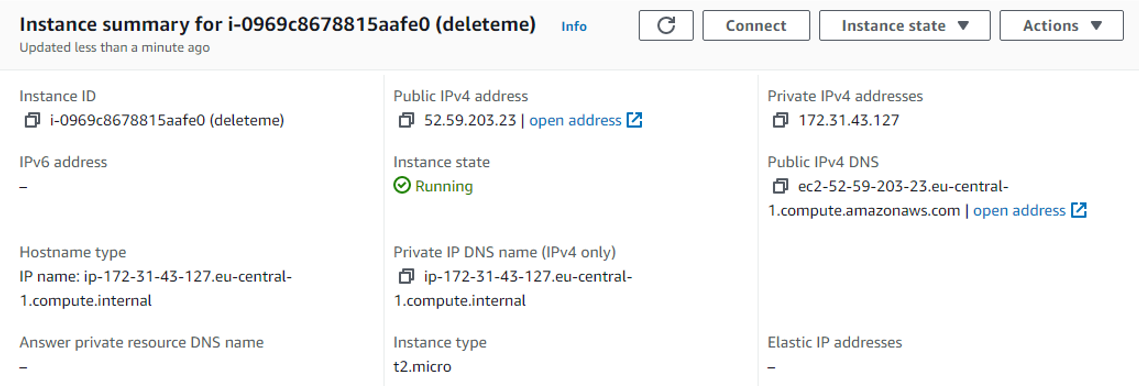
Verify instance was created
-
Destroy instance with
terraform destroy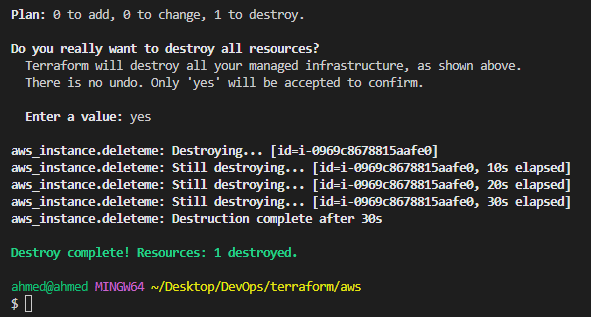
-
Use an IDE plugin to help with syntax highlighting and autocompletion (official VSCode plugin).
-
Use built-in formatter and validator, check plan before applying changes.
-
Sensitive information (state and secret variables) shouldn’t be pushed to the VCS; they can be stored locally and ignored by the VCS, or stored remotely and encrypted at rest (.gitignore for terraform).
-
Recommended directory structure and file naming for a minimal module:
.
├── README.md     # module description
├── main.tf       # entry point (resource definition)
├── variables.tf  # input variables and locals
├── outputs.tf    # output variables
-
When using providers (for vagrant or terraform), be sure to pin their versions to ensure reproducibility.