[v1] User Guide
This tutorial will show you how to create template layout files using a simple example.
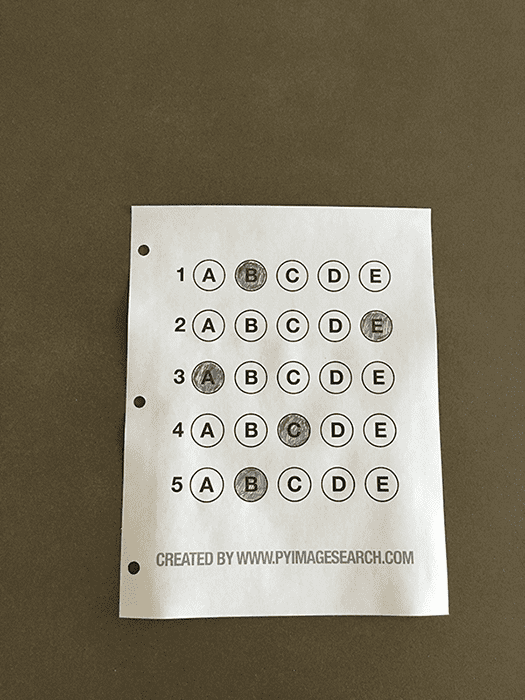
First let's make a layout for a sample OMR from Adrian's blog.
-
Create a directory for your files, say
inputs/AdrianSamples. Note that all directories ininputs/directory will be processed by default. -
Download above OMR image and put it into
inputs/AdrianSamples/. -
Create a file
inputs/template.json. Putting the following starter json in it.
{
  "pageDimensions": [ 300, 400 ],
  "bubbleDimensions": [ 20, 20 ],
  "customLabels": {},
  "fieldBlocks": {
    "MCQBlock1": {
      "fieldType": "QTYPE_MCQ5",
      "origin": [ 0, 0 ],
      "fieldLabels": ["q1", "q2", "q3", "q4", "q5"],
      "bubblesGap": 30,
      "labelsGap": 30
    }
  },
  "preProcessors": [
    {
      "name": "CropPage",
      "options": {
        "morphKernel": [ 10, 10 ]
      }
    }
  ]
}
Now run python3 main.py --setLayout. The page should get cropped automatically and show a basic overlay of the template.
Note that we have put "origin": [0, 0], which means the overlay will start from the top left corner.
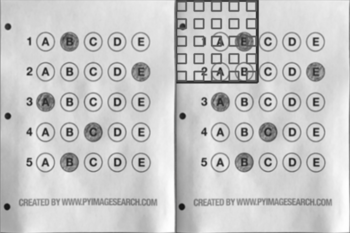
"origin": [65, 60],
Run the command again.
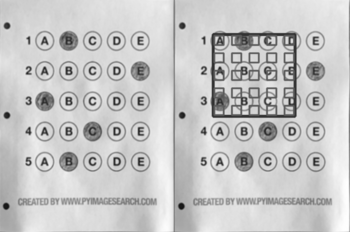
Now let's tweak over the two gaps bubblesGap and labelsGap.
Clearly we need to update the gaps to be bigger. Also, horizontal gaps are smaller than vertical ones. Tweaked gaps come out to be-
    "bubblesGap" : 41,
    "labelsGap" : 52,
The bubbles also should be made slightly bigger
"bubbleDimensions": [25, 25 ],
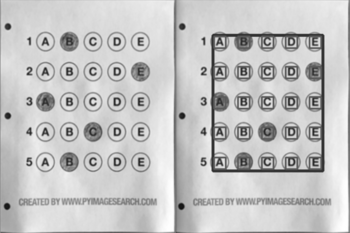
Run the command again to get the arranged layout.
Note the "preProcessors" array, there are various plugins to use. Each plugin is described with a name and an options object that contains the configuration of the plugin. In our case, we use the 'CropPage' plugin with a (default) option of using morph kernel of size [10, 10].
Above is the simplest version of what the template.json can do.
For more templates see sample folders.
To understand how rest of the parameters work in template.json, checkout About Templates
Please check the sample1/ folder to understand the use of omr_marker.jpg. If you can modify your OMR sheets with these markers, it will give you much higher accuracy when scanning using mobile camera. We enable the markers plugin using the following snippet.
{
  // ...
  "preProcessors": [
    // ...
    {
      "name": "CropOnMarkers",
      "options": {
        "relativePath": "omr_marker.jpg",
      }
    }
  ]
}Note: this section is moved to the Project Readme