Deploy File System using longhorn
caprivm (jcaviede@nttdata.com)
This page explains how to deploy a cloud native distributed block storage based on Longhorn. Longhorn is a lightweight, reliable, and powerful distributed block storage system for Kubernetes. The server used for the deployment has the following sizing:
| Feature | Value |
|---|---|
| OS Used | Ubuntu 20.04 LTS |
| Helm version | v3.7.1+g1d11fcb |
| Home user | ubuntu |
| K8s server version | v1.23.1 |
| K8s client version | v1.23.1 |
| Longhorn version | 1.2.4 |
The contents of the page are:
Before executing the step-by-step of this guide, it is important to install the next tools:
Install jq parsing tool:
sudo apt update
sudo apt install -y jqThe list of environment variables used for this implementation are summarized in the following exports:
export NODE_USER="ubuntu"
export KUBERNETES_SINGLE_NODE_IP="10.1.3.152"
NOTE: Replace or configure each of the variables according to your environment.
This guide considers the installation of Longhorn using Helm Charts. For more information about Longhorn, see the following link: https://longhorn.io/
Longhorn suggests a whole series of recommendations to follow before beginning the deployment of the solution. The complete list of recommendations can be found at this link: https://longhorn.io/docs/1.2.4/deploy/install/#installation-requirements. For this guide purposes, we will use a script to check the Longhorn environment for potential issues:
mkdir ~/longhorn && cd ~/longhorn
wget https://raw.githubusercontent.com/longhorn/longhorn/v1.2.4/scripts/environment_check.sh
chmod +x environment_check.sh
./environment_check.sh
# Output example:
# daemonset.apps/longhorn-environment-check created
# waiting for pods to become ready (0/1)
# waiting for pods to become ready (0/1)
# all pods ready (1/1)
#
#  MountPropagation is enabled!
#
# cleaning up...
# daemonset.apps "longhorn-environment-check" deleted
# clean up completeAdd the repository, update it, and then deploy Longhorn:
helm repo add longhorn https://charts.longhorn.io
helm repo update
helm install longhorn longhorn/longhorn --namespace longhorn-system --create-namespace
You can see the status of the pods using kubectl -n longhorn-system get pod -w or watch kubectl -n longhorn-system get pod. When the installation completes, you should see output like the following:
kubectl -n longhorn-system get pod
# NAME                                        READY   STATUS    RESTARTS   AGE
# csi-attacher-6454556647-9ldkq               1/1     Running   0          13d
# csi-attacher-6454556647-dfhbc               1/1     Running   0          13d
# csi-attacher-6454556647-nzrkc               1/1     Running   0          13d
# csi-provisioner-869bdc4b79-2dtsw            1/1     Running   0          13d
# csi-provisioner-869bdc4b79-77pdf            1/1     Running   0          13d
# csi-provisioner-869bdc4b79-gvztb            1/1     Running   0          13d
# csi-resizer-6d8cf5f99f-7t2v2                1/1     Running   0          13d
# csi-resizer-6d8cf5f99f-dtg99                1/1     Running   0          13d
# csi-resizer-6d8cf5f99f-rpctn                1/1     Running   0          13d
# csi-snapshotter-588457fcdf-46v98            1/1     Running   0          13d
# csi-snapshotter-588457fcdf-66vnr            1/1     Running   0          13d
# csi-snapshotter-588457fcdf-t6zkq            1/1     Running   0          13d
# engine-image-ei-4dbdb778-b84vb              1/1     Running   0          13d
# instance-manager-e-0c33580e                 1/1     Running   0          13d
# instance-manager-r-c881bc0f                 1/1     Running   0          13d
# longhorn-csi-plugin-26p9w                   2/2     Running   0          13d
# longhorn-driver-deployer-76698c6bfd-5s65x   1/1     Running   0          13d
# longhorn-manager-9z8rx                      1/1     Running   0          13d
# longhorn-ui-5f7f496999-tp5tr 1/1 Running 0 13dThe official Longhorn documentation provides a step-by-step to access the UI securely using a self-signed certificate and basic-auth. For the purposes of this guide, there are two ways to access the UI.
NOTE: Both ways of accessing the interface are insecure as they are done using HTTP instead of HTTPS.
Check the status of the Longhorn UI pod and service:
kubectl -n longhorn-system get pods longhorn-ui-5f7f496999-tp5tr
# NAME                           READY   STATUS    RESTARTS   AGE
# longhorn-ui-5f7f496999-tp5tr   1/1     Running   0          13d
kubectl -n longhorn-system get svc longhorn-frontend
# NAME                TYPE        CLUSTER-IP    EXTERNAL-IP   PORT(S)   AGE
# longhorn-frontend   ClusterIP   10.233.7.92   <none>        80/TCP    13d
You can see the IP of the service to access the UI is 10.233.7.92. This IP will be used after, so it is declare as variable:
export UI_SERVICE_IP='10.233.7.92'If your Kubernetes deployment is a single node, as explained in this section, you can use an SSH tunnel to access the service. On an external server with connection to the Kubernetes cluster:
ssh ubuntu@$KUBERNETES_SINGLE_NODE_IP -L 8081:$UI_SERVICE_IP:80Now, in your remote server access via browser to http://localhost:8081. You can see an interface like the following:
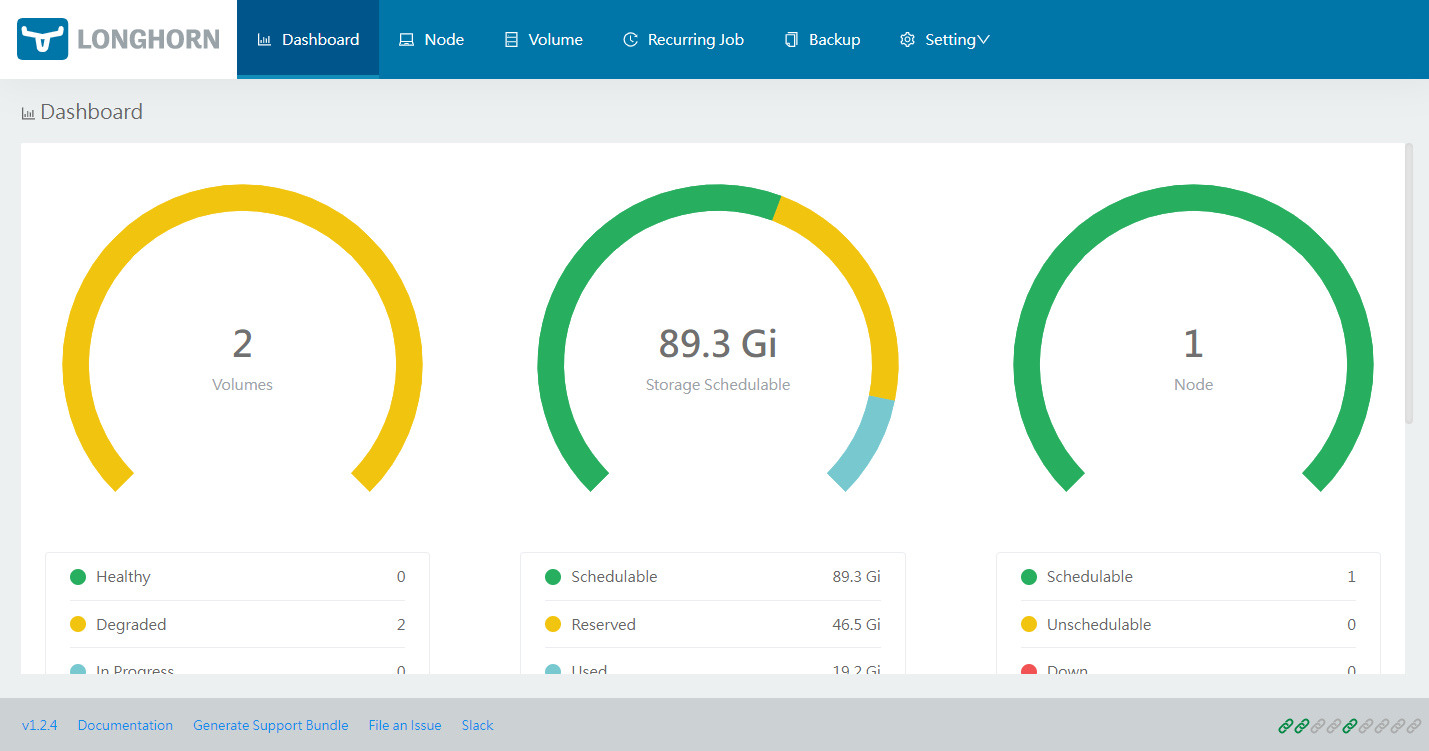
You can access the service by changing its type to NodePort. Modify the service longhorn-frontend exposed before:
kubectl -n longhorn-system edit svc longhorn-frontendModify the next line:
sessionAffinity: None
-  type: ClusterIP
+  type: NodePort
status:
  loadBalancer: {}
Save and exit. Verify that the service is now type NodePort:
kubectl -n longhorn-system get svc longhorn-frontend
# NAME                TYPE       CLUSTER-IP    EXTERNAL-IP   PORT(S)       AGE
# longhorn-frontend   NodePort   10.233.7.92   <none>        80:6534/TCP   13d
Now, on an external server that has connectivity to any node in the Kubernetes cluster, enter the UI through the browser using http://$KUBERNETES_SINGLE_NODE_IP:6354. You should see the same UI that was shown before.
NOTE: The use of NodePort is not a recommended practice within Kubernetes due to the security implications that it can bring.
Enjoy Longhorn!