Real-time identity verification & onboarding. We help banks, fintech’s and other businesses to increase the number of services they provide as well as attract new customers by automating the onboarding and verification process.
- Features
- Component Libraries
- Requirements
- Installation
- Usage
- ElkycStep Protocol
- Predefined steps
- Starting flow
- Read passport data using a smartphone (NFC) or webcam;
- Doc type identification (Machine Learning);
- Parsing doc data (OCR);
- Document authenticity control (data cross-check from visual zone, chip, MRZ);
- Document ownership checks (Liveness detection, Facematch)
- Video verification;
- Electronic signature;
- Database checks (AML);
- Data input automation (into client’s software);
- Web workplace;
- On-premises (all data is processed on client’s side);
- And much more
ElkycCoreSDK is the main component that is used by other components. It contains common logic and steps for other components. Other components can't work without it.
- ElkycDocumentSDK - This library focuses on all kinds of document scanning(Passport, Driver's Licence, Tax Number, etc) and RFID scan(ID Cards with NFC chip). But as well it can scan Credit Cards, Barcode, QRCode and capture Selfie with Document.
- ElkycSpecificToolsSDK - It contains additional steps for a verification process - Signature Pad and OTP Verification.
- ElkycFaceSDK - This library is built for biometrical face verification. You can match faces, verify is person alive or not, get the selfie.
- iOS 11.0+
- Xcode 11+
- Swift 5.1+
CocoaPods is a dependency manager for Cocoa projects. For usage and installation instructions, visit their website. To integrate ElkycCoreSDK into your Xcode project using CocoaPods, specify it in your Podfile:
source 'git@github.com:elkyc/ElkycPodsRepo.git'

pod 'ElkycCoreSDK'The Swift Package Manager is a tool for automating the distribution of Swift code and is integrated into the swift compiler.
Once you have your Swift package set up, adding ElkycCoreSDK as a dependency is as easy as adding it to the dependencies value of your Package.swift.
dependencies: [
    .package(url: "https://github.com/elkyc/ElkycCoreSDK.git", .branch("main"))
]
If you prefer not to use any of the aforementioned dependency managers, you can integrate ElkycCoreSDK into your project manually.
-
Open up Terminal,
cdinto your directory, and run the following:$ git clone git@github.com:elkyc/ElkycCoreSDK.git ElkycCoreSDK
-
Open the new
ElkycCoreSDKfolder, and drag theElkycCoreSDK.xcframeworkinto the Project Navigator of your application's Xcode project.
This Framework will help you to build a verification process for your project, the goal is to build easy steps which you can run and get the result to your system or in your application. It is built on top of standard Apple Libraries. This part of our SDK's contains common logic for other frameworks and it helps to run the verification process.
The whole process is going synchronously from the first to the last step. During the process, data will be sent to our or your backend. The process will stop if any of the steps will return an error.
SDK can be configured via config property on the shared instance.
Config has this variables:
- configuration, this is enum where you can configure how data will be transfered to the servers.
public enum Configuration {
    /// All data will process by cloud backend
    case cloud
    /// The step data will not move outside of the device
    case local
    /// Custom Host Configuration
    case custom(config: CustomHostConfiguration)
}

public struct CustomHostConfiguration {
    /// HTTPS Host to which data will be sent.
    /// Example: https://example.com
    public var host: String

    /// Path to which data will be sent.
    /// Example: /api/sdk/workplace/verification
    public var mainPath: String

    /// Optional, if you support custom auth in standart format for SDK, then you can use this property.
    /// Example: /api/sdk/auth/signIn
    public var authPath: String?

    /// Turn on/off data encryption,
    public var encryptData: Bool

    /// Optional. If set then SDK will validate signature
    public var rssigSalt: String?

    /// Optional. If set then SDK will use this token for authorization
    public var accessToken: String?
}- isInDebug, bool variable, if true then you will see additional logs, false by default
- faceSDKLocalizationHandler, to change existing localization you can utilize the localization hook localizationHandler provided by Face SDK. This closure is called every time a string is requested. By returning nil we fallback to the default localization provided by SDK.
"hint.fit" = "Fit your face in the oval";
"hint.lookStraight" = "Look straight";
"hint.moveAway" = "Move away";
"hint.moveCloser" = "Move closer";
"hint.stayStill" = "Hold steady";
"livenessProcessing.title.processing" = "Processing...";
"livenessRetry.action.retry" = "Retry";
"livenessRetry.text.guidelines" = "But please follow these guidelines:";
"livenessRetry.text.noGlare" = "No glare or extreme lighting";
"livenessRetry.text.noSmiling" = "Neutral expression, no smiling";
"livenessRetry.title.tryAgain" = "Let’s try that again";
"noCameraPermission.action.ok" = "OK";
"noCameraPermission.action.settings" = "Settings";
"noCameraPermission.text.changeSettings" = "The application doesn't have permission to use the camera, please change the privacy settings";
"noCameraPermission.title.unavailable" = "Camera unavailable";
CustomHostConfiguration is a struct where you can configure your custom host. This struct has a bunch of rules and properties, they intersect with each other, so I will describe them in detail.
The main difference is how SDK connects to a host where it saves data.
- authPath - You can set this path if your host will implement the same authorization system like Elkyc cloud has.
- accessToken - You can set your custom Bearer token, instead of having authPath. BUT authPath has a higher priority.
- encryptData - right now working ONLY if authPath is set. Will encrypt JSON data with AES-256-CTR standard.
- rssigSalt - If you set this value then JSON data will be validated with Bcrypt standard.
All our frameworks contain many predefined steps which you can configure. Usually, you should not implement your step but you can, probably you will need this if you want to add your custom UI to the verification process. In this section, you can find a way how to do that, as well as what basic operations on steps you can perform.
public protocol ElkycStep: AnyObject {
    associatedtype Output

    var stepId: ElkycStepId { get set}
    func start(from viewController: UIViewController, completion: @escaping ((Result<Output, Error>) -> Void))
}

public struct ElkycStepId {
    public var id: String = UUID().uuidString
    public var stepType: StepType
}All basic operations help you transform and connect all steps into one chain - flow. Below you can find the quick explanation about each function with an example.
- next - A function that transforms output from step into a new step.
func next<Second: ElkycStep>(_ next: @escaping (Output) -> Second) -> AnyElkycStep<Second.Output>

DocumentScan(documentMask: .empty).next { docResult -> DocumentConfirm in
   return DocumentConfirm(docImage: docResult.mainDocumentImage())
}- combine - A function that combines two steps result into one.
func combine<Second: ElkycStep>(_ zipped: @escaping (Output) -> Second) -> AnyElkycStep<(Self.Output, Second.Output)>

DocumentScan(documentMask: .empty).combine { docResult -> DocumentConfirm in
   return DocumentConfirm(docImage: docResult.mainDocumentImage())
}- retry - A function that attempts to recreate its step when closure returns true.
func retry(when: @escaping (Self.Output) -> Bool) -> AnyElkycStep<Self.Output>

DocumentConfirm(docImage: UIImage()).retry { result -> Bool in
	switch result {
	case .retry:
		return true
	case .next:
		return false
	}
}- map - A function that transforms output from the step with a provided closure.
func map<NewOutput>(_ map: @escaping (Self.Output) -> NewOutput) -> AnyElkycStep<NewOutput>

AcceptTerms().map { return "Success" }- eraseToAnyStep - Wraps the step with a type eraser.
func eraseToAnyStep() -> AnyElkycStep<Self.Output>

AcceptTerms().map { return "Success" }.eraseToAnyStep()- just - Constructor which helps to create just a step with a value inside
AnyElkycStep.just("Hello World!")If you want to create your step this is not something hard, you should just implement ElkycStep protocol with custom id. Here is an example.
public class Custom: ElkycStep {
    public let stepId: ElkycStepId = .custom

    public func start(from viewController: UIViewController, completion: @escaping ((Result<Void, Error>) -> Void)) {
        let customViewController: CustomViewController = CustomViewController()
        customViewController.completion = completion
        setCurrent(step: customViewController, from: viewController)
    }
}All our frameworks have predefined steps which can be easily used. Almost all steps have configs and inputs. In this section, I will describe all available steps in the current framework, their configs and will show how they look like.
Right now all steps localized in Russian and English.
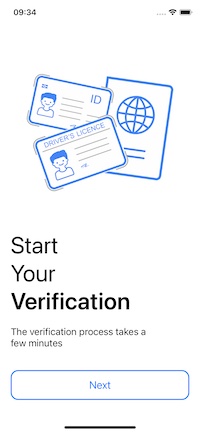
This step is intro for other steps in the chain.
Input:
- config
public var image: UIImage?
public var title: String?
public var attributedTitle: NSAttributedString?
public var description: String?
public var mainBtnTint: UIColor
public var mainBtnTitle: String?
Config has predefined static variables:
- startVerification
- rfid

- liveness

- world

- selfieWithDoc

- signature

You can use this step in the end of the process.
Input:
- config
public var title: String
public var description: String
public var image: UIImage?
public var mainBtnBackgroundColor: UIColor
public var mainBtnTintColor: UIColor
public var mainBtnTitle: String

public var showCloseBtn: Bool
public var closeBtnTint: UIColor
public var alertTitle: String
public var alertDescription: String
public var alertDestructiveBtnTitle: String
public var alertMainBtnTitle: String
Output:
As output, you will receive a Response enum. Which lets you understand what action was chosen by the user.
public enum Response {
	case mainAction
	case close
}
Config has predefined static variables:
- livenessSuccess

- livenessFail

- congrats

Do not use this step it is only for our internal demo project. Maybe we will share it with everybody later
If you want to allow a user to select a type of the document before verification process, you can use this step.
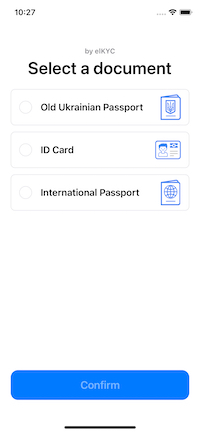
Input:
- documents - instances which implement DocumentTypeViewProtocol
public protocol DocumentTypeViewProtocol {
    var image: UIImage? { get }
    var name: String { get }
}- config
public var title: String
public var mainBtnBackgroundColor: UIColor
public var mainBtnTintColor: UIColor
public var mainBtnTitle: String
public var documentTypeViewTintColor: UIColor
Output:
As output, you will receive an Int value, this gives you an index of the selected type
You can use this step as a step before some document scan.
Input:
- config
public var title: String
public var description: String
public var image: UIImage?
public var mainBtnBackgroundColor: UIColor
public var mainBtnTintColor: UIColor
public var mainBtnTitle: String
public var galleryBtnBackgroundColor: UIColor
public var galleryBtnTintColor: UIColor
public var galleryBtnTitle: String
public var isGalleryBtnHidden: Bool
Output:
As output, you will receive a StepResult enum. Which lets you understand what action was chosen by the user. This step has two action buttons - take photo and take image from gallery
enum StepResult {
	case takePhoto
	case galleryImage(UIImage)
}
Config has predefined static variables:
- worldwide

- worldwideBack

- utilityBill

- travelDocument

- idCard

- ukrainianPassportFirst
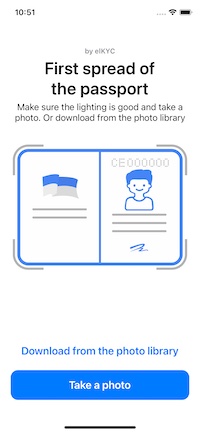
- ukrainianPassportSecond

- ukrainianPassportThird

- ukrainianPassportFourth

You can use this step as a step after some document scan.

Input:
- config
public var title: String
public var docImage: UIImage?
public var mainBtnBackgroundColor: UIColor
public var mainBtnTintColor: UIColor
public var mainBtnTitle: String
public var retryBtnBackgroundColor: UIColor
public var retryBtnTintColor: UIColor
public var retryBtnTitle: String
public var isRetryBtnHidden: Bool
public var hints: [DocumentConfirmHintViewModel]?
Output:
As output, you will receive a StepResult enum. Which lets you understand what action was chosen by the user. This step has two action buttons - retry and next
enum StepResult {
	case retry
	case next
}This step is intro selfie step.

Input:
- config
public var title: String
public var description: String
public var image: UIImage?
public var mainBtnBackgroundColor: UIColor
public var mainBtnTintColor: UIColor
public var mainBtnTitle: StringYou can use this step as a step after selfie with doc photo.

Input:
- config
public var title: String
public var docImage: UIImage?
public var mainBtnBackgroundColor: UIColor
public var mainBtnTintColor: UIColor
public var mainBtnTitle: String
public var retryBtnBackgroundColor: UIColor
public var retryBtnTintColor: UIColor
public var retryBtnTitle: String
public var isRetryBtnHidden: Bool
public var hints: [DocumentConfirmHintViewModel]?
Output:
As output, you will receive a StepResult enum. Which lets you understand what action was chosen by the user. This step has two action buttons - retry and next
enum StepResult {
	case retry
	case next
}To start your prepared flow all you should do is call a method on shared ElkycSDK.
ElkycSDK.shared.startFlow(appKey: Registration.appKey,
                                  clientKey: Registration.clientKey,
                                  clientSession: "test session", flow: flow,
                                  from: self)
        { result in
	switch result {
	case .success(let response):
		print(response)
	case .failure(let error):
		print("ERROR: \(error.localizedDescription)")
	}
}
This method take 5 parameters
- appKey - application key, this key could be obtained at the portal
- clientKey - client key, this key could be obtained at the portal
- clientSession - Optional. This is unique identifier which you can use to identify your client session.
- flow - flow variable, it should consist one or more steps
- viewController - viewController from which flow will be presented
- completion - completion handler, here you will receive error from any step or an array with FlowResult struct
FlowResult is a struct where you can find the answer from a step, the array of FlowResult's will be received in the end of the flow. An array should be ordered by steps order.
public struct FlowResult {

    public let id: String
    public let type: FlowResultType
    public let result: Any

    public init(id: String, type: FlowResultType, result: Any)
    public func resultObject<T>(type: T.Type) -> T?
}
The response result should be casted to a specific object. For that the type field have typeHint variable which can help cast result to a right object.
for result in results {
	switch result.type {
	case .selfieWithDoc:
		let object = result.resultObject(type: UIImage.self)
	case .innScan:
		let object = result.resultObject(type: InnDocumentScanResponse.self)
	case .captureScan:
		let object = result.resultObject(type: CaptureResponse.self)
	case .documentScan:
		let object = result.resultObject(type: DocumentResult.self)
	case .signature:
		let object = result.resultObject(type: UIImage.self)
	case .faceLiveness:
		let object = result.resultObject(type: FaceLiveness.Response.self)
	case .faceMatching:
		let object = result.resultObject(type: FaceMatching.Response.self)
	case .faceCapturing:
		let object = result.resultObject(type: UIImage.self)
	default:
		()
	}
}
If you want to add your specific result to a flow use this method on a ElkycSDK shared instance.
public func addFlowResult(_ flowResult: FlowResult)