Validating Incoming Parameters
We have seen how easy it is to bind parameters to our handler method. On numerous occasions you will want to ensure that incoming parameters are valid. geeMVC offers various possibilities for validating your data. These include:
- Using the @Check annotation in your request handler.
- Using validation annotations directly on request handler parameters.
- Using validation annotations directly on bean properties.
- Using a custom validator to check bean.
Incoming request data can be validated by annotating the request handler method using the @Check annotation. @Check provides the following elements:
| Element | Type | Default | Description |
|---|---|---|---|
| param | java.lang.String[] | Empty array | List of parameter names to be validated. |
| required | boolean | false | Determines if the parameter is required. |
| on | java.lang.String[] | Empty array | List of paths that this check is valid for. |
| min | double | -1 | Checks that a number is greater or equal to the specified minimum value. |
| max | double | -1 | Checks that a number is smaller or equal to the specified maximum value. |
| minLength | int | -1 | Checks that a string, collection or map has a minimum length of the specified value. |
| maxLength | int | -1 | Checks that a string, collection or map has a maximum length of the specified value. |
| is | java.lang.String | Empty string | Allows script based evaluation with either simple comparison, regular expression, JavaScript, Groovy or MVEL. |
| message | java.lang.String | empty string | Specifies a custom error message for this validation rule. |
In the previous section Binding a Bean to your Handler Method we created a controller and form bean for holding our form values. Subsequently we extended our controller with a new update handler method and a JPA bean. Now lets extend the controller class again and add the @Check validation rules.
The controller now looks like this:
package com.example;
// @Check validation rules can be set on the class level or on the method handler level.
@Check(param = "accountForm.username", required = true, minLength = 8, maxLength = 30, on = "/add")
@Check(param = "accountForm.password", required = true, minLength = 8, maxLength = 30, on = "/add")
@Controller
@Request("/accounts")
public class AccountController {
@Request("form")
public String showForm() {
return "view: account/form";
}
@Request(path = "add", onError = "account/form")
public String createAccount(AccountForm accountForm) {
// Form bean is processed and saved to database ...
return "view: account/success";
}
// Here we set the @Check validation rule on the method handler level.
@Check(param = "accountForm.forename", minLength = 3, maxLength = 30)
@Check(param = "accountForm.surname", minLength = 3, maxLength = 30)
@Request(path = "update/{id}", onError = "account/form")
public String updateAccount(@Data AccountBean accountBean) {
// Account bean is processed and saved to database ...
return "view: account/success";
}
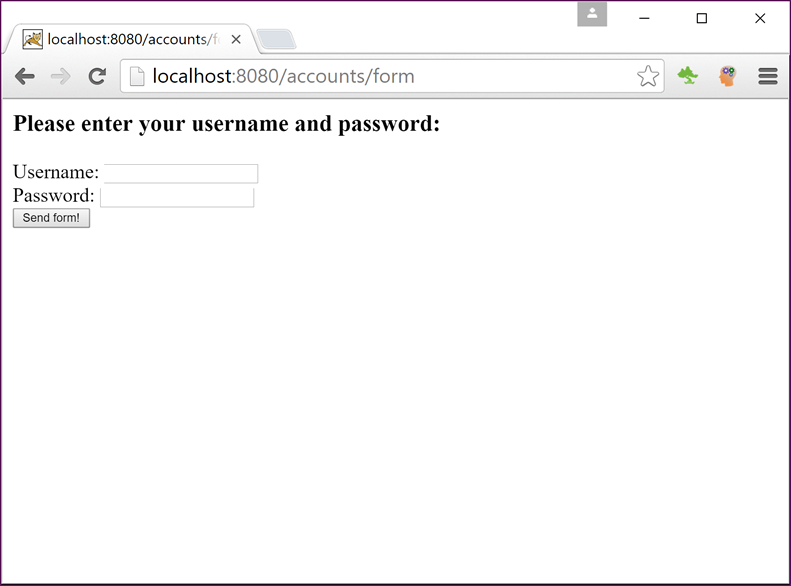
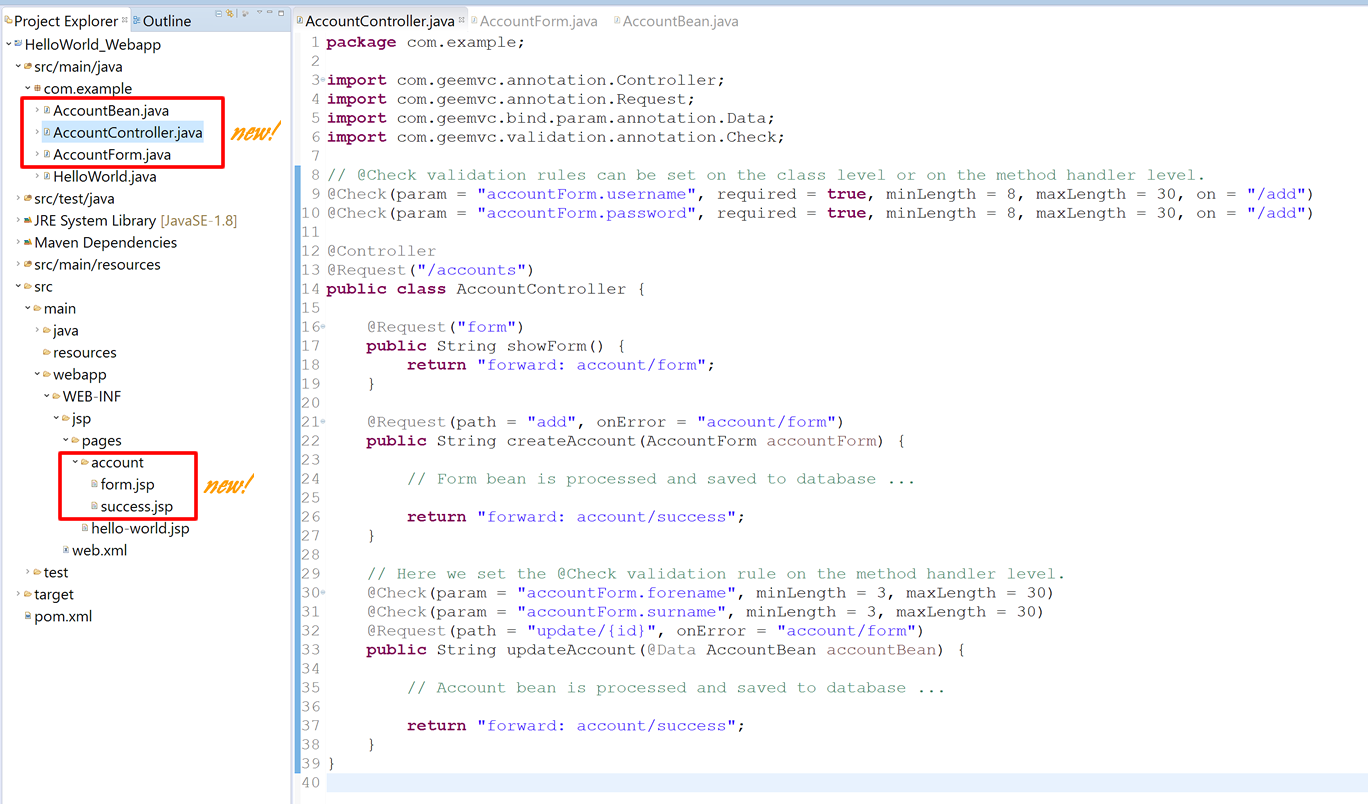
}If you have followed the previous steps and made the validation changes accordingly, try starting the servlet-container again with mvn jetty:run and then opening up http://localhost:8080/accounts/form in your browser. You should see the following form:
If you are unsure what the current project structure should now look like, check the following screenshot.
Notice how when we leave the fields blank and send off the form, you simply get sent back to the form page with no errors being shown? The reason you are being sent back to the form is because geeMVC has validated your data and knows that both fields are required. And because you specified onError="account/form" in your @Request annotation, geeMVC knows where to go when a validation error occurs. OK, but why are we not seeing validation errors? This is simply because we are not using geeMVC taglibs for creating our form yet. If we were, geeMVC would automatically display the errors for you. We'll improve on that next.
This is how our JSP form page looks like with taglibs:
<%@ taglib uri="http://geetools.com/jsp/geemvc/form" prefix="f" %>

<h3>Please enter your username and password:</h3>

<!-- Simple form with 2 fields. -->
<f:form action="/accounts/add">
	<!-- geeMVC will automatically populate these for you in the form bean. -->
	<f:text name="accountForm.username" label="Username" />
	<f:password name="accountForm.password" label="Password" />
	<input type="submit" value="Send form!" />
</f:form>
This will not only show our error messages, but also create the general HTML markup, including labels. If we had not passed our labels manually here, geeMVC would look for them in the corresponding message.properties - but more on that later in the i18n section.
The result should now look something like this after leaving the fields blank again:
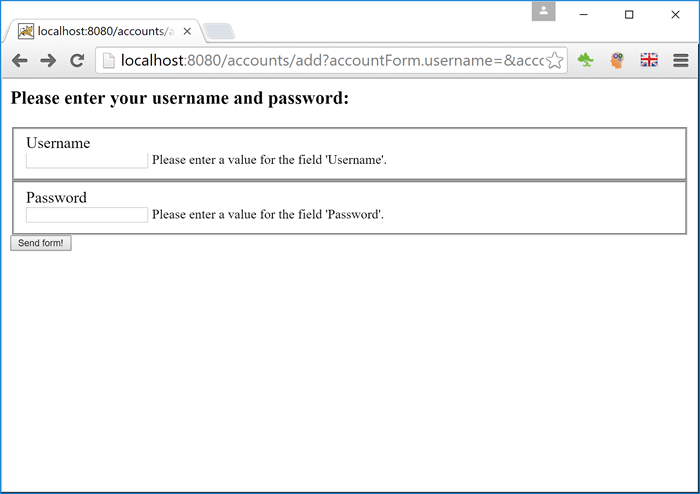
If we had entered incorrect values instead of leaving the fields blank, geeMVC would automatically re-populate them. The password field of course is exempt from this for security reasons. See below:
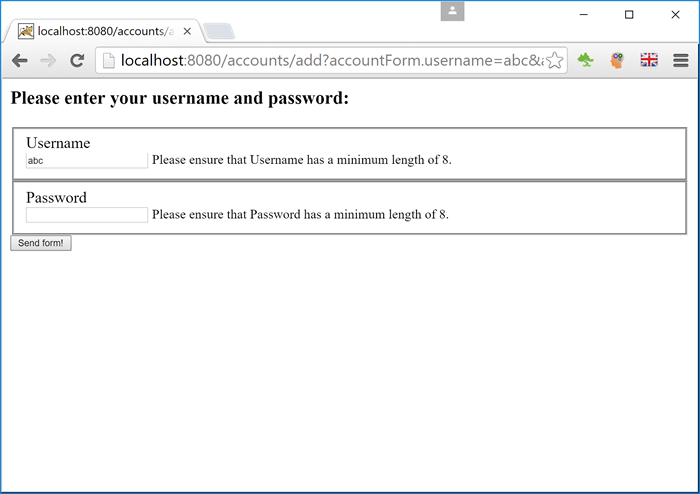
The form is still not very pretty but this is easy to change with CSS as the generated HTML markup makes this very straightforward - we'll come to this later however in the section "Creating a Standard Reusable Layout for your Website". Notice how geeMVC generates CSS classes and element-ids for you to simplify working with CSS and JavasScript. Of course all classes and ids can be overriden by specifying them in the taglibs.
<!-- HTML snippet generated by geeMVC taglibs. -->
<h3>Please enter your username and password:</h3>

<!-- Simple form with 2 fields. -->
<form id="el-create-account" name="create_account"
	action="/accounts/add">

	<!-- geeMVC will automatically populate these for you in the form bean. -->
	<fieldset id="fs-el-account-form-username" class="form-field has-error">
		<label for="el-account-form-username">Username</label>
		<div>
			<input id="el-account-form-username" name="accountForm.username"
				value="abc" class="form-el" type="text" /><small class="error">
				Please ensure that Username has a minimum length of 8.</small>
		</div>
	</fieldset>

	<fieldset id="fs-el-account-form-password" class="form-field has-error">
		<label for="el-account-form-password">Password</label>
		<div>
			<input id="el-account-form-password" name="accountForm.password"
				class="form-el" type="password" value="" /><small class="error">
				Please ensure that Password has a minimum length of 8.</small>
		</div>
	</fieldset>

	<input type="submit" value="Send form!" />
</form>In this section you will learn how to validate handler method parameters. Although you can use the @Check annotation here too, a recommended practice is to use the javax.validation.constraints annotations. geeMVC comes with an additional annotation with the name @Required as javax.validation.constraints.NotNull is not very useful when parameters are mostly not null anyway. @Required will check for emptiness, rather than not-null. The following javax.validation.constraints annotations are currently supported by geeMVC:
| Annotation | Description | Example |
|---|---|---|
| @AssertFalse | The value of the parameter must be false. | @AssertFalse boolean isInactive; |
| @AssertTrue | The value of the parameter must be true. | @AssertTrue boolean isActive; |
| @DecimalMax | The value of the parameter must be a decimal and lower or equal to the specified element value. | @DecimalMax("1000.00") BigDecimal price; |
| @DecimalMin | The value of the parameter must be a decimal and greater or equal to the specified element value. | @DecimalMin("10.00") BigDecimal price; |
| @Future | The value of the parameter must be a date in the future. | @Future Date deliveryDate; |
| @Max | The value of the parameter must be an integer and lower or equal to the specified element value. | @Max(30) int qty; |
| @Min | The value of the parameter must be an integer and greater or equal to the specified element value. | @Min(10) int qty; |
| @NotNull | The value of the parameter must not be null. | @NotNull Long id; |
| @Null | The value of the parameter must be null. | @Null String mustBeNull; |
| @Past | The value of the parameter must be a date in the past. | @Past Date birthday; |
| @Pattern | The value of the parameter must match the provided regular expression. | @Pattern(regexp="[\\d]{5}") String zipCode; |
| @Size | Checks that a String, Collection or Map has a minimum and/or maximum length of the specified value. | @Size(min=2, max=30) String forename; |
| @Required | Additional annotation that checks for a none-empty value. | @Required String username; |
Let's start again by creating a concrete example. First we will add a new handler method to our AccountController:
    @Request("view")
    public Result viewAccount(@Required @Param Long id, Errors errors, Notices notices) {
        // Add global error.
        if (!errors.isEmpty()) {
            errors.add("Unable to find account for the provided data.");
        } else {
            notices.add("Perfect, your account id is {0}!", id);
        }

        AccountBean account = null;

        // If an id exists we'll pretend to get an account object from the database.
        if (id != null) {
            account = new AccountBean();
            account.setId(id);
            account.setForename("Tom");
            account.setSurname("Smith");
            account.setUsername("tom.smith");
        }

        // Finally we'll bind the account object to the view.
        return view("account/view").bind("account", account);
    }
In this case we are not forwarding to an error page or back to a form, but instead add a message to the Errors object. If no validation errors exist, we simply add a success message to our Notices object and create an Account bean that we bind to our view.
/WEB-INF/jsp/pages/account/view.jsp
<!-- Useful JSTL taglibs. -->
<%@ taglib uri="http://java.sun.com/jsp/jstl/core" prefix="c"%>
<%@ taglib uri="http://java.sun.com/jsp/jstl/fmt" prefix="fmt"%>
<!-- geeMVC taglibs. -->
<%@ taglib uri="http://geetools.com/jsp/geemvc/form" prefix="f"%>
<%@ taglib uri="http://geetools.com/jsp/geemvc/html" prefix="h"%>
<h1>Your Account Details</h1>
<f:haserrors>
<f:errors />
</f:haserrors>
<f:hasnotices>
<f:notices />
</f:hasnotices>
<br />
<br />
<c:if test="${not empty account}">
Welcome ${account.forename} ${account.surname}, your username is ${account.username}.
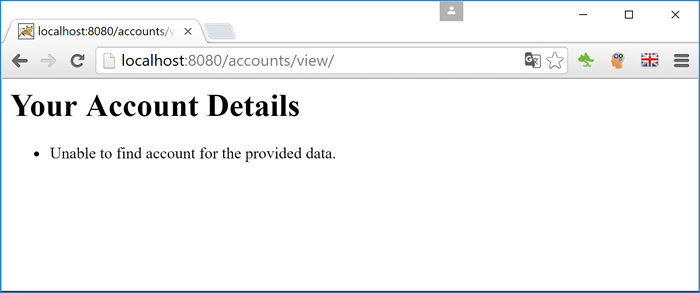
</c:if>We have included two JSTL taglibs, which come in very handy for formatting and interacting with our objects. Once done, restart the servlet container and enter http://localhost:8080/accounts/view/ into your browser. As expected, you should now see an error message:
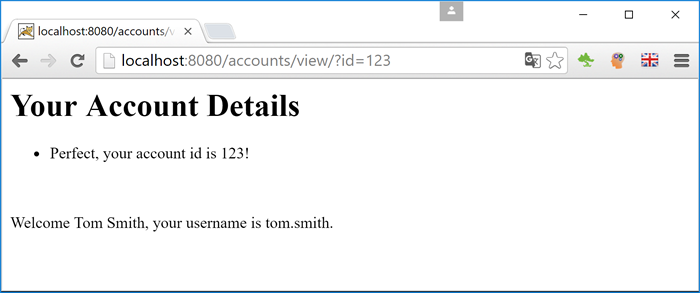
If you add the missing id parameter to the URI (http://localhost:8080/accounts/view/?id=123), you will see the correct output:
When you are using form beans it makes sense to add your validation rules directly on the fields or properties. In this section we will improve our form bean by adding some validation rules. In the following example we will begin by extending our createAccount() handler method. If we want geeMVC to ensure the validity of our bean, we must tell it to do so with the @Valid annotation.
    // We have added the @Valid annotation to the form bean.
    @Request(path = "add", onError = "account/form")
    public String createAccount(@Valid AccountForm accountForm) {

        // Form bean is processed and saved to database ...

        return "view: account/success";
    }
Now we'll add some validation rules to our bean.
public class AccountForm implements Serializable {
private static final long serialVersionUID = 1883126717314828072L;
protected String username = null;
protected String password = null;
protected String forename = null;
protected String surname = null;
@Required
@Pattern(regexp = "^\\S+@\\S+$")
@On("/add")
protected String email = null;
@Min(18)
@On("/add")
protected int age;
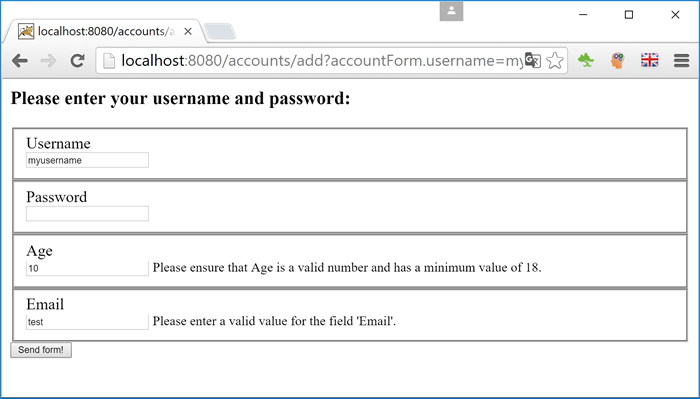
// ...Notice that we are also telling geeMVC when to validate using the @On annotation. Alternatively, you could replace the 3 annotations above the email field with just 1 @Check annotation.
Our HTML form does not have the new fields yet, so let's add them now:
<%@ taglib uri="http://geetools.com/jsp/geemvc/form" prefix="f" %>

<h3>Please enter your username and password:</h3>

<!-- Simple form with 2 fields. -->
<f:form action="/accounts/add">

	<!-- geeMVC will automatically populate these for you in the form bean. -->
	<f:text name="accountForm.username" label="Username" />
	<f:password name="accountForm.password" label="Password" />
	<f:text name="accountForm.age" label="Age" />
	<f:text name="accountForm.email" label="Email" />
	<input type="submit" value="Send form!" />
</f:form>
Again, you can check the result by running mvn jetty:run and then opening up http://localhost:8080/accounts/form in your browser.
Sometimes you need more flexibility to cover complex validation rules. geeMVC gives you complete freedom by letting you create custom validators. Let's dive straight into an example.
We will be making a couple of changes to our existing update handler to turn it into a working i18n example. Then we'll create the actual custom validator for our bean. First let's get acquainted with the @CheckBean annotation that we will need.
| Element | Type | Default | Description | Example |
|---|---|---|---|---|
| value | java.lang.Class | Object.class | The bean type to be validated. Must be set when the type element is empty. | AccountBean.class |
| type | java.lang.Class | Object.class | The bean type to be validated. Must be set when the value element is empty. | AccountForm.class |
| on | java.lang.String[] | Empty array | Array of paths to validate | POST /update/{id}, /accounts/update/{id}, /accounts/add |
| weight | int | 0 | Defines the importance of the validator. The validator with the highest weight is used if more than one validator is found for the specified type and path. | 10 |
Your custom validator must comply with two things:
- Your custom validator must be annotated with @CheckBean.
- You must implement the Validator interface.
The rest is fairly simple. If you want geeMVC to forward to an error page or back to the form in case of validation errors, you must either return a View here, add the onError element to your @Request annotation or handle the error in your request handler itself.
Notice how we are adding i18n message keys here (e.g. "account.error.forename.empty") instead of plain text. We'll come to that once we have covered the validation part.
package com.example;

@CheckBean(type = AccountBean.class, on = "POST /update/{id}")
public class AccountValidator implements Validator {

    @Override
    public Object validate(RequestHandler requestHandler, ValidationContext validationCtx, Errors e) {
        // Here we are retrieving the bean that geeMVC has already populated.
        AccountBean account = (AccountBean) validationCtx.typedValues().get("account");

        // Now we check the values of our bean and add our own custom error message.
        // Error messages are located in src/main/resources/locale/messages.properties.
        if (account.getForename() == null || account.getForename().length() < 3) {
            e.add("account.forename", "account.error.forename.empty", account.getForename());
        }

        if (account.getSurname() == null || account.getSurname().length() < 3) {
            // It is important that we add the field name if we want the error to appear directly by the form-field.
            e.add("account.surname", "account.error.surname.empty", account.getSurname());
        }

        // If errors were found we return the user back to the form page.
        return e.isEmpty() ? null : "view: account/update-form";
    }
}
As in the previous example, we need to tell geeMVC to validate our bean using the @Valid annotation in the handler method signature. Note that we also need to remove the @Data attribute for now as we have not set up JPA yet, which would lead to geeMVC not being able to find the JPA EntityManager. Below is our new showUpdateForm() request handler and the altered version of our updateAccount().
    @Request("update-form/{id}")
    public Result showUpdateForm(@PathParam Long id, AccountBean accountBean) {
        // We'll pretend that the data has come from the database.
        accountBean.setId(id);
        accountBean.setForename("Marc");
        accountBean.setSurname("Check");

        // Forward to the view and bind the account-bean to it.
        return view("account/update-form").bind("account", accountBean);
    }

    @Request(path = "update/{id}", method = HttpMethod.POST)
    public Result updateAccount(@PathParam Long id, @Valid AccountBean account) {

        // Account bean is processed and saved to database ...

        // Forward to the view and bind the updated account-bean to it.
        return view("account/update-success").bind("account", account);
    }
Next we will need to create our JSP pages so that we have a working example:
<%@ taglib uri="http://geetools.com/jsp/geemvc/form" prefix="f" %>
<%@ taglib uri="http://geetools.com/jsp/geemvc/html" prefix="h" %>

<!-- Title will be retrieved from locale/messages.properties. -->
<h3><h:message key="accountform.update.title" /></h3>

<f:form action="/accounts/update/${account.id}" method="post">

	<!-- Labels and error messages will be retrieved from locale/messages.properties. -->
	<f:hidden name="account.id" />
	<f:text name="account.forename" />
	<f:text name="account.surname" />
	<f:button name="accountform-button"><h:message key="accountform.button" /></f:button>
</f:form><!-- geeMVC taglibs. -->
<%@ taglib uri="http://geetools.com/jsp/geemvc/html" prefix="h"%>
<!-- Title will be retrieved from locale/messages.properties. -->
<h1><h:message key="account.success.title" /></h1>
<!-- Text will be retrieved from locale/messages.properties. -->
<p><h:message key="account.success.message" p1="${account.forename}" p2="${account.surname}" /></p>In our previous examples we would now have a working example, but in this case we added i18n messages. Let's quickly create these so that we can start viewing our work in the browser.
# Update form header.
accountform.update.title=Please provide your full name:
# Field labels.
accountform.button=Send form!
account.forename=Forename
account.surname=Surname
# Success messages.
account.success.title=Success!
account.success.message=You successfully updated the name to {0} {1}!
# Error messages.
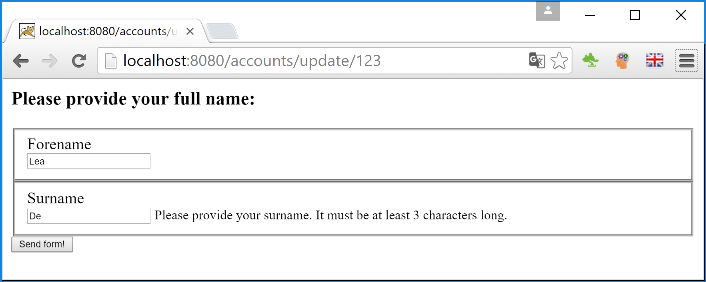
account.error.forename.empty=Please provide your forename. It must be at least 3 characters long.
account.error.surname.empty=Please provide your surname. It must be at least 3 characters long.# Update form header.
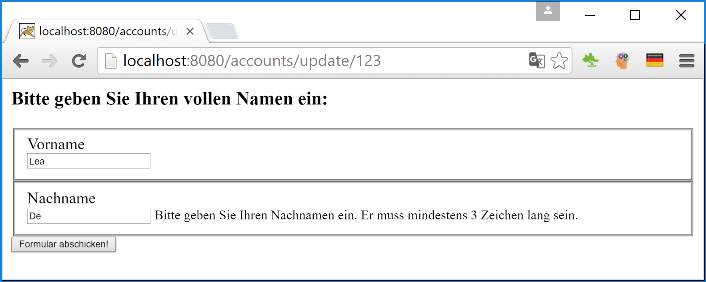
accountform.update.title=Bitte geben Sie Ihren vollen Namen ein:
# Field labels.
accountform.button=Formular abschicken!
account.forename=Vorname
account.surname=Nachname
# Success messages.
account.success.title=Erfolg!
account.success.message=Sie haben erfolgreich den Namen zu {0} {1} verändert!
# Error messages.
account.error.forename.empty=Bitte geben Sie Ihren Vornamen ein. Er muss mindestens 3 Zeichen lang sein.
account.error.surname.empty=Bitte geben Sie Ihren Nachnamen ein. Er muss mindestens 3 Zeichen lang sein.As you can see we have created an English and a German version of our properties file. When you switch the "Accept-Language" header in your browser you should see different text being displayed. We used the Chrome extension quick language switcher here to keep it nice and simple. If you want to try it for yourself, just execute mvn clean jetty:run and open up http://localhost:8080/accounts/update-form/123 in your browser. You will hopefully see something like this after sending off the form with incorrect data: