实现所有网站的qq登录返回登录后的cookie信息,已经打包成jar。建议自行搭建环境进行源码打包。 #84
Comments
|
已经做了jar包放在了release中。 第一步给Linux服务器安装google-chrome(谷歌浏览器)Centos操作系统的使用下面这个 下载rpm包 wget https://dl.google.com/linux/direct/google-chrome-stable_current_x86_64.rpm安装依赖 sudo yum install -y lsb进行安装 sudo yum localinstall google-chrome-stable_current_x86_64.rpmUbuntu用户的使用下面的 下载deb包 wget https://dl.google.com/linux/direct/google-chrome-stable_current_amd64.deb安装deb包 sudo apt install -y ./google-chrome-stable_current_amd64.deb完成后Centos和Ubuntu都会多一个命令 google-chrome第二步,下载chromedriver 它的作用是操作google-chrome浏览器,也就是通过它来对谷歌浏览器操作的下载地址:https://npm.taobao.org/mirrors/chromedriver/ 随便选一个吧,我选的是这个版本的:https://npm.taobao.org/mirrors/chromedriver/86.0.4240.22/
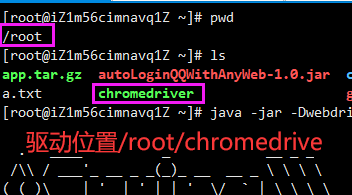
将他上传到一个目录下,例如 授予执行权限执行完后就会是绿色的提示。 chmod 777 chromedriver第三步、下载jar包,或者去github自行打成jar包jar包下载地址:https://github.com/1015770492/autoLoginQQWithAnyWeb/releases/tag/1.0 java环境需要先弄好 是一个springboot项目,端口是:7000,可以通过运行参数 提醒
第四步发送请求得到cookie信息
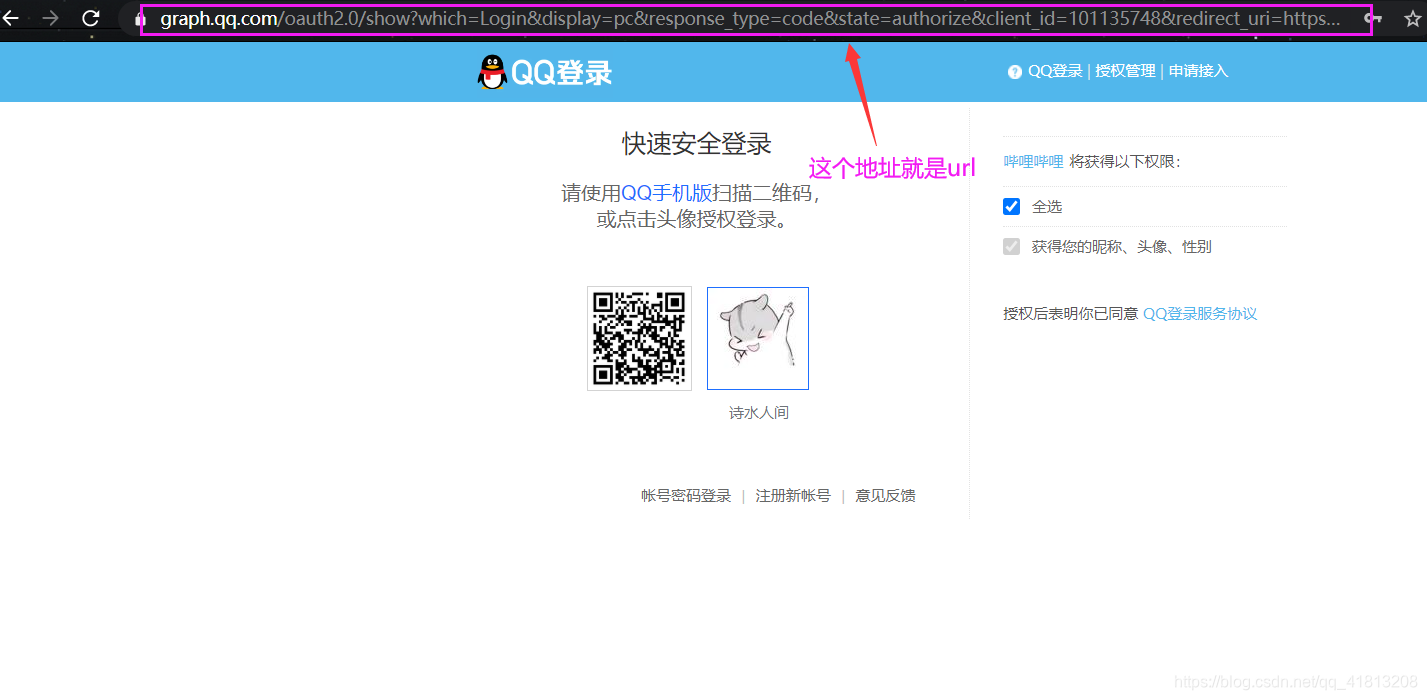
下面是qq音乐的登录地址(qq音乐它不会跳转到后面的那个界面,需要通过抓包分析) 参数补充说明url 是登录qq的那个页面,复制登录界面的url 传入即可 处理请求的Controller源码package top.yumbo.music.test.controller;
import com.alibaba.fastjson.JSONObject;
import org.openqa.selenium.By;
import org.openqa.selenium.Cookie;
import org.openqa.selenium.WebDriver;
import org.openqa.selenium.WebElement;
import org.openqa.selenium.chrome.ChromeDriver;
import org.openqa.selenium.chrome.ChromeOptions;
import org.springframework.util.StringUtils;
import org.springframework.web.bind.annotation.*;
import java.util.Set;
@RestController
public class LoginController {
@RequestMapping(value = "/login", method = {RequestMethod.GET, RequestMethod.POST})
public JSONObject loginQQBackCookie(@RequestBody(required = false) JSONObject jsonObject,
@RequestParam(value = "url", required = false) String url,
@RequestParam(value = "username", required = false) String username,
@RequestParam(value = "format", required = false, defaultValue = "1") String format,
@RequestParam(value = "password") String password
) {
if (StringUtils.hasText(url) && StringUtils.hasText(username) && StringUtils.hasText(password)) {
// 什么也不做
} else if (jsonObject != null && StringUtils.hasText(jsonObject.getString("url")) && StringUtils.hasText(jsonObject.getString("username")) && StringUtils.hasText(jsonObject.getString("password"))) {
url = jsonObject.getString("url");
username = jsonObject.getString("username");
password = jsonObject.getString("password");
} else {
final JSONObject error = new JSONObject();
if (jsonObject == null) {
error.put("输入了错误的信息", jsonObject);
} else {
final JSONObject info = new JSONObject();
info.put("username", username);
info.put("password", password);
info.put("url", url);
error.put("输入了错误的信息", info);
}
return error;
}
// idea中为了方便则开启这条注释,指定正确的chrome驱动位置
// System.setProperty("webdriver.chrome.driver", "D:/Program Files (x86)/chromedriver/chromedriver.exe");
final JSONObject cookieJson = new JSONObject();
String cookie = null;
//设置系统环境变量
WebDriver driver = null;
try {
ChromeOptions options = new ChromeOptions();
options.addArguments("--headless"); //无浏览器模式
options.addArguments("--no-sandbox");// 为了让root用户也能执行
// 优化参数
options.addArguments("--disable-dev-shm-usage");
options.addArguments("blink-settings=imagesEnabled=false");
options.addArguments("--disable-gpu");
driver = new ChromeDriver(options);//实例化
driver.get(url);
final WebDriver ptlogin_iframe = driver.switchTo().frame("ptlogin_iframe");
ptlogin_iframe.findElement(By.id("switcher_plogin")).click();
final WebElement u = ptlogin_iframe.findElement(By.className("inputstyle"));
u.click();// 点击输入框
u.sendKeys(username + "\n");// 输入账号
final WebElement login_button = ptlogin_iframe.findElement(By.id("login_button"));
final WebElement p = ptlogin_iframe.findElement(By.id("p"));
p.sendKeys(password + "\n");// 输入密码,回车就提交了下面的这个点击登录不需要
// login_button.click();// 点击登录按钮
System.out.println(driver.getCurrentUrl());
//获得cookie
Set<Cookie> coo = driver.manage().getCookies();
//打印cookie
System.out.println(coo);
if (format.equals("2") || (jsonObject != null && (jsonObject.get("format") + "").equals("2"))) {
cookieJson.put("cookie", parseSetCookie(coo));
} else {
cookieJson.put("cookie", coo);
}
} catch (Exception e) {
System.out.println("抛异常了");
e.printStackTrace();
} finally {
//使用完毕,关闭webDriver
if (driver != null) {
driver.quit();
}
}
return cookieJson;
}
/**
* cookie数据的处理
*
* @param cookies
* @return
*/
private String parseSetCookie(Set<Cookie> cookies) {
if (cookies == null) {
return "";
}
System.out.println("解析前cookie是" + cookies.toString());
String cookieString = "";
for (Cookie cookie : cookies) {
cookieString += (cookie.getName() + "=" + cookie.getValue() + ";");
}
System.out.println("解析后:\n" + cookieString);
return cookieString;
}
} |


|
selenium是不是只支持jdk11+?我jdk8弄来弄去都不行 |
博客地址:https://blog.csdn.net/qq_41813208/article/details/112646537
项目源码地址:
https://github.com/1015770492/autoLoginQQWithAnyWeb
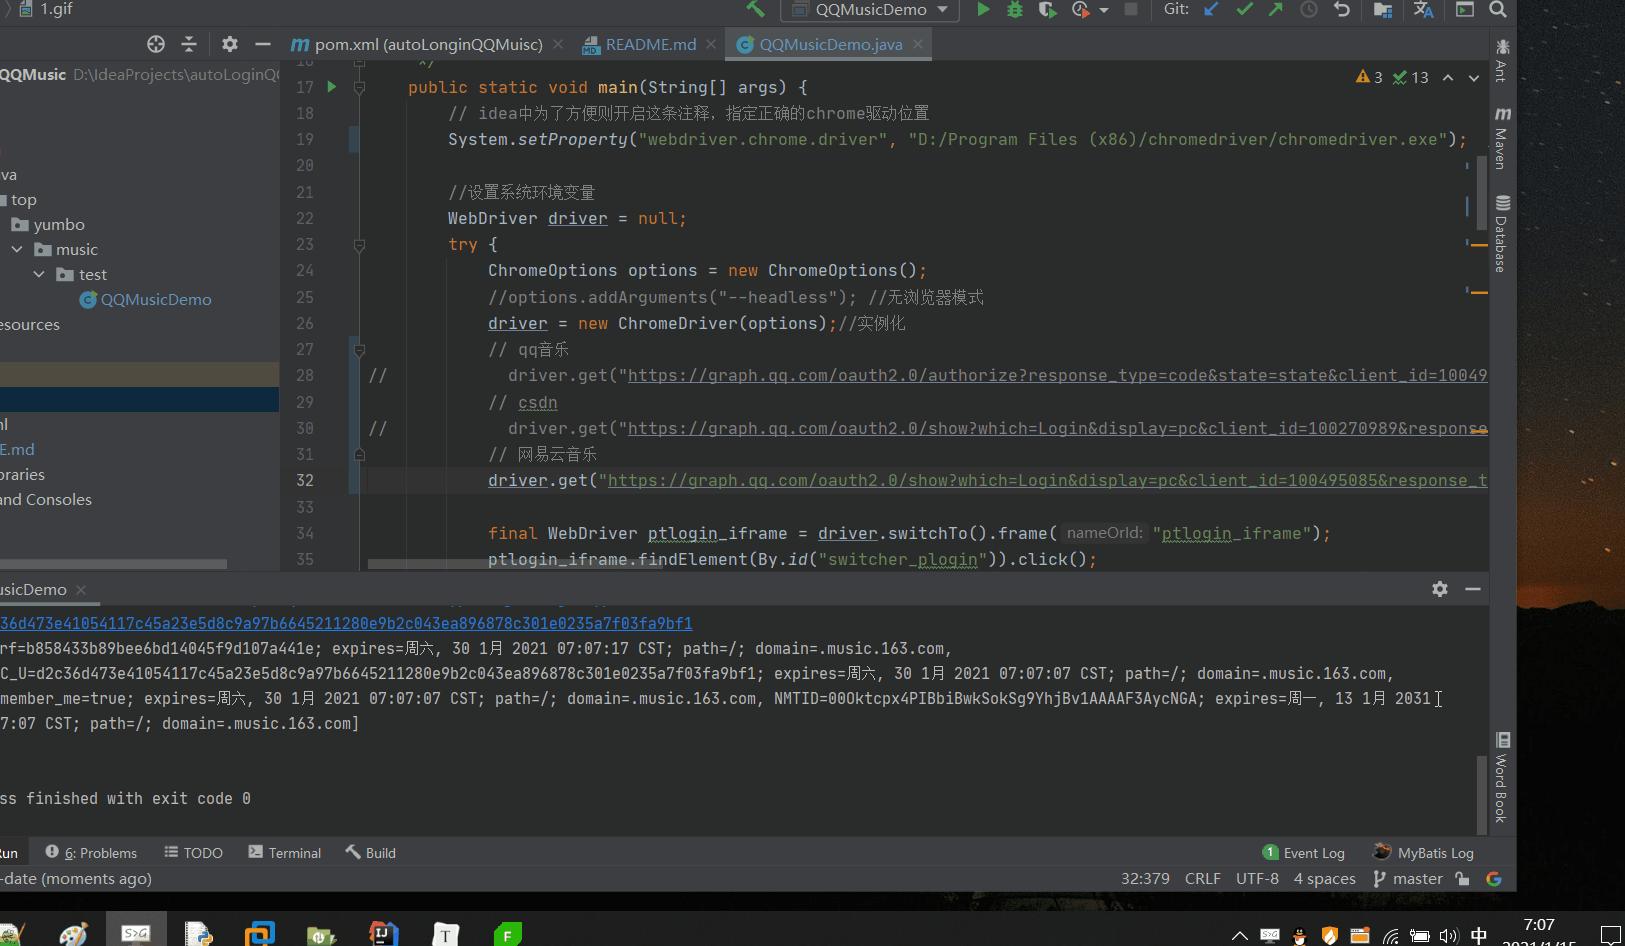
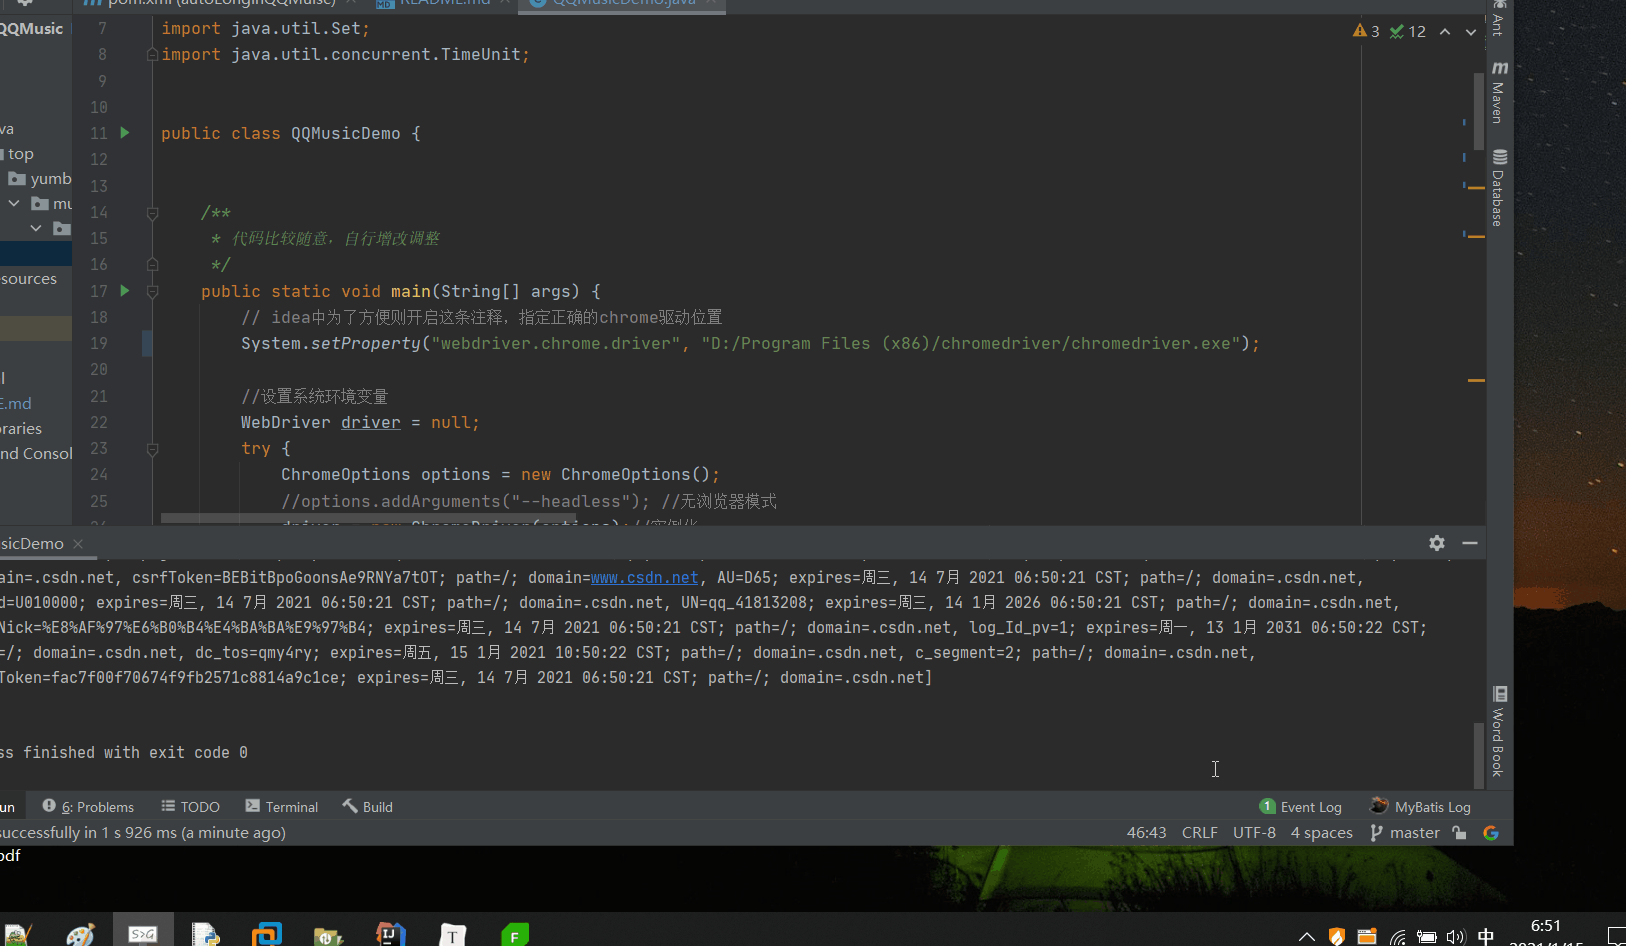
下面是效果图:分别代表qq音乐、网易云音乐、csdn,其它的就不掩饰了,可以考虑挂在服务器上实现自动添加cookie,具体代码我没有写,大家可以自己实现。

The text was updated successfully, but these errors were encountered: