Section 3
The basis of all applications involves retrieving information from a data source and putting information back into a data source. A helpful acronym CRUD represents the various phases of single data record management.
C - (create) create a data record or entity
R - (read) retrieval of a specific data record or entity
U - (update) modification and persistence of a data record or entity
D - (delete) removal of a specific data record or entity
In our applications, we work with all phases of CRUD. List is another phase of data management commonly used in applications. List deals with retrieval of multiple data records, but isn't included in CRUD because it ruins the cleverness.
Each phase has an associated pattern in Model-Glue. By learning these patterns, you will be able to quickly develop applications that work with data. Also, by understanding these patterns, you will be able to quickly understand Model-Glue applications written by other developers.
It is important to note, Model-Glue enforces the Model/View/Controller (MVC) pattern. As such, much of Model-Glue specific development revolves around the Controller and to a lesser extent the View. The Model is generally left unaware of Model-Glue as a best practice.
In this module, we will deal with a number of pre-made files. These files contain content that is not relevant to Model-Glue. In some cases, HTML markup has been built for you, in other cases model objects have been made for you. Since this class is compressed, we'll explain how all these relate together and do exercises on the Model-Glue specific items.
-
Open up your /PlantOMatic/config/ModelGlue.xml
-
Paste the following Controller definition inside the
<controllers>section<controller id="ShipmentController" type="PlantOMatic.controller.ShipmentController"> <message-listener message="handleShipment" /> <message-listener message="needShipmentBean" /> <message-listener message="needShipmentDetail" /> <message-listener message="needShipmentList" /> </controller> -
Paste the following Event Handler definitions inside the
<event-handlers>section<event-handler name="Shipment.List" type="templatedPage"> <broadcasts> <message name="needShipmentList" /> </broadcasts> <views> <include name="Primary" template="List.Shipment.cfm"> <value name="xe_Display" value="Shipment.Display" /> <value name="xe_Form" value="Shipment.Form" /> </include> </views> </event-handler> <event-handler name="Shipment.Display" type="templatedPage"> <broadcasts> <message name="needShipmentDetail" /> </broadcasts> <views> <include name="primary" template="Display.Shipment.cfm"> <value name="xe_ShipmentList" value="Shipment.List" /> <value name="xe_ItemForm" value="Item.Form" /> <value name="xe_ShipmentDisplay" value="Shipment.Display" /> <value name="xe_ItemRemove" value="doItem.Remove" /> </include> </views> </event-handler> <event-handler name="Shipment.Form" type="templatedPage"> <broadcasts> <message name="needShipmentBean" /> </broadcasts> <views> <include name="Primary" template="Form.Shipment.cfm"> <value name="xe_HandleForm" value="doShipment.Form" /> </include> </views> </event-handler> <event-handler name="doShipment.Form"> <broadcasts> <message name="handleShipment" /> </broadcasts> <results> <result name="Failure" do="Shipment.Form" /> <result name="Success" do="Shipment.List" redirect="true" /> </results> </event-handler> -
Open /PlantOMatic/config/ColdSpring.xml and add the following bean definition
<bean id="ShipmentManager" class="PlantOMatic.model.ShipmentManager"> <constructor-arg name="dsn"> <bean factory-bean="reactorConfiguration" factory-method="getDsn" /> </constructor-arg> </bean> -
Create a new file in /PlantOMatic/controller named ShipmentController.cfc
-
Use the following code as the body of ShipmentController.cfc
<cfcomponent output="false" hint="I am a Model-Glue controller." extends="ModelGlue.gesture.controller.Controller" beans="ShipmentManager"> <cffunction name="handleShipment" output="false" access="public" returntype="void" hint="I handle a submitted shipment list"> <cfargument name="event" type="any" /> <cfset var shipment = arguments.event.makeEventBean( "PlantOMatic.model.Shipment" ) /> <cfset var MessageContainer = arguments.event.getValue( "MessageContainer" ) /> <cfif shipment.validate( MessageContainer ) IS true> <cfset beans.ShipmentManager.save( shipment ) /> <cfset MessageContainer.addSuccess( "Your Shipment was added!" )> <cfset arguments.event.addResult( "Success" ) /> <cfelse> <cfset MessageContainer.addError( "Your Shipment could not be added, probably because you didn't add a name" ) /> <cfset arguments.event.addResult( "Failure" ) /> </cfif> </cffunction> <cffunction name="needShipmentBean" output="false" access="public" returntype="void" hint="I find and return information about a shipment"> <cfargument name="event" type="any" /> <cfset var Shipment = arguments.event.makeEventBean( "PlantOMatic.model.Shipment", "ShipmentID" ) /> <cfset Shipment = beans.ShipmentManager.load( Shipment ) /> <cfset arguments.event.setValue( "ShipmentBean", arguments.event.makeEventBean( Shipment ) ) /> </cffunction> <cffunction name="needShipmentDetail" output="false" access="public" returntype="void" hint="I return detail of a specific Shipment"> <cfargument name="event" type="any" /> <cfset var Shipment = arguments.event.makeEventBean( "PlantOMatic.model.Shipment", "ShipmentID" ) /> <cfset arguments.event.setValue( "ShipmentDetail", beans.ShipmentManager.loadDetail( Shipment ) ) /> </cffunction> <cffunction name="needShipmentList" output="false" access="public" returntype="void" hint="I return stored shipments"> <cfargument name="event" type="any" /> <cfset arguments.event.setValue( "ShipmentList", beans.ShipmentManager.loadCatalog() ) /> </cffunction> </cfcomponent> -
Open /PlantOMatic/views/Display.Shipment.cfm and prepend the following:
<cfsilent> <cfset event.copyToScope( variables, "ShipmentDetail,xe_ItemForm,xe_ItemRemove,xe_ShipmentList,xe_ShipmentDisplay" ) /> <cfset linkItemForm = event.linkTo( xe_ItemForm, "shipmentID" ) /> <cfset linkPrint = event.linkTo( xe_ShipmentDisplay, "shipmentID" ) /> <cfset linkItemRemove = event.linkTo( xe_ItemRemove, "shipmentID" ) /> <cfset linkShipment = event.linkTo( xe_ShipmentList ) /> </cfsilent> -
Open /PlantOMatic/views/Form.Shipment.cfm and prepend the following:
<cfsilent> <cfimport prefix="uform" taglib="/PlantOMatic/uniform" /> <cfset event.copyToScope( variables, "CFUniformConfig,ShipmentBean,xe_HandleForm" ) /> <cfset handleSubmitForm = event.linkto( xe_HandleForm ) /> <cfset bean = ShipmentBean /> </cfsilent> -
Open /PlantOMatic/views/List.Shipment.cfm and prepend the following:
<cfsilent>
  <cfset event.copyToScope( variables, "ShipmentList,xe_Display,xe_Form" ) />
  <cfset linkDisplay = event.linkTo( xe_Display ) />
  <cfset linkEdit = event.linkTo( xe_Form ) />
  <cfset linkPrint = event.linkTo( xe_Display ) & "&requestformat=print" />
</cfsilent>
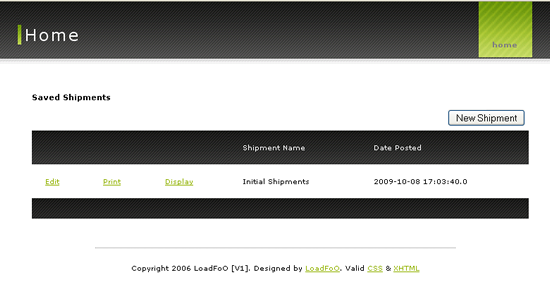
Once you successfully complete the above tasks, run your application and click the home navigation element. You should see a screen load with the title of Saved Shipments (see figure below). You may interact with this screen, pressing Edit, Print, Display and the other links in the User Interface. All of them will work, except for New Item. We'll cover New Item in a future section.
Shipment List View