Getting started instructions for modular NetBeans project produce an invalid image #68
Comments
|
You can try the sample linked at that section: https://github.com/openjfx/samples/tree/master/IDE/NetBeans/Modular/Java and see if you still have the same issue. Probably you are missing some configuration step. |
|
The sample project downloaded from github works. whereas the run.modulepath property generated by NetBeans following the instructions in the tutorial is: Apparently, the order in which the paths are specified is important: if I move ${libs.JavaFXMODS11.classpath} at the beginning of the string, the packaging step generates a correct image. |
|
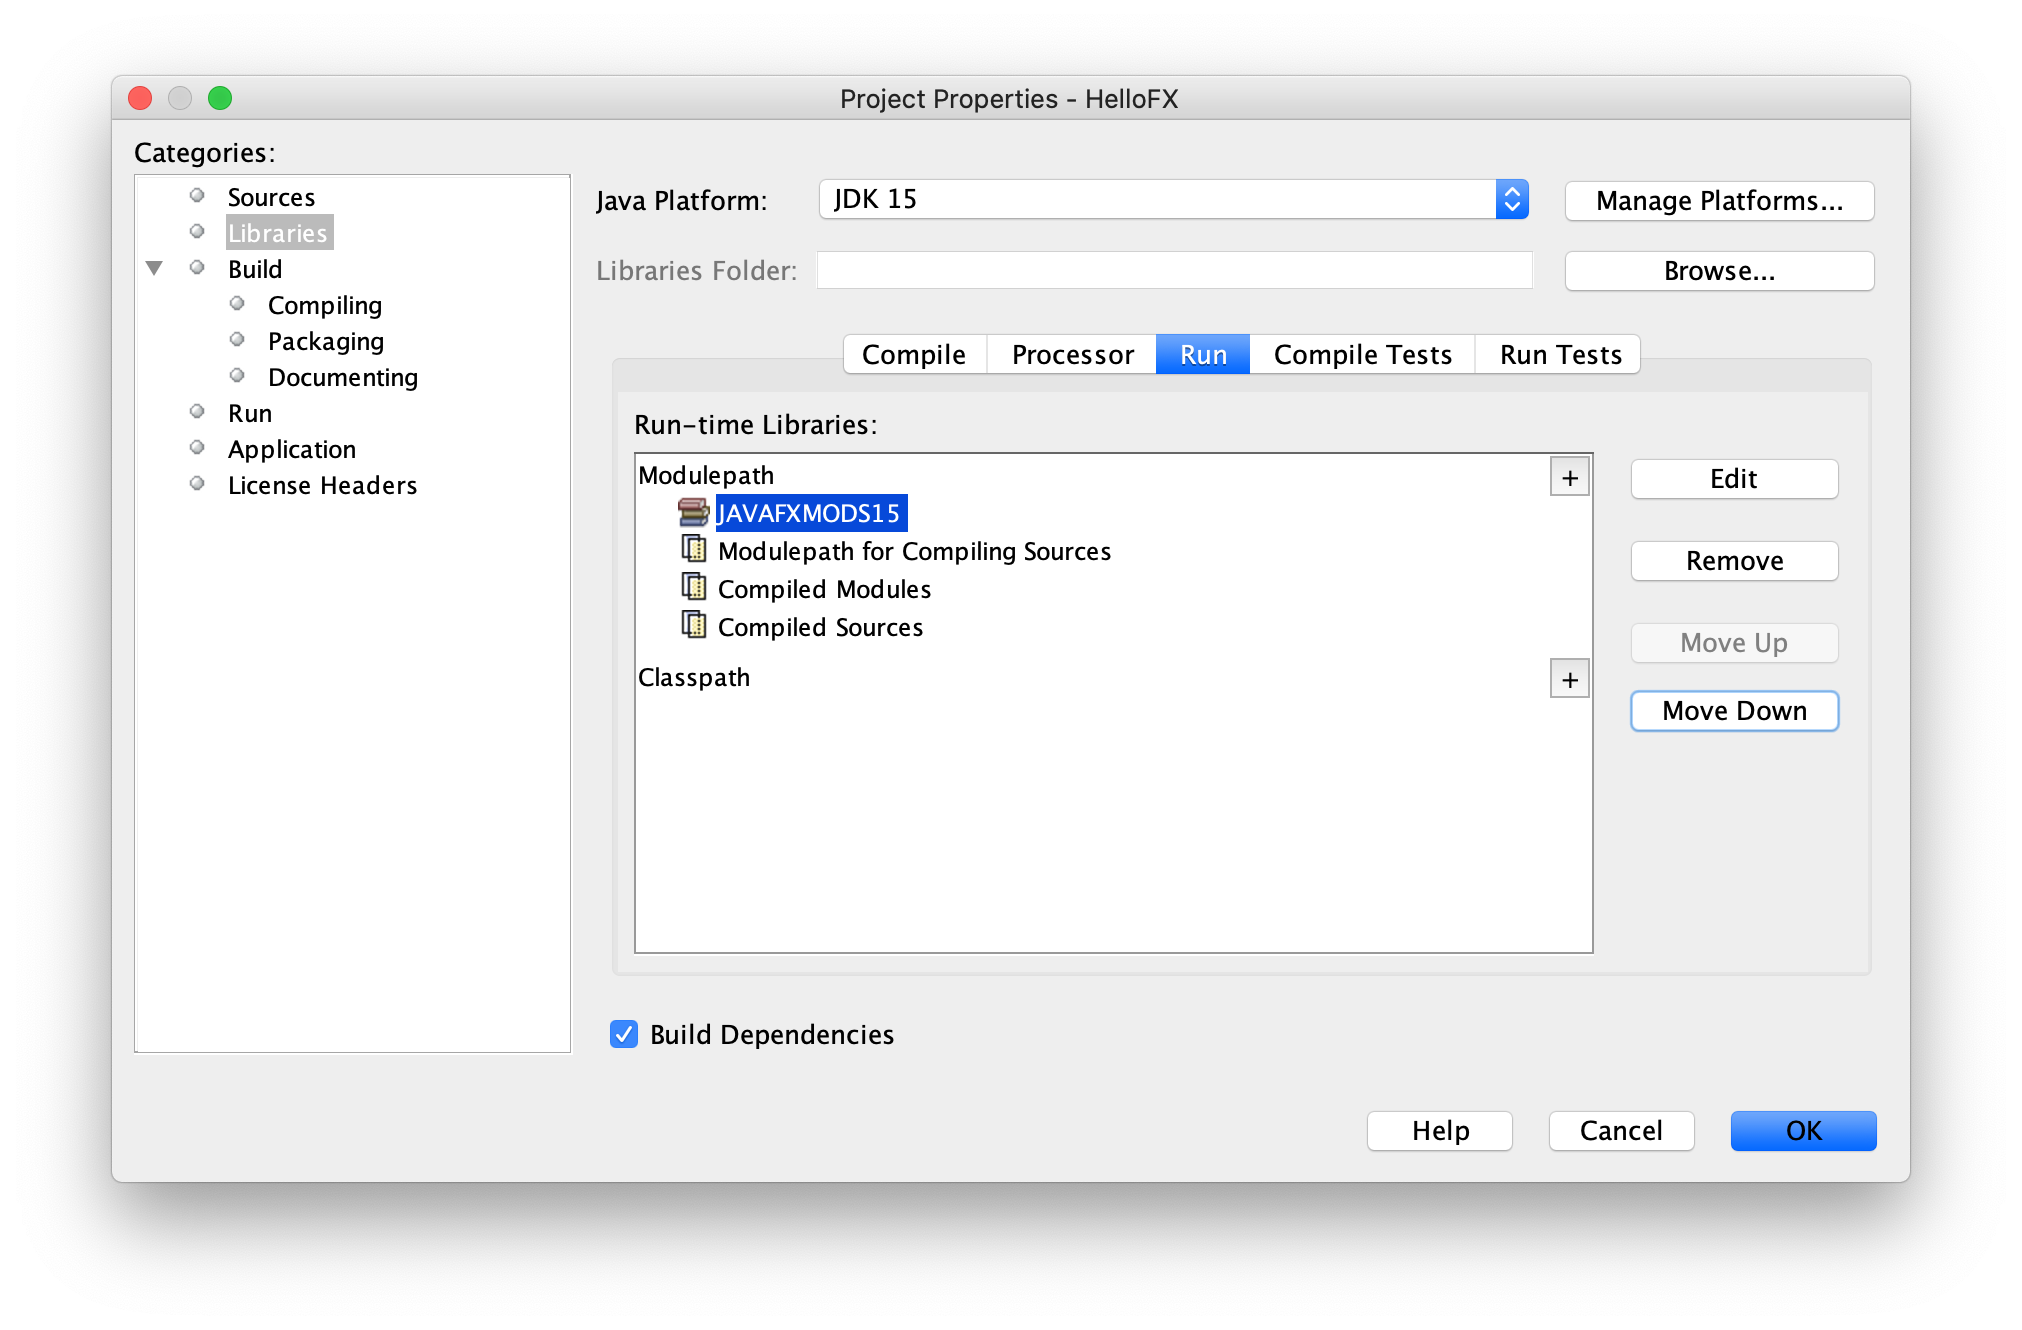
Yes, the order is important, indeed. However, the order can be modified when you add the library. See updated document https://openjfx.io/openjfx-docs/#IDE-NetBeans, section Modular from IDE:
and sample: |
I have followed the instructions contained in the getting started page, creating a modular project in Netbeans ("Modular from IDE" section).
In particular, I have followed the instructions contained in Section 6 to add the JavaFX jmods to the module path, but it seems that the jmods have not been used to create the image. When I run it, I get the error on the initialisation of the quantum renderer.
The output of the Ant build file is also suspicious, because it mentions the JavaFX jars instead of the jmods:
If I follow the instructions for Eclipse, the image runs fine. The difference between the two images is that the image generated by NetBeans does not contain the following files:
The text was updated successfully, but these errors were encountered: