SettingUpATomcatServerInEclipse
We target everything to the Java Servlet spec v2.4. Though you can use most any compliant container, we use the Tomcat 5.5 series by default. Download the latest version here:
http://tomcat.apache.org/download-55.cgi
Uncompress the software package somewhere permanent.
Alternatively, you can install tomcat from the Ubuntu repositories and tweak slightly to make Eclipse happy.
sudo apt-get install tomcat6
Stop the tomcat (you want to run it from eclipse)
sudo /etc/init.d/tomcat6 stop
And do a few tweaks from tsaid: http://stackoverflow.com/questions/447289/problem-creating-a-tomcat-6-server-in-eclipse-form-ubuntu/2077524#2077524
sudo apt-get install tomcat6
cd /usr/share/tomcat6
sudo ln -s /var/lib/tomcat6/conf conf
sudo ln -s /etc/tomcat6/policy.d/03catalina.policy conf/catalina.policy
sudo ln -s /var/log/tomcat6 log
sudo chmod -R 777 /usr/share/tomcat6/conf
Under the general Eclipse "Preferences..." menu item ("Window -> Preferences..." on Windows and Linux, "Eclipse -> Preferences" on Mac OS X), browse to "Server -> Runtime Environments", as shown in the following figure:
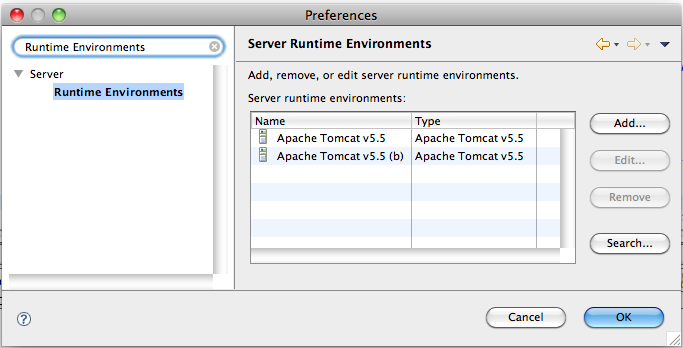
Click "Add" to add a new runtime. Select the "Apache Tomcat v5.5" runtime.

Once selected, you need to specify the path to your download of Tomcat:
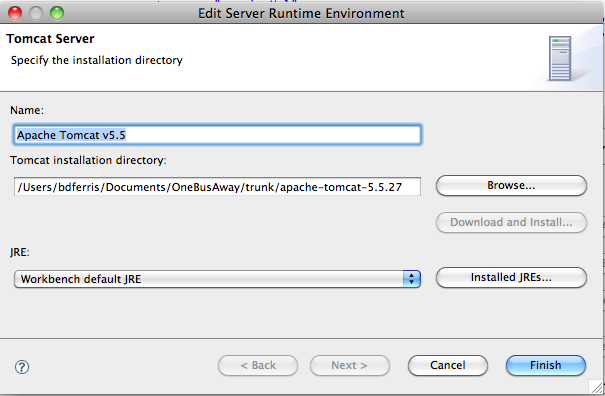
If you installed from the repositories with the above instructions, your installation directory is /usr/share/tomcat6
We need to open the "Server" view so that we can add a new server instance. In Eclipse, select the following menu item chain "Window -> Show View -> Other... -> Server -> Servers". This should add a "Servers" tab window to your workbench. Right click in that "Servers" window, select "New -> Server". It should bring up the following dialog:

Keep the host name as "localhost", select the "Apache Tomcat v5.5 Server" as the type, name the server whatever you like ("opentripplanner" perhaps?), and make sure the Server runtime you installed is selected in the drop down list. Click "Finish" and there should now be a server entry with the name you specified in the "Servers" window.
By default, Eclipse will deploy your webapp to a folder in the following location:
<path to Eclipse workspace directory>/.metadata/.plugins/org.eclipse.wst.server.core/tmp0
Since that's a little unwieldy to work with, I like to change it to something more direct. To change the location, double click on the server entry with the name you specified that should now be listed in the "Servers" window.
In the Server Locations tab, change to "Use a custom location" and select a more reasonable path (I like <path to Eclipse workspace directory>/apache-tomcat-config/server_name myself). See as an example:

Note that to update this setting, the server must not have any projects assigned to it yet (as in the next section) and the server must be published (right click on the server entry and click "Publish").
You may need to increase the memory available to Tomcat if you are working with large cities. Click "Open Launch Configuration". Enter the "Arguments" tab. In the VM args textarea, add -Xmx2000m or -Xmx2G for 2000 megabytes (you may need a larger number, depending on the size of your city).
You may also need to allow Tomcat more time to startup before it times out, since it takes a while to load large graphs (if you don't, you might get an error from Tomcat that it couldn't start in the allocated amount of time). You can do this under the "Timeouts" section of main server overview page, and increase the default "Startup" value from 45 seconds to something like 90 seconds.
For more on memory and speed considerations, see JVMPerformance.
We now want to add project modules to the server so the server can host their content. Right click on your newly created server entry and select "Add and Remove Projects..."
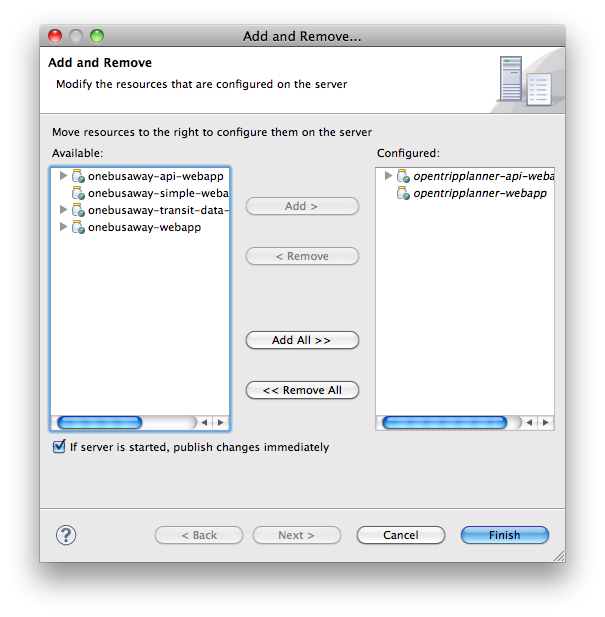
Add any or all of the OpenTripPlanner webapp projects that you wish to work with.
If the dialog box does not present you with any webapp modules to add to your server, please make sure you have installed the Maven integration for Eclipse WTP (from the Maven Extras update site).
Once you've added a few project modules to a server, it's ready to run. Right click on your server instance and you should see methods for starting and stopping the server instance, as well as running the instance in debugging mode.
When you run a server instance, an entry is actually created in the standard Eclipse Run Configurations, which controls the command line options, classpath, and other settings for running applications, unit tests, etc in Eclipse. You can specify additional command line options there to, for example, increase the amount of heap memory available to the server or define other system properties.
When the server is started, it will begin spitting out messages to the console about its startup progress. When all has gone well, you'll typically get a message like:
Oct 10, 2009 8:06:21 AM org.apache.catalina.startup.Catalina start

INFO: Server startup in 4563 ms
However, go back and check for any exceptions that might have been thrown when attempting to load the project module into the container.
If all has gone well, you should now be able to see your project at:
http://localhost:8080/name-of-project-module-here
For example, your OpenTripPlanner project should be visible at the URL:
http://localhost:8080/opentripplanner-webapp/
Loading the graph can take quite a while, and waiting for the server to restart repeatedly when testing new code can get frustrating. Fortunately it is possible to swap new code into a running server without restarting it. This is called Hot Code Replacement (HCR).
In order to do so you need to /turn off/ web module auto-reloading, which gets in the way of HCR. Go to the Servers view (menu Window -> Show View -> Servers if it is not visible) and double-click your server to open the server configuration tab. There, switch from the Overview tab to the Modules tab (these tabs are on the bottom of the window). Edit each module in the list, un-checking "Auto reloading enabled” which is checked by default.

One last thing: When starting you Tomcat server, you must choose "Start in debug" rather than "Start". Hot Code Replacement only works in debug mode.
Many thanks to the author of this blog post for an excellent explanation of this feature.