Default case with OSM for Windows
This tutorial presents how to create Local Climate Zones with OpenStreetMap data.
Two tools are available to run GeoClimate algorithms: Command Line Interface (beginner user) and Groovy (intermediate and advanced user)
You will run the archive Geoclimate.jar in a Command Line Interface.
First, make sure Java (version 11 minimum) is installed in your computer.
You need to download Geoclimate.jar here.
Rename the downloaded file as "Geoclimate.jar".
Create a folder in your documents (for instance C:\mydirectory\Geoclimate) and place Geoclimate.jar in this folder.
In order to run Geoclimate, you need to write a configuration file. This file specifies inputs, methods and outputs of Geoclimate.
An example of configuration file is presented below :
{
    "description": "Processing OSM data",
    "input": {
        "locations": [
            "Pont-de-Veyle"
        ]
    },
    "output": {
        "folder": "C:\\temp"
    },
    "parameters": {
        "rsu_indicators": {
            "indicatorUse": [
                "LCZ",
                "TEB",
                "UTRF"
            ],
            "svfSimplified": true,
            "estimateHeight": true
        },
        "grid_indicators": {
            "x_size": 100,
	    "y_size": 100,
	    "rowCol": false,
	    "output" : "geojson",
	    "indicators" :["BUILDING_FRACTION", "BUILDING_HEIGHT", "BUILDING_POP",
                               "BUILDING_TYPE_FRACTION", "WATER_FRACTION", "VEGETATION_FRACTION",
                               "ROAD_FRACTION", "IMPERVIOUS_FRACTION", "FREE_EXTERNAL_FACADE_DENSITY",
                               "BUILDING_HEIGHT_WEIGHTED", "BUILDING_SURFACE_DENSITY",
                               "SEA_LAND_FRACTION", "ASPECT_RATIO", "SVF",
                               "HEIGHT_OF_ROUGHNESS_ELEMENTS", "TERRAIN_ROUGHNESS_CLASS",
                               "UTRF_AREA_FRACTION", "UTRF_FLOOR_AREA_FRACTION",
                               "LCZ_PRIMARY"]
         }
    }
}
You can copy this example in a notebook and name it "my_first_config_file_osm.json". Place this configuration file in the same folder than Geoclimate.jar .
The configuration file is structured in four main parts.
-
"description" is a text that describes your process. You can name your process here.
-
"input" specifies the input data you will use. In this example, we specify "osm" for OpenStreetMap, and we run Geoclimate for a small village in France called Pont-de-Veyle.
-
"output" specifies the format you expect for your output (here "folder") and where you want to create your output files (here in C:\temp).
-
"parameters" specifies the output you want to calculate based on your reference spatial units ("rsu_indicators") or on a grid ("grid_indicators").
-
At RSU scale, we calculate the LCZ, the TEB inputs and the UTRF ("indicatorUse": ["LCZ", "TEB", "UTRF"]). We use the simplified method to calculate the sky view factor ("svfSimplified": true) and the method to estimate the height of buildings in OSM ("estimateHeight" : true).
-
With the grid approach, we specify the grid dimensions in meters ("x_size" and "y_size") and the output format ("output" : "geojson"). Then, we specify the indicators we want to calculate for each cell of the grid ("BUILDING_FRACTION", "BUILDING_HEIGHT", "WATER_FRACTION", "VEGETATION_FRACTION", "ROAD_FRACTION", "IMPERVIOUS_FRACTION", "LCZ_FRACTION").
On your machine, open a command prompt.
Go to the folder where Geoclimate.jar is located using this command line :
cd mydirectory\Geoclimate
Then, you can run this command line which presents you the main options of Geoclimate :
java -jar Geoclimate.jar -h
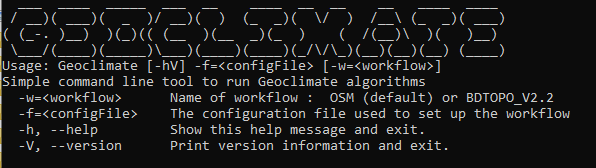
In order to perform your first calculations with the configuration file above, use
java -jar Geoclimate.jar -f my_first_config_file_osm.json -w OSM
where the f option is used to set the path of the configuration file.
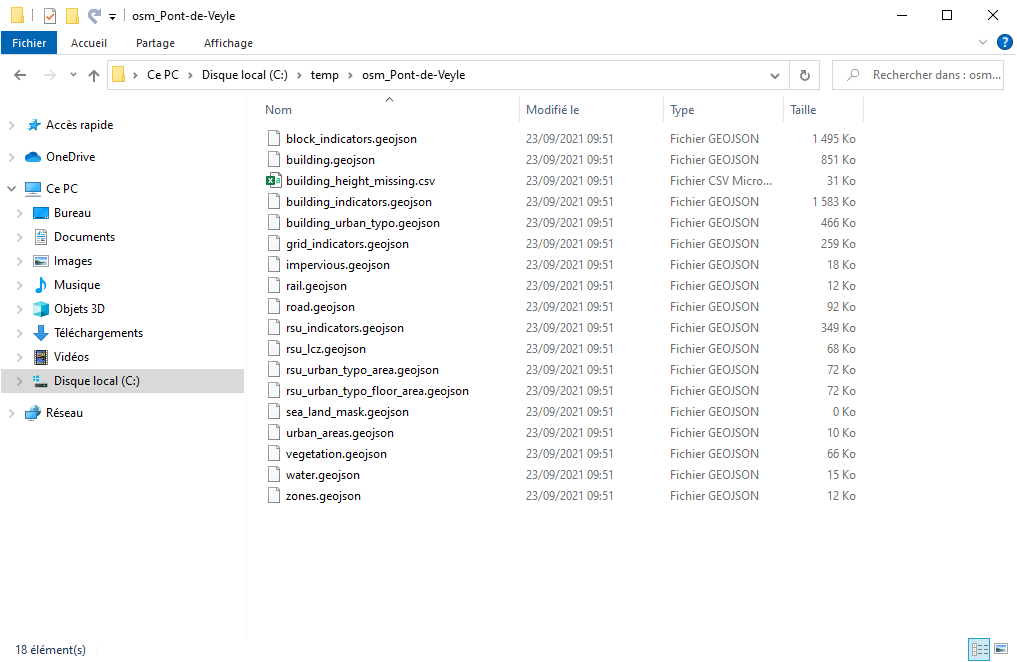
If everything runs well, you will obtain a message : The OSM workflow has been successfully executed
The results of your calculations are located in you C:\temp folder.
GeoClimate - documentation 2020 - 2024 -
This work is licensed under a Creative Commons Attribution-ShareAlike 4.0 International.
