This Discord bot allows users to talk in a voice chat without the use of a microphone. With the use of a Text to Speech service such as IBM Watson, it's possible to convert a Discord user's text messages to speech. Integrated into the project is OpenAI's chatbot solution that allows users to have realistic conversations via Voice & Text.
These steps will get you up and running as soon as possible.
General installation:
Follow these steps to install the bot regardless of your platform.
- Clone this repository.
- Install the Python dependencies by running the
pip install -r requirements.txtcommand in a terminal window. This will install all of the needed Python libraries that are listed in therequirements.txtfile. - Edit the following variables in the
main.pyfile:bot_prefix: Changing this is optional, but you can change your Discord bot's prefix if you wantDISCORD_TOKEN: Your Discord bot's token- Can be found on your Discord developer portal
IBM_WATSON_API_KEY: Your IBM Watson Text to Speech service API key- Can be found on your IBM Cloud dashboard
IBM_WATSON_URL: Your IBM Watson Text to Speech service API URL- Can be found on your IBM Cloud dashboard
IBM_WATSON_DEFAULT_ACCENT: Changing this is optional, but you can change your Discord bot's default accentDISCORD_BOT_ID: Your Discord bot's ID- Can be found on your Discord developer portal
- If you'd like to limit the bot's usage to certain individuals or restrict its access to specific text channels, you can edit the
user_idsandchannel_idsvariables accordingly.
Windows-specific:
If you're on Windows, follow these additional steps in order to get the bot's voice chat module to run:
- Edit the
versionvariable in themain.pyfile by changing its value to "W" for "Windows". - Go to the following link to install a Windows version of the FFmpeg software (please note that clicking on the link above will automatically start the download process). This software is needed in order to get the bot to talk in voice channels.
- Extract the zip file anywhere on your PC and copy the "ffmpeg.exe" file which can be found in the "bin" directory of the zip file you've just extracted.
- Paste the "ffmpeg.exe" file in the "bin" directory of the Discord bot folder.
- To start the bot, you can either:
-
Run the following command in a terminal window:
python main.pyor
-
Double click the
run.batfile, which runs thepython main.pycommand on its own. Please note that you'll have to edit the bat file accordingly if you change the script's name.
-
Linux-specific:
If you're on Linux (most likely because you'd like to host the bot on a server), follow these additional steps in order to get the bot's voice chat module to run:
- Edit the
versionvariable in themain.pyfile by changing its value to "L" for "Linux". - In a terminal window, run the following command:
sudo apt install ffmpeg - To start the bot, you can run the following command in a terminal window:
python main.py
Now that you've successfully completed the installation process, you're ready to start using the bot! Assuming you've already invited it to one of your servers and you've got enough permissions to use it, you can run a couple of commands to get started.
If you're already in a voice channel:
- Type
.join(or "PREFIXjoin" if you've decided to change the bot's prefix) in any text channel - this will tell the bot to join the voice channel you're currently in. - The bot should now dictate the messages being sent in any valid text channel.
- Type
.leave(or "PREFIXleave" if you've decided to change the bot's prefix) if you want the bot to leave the voice channel it's currently in. This will also reset it and delete all of the MP3 files that it used during the session.
If you're not in a voice channel:
- Type
.join CHANNEL_ID(or "PREFIXjoin CHANNEL_ID" if you've decided to change the bot's prefix) in any text channel - this will tell the bot to join the voice channel you're specified in the command. - The bot should now dictate the messages being sent in any valid text channel without you being in the voice channel.
- Type
.leave(or "PREFIXleave" if you've decided to change the bot's prefix) if you want the bot to leave the voice channel it's currently in. This will also reset it by deleting all of the MP3 files that it used during the session and change its accent to the default one.
Additional commands:
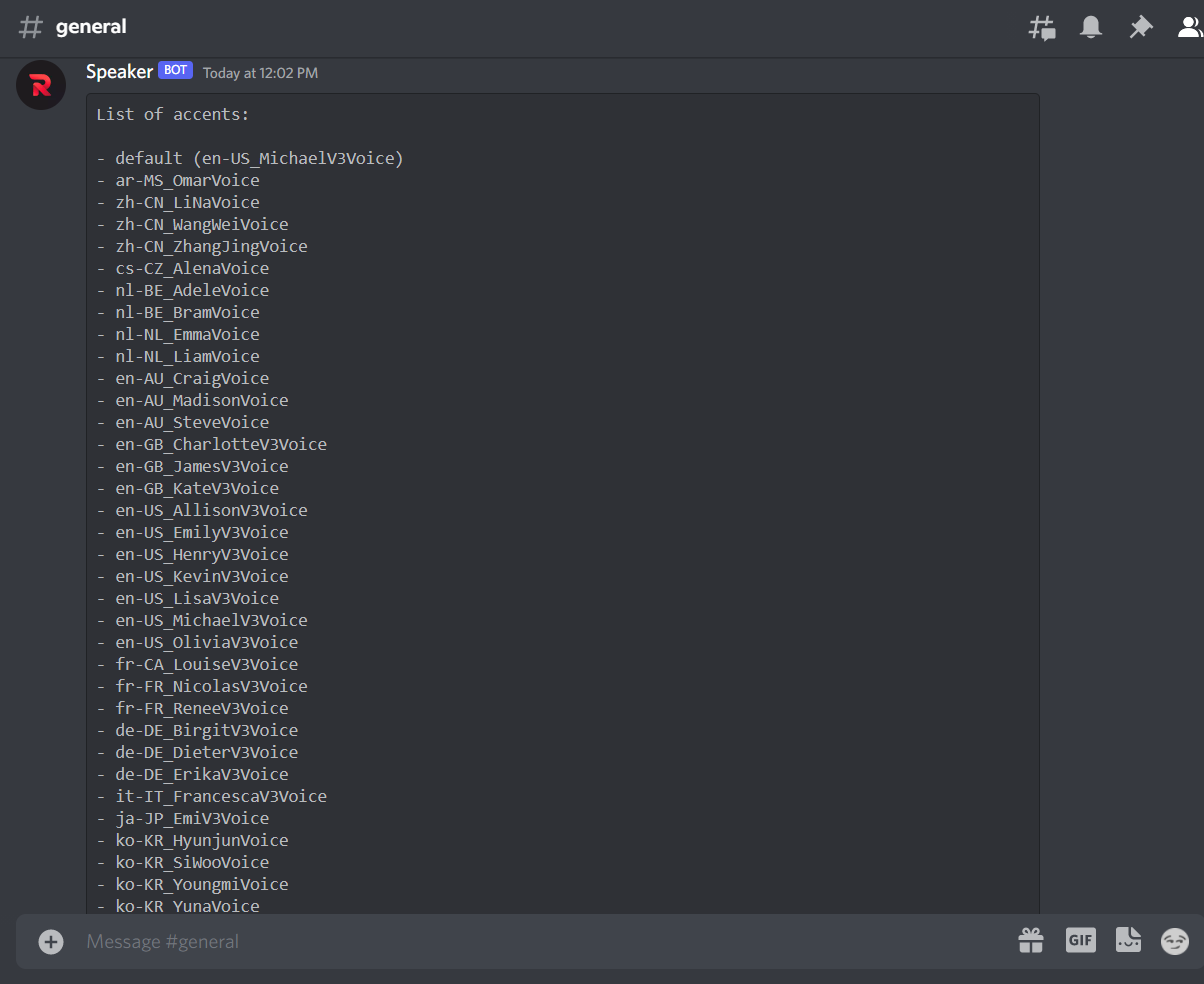
- You can get a list of accents by running the
.accents(or "PREFIXaccents") command. This will return a list of accents as shown in the following screenshot: - You can change the bot's accent by running the
.accent ACCENT(or "PREFIXaccent ACCENT") command, as shown in the screenshot below. Please note that the command must be taken from the list of accents generated from the.accents(or "PREFIXaccents") command. - You can change the bot's tone to either squeaky or deep by putting your message inside special tags as such: "YOUR MESSAGE" or "YOUR MESSAGE".
- You can have a realistic conversation with the bot by putting your message inside a special ai tag as such: "YOUR MESSAGE". The bot will respond in voice chat & will reply to your message via the used text channel.

Project demo:
This YouTube video showcases a complete project demo with audio recorded by one of our users: