component commands
Hardsploit was created to interact with components, chips of different sizes and purposes. All of them use specifics instructions to be able to communicate. Hardsploit offers the possibility to interact with different BUS. Trust us, it's just a beginning, more will come in the future ! Because every BUS is different we give you a different module for each BUS.
It can seems obvious but you need two things to interact with a target:
- The Hardsploit board needs to be plugged to your computer and detected by the Hardsploit GUI
- The component you want to work with must be correctly wired to the Hardsploit board
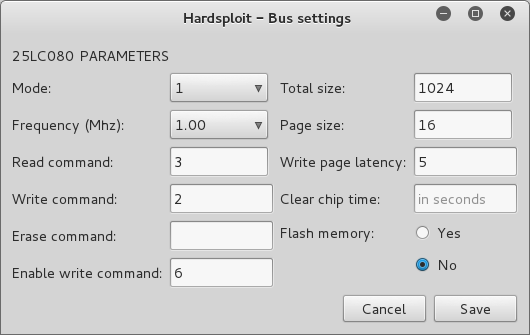
The first step is to give Hardsploit some settings. You can find them with the help of your component datasheet.
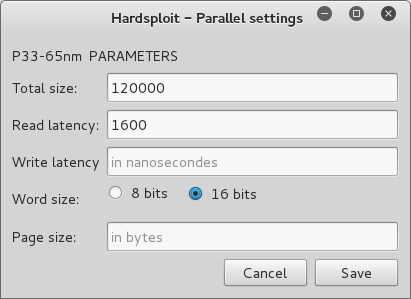
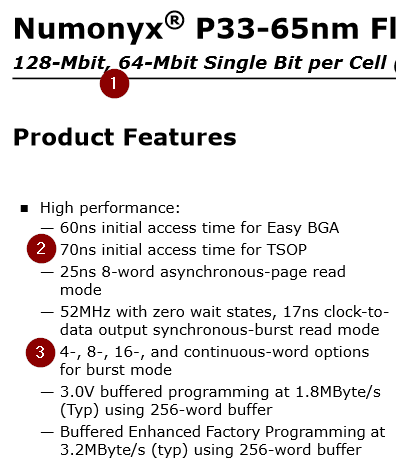
- Total size: Value in bytes, the total size of your component
- Read / Write Latency: The maximum value is 1600 nanoseconds, you can use it or the one on your component datasheet
- Word size: 8 or 16 bits
- Page size in bytes
The write latency and page size aren't used for the moment as the "Import" action is not implemented yet
Once it's done save the settings by clicking on the "Save" button
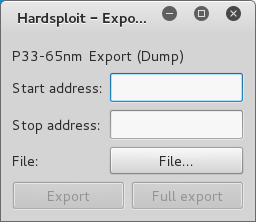
- (Partial dump) Enter the start address
- (Partial dump) Enter the stop address
- Choose an emplacement on your disk to save the dump result
- Click the "Export" or "Full export" button
- Wait for Hardsploit to finish the dump !
Total size, latency and word size fields must be given in the settings before executing a dump
To avoid you re-writing the same data every time you launch Hardsploit to work on the same component, you can save some parameters in the database.
As always, you can find the right value by reading the datasheet of your SPI component
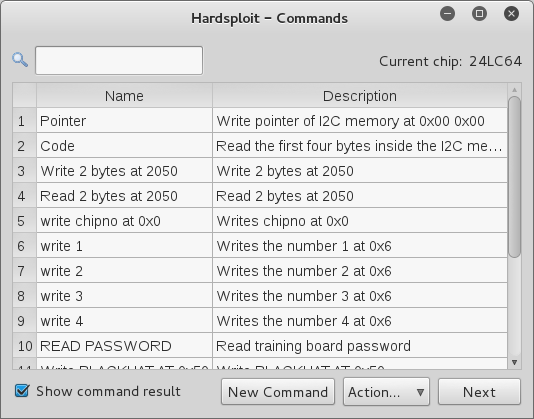
Here you can find all the commands you saved with their names and global descriptions. You can filter the results by using the filter field in the top of the table.
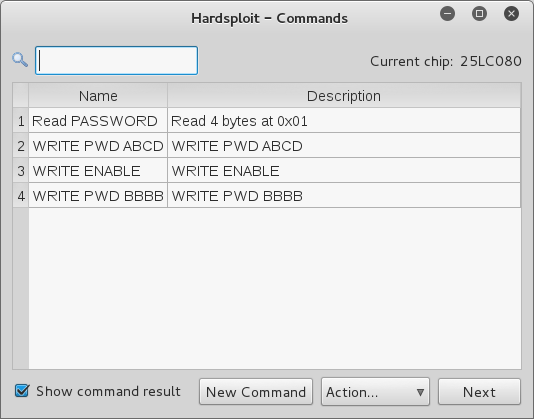
To create a new SPI command, click the "New Command" button at the bottom of the window.
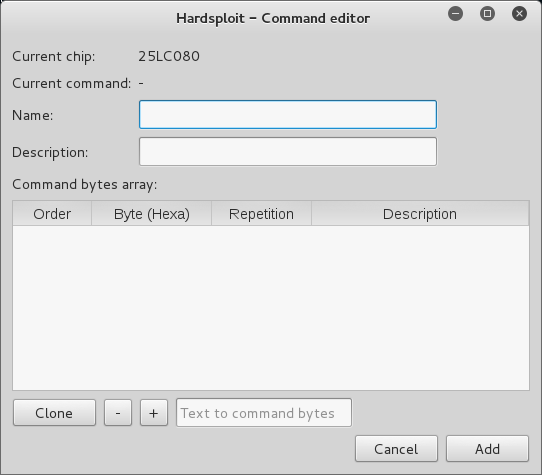
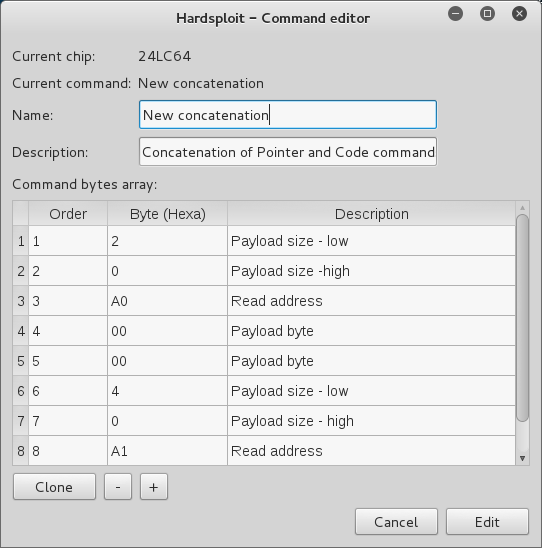
At the top you can find
1. The details about what chip we are currently working with, the bus and because it's a new command we have nothing in "Current command"
2. Name of the command
3. Description of the command
For the command bytes array:
1. The order represents the place of the byte in the array
2. The value in hexadecimal
3. The number of repetition to avoid creating a large number of row for the same byte
4. An optional description
Bottom of the window:
1. If a row is selected you can clone it by using the "Clone" button
2. "Minus" button: Remove the selected row
3. "Plus" button: Add a new row at the bottom of the array with default values
  * If you have entered a string in the field, it will convert it in bytes in the table:
When the command is ready, click the "Add" button to add it to the main table.
By clicking on your command name in the table you will have 4 options:
1. Execute: Send the command to Hardsploit
2. Edit: Edit your command
3. Delete: Delete your command and the associated bytes
4. Use as template: Use your command as a base to create another one
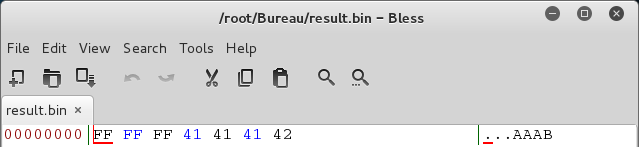
If your command is correctly formated and saved you can execute it. Select your command in the Command Table and in the bottom list select "Execute". Then click the "Next" button.

You can then save the result in a binary file
All the settings are required minus the read command
- (Partial import) Enter the start address
- Choose an emplacement on your disk to save the dump result
- Click the "Export" or "Full export" button
- Wait for Hardsploit to finish the dump !
The mode, frequency, total size and SPI command read settings are required
- (Partial export) Enter the start address
- (Partial export) Enter the stop address
- Choose an emplacement on your disk to save the dump result
- Click the "Export" or "Full export" button
- Wait for Hardsploit to finish the dump !
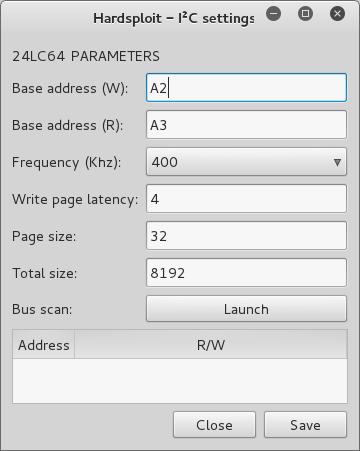
To avoid re-writing the same thing again and again every time you launch Hardsploit to work on the same component, you can save some parameters in the database.
- The Write (W) base address
- The Read (R) base address
- The frequency
- The write page latency
- The page size
- The memory total size
As always, you can find the right parameters by reading the datasheet of your I2C component
The I2C Bus Scan is an easy way to get the two bases addresses (R/W) of your component. If your component is correctly wired and Hardsploit board connected, just click the "Bus scan" button. Hardsploit will return you the Read and Write addresses you save in the appropriate fields.
All the settings minus the read base address are required
- (Partial import) Enter the start address
- Choose an emplacement on your disk to save the dump result
- Click the "Export" or "Full export" button
- Wait for Hardsploit to finish the dump !
The write base address, the frequency and the total size settings are required
- (Partial export) Enter the start address
- (Partial export) Enter the stop address
- Choose an emplacement on your disk to save the dump result
- Click the "Export" or "Full export" button
- Wait for Hardsploit to finish the dump !
To create a new I2C command, it's easy:
- Verify that the Base address (R) settings is saved
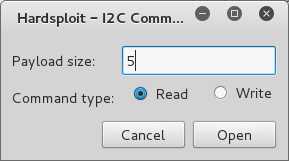
- Click on the "New Command" button
- Enter the number of byte(s) you want to read in the "Payload size" field
- Check "Read"
- Click "Open"
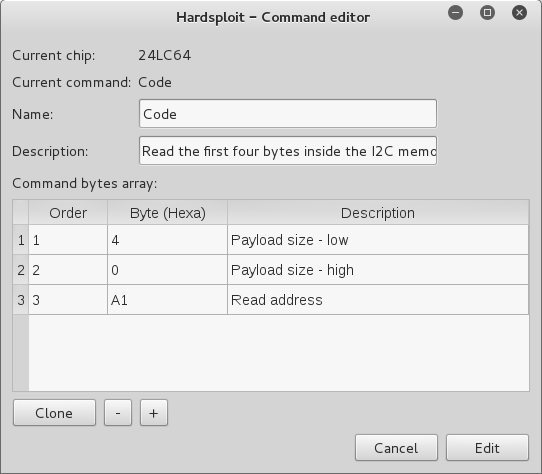
In the new window, give your command a name and a description and take a look at the "Bytes" table:
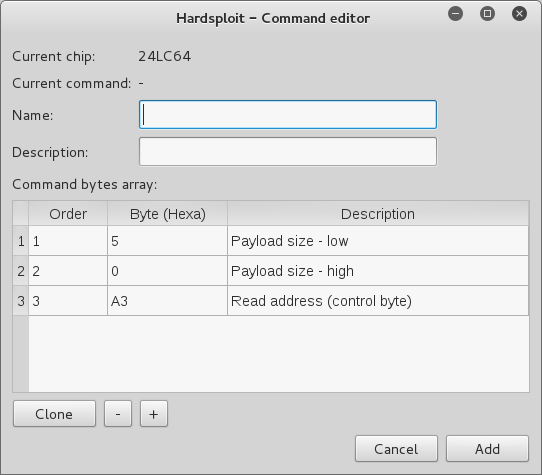
Nothing to do ! We have already complete the byte table for you, just click the "Add" button and your new command will appear in the Command Table, ready to execute.
- Verify that the Base address (W) is saved
- Enter the number of byte(s) you want to write in the "Payload size" field
- Check "Write"
- Click "Open". In the new window, give your command a name and a description and take a look at the "Bytes" table:
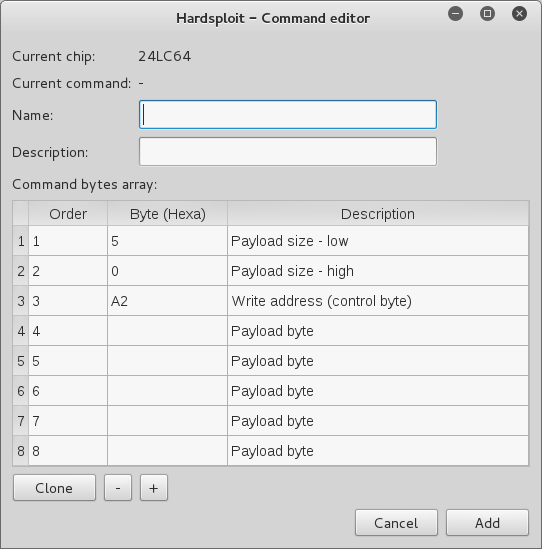
You just need to complete the 5 (in this example) bytes you want to write then click the "Add" button and your new command will appear in the Command Table, ready to execute !
Of course you can always customize your command by adding / removing /cloning ("+" / "-" / "Clone" buttons) a byte row directly, but don't forget to update the payload size !
By clicking on your new command name in the Command table you will have 5 options:
- Execute: Send the command to Hardsploit
- Use as template: Use your command as a base to create another one
- Edit: Edit your command
- Delete: Delete your command and the associated bytes
Let's assume you want to read something on your component. You first have to write the start pointer before reading anything right ? Well that's two commands:
- One to write the pointer
- One to read the bytes.

And maybe you will need to write this pointer with another commands. To avoid you re-writing a command every time just click on your "Pointer" command in the table then hold "Ctrl" and click on the command you want to concatenate with it. When both are selected, choose the "Concatenate" option and click "Next".
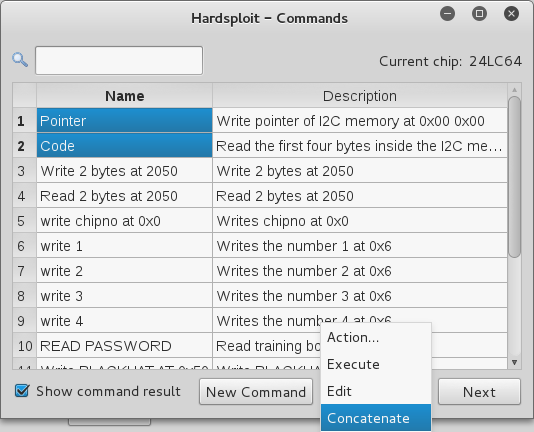
Voila! You have a new command at the bottom of the table that write the pointer and then read content at the same time.