Bridge.NET is an open source C#-to-JavaScript Compiler. Write your application in C# and run on billions of devices.
Compile your C#...
public class Program
{
    public static void Main()
    {
        var msg = "Hello, World!";

        Console.WriteLine(msg);
    }
}
into JavaScript
Bridge.define("Demo.Program", {
    main: function Main () {
        var msg = "Hello, World!";

        System.Console.WriteLine(msg);
    }
});
Run the sample above at Deck.NET.
- Read the Getting Started Knowledge Base article
- Try Deck if you want to play
- Installation:
- The Attribute Reference is important
- The Global Configuration is important
- Check out Retyped for 2200+ supported libraries
- Licensed under Apache License, Version 2.0
- Need Help? Bridge.NET Forums or GitHub Issues
- @bridgedotnet on Twitter
- Gitter for messaging
A great place to start if you're new to Bridge is reviewing the Getting Started wiki.
The easiest place to see Bridge in action is Deck.NET.
The following code sample demonstrates a simple App.cs class that will run automatically on page load and write a message to the Bridge Console.
Example (Deck)
public class Program
{
    public static void Main()
    {
        Console.WriteLine("Hello World!");
    }
}
The C# class above will be compiled into JavaScript and added to /Bridge/ouput/demo.js within your project. By default, Bridge will use the Namespace name as the file name. In this case: demo.js. There are many options to control the output of your JavaScript files, and the Attribute Reference is important documentation to review.
Bridge.define("Demo.Program", {
    main: function Main() {
        System.Console.WriteLine("Hello World!");
    }
});A full list of installation options available at bridge.net/download/, including full support for Visual Studio and Visual Studio Community on Windows, and Visual Studio Mac.
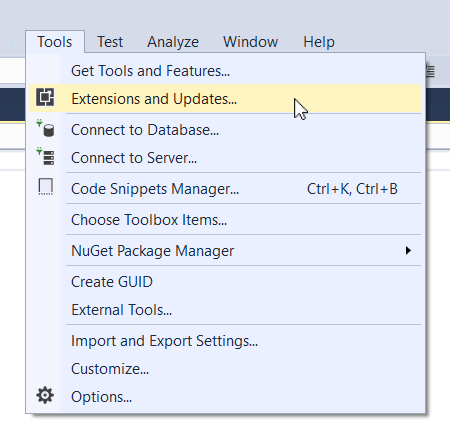
If you're using Visual Studio for Windows, the easiest way to get started is by adding the Bridge.NET for Visual Studio extension.
From within Visual Studio, go to the Tools > Extensions and Updates....
From the options on the left side, be sure to select Online, then search for Bridge. Clicking Download will install Bridge for Visual Studio. After installation is complete, Visual Studio may require a restart.
Once installation is complete you will have a new Bridge.NET project type. When creating new Bridge enabled projects, select this project type.
Another option is installation of Bridge into a new C# Class Library project using NuGet. Within the NuGet Package Manager, search for Bridge and click to install.
Bridge can also be installed using the NuGet Command Line tool by running the following command:
Install-Package Bridge
More information regarding Nuget package installation for Bridge is available in the Documentation.
Interested in contributing to Bridge? Please see CONTRIBUTING.md.
We also flag some Issues as up-for-grabs. These are generally easy introductions to the inner workings of Bridge, and are items we just haven't had time to implement. Your help is always appreciated.
Show your support by adding a built with Bridge.NET badge to your projects README or website.
[](http://bridge.net/)<a href="http://bridge.net/">
<img src="https://img.shields.io/badge/built%20with-Bridge.NET-blue.svg" title="Built with Bridge.NET" />
</a>We need your help spreading the word about Bridge. Any of the following items will help:
- Add a Badge
- Star the Bridge project on GitHub
- Leave a review at Visual Studio Gallery
- Blog about Bridge.NET
- Tweet about @bridgedotnet
- Start a discussion on Reddit or Hacker News
- Answer Bridge related questions on StackOverflow
- Give a local usergroup presentation on Bridge
- Give a conference talk on Bridge
- Provide feedback (forums, GitHub or email)
- Vote for Bridge.NET on UserVoice
Bridge is continually tested with the full test runner available at http://testing.bridge.net/.
Bridge is developed by the team at Object.NET. Frameworks and Tools for .NET Developers.
Apache License, Version 2.0
Please see LICENSE for details.


