# Run with a rspecific repository
gitsi ~/Development/Code

# The current directory is a repository
gitsi
Click here to see a short example video
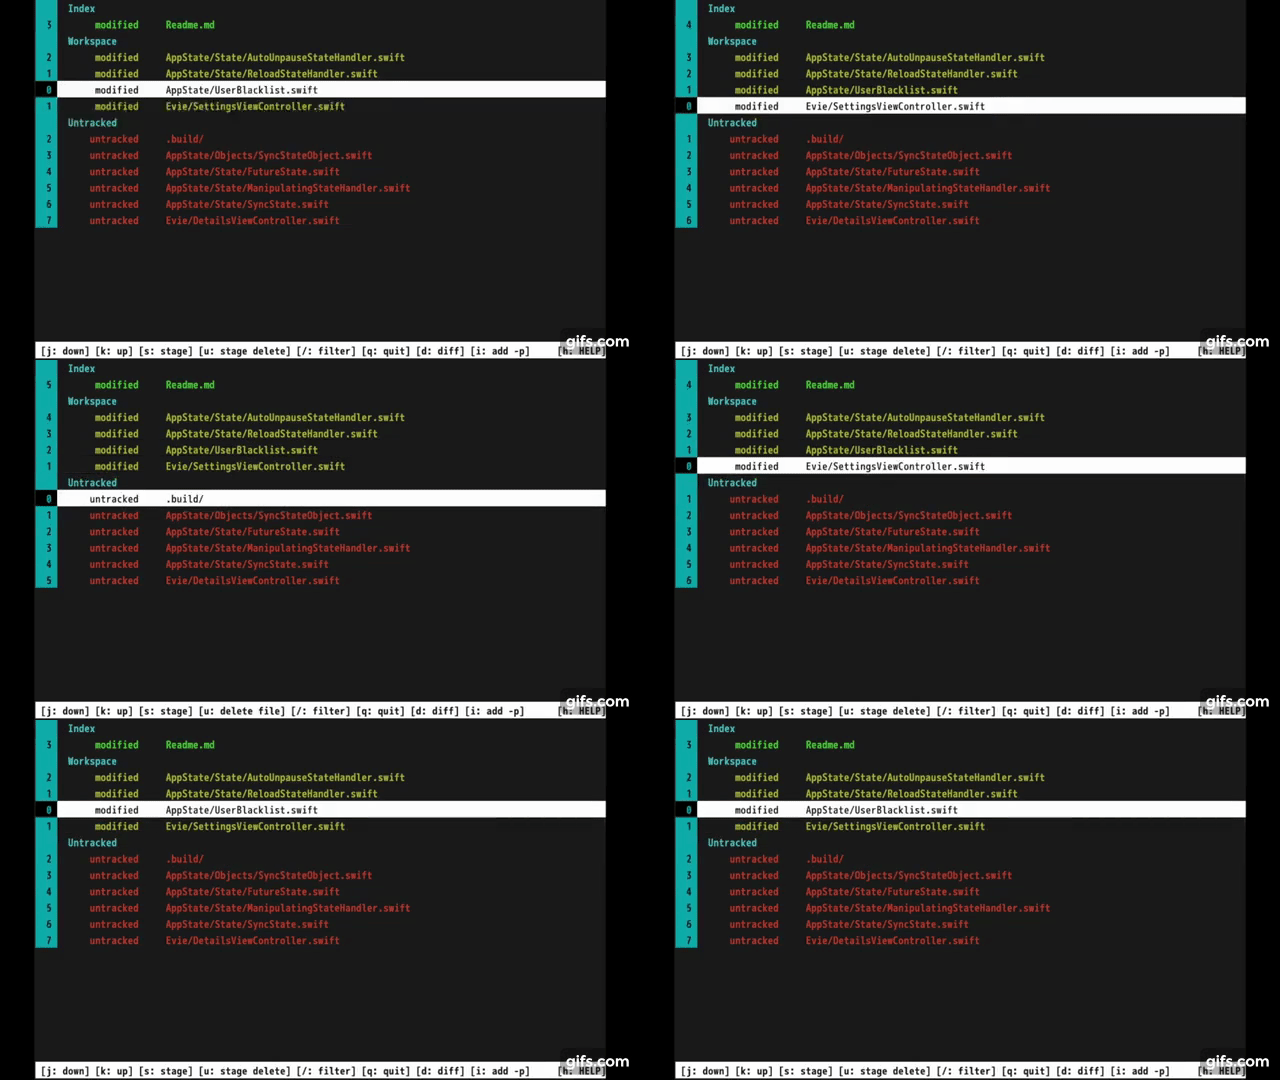
Gitsi is a simple wrapper around git status and git add It provides an easy terminal UI that is optimized for staging, unstaging, and deleting files and changes between the git index, workspace and untracked files.
There are many useful features such as quick jumping to sections, filtering, running git add -p diffing, and quick navigation.
Gitsi displays all your changes and untracked files in a list with the index, workspace, and untracked sections. Just like git status However, you can navigate this this interactively much like vi / vim. Which makes it much easier to quickly jump to the one file you'd like to add or the one file you'd like to move back from the index to the workspace.
The following shortcuts are also explained within gitsi in a help section at the bottom.
jmove one line downkmove one like upC-dJump half a page downC-uJump half a page up![Shift 1] Jump straight to the index section of the git status output.@[Shift 2] Jump straight to the workspace section of the git status output.#[Shift 3] Jump straeight to the untracked files section of the git status output.GJump to the bottom of the list.gJump to the top of the list.qQuit
/Enter the search / filter mode. Hit return to apply the filter and ESC to cancel the filter. If a filter has been applied, hit/again to edit it again.ESCCancel the current search or visual mark mode.EnterApply the current search.
sAdd file or stage (depending on context).uUnstage file or delete file (depending on context).mMark selected file.VToggle visual mark mode. Moving around will mark filesSStage / Add all marked files. This will also unmark all marked files.UUnstage / delete all marked files. This will also unmark all marked files.dSwitch to a git diff of the selected fileeOpen the selected file in vim for editingiRun a interactive add `git add -p1cRungit commitCRungit commit --amendxDelete all changes to this file. The same asgit checkout -- name-of-file
The j/k/C-d/C-u commands can be repeated by entering numbers before the actual command, like vim. i.e. 12j would jump down 12 lines.
brew install libgit2
make release
make installapt-get install make
apt-get install libgit2-dev
apt-get install libncurses-dev
make release
make installThis is the first pure C project I finished since around 2004. I'm sure there're tons of bugs. If you find an issue, feel free to point it out.
If you build it in debug mode, it will create /tmp/gitsi.log and you can use the gitsi_debug_str function to write to this log.
I deliberately c hose to have all the code in one file in order to simplify working in terminal editors like vim. However, as can be seen in the todo list at the bottom, this might change in the future.
There're currently no tests (and no testing framework) but that's on the agenda.
If you're a die-hard C user and find things that are wrong, please keep in mind that this is a beginner project and please be kind. Thanks.
make will create a debug build in the current folder (./gitsi).
You can debug on the terminal via llvm llvm gitsi [repo]
There's an Xcode project included. It should work right away once you've installed libgit (see above under macOS installation)
Since Xcode does not support running apps with TUI / curses, you have to attach to a process. The way it works is:
- Build in Xcode, and then run for debugging
- Xcode will say "waiting to attach"
- Go into a terminal and run the just-build Xcode product (i.e. somewhere in derived data)
- Xcode will connect. Now your breakpoints will be hit.
For testing on Linux, if you're on a Mac, there's res/Dockerfile that adds clang, valgrind, etc. It can be run via:
# assuming you build the docker image via `docker build . --tag=gitsi:dev`
# also assuming you're in the parent dir that contains the checked out `gitsi` dir (i.e. cd ..)
docker run -it --mount type=bind,source="$(pwd)"/gitsi,target=/code gitsi:dev bash
Valgrind is a good way of detecting memory leaks. Running it looks like this:
valgrind --leak-check=full \
         --show-leak-kinds=all \
         --track-origins=yes \
         --verbose \
         --log-file=valgrind-out.txt \
         ./gitsi REPO-DIR
Note that there're some gray_control leaks in libssh. Those seem to be ignorable, based on
https://github.com/libgit2/libgit2/pull/4804/files
NCurses also works in a way that looks like leaks to valgrind: https://invisible-island.net/ncurses/ncurses.faq.html#config_leaks
- Currently, gitsi has to be run in the repo root, otherwise some operations calculate the wrong file path. This should account for the pwd.
- [Maybe] Split up into multiple files
- Add git stash support, especially for stashing individual files
- The loop over the status items should not happen three times, but instead happen once and call out to functions for index, workspace, and untracked
- git commit -a
- Deleted files can only be unstaged to toggle between index and workspace. That seems to be because the status is not taken into account
- [Maybe] add to homebrew
- [Maybe] a config file (line numbers on off, color on off, etc)
- Better error handling (calloc fail, git fail, etc)
