XTLS/Xray-core#1880 (comment) 看作者说想要精简, 我翻了好几遍好像没找到相关的项目, 俗话说: 求人不如求只因
小米 4A 千兆版刚刷好的 openwrt 想要安装 xray, (free 只有 7.6M upx 后的 xray 还有 8.4M) 遂想要精简下 xray-core 仅保留用到的, 其他都删除
main.go 放倒外面其他的只要 config.json 中没有使用的全都删除,写的慢但是删的是真不慢, blackhole 和 DNS 我都删了, 应该还能再删, 这里有些文件夹我不确定有什么用,官方文档也没说明 难受
仅保留:
- http
- freedom
- vless
删了这么多竟然还能运行, 我震惊一百年!
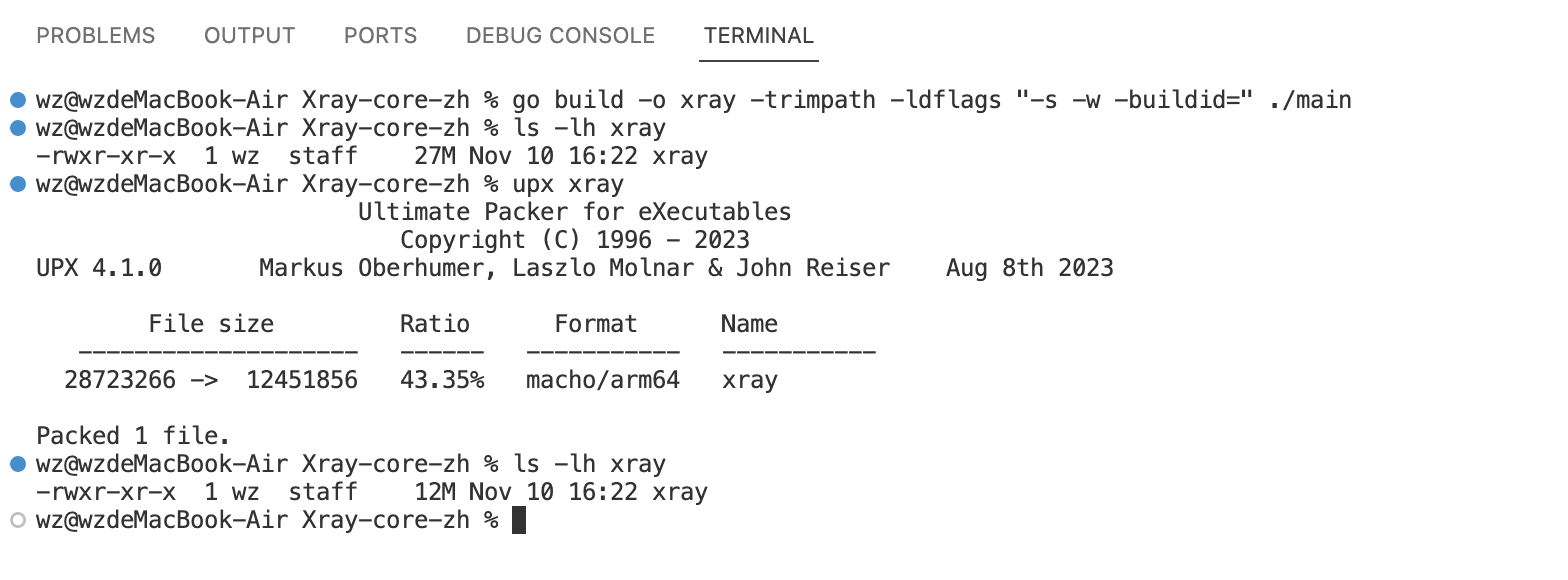
go build -o xray -trimpath -ldflags "-s -w -buildid=" main.go

CGO_ENABLED=0 GOOS=linux GOARCH=amd64 go build -o xray -trimpath -ldflags "-s -w -buildid=" main.go
# 在mac下编译后xray大概13M
# upx 之后xray大概 5.8M真机好像只有 softfloat 这种才能运行, mac m1 下无法交叉编译, 只能在 linux 上才能编译,测试 centos8 可以 build
CGO_ENABLED=0 GOARCH=mipsle GOMIPS=softfloat go build -o xray -trimpath -ldflags "-s -w -buildid=" main.go
CGO_ENABLED=0 GOOS=linux GOARCH=arm64  go build -o xray -trimpath -ldflags "-s -w -buildid=" main.go

# 树莓派3B 之前想要在树莓派上运行
CGO_ENABLED=0 GOOS=linux GOARCH=arm  go build -o xray -trimpath -ldflags "-s -w -buildid=" main.go
简单参考 https://djgo.cc/other/xray
在路由器中使用和上面本质上和没啥差别 (😅主要是那个透明代理我看了半天搞不懂) 我的用法是路由器防火墙放开 10801端口, 然后让 xray 监听这个端口
然后配置好开机自启动脚本 放在 /overlay 目录下可以防止重启丢失
/tmp 目录简单理解就是内存映射成磁盘, 每次重启tmp内的文件会丢失
	// 这里的"listen": "127.0.0.1" 代表的是仅本机可用, 运行在路由器内要让局域网访问所以需要把listen删除
	"inbounds": [
        {
			// "listen": "127.0.0.1",
            "port": 10801,
            "protocol": "http",
            "tag": "http-in"
        }
    ],

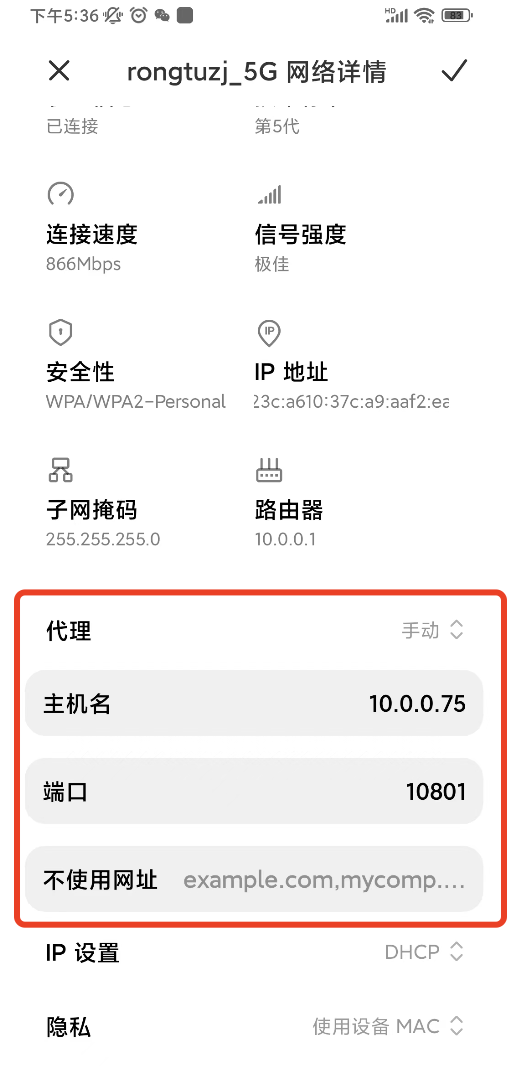
	// 安卓手机内, (我没有苹果)
	1. 设置找到路由器的wifi
	2. 查看详情下滑找到 "代理"  选择 "手动"
	3. 主机名填写 路由器的IP地址 比如:192.168.31.1
	4. 端口填写 xray 监听的端口 比如:10801
	本质上就是安卓系统把所有的流量转发给 xray  然后 xray 根据config.json内配置的规则进行分流, 符合规则走"代理",否则走"直连"

4G信号没法用, 因为这个是在路由器中运行的, 除非你有一台全天24小时运行的云服务器然后重复上面的步骤, 在这里配置那个服务器的IP 😄(我干过,就是带宽太低了,虽然可以精心维护不走代理的域名,相当麻烦 遂作罢!){
"inbounds": [
{
"listen": "127.0.0.1",
"port": 10801,
"protocol": "http",
"tag": "http-in"
}
],
"outbounds": [
{
"protocol": "freedom",
"tag": "direct"
},
{
"protocol": "vless",
"settings": {
"vnext": [
{
"address": "x.x.x.x",
"port": 443,
"users": [
{
"alterId": 64,
"encryption": "none",
"flow": "xtls-rprx-vision",
"id": "abababbaba-abababba-abab-abbab-ababba",
"level": 1,
"security": "none"
}
]
}
]
},
"streamSettings": {
"network": "tcp",
"security": "tls",
"tlsSettings": {
"allowInsecure": false,
"allowInsecureCiphers": false,
"alpn": ["h2"],
"fingerprint": "chrome",
"serverName": "www.domain.xyz"
}
},
"tag": "proxy"
}
],
"routing": {
"domainMatcher": "hybrid",
"domainStrategy": "AsIs",
"rules": [
{
"domain": ["domain:google.com", "domain:google.com.hk"],
"outboundTag": "proxy",
"type": "field"
},
{
"domain": ["domain:taobao.com", "domain:jd.com"],
"outboundTag": "direct",
"type": "field"
}
]
}
}


