RiakCS on a Raspberry Pi 3 Cluster with Raspbian (Debian Buster 10.0)
The Raspberry Pi 3 single board computer from the Raspberry Pi Foundation has a 1.2 GHz quad-core ARMv8 processor, 1 GByte main memory and a 10/100 Mbps Ethernet interface.

This installation tutorial explains the installation of a Raspberry Pi 3 device from scratch and the configuration of s3cmd on your computer.
This implies that you have already an installation of s3cmd on the system you want to use for the interaction with Riak CS.
$ wget https://downloads.raspberrypi.org/raspios_lite_armhf/images/raspios_lite_armhf-2020-05-28/2020-05-27-raspios-buster-lite-armhf.zip
$ unzip 2020-05-27-raspios-buster-lite-armhf.zip
Archive:  2020-05-27-raspios-buster-lite-armhf.zip
  inflating: 2020-05-27-raspios-buster-lite-armhf.img

$ lsblk | grep mm
mmcblk0     179:0    0  29,8G  0 disk
└─mmcblk0p1 179:1    0  29,8G  0 part
Check which one is the correct device! If you use an internal card reader, it is often /dev/mmcblk0.
$ sudo dd bs=4M if=2020-05-27-raspios-buster-lite-armhf.img of=/dev/mmcblk0 status=progress
$ sudo sync
Default login of this image is pi/raspberry. To become user root, execute sudo su.
Older Raspbian versions started the SSH server by default. Because of security reasons (as explained here), all Raspbian versions since version 2016-11-25 (see the release notes) have the SSH server disabled by default. To get the SSH server automatically activated during boot time, create a file ssh with any content (or just an empty file) inside the boot partition (it is the first partition) of the micro SD card.
$ lsblk | grep mm
mmcblk0     179:0    0  29,8G  0 disk
├─mmcblk0p1 179:1    0   256M  0 part
└─mmcblk0p2 179:2    0   1,5G  0 part

$ sudo mount /dev/mmcblk0p1 /media/

$ df | grep mm
/dev/mmcblk0p1    258095     52144    205951   21% /media

$ sudo touch /media/ssh
$ sync
$ sudo umount /media
The Raspbian operating system will try to fetch network configuration by using DHCP on the Ethernet interface per default.
If DHCP is not the desired solution, you may want to specify a static IP address for the single board computer. Leave the file /etc/network/interfaces at its default, because since Debian 9 (Stretch) it effectively does nothing. Instead, modify the file /media/etc/dhcpcd.conf.
$ sudo mount /dev/mmcblk0p2 /media/

$ sudo joe /media/etc/dhcpcd.conf
Insert these lines:
# Static address, routes and dns
interface eth0
static ip_address=10.0.3.10/16
static routers=10.0.0.1
static domain_name_servers=10.0.0.2 8.8.8.8 8.8.4.4

$ sudo umount /media
$ sync
Insert the micro SD card into the Raspberry Pi computer, connect it with the Ethernet cable and the micro USB cable for power supply and switch on the power supply. The operating system will try to fetch network configuration by using DHCP on the Ethernet interface per default. If you activated the SSH server, you can now log in via SSH.
After you logged into the single boad computer with SSH, you can now configure the computer with the raspi-config tool.
$ sudo raspi-config


This is not required for running Riak CS, but the Raspberry Pi 3 has just 1 GB of main memory which is not much at all and there is no need to waste 48 MB.
A part of the main memory (just 1 GB) is assigned to the GPU. A pure server does not need a GPU at all. The share can me specified via the raspi-config tool. The minimum value is 16 MB, which is more useful compared with the default value (76 MB).


After the new value is specified and after a reboot, the new value should be visible:
$ vcgencmd get_mem gpu
gpu=16M
This is not required for running Riak CS, but it is always useful to configure the operating system properly
$ sudo dpkg-reconfigure tzdata

Current default time zone: 'Europe/Berlin'
Local time is now:      Mon Jun  8 22:05:01 CEST 2020.
Universal Time is now:  Mon Jun  8 20:05:01 UTC 2020.

$ cat /etc/timezone
Europe/Berlin
It is also possible to specify the time zone via the raspi-config tool.
It is more handy to have network names like eth0 in Raspbian. Use the raspi-config tool.


Reboot the system.
$ uname -a
Linux raspberrypi 4.19.118-v7+ #1311 SMP Mon Apr 27 14:21:24 BST 2020 armv7l GNU/Linux
$ ip -4 addr show | grep global
    inet 10.0.3.10/16 brd 10.0.255.255 scope global noprefixroute eth0
This is not required for running Minio, but it is always useful to have the correct time on a computer
$ sudo apt-get update && sudo apt-get install -y ntp ntpdate
Now the time sould be synchronized with several NTP servers.
$ ntpq -p
    remote           refid      st t when poll reach   delay   offset  jitter
==============================================================================
0.debian.pool.n .POOL.          16 p    -   64    0    0.000    0.000   0.001
1.debian.pool.n .POOL.          16 p    -   64    0    0.000    0.000   0.001
2.debian.pool.n .POOL.          16 p    -   64    0    0.000    0.000   0.001
3.debian.pool.n .POOL.          16 p    -   64    0    0.000    0.000   0.001
*ntp1.hetzner.de 124.216.164.14   2 u    -   64    1   10.731   -0.077   1.091
ntp2.wtnet.de   10.129.9.96      2 u    -   64    1   15.703    0.202   0.912
-206-55-191-142. .PPS.            1 u    2   64    1  130.613   -8.956   0.506
fry.celeborn.de 217.245.152.227  2 u    -   64    1   13.018   -0.139   0.961
-srv02.spectre-n 131.188.3.222    2 u    1   64    1   19.273   -5.398   4.835
-69.10.161.7     195.205.216.85   3 u    1   64    1  187.346  -14.629   1.260
+195.50.171.101  192.53.103.108   2 u    -   64    1    7.703   -0.451   1.148
+srv01.spectre-n 129.69.1.170     2 u    -   64    1   12.422   -1.017   1.170
+ntp2.m-online.n 212.18.1.106     2 u    -   64    1   13.326   -0.250   1.148
-173.0.48.220 (1 43.77.130.254    3 u    -   64    1  170.358   -6.018   0.902
tor-relais2.lin 193.190.230.37   2 u    -   64    1   11.266    0.395   0.991
+mail.zq1.de     124.216.164.14   2 u    1   64    1   12.994    0.056   1.216
ntp.netviscom.c 199.102.46.70    2 u    1   64    1  120.971    3.222   1.101
167.86.76.95 (j 237.17.204.95    2 u    -   64    1   16.601    2.706   0.905
y.ns.gin.ntt.ne 249.224.99.213   2 u    1   64    1   18.689   -6.426   1.044
ntp1.wtnet.de   10.129.9.96      2 u    1   64    1   13.943   -0.691   0.415
Check the time and date:
$ date -R
Mon, 08 Jun 2020 22:06:45 +0200
Some of them are not required for the installation of Riak CS, but just nice to have.
$ sudo apt-get update

$ sudo apt-get install -y curl htop joe nmap git


$ sudo apt-get install -y build-essential autoconf libncurses5-dev openssl libssl-dev fop xsltproc unixodbc-dev libpam0g-dev

$ sudo apt-get install -y  libwxgtk3.0-dev libwxbase3.0-0v5 libwxbase3.0-dev openjdk-10-jdk maven libxml2-utils
If the libxml2-utils packet is not present, the configure of Erlang results in this error message:
*********************************************************************
**********************  DOCUMENTATION INFORMATION  ******************
*********************************************************************

documentation  :
                xmllint is missing.
                Using fakefop to generate placeholder PDF files.
OTP 19.3 wants OpenSSL 1.0.x.
If it is not present, the configure of Erlang results in such error messages:
*********************************************************************
**********************  APPLICATIONS DISABLED  **********************
*********************************************************************

crypto         : No usable OpenSSL found
ssh            : No usable OpenSSL found
ssl            : No usable OpenSSL found
deploying OpenSSL 1.0.x is well explained here:
curl https://www.openssl.org/source/openssl-1.0.2r.tar.gz | tar xfz - && cd openssl-1.0.2r && ./config --prefix=/usr/local/openssl-1.0.2r -fpic && make && sudo make install && cd .. && rm -rf openssl-1.0.2r
This will create:
/usr/local/openssl-1.0.2r
If these steps are done, the installation of Erlang works well
$ cd ~
$ wget http://s3.amazonaws.com/downloads.basho.com/erlang/otp_src_R16B02-basho10.tar.gz
$ tar xvzf otp_src_R16B02-basho10.tar.gz
$ cd OTP_R16B02_basho10/
./otp_build autoconf
$ ./configure --with-ssl=/usr/local/openssl-1.0.2r
$ make
$ sudo make install
Test if Erlang has been installed.
$ which erl
/usr/local/bin/erl

$ erl --version
Erlang R16B02_basho10 (erts-5.10.3) [source] [smp:4:4] [async-threads:10] [hipe] [kernel-poll:false] [frame-pointer]
According to this information, the latest version of Riak CS is still 2.1.0 (from 2015/2016) and it requires Riak 2.1.1 and Stanchion 2.1.0.
Compatibility: Riak CS 2.1.2 and Stanchion 2.1.2 have been successfully tested with Riak 2.1.3, 2.1.4, 2.2.3, 2.2.6 and 2.9.0 (release candidate). Please see the Release Notes for Riak CS for upgrade information at https://github.com/basho/riak_cs/blob/2.1.2/RELEASE-NOTES.md.
http://riak-users.197444.n3.nabble.com/Riak-CS-2-1-2-and-Stanchion-2-1-2-Release-td4035591.html
$ cd ~
$ wget https://github.com/basho/riak/archive/riak-2.9.2.tar.gz
$ tar -xvzf riak-2.9.2.tar.gz
$ ccd riak-riak-2.9.2
$ make rel
Create a symbolic link riak.
$ ln -s ~/riak-riak-2.9.2/ ~/riak
Insert this line into the file riak.conf.
$ echo "leveldb.limited_developer_mem = on" >> ~/riak/rel/riak/etc/riak.conf
Some entries inside the file ~/riak/rel/riak/etc/riak.conf need to be modified. For a single node scenario the default address 127.0.0.1 for localhost is fine, but for a multi node installation, these values need to be present/modified.
nodename = riak@10.0.3.10
listener.http.internal = 10.0.3.10:8098
listener.protobuf.internal = 10.0.3.10:8087
Increase the time, Riak waris for Erlang
$ echo 'export WAIT_FOR_ERLANG=30' >> ~/.bashrc
$ bash
Start Riak.
$ ~/riak/rel/riak/bin/riak start

$ nmap localhost
...
PORT     STATE SERVICE
22/tcp   open  ssh
8087/tcp open  simplifymedia
8099/tcp open  unknown
Add the riak binary folder to the search path.
$ echo 'export PATH=$PATH:/home/pi/riak/rel/riak/bin/' >> ~/.bashrc
$ bash
Test the search path and test Riak.
$ riak ping localhost
pong
$ riak-admin test
Successfully completed 1 read/write cycle to 'riak@127.0.0.1'
The compilation of Stanchion 2.1.1 and 2.1.2 failed but the compilation of the stanchion git repository worked well on June 10th 2020:
$ git clone https://github.com/basho/stanchion.git
$ cd stanchion/
$ make rel
==> rel (get-deps)
==> stanchion (get-deps)
...<many lines>...
==> rel (compile)
==> stanchion (compile)
==> rel (generate)
Schema: ["/home/pi/stanchion/rel/stanchion/lib/00-stanchion.schema",
        "/home/pi/stanchion/rel/stanchion/lib/11-erlang_vm.schema"]
Some entries inside the file ~/stanchion/rel/stanchion/etc/stanchion.conf need to be modified. For a single node scenario the default address 127.0.0.1 for localhost is fine, but for a multi node installation, these values need to be present/modified.
listener = 10.0.3.10:8085
riak_host = 10.0.3.10:8087
nodename = stanchion@10.0.3.10
Even in case of a multi-node deployment, stanchion is only started later on a single node.
The compilation of Riak CS 2.1.1 failed but the compilation of the riak_cs git repository worked well on June 10th 2020:
$ git clone https://github.com/basho/riak_cs.git
$ cd riak_cs
$ make rel
Building riak-cs
==> rel (get-deps)
==> riak_cs (get-deps)
...<many lines>...
Building riak-cs
==> rel (riak_test_compile)
==> riak_cs (riak_test_compile)
...<many lines>...
cp ebin/riak_cs_wm_utils.beam riak_test/ebin
cp ebin/twop_set.beam riak_test/ebin
Building riak-cs
==> rel (generate)
Schema: ["/home/pi/riak_cs/rel/riak-cs/lib/10-riak_cs.schema",
        "/home/pi/riak_cs/rel/riak-cs/lib/11-erlang_vm.schema"]
Modify inside the file ~/riak_cs/rel/riak-cs/etc/riak-cs.conf this line
anonymous_user_creation = off
into this line
anonymous_user_creation = on
and check if these values are correct:
listener = 10.0.3.10:8080
riak_host = 10.0.3.10:8087
stanchion_host = 10.0.3.10:8085
nodename = riak-cs@10.0.3.10
The file ~/riak/rel/riak/etc/advanced.config requires this content:
[
{riak_kv, [
	  {add_paths, ["/home/pi/riak_cs/ebin/"]},
	  {storage_backend, riak_cs_kv_multi_backend},
	  {multi_backend_prefix_list, [{<<"0b:">>, be_blocks}]},
	  {multi_backend_default, be_default},
	  {multi_backend, [
	      {be_default, riak_kv_eleveldb_backend, [
		  {total_leveldb_mem_percent, 30},
		  {data_root, "/home/pi/riak/rel/riak/data/leveldb"}
	      ]},
	      {be_blocks, riak_kv_bitcask_backend, [
		  {data_root, "/home/pi/riak/rel/riak/data/bitcask"}
	      ]}
	  ]}
  ]},

  ... <old lines in the file> ...

].
Insert a line into this file riak.conf.
$ echo "buckets.default.allow_mult = true" >> ~/riak/rel/riak/etc/riak.conf
append these lines into the file
* soft nofile 65536
* hard nofile 200000
into this file:
/etc/security/limits.conf
to prevent his error message of Riak
!!!!
!!!! WARNING: ulimit -n is 1024; 65536 is the recommended minimum.
!!!!
After a reboot the output of ulimit -n should be 65536 and not 1024.
$ ulimit -n
65536
Modify the hostname in the file hostname
$ sudo joe /etc/hostname
In this scenario we name the master riak10. After a reboot the hostname has changed:
$ uname -a
Linux riak10 4.19.118-v7+ #1311 SMP Mon Apr 27 14:21:24 BST 2020 armv7l GNU/Linux
$ hostname
riak10
The further Riak nodes will be called riak11, riak12 and riak13.
Insert these lines into the file /etc/hosts
10.0.3.10       riak10
10.0.3.11       riak11
10.0.3.12       riak12
10.0.3.13       riak13
Start Riak KV.
$ ~/riak/rel/riak/bin/riak start

$ nmap localhost
...
PORT     STATE SERVICE
22/tcp   open  ssh
8087/tcp open  simplifymedia
8099/tcp open  unknown
Start Stanchion.
$ ~/stanchion/rel/stanchion/bin/stanchion start

$ nmap localhost
...
PORT     STATE SERVICE
22/tcp   open  ssh
8085/tcp open  unknown
8087/tcp open  simplifymedia
8099/tcp open  unknown
Start Riak CS
$ ~/riak_cs/rel/riak-cs/bin/riak-cs start

$ nmap localhost
...
PORT     STATE SERVICE
22/tcp   open  ssh
8080/tcp open  http-proxy
8085/tcp open  unknown
8087/tcp open  simplifymedia
8099/tcp open  unknown

$ free -h
            total        used        free      shared  buff/cache   available
Mem:          975Mi       152Mi       104Mi       3.0Mi       719Mi       756Mi
Swap:          99Mi       5.0Mi        94Mi
Create an admin user (this is only possible if anonymous_user_creation was set to value on inside the file ~/riak_cs/rel/riak-cs/etc/riak-cs.conf before).
$ curl -H 'Content-Type: application/json' \
  -XPOST http://localhost:8080/riak-cs/user \
  --data '{"email":"admin@example.com", "name":"admin"}'
{
"email":"admin@example.com",
"display_name":"admin",
"name":"admin",
"key_id":"PD-PR0WDC0EY1YCHDRDH",
"key_secret":"gUHbRrTNktEW7h0T6FSNhSU9RTw8ejRYWMC4zg==",
"id":"22a3d69bab86b16e330d7f09ca3ac27f340a52551071a42d7fb067f0eee464ac",
"status":"enabled"
}
To access the Riak CS port from another node, modify the value of listener inside the file /home/pi/riak_cs/rel/riak-cs/etc/riak-cs.conf
listener = 10.0.3.10:8080
Restart Riak CS
$ ~/riak_cs/rel/riak-cs/bin/riak-cs restart
ok
Just these lines need to be modified:
access_key = PD-PR0WDC0EY1YCHDRDH
host_base = 10.0.3.10:8080
host_bucket = 10.0.3.10:8080
secret_key = gUHbRrTNktEW7h0T6FSNhSU9RTw8ejRYWMC4zg==
use_https = False
Now s3cmd should work properly with the Riak CS service, if the port of Riak CS is accessible.
$ nmap 10.0.3.10
...
PORT     STATE SERVICE
22/tcp   open  ssh
8080/tcp open  http-proxy
8099/tcp open  unknown


$ s3cmd mb s3://testbucket
Bucket 's3://testbucket/' created
$ s3cmd ls
2020-06-10 20:38  s3://testbucket
$ s3cmd put /etc/hostname s3://testbucket
WARNING: Module python-magic is not available. Guessing MIME types based on file extensions.
upload: '/etc/hostname' -> 's3://testbucket/hostname'  [1 of 1]
11 of 11   100% in    0s    31.33 B/s  done
$ s3cmd ls s3://testbucket
2020-06-10 20:39        11   s3://testbucket/hostname
$ s3cmd get s3://testbucket/hostname /tmp/
download: 's3://testbucket/hostname' -> '/tmp/hostname'  [1 of 1]
11 of 11   100% in    0s   286.53 B/s  done
$ s3cmd del s3://testbucket/hostname
delete: 's3://testbucket/hostname'
$ s3cmd rb s3://testbucket
Bucket 's3://testbucket/' removed
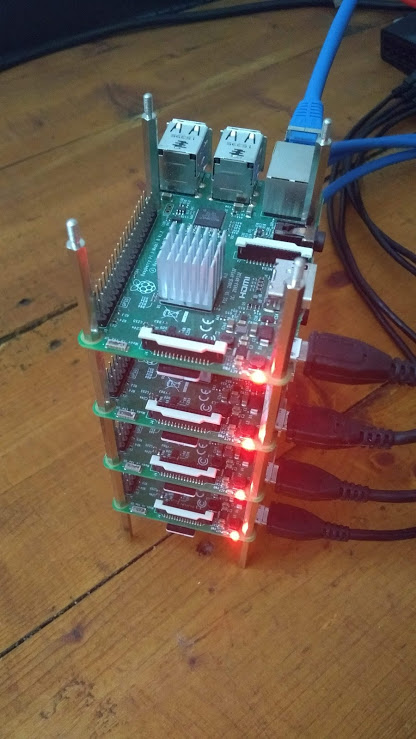
After we created a working single-node scenario, depolying a multi-node scenario is the next logical step. This section explains the required steps for each additional node. In this tutorial, we deploying a 4-node Riak CS cluster.
The Riak data storage system and Riak CS must be deployed on each node. The Stanchion component must be deployed on a single node inside the cluster to keep user IDs and bucket names unique inside the cluster.

First copy the microSD memory card to a local file. Check which one is the correct device! If you use an internal card reader, it is often /dev/mmcblk0.
$ sudo dd bs=4M if=/dev/mmcblk0 of=~/tmp/masterimage.img status=progress
$ sudo sync
Write the image to a new microSD memory card.
$ sudo dd bs=4M if=~/tmp/masterimage.img of=/dev/mmcblk0 status=progress
32010928128 bytes (32 GB, 30 GiB) copied, 1214,96 s, 26,3 MB/s
$ sudo sync
If the microSD memory cards are not 100% equal to each other, it my be required to repair the file system on the second partion:
$ sudo fsck.ext4 /dev/mmcblk0p2
Mount the second partition of the micro SD memory card:
$ sudo mount /dev/mmcblk0p2 /media/test
Modify the IP address in the file dhcpcd.conf:
$ sudo joe /media/test/etc/dhcpcd.conf
Modify the IP address in this line to the correct value:
static ip_address=10.0.3.10/16
Modify the hostname in the file hostname
$ sudo joe /media/test/etc/hostname
In this scenario, the Riak master node was called riak10 and the further Riak nodes were called riak11, riak12 and riak13.
To access the Riak CS port from another node, modify the value of listener inside the file riak-cs.conf to the correct value.
$ sudo joe /media/test/home/pi/riak_cs/rel/riak-cs/etc/riak-cs.conf

listener = 10.0.3.10:8080
Some entries inside the file riak.conf need to be modified. For a single node scenario the default address 127.0.0.1 for localhost is fine, but for a multi node installation, these values need to be present/modified.
$ sudo joe /media/test/home/pi/riak/rel/riak/etc/riak.conf

nodename = riak@10.0.3.10
listener.http.internal = 10.0.3.10:8098
listener.protobuf.internal = 10.0.3.10:8087
Check and modify inside the file ~/riak_cs/rel/riak-cs/etc/riak-cs.conf these values
listener = 10.0.3.10:8080
riak_host = 10.0.3.10:8087
stanchion_host = 10.0.3.10:8085
nodename = riak-cs@10.0.3.10
Stanchion stanchion_host runs only on the first node but the other values need to match the node where the individual node.
Umount the microSD card.
# sudo umount /media/test
These steps need to be done for all additional Riak nodes
If all nodes run now, it is useful to distribute the own public key from the workstation to the Riak nodes for SSH login without a password:
$ ssh-copy-id -i ~/.ssh/id_rsa.pub pi@10.0.3.10
$ ssh-copy-id -i ~/.ssh/id_rsa.pub pi@10.0.3.11
$ ssh-copy-id -i ~/.ssh/id_rsa.pub pi@10.0.3.12
$ ssh-copy-id -i ~/.ssh/id_rsa.pub pi@10.0.3.13
New hostnames and/or IP addresses cause often trouble with Riak installations. In this case remove the old ring on all nodes.
$ rm -rf ~/riak/rel/riak/data/*
Start Riak on all nodes:
$ ~/riak/rel/riak/bin/riak start
Start Stanchion on the first node:
$ ~/stanchion/rel/stanchion/bin/stanchion start
Start Riak CS on all nodes:
$ ~/riak_cs/rel/riak-cs/bin/riak-cs start
Shows if Riak runs:
$ ~/riak/rel/riak/bin/riak ping
pong
Shows if Stanchion runs:
$ ~/stanchion/rel/stanchion/bin/stanchion ping
pong
Shows if Riak CS runs:
$ ~/riak_cs/rel/riak-cs/bin/riak-cs ping
pong
Shows the current host/port address for Stanchion.
$ ~/riak_cs/rel/riak-cs/bin/riak-cs-admin stanchion show
Current Stanchion Adderss: http://10.0.3.10:8085
At this point Riak and Riak-cs are working on all nodes. Join from each new node to the cluster of the first node.
$ riak-admin cluster join riak@10.0.3.10
Success: staged join request for 'riak@10.0.3.11' to 'riak@10.0.3.10'
Next, plan and commit the changes:
$ riak-admin cluster plan
$ riak-admin cluster commit
Cluster changes committed

$ riak-admin cluster status
---- Cluster Status ----
Ring ready: true

+--------------------+------+-------+-----+-------+
|        node        |status| avail |ring |pending|
+--------------------+------+-------+-----+-------+
| (C) riak@10.0.3.10 |valid |  up   | 25.0|  --   |
|     riak@10.0.3.11 |valid |  up   | 25.0|  --   |
|     riak@10.0.3.12 |valid |  up   | 25.0|  --   |
|     riak@10.0.3.13 |valid |  up   | 25.0|  --   |
+--------------------+------+-------+-----+-------+

Key: (C) = Claimant; availability marked with '!' is unexpected
If you erased the ring before, you also need to create a new user account
Create an admin user (this is only possible if anonymous_user_creation was set to value on inside the file ~/riak_cs/rel/riak-cs/etc/riak-cs.conf before).
$ curl -H 'Content-Type: application/json' \
  -XPOST http://10.0.3.10:8080/riak-cs/user \
  --data '{"email":"admin@example.com", "name":"admin"}'
{
"email":"admin@example.com",
"display_name":"admin",
"name":"admin",
"key_id":"711BGMKKAZNNSIZTA3XS",
"key_secret":"nKFyDXfAHNeRX7gYQlV2ZZhYoBX-k7pQ_YdUFQ==",
"id":"593bcfe3174d8737fa539d3b8efdcb1ddf44c493b19736d9b1a7c7415c4d78f6",
"status":"enabled"
}
Many hints of this tutorial have been taken from the work of Henry Cocos and from these sources:
- http://docs.basho.com/riak/cs/2.1.1/tutorials/fast-track/local-testing-environment/
- http://docs.basho.com/riak/cs/2.1.1/tutorials/fast-track/test-installation/.
- https://www.howtoforge.com/tutorial/how-to-setup-riak-kv-cluster-on-ubuntu-1804/
If Riak KV has been started, it is possible to check if its running via the command riak ping.
$  ~/riak/rel/riak/bin/riak ping
pong
The Riak KV configurations can be checked with:
$ riak chkconfig

config is OK
-config /home/pi/riak-riak-2.9.2/rel/riak/data/generated.configs/app.2020.06.13.16.55.46.config -args_file /home/pi/riak-riak-2.9.2/rel/riak/data/generated.configs/vm.2020.06.13.16.55.46.args -vm_args /home/pi/riak-riak-2.9.2/rel/riak/data/generated.configs/vm.2020.06.13.16.55.46.args
If Riak KV is running, it is possible to check if its able to read and write data via the command riak-admin test.
$ ~/riak/rel/riak/bin/riak-admin test
Successfully completed 1 read/write cycle to 'riak@127.0.0.1'
The logfiles are here:
~/riak/rel/riak/log/
The Riak KV ring is here:
~/riak/rel/riak/data/