Stereo mapping
Tutorial about mapping an environment using saved stereo images in a database, from a directory or a side-by-side video file. If you have a Bumblebee2 stereo camera, RTAB-Map can already use it (see Source menu). To use a stereo camera under ROS, see this tutorial.
- Parameters
- Process a directory of stereo images
- Process a database of stereo images
- Process a side-by-side stereo video (with calibration example)
To use a any stereo camera with RTAB-Map under ROS, refer to stereo configuration of the rtabmap_ros ROS package. The database below was generated using this launch file test_stereo_data_recorder.launch and a calibrated Bumblebee2 camera: roslaunch rtabmap_ros test_stereo_data_recorder.launch

New in RTAB-Map 0.10.0
- Download and unzip this archive stereo_20Hz.zip (132 MB) containing 1034 stereo images at 20 Hz. (Updated 15/09/15)
- In Preferences->Source:
- set input rate to 20 Hz,
- set source type to stereo,
- set calibration file path to path of
stereo_20Hz_left.yamlof the archive, - scroll down to Stereo section and select Images driver
- fill left images path and right images path with those in the archive
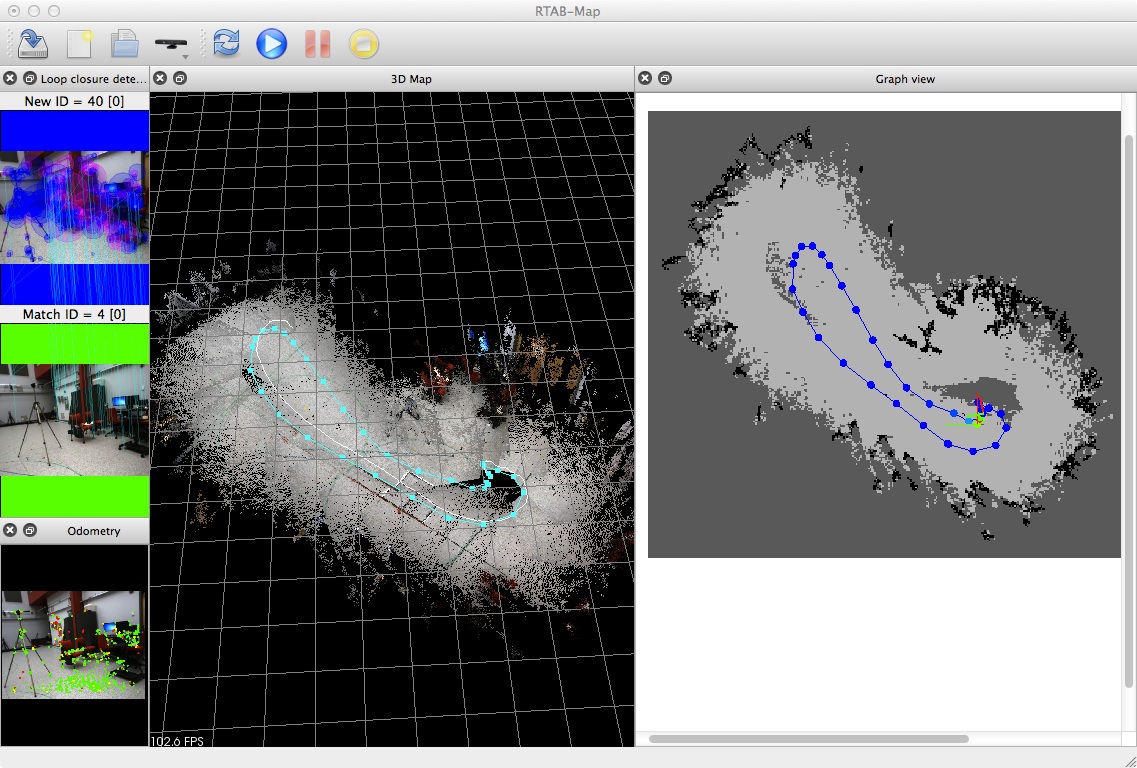
- Close Preferences, click on New database, then press start! When the mapping is finished, you should have something like the screenshot above.
-
Clone the bag_tools package in your catkin workspace (the file stereo_sequence_publisher.py is required)
$ cd ~/catkin_ws
$ git clone https://github.com/srv/srv_tools src/srv_tools
$ catkin_make
-
Then call the launch file stereo_20Hz.launch after unzipping stereo_20Hz.zip in Downloads (Updated 17/09/27, backward compatibility with Indigo):
$ cd Downloads/stereo_20Hz $ roslaunch stereo_20Hz.launch-
Issue Ubuntu 16.04/Kinetic, if you get "
ImportError: No module named cv" error, installpython-opencvand do "export PYTHONPATH=/usr/lib/python2.7/dist-packages:$PYTHONPATH". For latest Kinetic updates, we need to change the following in stereo_sequence_publisher.py://import cv import cv2 ... #image_l = cv.LoadImage(image_file_l) #image_r = cv.LoadImage(image_file_r) image_l = cv2.imread(image_file_l) image_r = cv2.imread(image_file_r)
-
Issue Ubuntu 16.04/Kinetic, if you get "
- Download this database stereo_20Hz.db (204 MB) containing 1034 stereo images at 20 Hz.
- Create a new database File -> "New database...".
- Select the downloaded database as source: "Menu Detection -> Select source -> More options...", select database as source type, then scroll down to set the database path (just under Database group). Check "Ignore odometry...", uncheck "Use database stamps as input rate." and set Input rate at the top to 20 Hz. If you are asking to set detection rate and buffer to 0, answer "No".
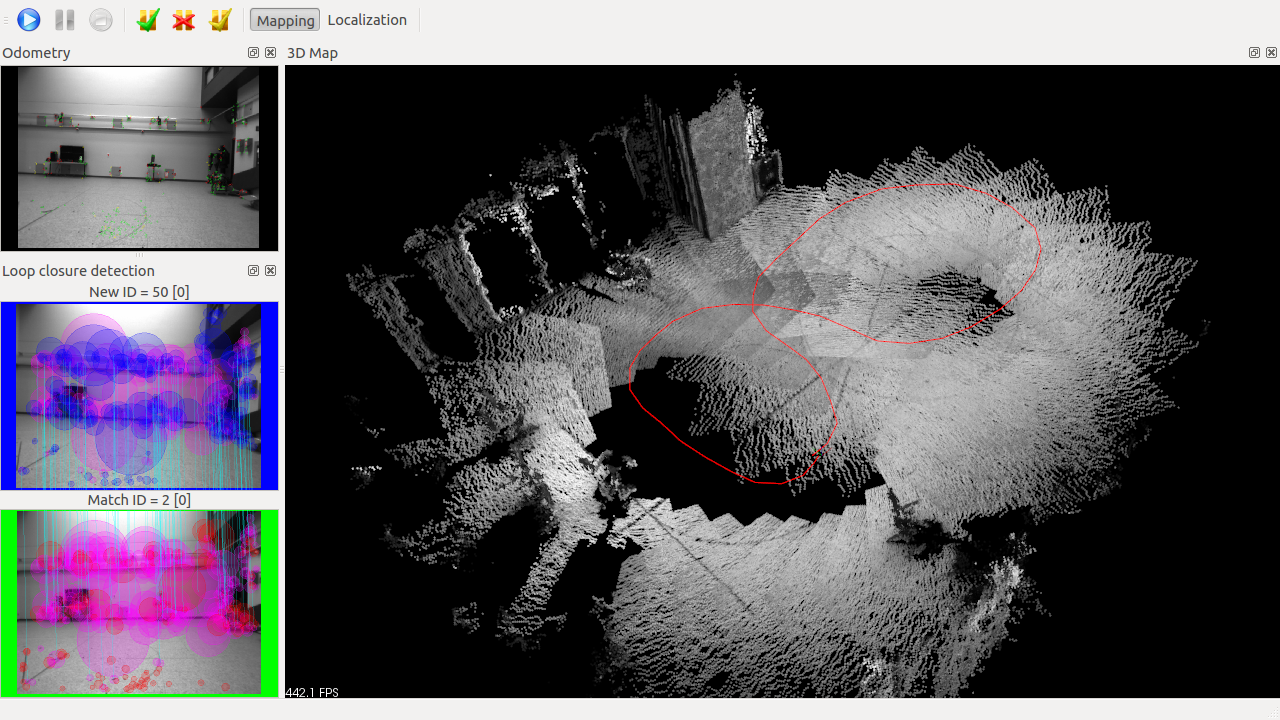
- Press start! When the mapping is finished, you should have something like the screenshot above.
New in RTAB-Map 0.10.1
- Download these videos stereo20Hz_chessboard33mm.avi (5 MB) and stereo20Hz_test.avi (8 MB). Add
.aviif downloaded videos don't have an extension. The first one will be used for calibration. I think you should have installed OpenCV with h264 codec support (e.g., OpenCV is built with FFMPEG+x264) to read these videos.
- Open "Preferences" menu and click "Source" tab. Select "Stereo" source type, set a name for the calibration name field (e.g. the camera name like "bumblebee"), select under Stereo group box the "Video Side-by-Side" driver, select
stereo20Hz_chessboard33mm.avivideo file and left unchecked "Rectify image" checkbox: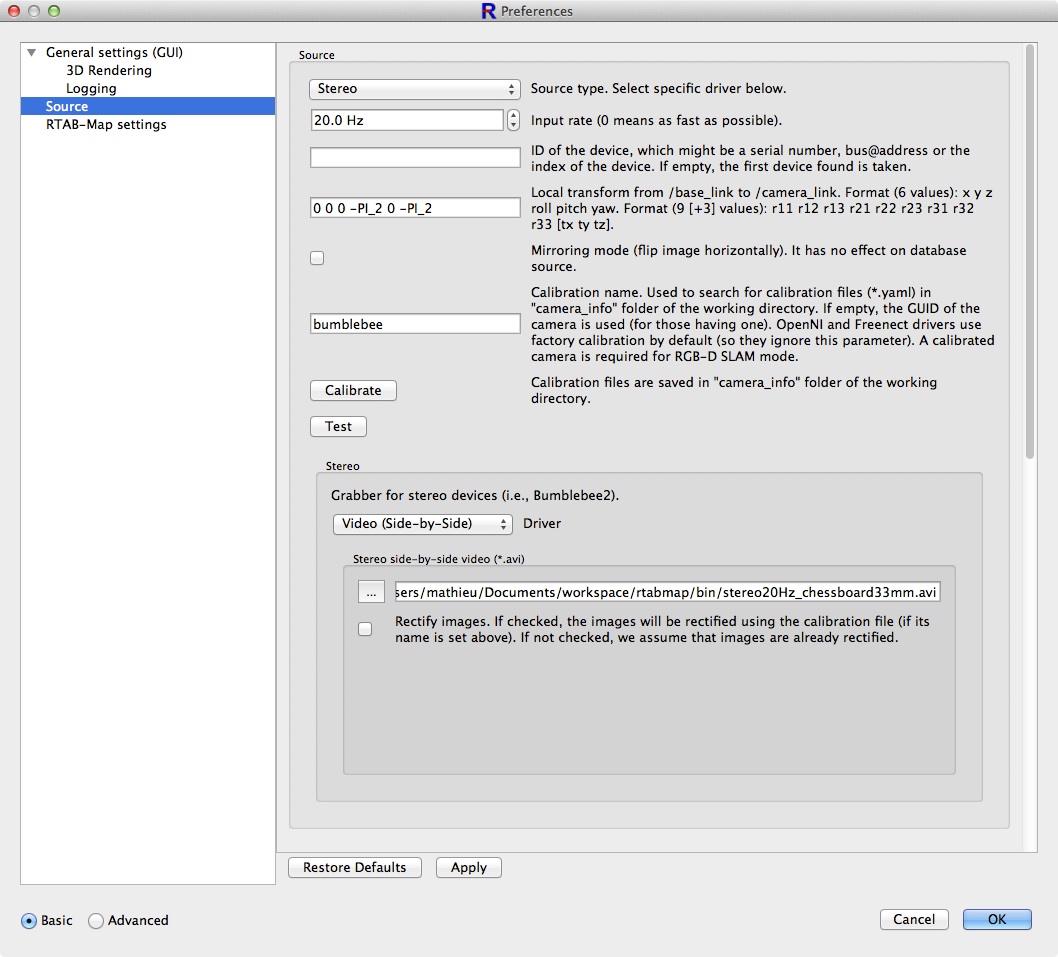
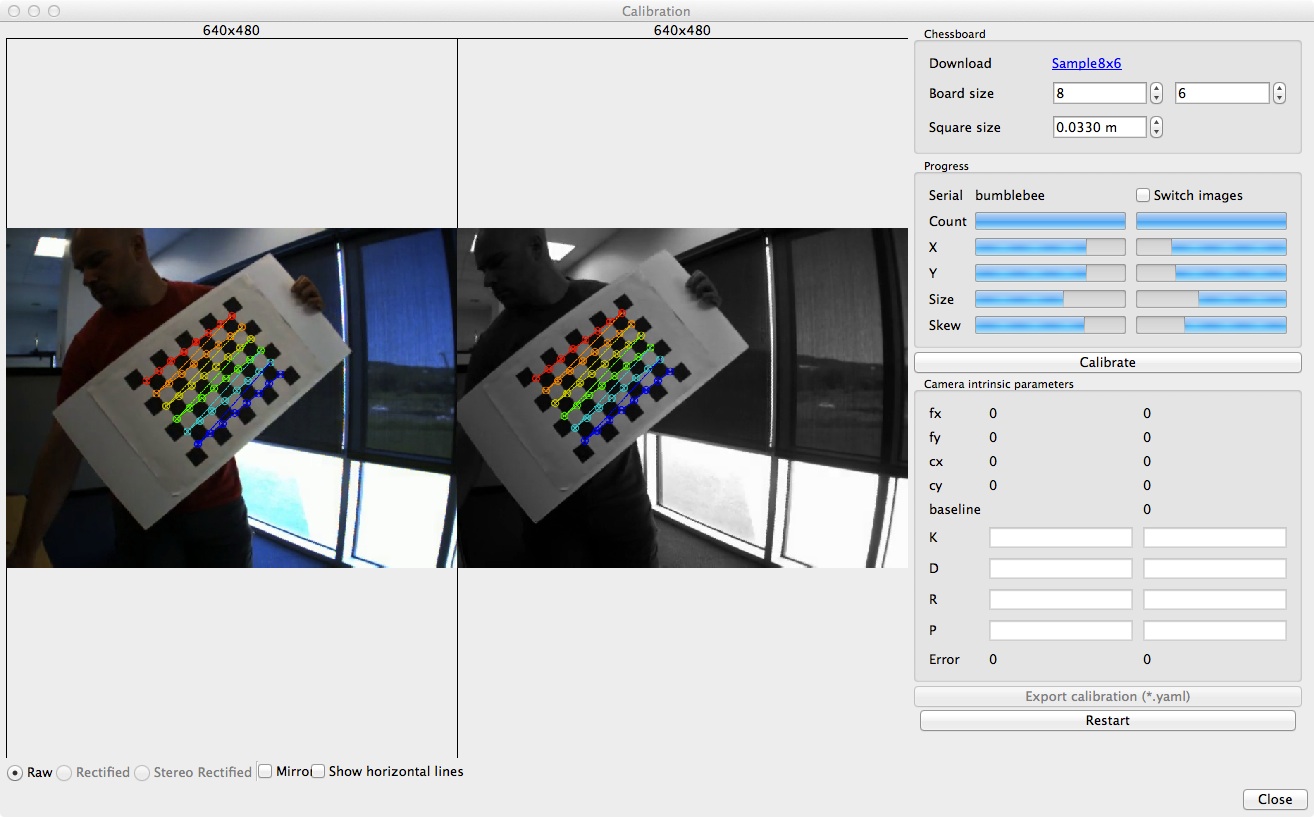
- Make sure the input rate is set to 20 Hz like the video. Click "Calibrate", you should see the Calibration dialog opening and already processing the calibration video:
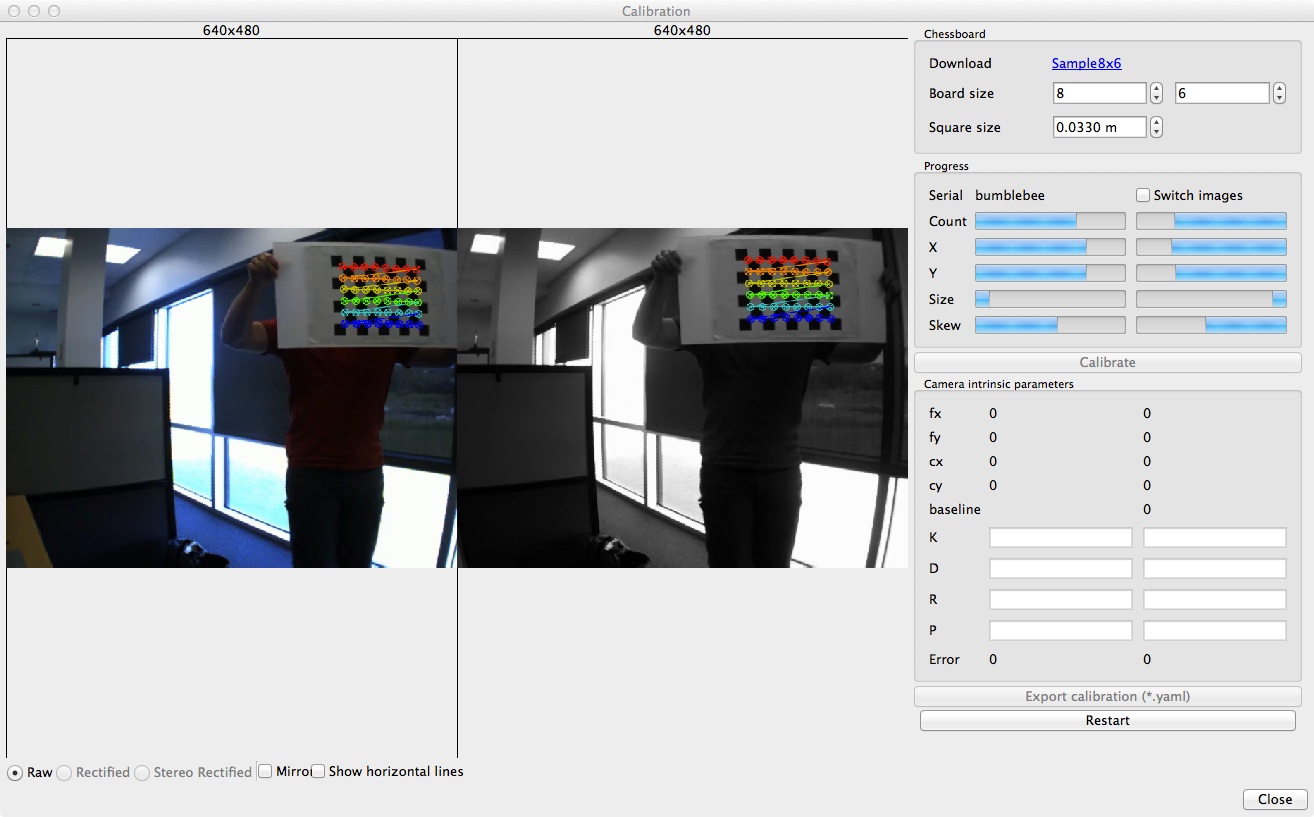
- If you use your own calibration video, move the chessboard as in this demonstration video (x axis, y axis, size and skew).
- Wait until the button "Calibrate" is enabled (don't forget to set the chessboard size, here is 0.033 m), then click on it to start the calibration (it may take a couple of minutes!):
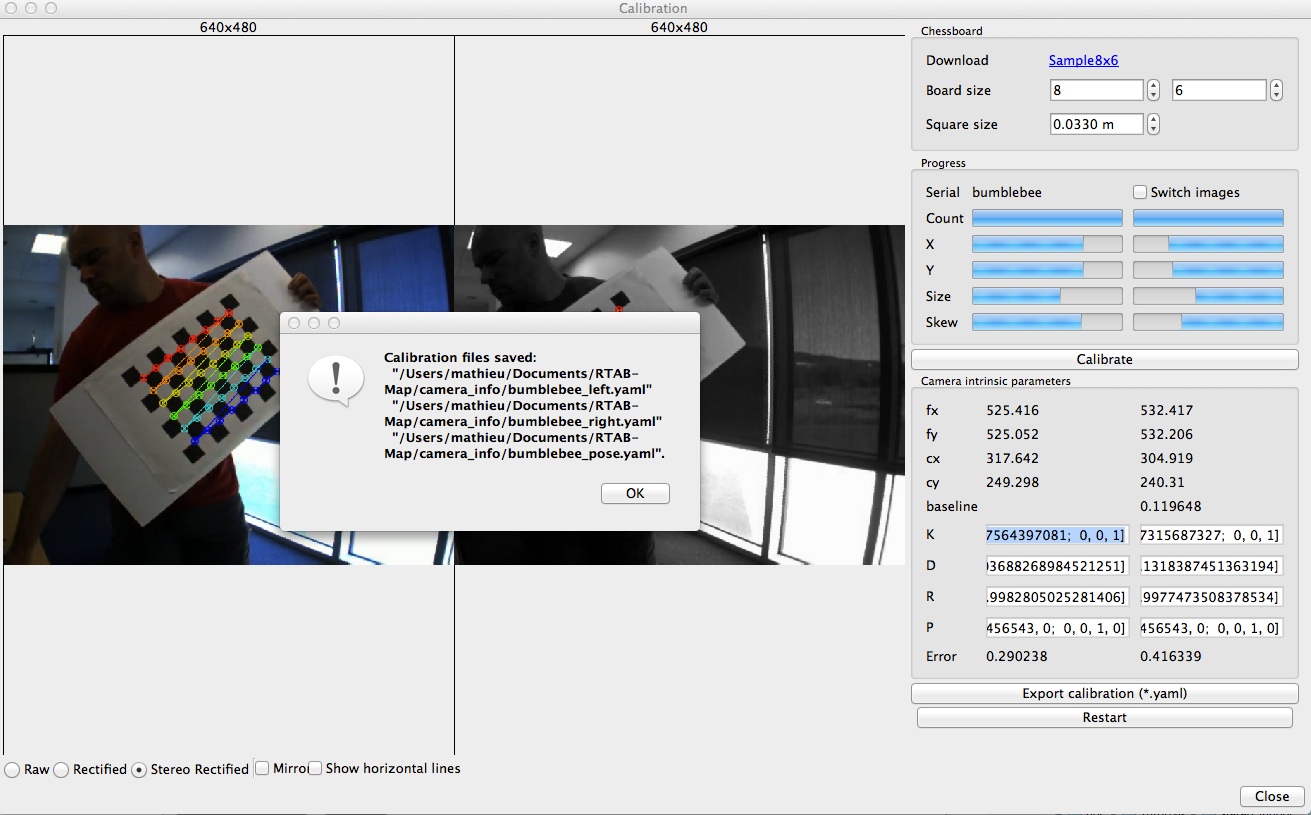
- When the calibration is done, click on "Export calibration (*.yaml)". Don't change the saving folder, which is the one used to look for calibration files:
- Close the Calibration dialog.
- Back to Preferences dialog under Source tab, select
stereo20Hz_test.avivideo file and check the "Rectify image" checkbox: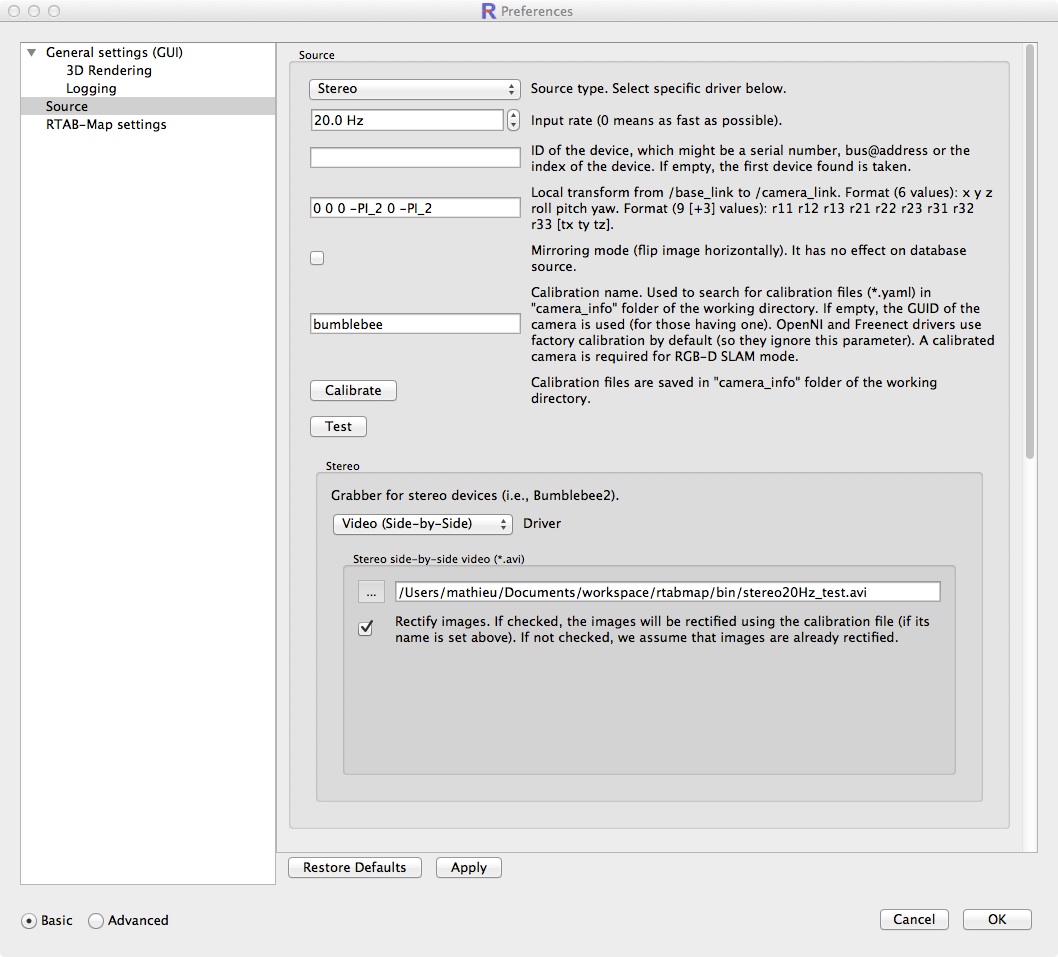
- Check also "Generate disparity image and convert it to depth" to get better disparity estimation for this kind of environment.
- Other option is to change the local stereo matching approach under Preferences (Advanced)->Stereo, uncheck "Use optical flow" and increase Window height to 15:

- Other option is to change the local stereo matching approach under Preferences (Advanced)->Stereo, uncheck "Use optical flow" and increase Window height to 15:
- Close the Preferences dialog.
- Click on "New database", then press "Start"! When the mapping is finished, you should have something like this: