RunningTheWebappInEclipse
Instructions for setting up and running the opentripplanner-webapp and opentripplanner-api-webapp in Eclipse.
Before getting started, we assume that you've already done the following:
-
Successfully downloaded and compiled the OTP source code within Eclipse. See GettingStartedEclipse for more details.
-
Configured the
opentripplanner-api-webappwith information about the location of your graph file, as well as some routing settings. See ConfiguringTheWebapp for more details. -
Successfully setup an instance of Tomcat within Eclipse. See
for more details.
-
Added both the
opentripplanner-api-webappandopentripplanner-webappmodules to your Tomcat server instance. Again, see
As described in further detail in , right click on your server instance and select "Start" to start the Tomcat server. Eventually, the server will finish its startup sequence and the server will be listed as started. Note that startup is not immediate, as it takes a while to load and initialize the serialized trip planner graph, especially for larger graphs. Be sure to check your console output for any exceptions thrown on server startup.
If all goes well, you should be able to browse to the OpenTripPlanner webapp: http://localhost:8080/opentripplanner-webapp/
The interface should looking something like:
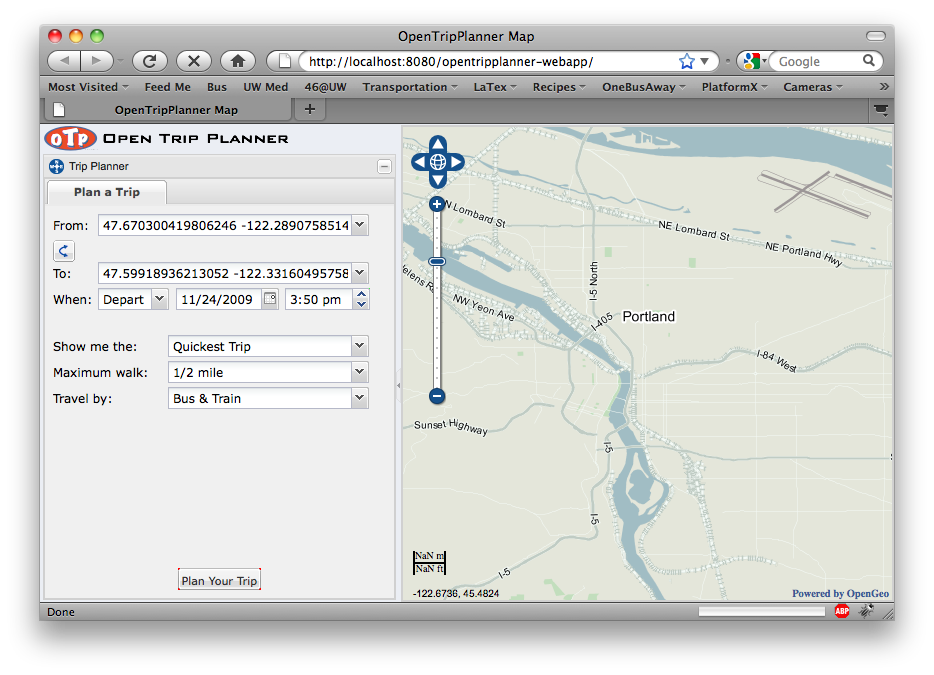
You can now plan your trip like you would with any trip planner, with a couple of caveats:
-
The "from" and "to" fields aren't hooked up to a geocoder yet, so you can't plan using street addresses. You can right-click on points on the map and select "Start a trip here" or "End a trip here" to set the starting and ending locations. You can also manually enter lat-lon locations (either comma- or space-separated) or specify an OpenTripPlanner graph Vertex id as the starting or ending point.
-
The various trip constraints concerning walking distance and travel mode aren't necessarily implemented yet.
If your trip is successfully planned, you should see something like:
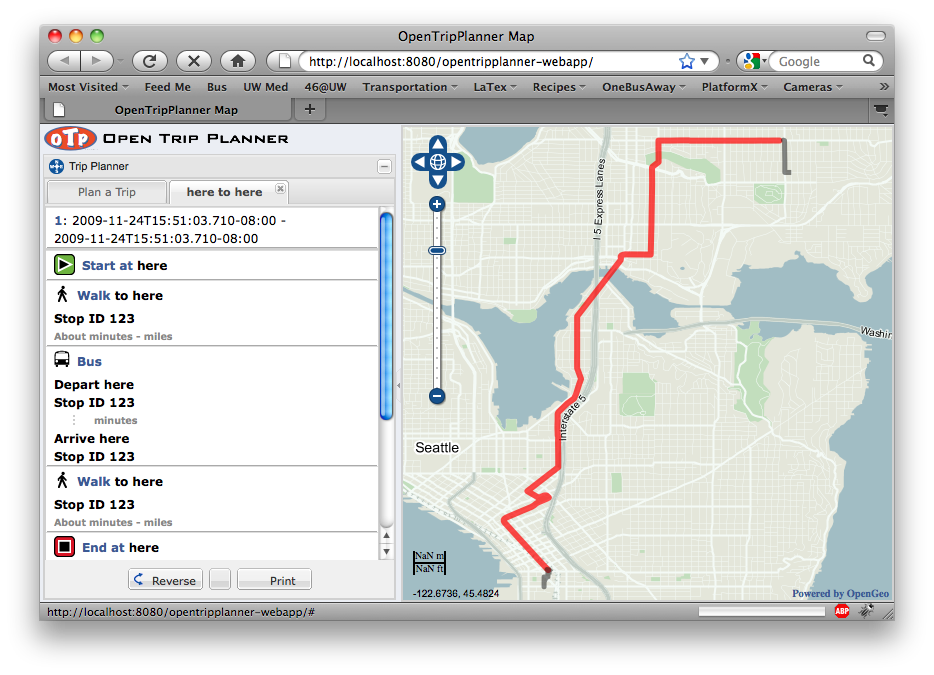
Note that a lot of work still clearly needs to be done on the interface in terms of narrative generation and map icons.