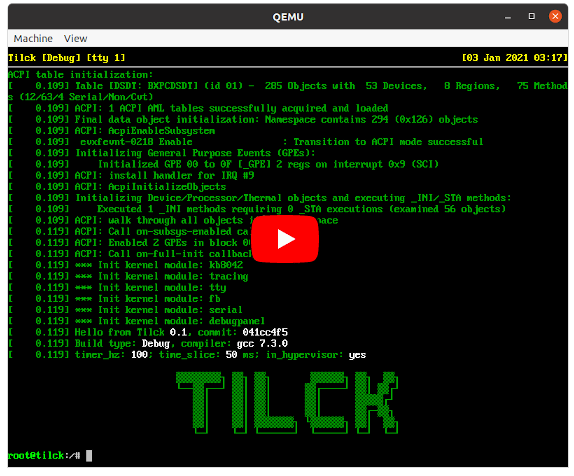
Tilck is an educational monolithic x86 kernel designed to be Linux-compatible at
binary level. Project's small-scale and simple design makes it the perfect playground
for playing in kernel mode while retaining the ability to compare how the very same
usermode bits run on the Linux kernel as well. That's a rare feature in the
realm of educational kernels. Because of that, building a program for Tilck requires just
a i686-musl toolchain from bootlin.com. Tilck
has no need to have its own set of custom written applications, like most educational
kernels do. It just runs mainstream Linux programs like the BusyBox suite.
While the Linux-compatibility and the monolithic design might seem a limitation from
the OS research point of view, on the other side, such design bring the whole project
much closer to real-world applications in the future, compared to the case where
some serious (or huge) effort is required to port pre-existing software on it. Also,
nothing stops Tilck from implementing custom non-Linux syscalls that aware apps might
take advantage of.
In the long term, depending on how successful the project will be, Tilck might
become suitable for embedded systems on which a fully deterministic and ultra
low-latency system is required. With a fair amount of luck, Tilck might be able
to fill the gap between Embedded Linux and typical real-time operating systems
like FreeRTOS or Zephyr. In any case, at some point it will be ported to the
ARM family and it might be adapted to run on MMU-less CPUs as well. Tilck would
be a perfect fit for that because consuming a tiny amount of RAM has always been
a key point in Tilck's design. Indeed, the kernel can boot and run on a i686 QEMU
machine with just 3 MB of memory today. Of course, that's pointless on x86, but
on an ARM Cortex-R that won't be anymore the case.
In addition to that, adding a basic support for networking and storage is part of the plans even if details have not been defined yet. Networking support might be limited to UDP + IP (at least at the beginning) and usable on a limited set of network cards. The same applies for storage: not all kinds of block devices will be supported, and a few filesystems (maybe just fat32 and ext2) will implemented in the kernel. The support for FUSE filesystems will be considered.
One major milestone for the project will be to support both networking and storage for a specific SoC like Raspberry Pi 3 (or 4) but that could possibly happen only after Tilck has been ported to ARM64.
-
An attempt to re-write and/or replace the Linux kernel. Tilck is a completely different kernel that has a partial compatibility with Linux just in order to take advantage of its programs and toolchains. Also, that helps a lot to validate its correctness: if a program works correctly on Linux, it must work the same way on Tilck as well (minus not-implemented features). But, having a fair amount of Linux programs working on it, is just a starting point: with time, Tilck will evolve in a different way and it will have its own unique set of features as well.
-
A kernel suitable for a desktop operating system. No X server works on Tilck, not only because a considerable amount of extra features will be required for that, but because working in that direction is completely outside of project's goals. See also: vvaltchev#81
Tilck is fundamentally different from Linux as it does not aim to target multi-user server nor desktop machines, at all because that would be pointless: Linux is not big & complex because of a poor implementation, but because of the incredible amount of features it offers and the intrinsic complexity they require. In other words, Linux is great given the problem it solves. Tilck will offer fewer features in exchange for:
- simpler code (by far)
- smaller binary size
- extremely deterministic behavior
- ultra low-latency
- easier development & testing
- extra robustness
In conclusion, while this is still an educational project at the moment, it has been written keeping in mind those goals and it has a test infrastructure that ambitiously tries to be almost enterprise-level (see Testing).
Tilck is a preemptable monolithic (but with compile-time modules) *NIX kernel,
implementing about ~100 Linux syscalls (both via int 0x80 and sysenter) on
x86. At its core, the kernel is not x86-centric even if it runs only on x86 at
the moment. Everything arch-specific is isolated. Because of that, most of
kernel's code can be already compiled for any architecture and can be used in
kernel's unit tests.
While the kernel uses a fair amount of legacy hardware like the 8259 PICs for IRQs, the legacy 8254 PIT for the system timer, the legacy 16550 UART for serial communication, the 8042 kb controller, the 8237 ISA DMA, and the Sound Blaster 16 sound card (QEMU only), it has also support for some recent hardware features like SSE, AVX and AVX2 fpu instructions, PAT, i686 sysenter, enumeration of PCI Express devices (via ECAM) and, above all, ACPI support via ACPICA. ACPI is currently used to receive power-button events, to reboot or power-off the machine, and to read the current parameters of machine's batteries (when implemented via ACPI control methods).
The operating system has been regularly tested on physical hardware from its inception by booting it with an USB stick (see the notes below). Test machines include actual i686 machines, older x86_64 machines with BIOS-only firmware, newer x86_64 machines with UEFI+CSM and finally super-recent pure-UEFI machines. For a long time, Tilck's development strictly complied with the following rule: if you cannot test it on real hardware, do not implement it in Tilck. Only recently, that rule has been relaxed a little in order to play with SB16. It is possible that, in the future, there might be a few other drivers that would be tested only on virtual machines: their development is justified by the educational value it will bring to the operating system and the infrastructure built for them will be reused for other drivers of the same kind. But that will never become a common practice. Tilck is designed to work on real hardware, where any kind of weird things happen. Being reliable there is critical for Tilck's success.
Tilck has a simple but full-featured (both soft and hard links, file holes, memory mapping, etc.) ramfs implementation, a minimalistic devfs implementation, read-only support for FAT16 and FAT32 (used for initrd) allowing memory-mapping of files, and a sysfs implementation used to provide a full view of ACPI's namespace, the list of all PCI(e) devices and Tilck's compile-time configuration. Clearly, in order to work with multiple file systems at once, Tilck has a simple VFS implementation as well. Note: there is no support for block devices in Tilck yet, so everything is in-memory.
While Tilck uses internally the concept of thread, multi-threading is not currently
exposed to userspace (kernel threads exist, of course). Both fork() and vfork() are
properly implemented and copy-on-write is used for fork-ed processes. The waitpid()
syscall is fully implemented (which implies process groups etc.). The support for
POSIX signals is partial: custom signal handlers are supported using the rt_sigaction()
interface, but most of the SA_* flags are not supported and handlers cannot interrupt
each other, yet. rt_sigprocmask(), sys_rt_sigpending(), sys_rt_sigsuspend()
work as expected, as well as special signals like SIGSTOP, SIGCONT and SIGCHLD.
For more details, see the syscalls document.
One interesting feature in this area deserves a special mention: despite the lack of
multi-threading in userspace, Tilck has full support for TLS (thread-local storage) via
set_thread_area(), because libmusl requires it, even for classic single-threaded
processes.
In addition to the classic read() and write() syscalls, Tilck supports vectored I/O
via readv() and writev() as well. In addition to that, non blocking I/O, select()
and poll() are supported too. Fortunately, no program so far needed epoll :-)
Tilck has a console supporting more than 90% of Linux's console's features. It works in the same way (using layers of abstraction) both in text mode and in framebuffer mode. The effort to implement such a powerful console was driven by the goal to make Vim work smoothly on Tilck, with syntax highlighting etc. While it's true that such a thing has a little to do with "proper" kernel development, being able to run a "beast" like Vim on a simple kernel like Tilck, is a great achievement by itself because it shows that Tilck can run correctly programs having a fair amount of complexity.
Tilck can run a fair amount of console applications like the BusyBox suite, Vim, TinyCC, Micropython, Lua, and framebuffer applications like fbDOOM just for fun, despite that being completely out of project's scope. Check project's wiki page for more info about the software that can run on Tilck.
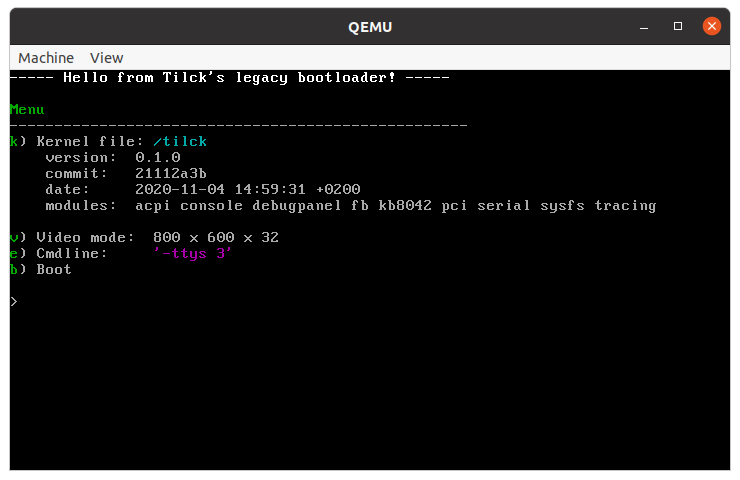
Tilck comes with an interactive bootloader working both on legacy BIOS and on
UEFI systems as well. The bootloader allows the user to choose the desired video
mode, the kernel file itself and to edit kernel's cmdline.
Tilck can be loaded by any bootloader supporting multiboot 1.0. For example,
qemu's built-in bootloader works perfectly with Tilck:
qemu-system-i386 -kernel ./build/tilck -initrd ./build/fatpart
Actually that way of booting the kernel is used in the system tests. A shortcut for it is:
./build/run_multiboot_qemu
Tilck can be easily booted with GRUB. Just edit your /etc/grub.d/40_custom
file (or create another one) by adding an entry like:
menuentry "Tilck" {
    multiboot <PATH-TO-TILCK-BUILD-DIR>/tilck
    module --nounzip <PATH-TO-TILCK-BUILD-DIR>/fatpart
    boot
}
After that, just run update-grub as root and reboot your machine.
Project's main documentation can be found in the docs/ directory. However,
Tilck's wiki can be used to
navigate through those documention files with the addition of much extra content
like screenshots. Here below, instead, there's a quick starter guide, focusing
on the most common scenarios.
The project supports a fair amount of build configurations and customizations
but building using its default configuration can be described in just a few
steps. The only true requirement for building Tilck is having a Linux
x86_64 host system or Microsoft's WSL. Steps:
- Enter project's root directory.
- Build the toolchain (just the first time) with:
./scripts/build_toolchain - Compile the kernel and prepare the bootable image with:
make
At this point, there will be an image file named tilck.img in the build
directory. The easiest way for actually trying Tilck at that point is to run:
./build/run_qemu.
The tilck.img image is, of course, bootable on physical machines as well,
both on UEFI systems and on legacy ones. Just flush the image file with dd
to a usb stick and reboot your machine.
To learn much more about how to build and configure Tilck, check the building
guide in the docs/ directory.
Tilck has unit tests, kernel self-tests, system tests (using the syscall interface), and automated interactive system tests (simulating real user input through QEMU's monitor) all in the same repository, completely integrated with its build system. In addition to that, there's full code coverage support and useful scripts for generating HTML reports (see the coverage guide). Finally, Tilck is fully integrated with the Azure Pipelines CI, which validates each pushed branch with builds and test runs in a variety of configurations. Kernel's coverage data is also uploaded to CodeCov. Below, there are some basic instructions to run most of Tilck's tests. For the whole story, please read the testing document.
Running Tilck's tests is extremely simple: it just requires to have python 3
installed on the machine. For the self-tests and the classic
system tests, run:
<BUILD_DIR>/st/run_all_tests -c
To run the unit tests instead:
-
Install the googletest library (once) with:
./scripts/build_toolchain -s build_gtest build_gmock -
Build the unit tests with:
make gtests -
Run them with:
<BUILD_DIR>/gtests
To learn much more about Tilck's tests in general and to understand how to run its interactive system tests as well, read the testing document.
With QEMU's integrated GDB server, it's possible to debug the Tilck kernel
with GDB almost as if it were a regular process. It just gets tricky when
context switches happen, but GDB cannot help with that. To debug it with GDB,
follow the steps:
-
(Optional) Prepare a debug build of Tilck, for a better debugging experience.
-
Run Tilck's VM with:
./build/run_nokvm_qemubut, remain at the bootloader stage. -
In a different terminal, run:
gdb ./build/tilck_unstripped. -
In GDB, run:
target remote :1234to connect to QEMU's gdb server. -
Set one or more breakpoints using commands like:
break kmain. -
Type
cto allow execution to continue and boot the OS by pressing ENTER in the bootloader.
In order to make the debugging experience better, Tilck comes with a set of
GDB scripts (see other/gdb_scripts). With them, it's super-easy to list
all the tasks on the system, the handles currently opened by any given process
and more. In order to learn how to take advantage of those GDB scripts and anything
else related to debugging the Tilck project, check the debugging document.
Debugging Tilck with GDB while it's running inside a VM is very convenient, but
in other cases (e.g. Tilck on real hardware) we don't have GDB support. In
addition to that, even when the kernel is running inside a VM, there are some
features that are just much more convient to expose directly from the kernel
itself rather than through GDB scripts. One way to expose kernel info to
userspace is to use sysfs, but that's not necessarily the most convenient way
for everything (still, Tilck does have sysfs implementation), especially when
interaction with the kernel itself is needed for debugging purposes. To help
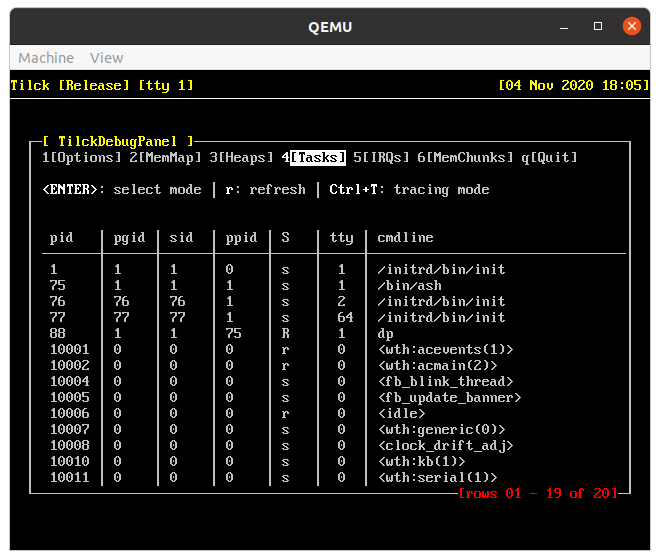
in those cases, a debug panel has been introduced inside Tilck itself. It
started as something like Linux's Magic SysRq which evolved in a sort of TUI
application with debug info plus tracing capabilities for user processes. In the
future, it will support some proper debugging features as well. To learn more
about it, check the the debugging document.
Tilck particularly distinguishes itself from many open source projects in one
way: it really cares about the user experience (where "user" means
"developer"). It's not the typical super-cool low-level project that's insanely
complex to build and configure; it's not a project requiring 200 things to be
installed on the host machine. Building such projects may require hours or even
days of effort (think about special configurations e.g. building with a
cross-compiler). Tilck instead, has been designed to be trivial to build and
test even by inexperienced people with basic knowledge of Linux. It has a
sophisticated script for building its own toolchain that works on all the major
Linux distributions and a powerful CMake-based build system. The build of Tilck
produces an image ready to be tested with QEMU or written on a USB stick. (To
some degree, it's like what the buildroot project does for Linux, but it's
much simpler.) Finally, the project includes also scripts for running Tilck
on QEMU with various configurations (BIOS boot, UEFI boot, direct (multi-)boot
with QEMU's -kernel option, etc.).
The reason for having the above mentioned features is to offer its users and
potential contributors a really nice experience, avoiding any kind of
frustration. Hopefully, even the most experienced engineers will enjoy a zero
effort experience. But it's not all about reducing the frustration. It's also
about not scaring students and junior developers who might be just curious to
see what this project is all about and maybe eager to write a simple program for
it and/or add a couple of printk()'s here and there in their fork. Hopefully,
some of those people just playing with Tilck might actually want to contribute
to its development.
In conclusion, even if some parts of the project itself are be pretty complex, at least building and running its tests must be something anyone can do.
Here below, there is a list of frequently asked questions. This list is not supposed to be exaustive and it will change over time. For the full list of questions on Tilck, check the Q & A page in the Discussions section instead.


