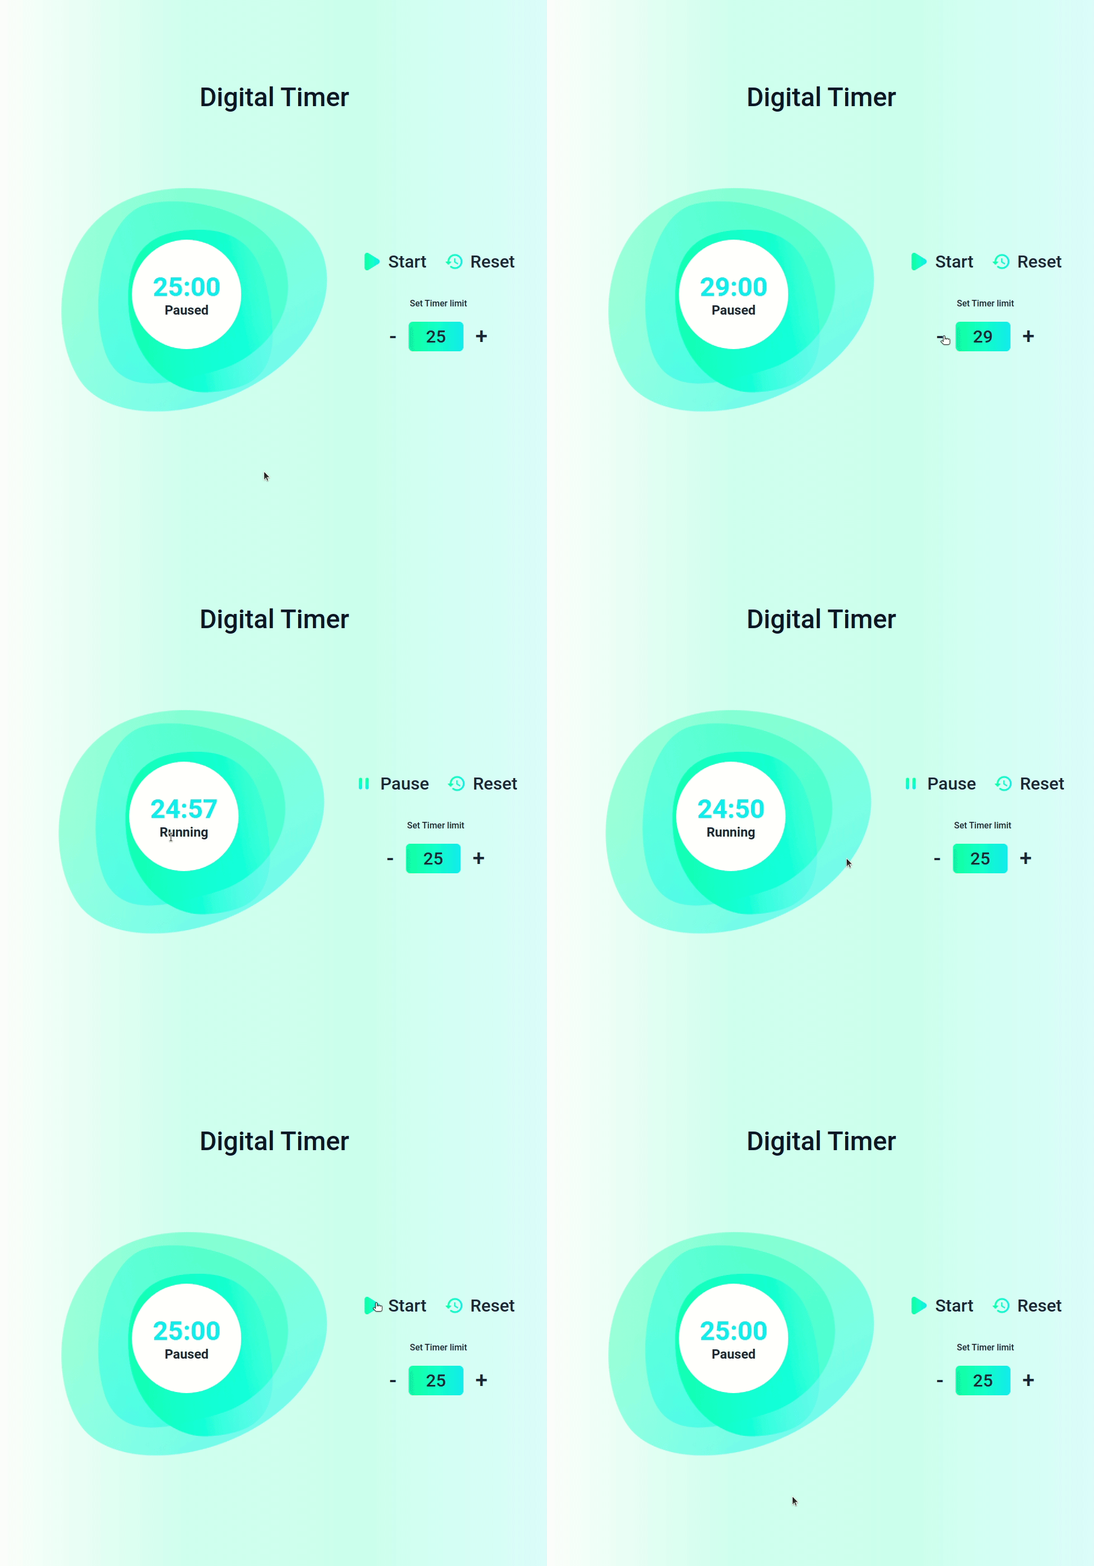
In this practice let's build a Digital Timer by applying the concepts we have learned till now.
Click to view the Design Files
Click to view the Set Up Instructions
- Download dependencies by running
npm install - Start up the app using
npm start
Click to view the Functionality to be added
The app must have the following functionalities
- When the Start button is clicked
- The Start text should change to Pause text
- The play icon should be replaced by pause icon
- The Timer status should change to Running
- The Timer should start running backward from the timer limit value set
- If the Timer has been paused after starting, it should resume from where it was paused
- Both the Plus and Minus buttons should be disabled
- When the Pause button is clicked
- The Pause text should change to Start text
- The pause icon should be replaced by play icon
- The Timer should stop running backward
- The Timer status should change to Paused
- Both the Plus and Minus buttons should be disabled
- When the button with Plus is clicked
- The timer limit value should increase by 1 minute
- The Timer should display time with the increased timer limit value
- When the button with Minus is clicked
- The timer limit value should decrease by 1 minute
- The Timer should display time with the decreased timer limit value
- When the timer limit value is modified by clicking Plus or Minus button then the clicking on Start button should start the Timer with modified value
- When the Timer ends (displays 00:00)
- The Pause text should change to Start text
- The pause icon should be replaced by play icon
- The Timer should stop running backward
- The Timer status should change to Paused
- After completion of Timer, when the Start button is clicked
- The Start text should change to Pause text
- The play icon should be replaced by pause icon
- The Timer should start running backward from the current timer limit value.
- The Timer status should change to Running
- When the Reset button is clicked then
- The Pause text should change to Start text
- The pause icon should be replaced by play icon
- The Timer should stop running backward
- The Timer status should change to Paused
- Initial Timer limit value should be displayed
- Both the Plus and Minus buttons should be enabled
Click to view the Implementation Files
- Your task is to complete the implementation of
src/components/DigitalTimer/index.jssrc/components/DigitalTimer/index.css
Click to view Important Note Points
The following HTML attributes are required for the HTML button and image elements for the tests to pass
- The HTML main heading element to display the time should have the testid attribute and its value as
timer
Click to view Quick Tips
-
You can use the below box-shadow CSS property to apply box-shadow effect to the containers,
box-shadow: 0px 8px 40px rgba(7, 7, 7, 0.08); -
The floor() method rounds a number DOWNWARDS to the nearest integer, and returns the result.
console.log(Math.floor(5.95)); // output: 5 -
You can use the
background-positionproperty to set the starting position of a background image.background-position: center;
Image URLs
- https://assets.ccbp.in/frontend/react-js/digital-timer-elapsed-bg.png
- https://assets.ccbp.in/frontend/react-js/play-icon-img.png alt text should be
play icon - https://assets.ccbp.in/frontend/react-js/pause-icon-img.png alt text should be
pause icon - https://assets.ccbp.in/frontend/react-js/reset-icon-img.png alt text should be
reset icon
- Roboto
- All components you implement should go in the
src/componentsdirectory.- Don't change the component folder names as those are the files being imported into the tests.
- Do not remove the pre-filled code
- Want to quickly review some of the concepts you’ve been learning? Take a look at the Cheat Sheets.
