How to create IoT applications
The MBP enables the simple realization of IoT applications by allowing users to create rules for their IoT environments. By defining rules, users are able to specify how their environments should react to pre-defined events that might occur.
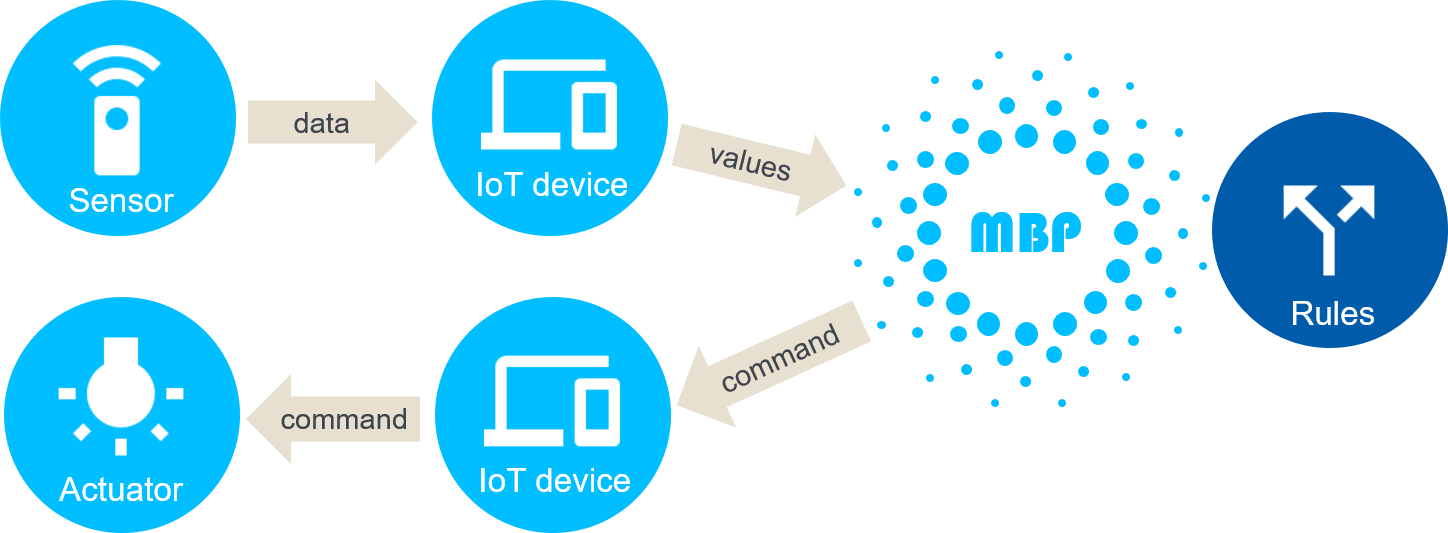
An example of an IoT application that can be realized with the MBP is a heating, ventilation, air conditioning (HVAC) system, in which the temperature of a room is continuously monitored in order to recognize and react when the temperature goes outside the thermal comfort zone (e.g., between 20°C and 22° C).
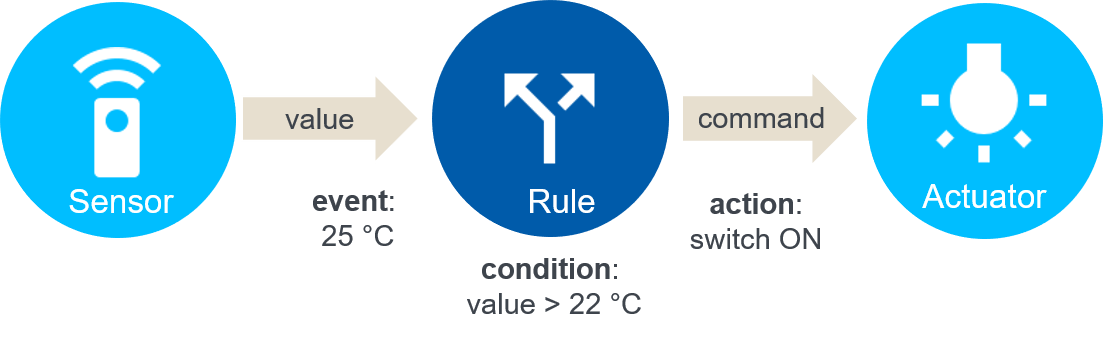
We can create rules to implement this IoT application in the form of event-condition-action rules, for example:
-
event: temperature value of a temperature sensor -
condition: “is temperature value above the thermal comfort zone (temperature > 22 °C)?” -
action: if the condition is true, send control commands to switch on a cooler fan
In this way, a room temperature can be automatically regulated based on user-defined conditions and continuous sensor measurements.
Such rules can be defined on the graphical rule modeling tool of the MBP. The following gives an overview on how to create and start evaluating user-defined rules.
Each rule, which is called rule definition in the MBP, consists of a rule condition and a set of rule actions. To create a rule, follow these steps:
Once you have registered at least a sensor, you can create a rule condition as follows.
- in the
Main Navigation, selectRules > Conditions, and press the ➕buttonto add a new rule condition. - provide a
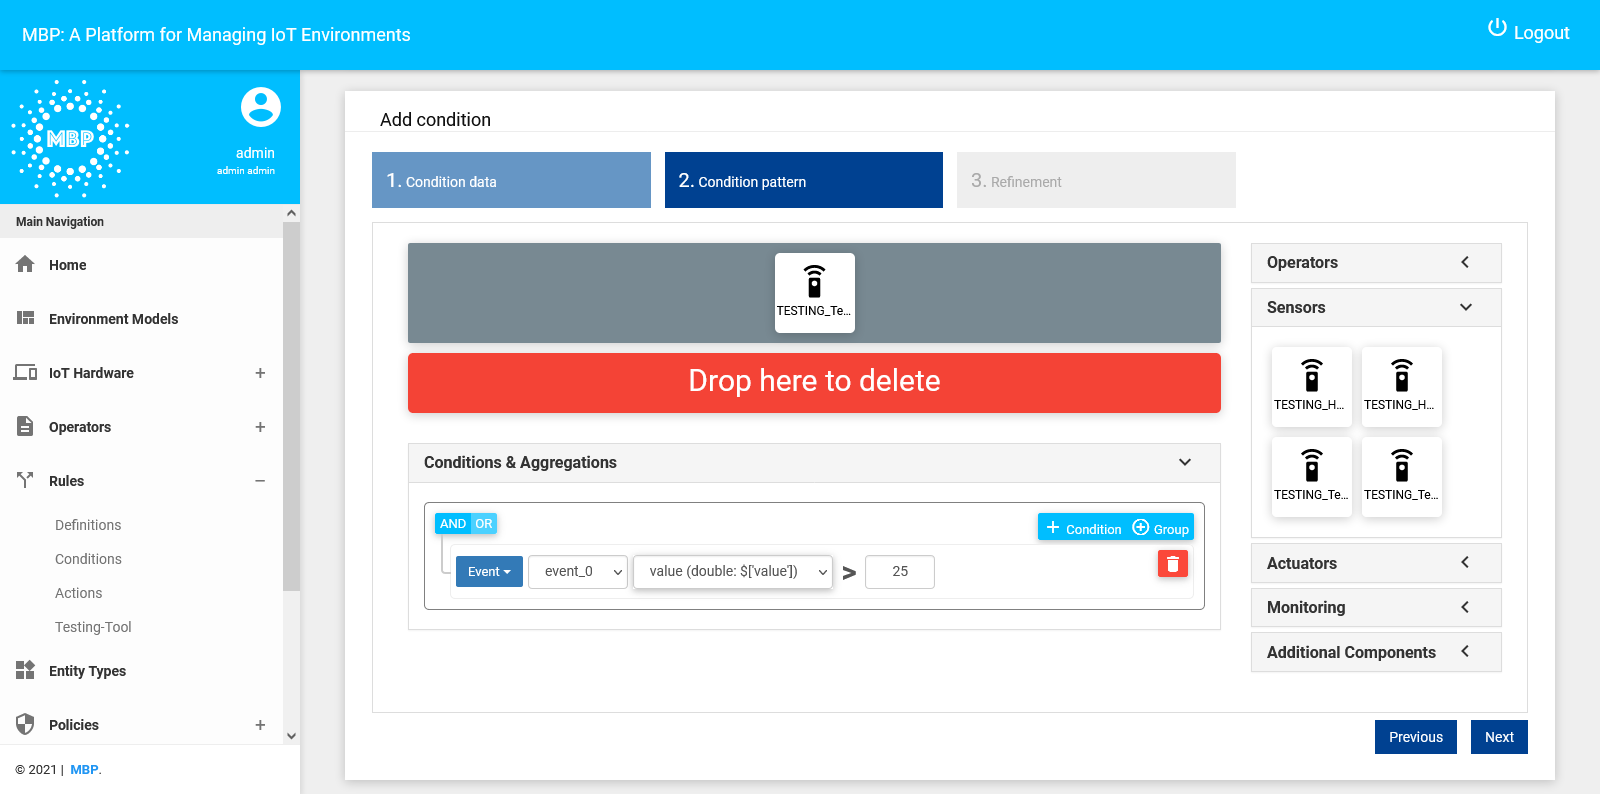
nameand adescriptionfor the condition and pressNext. - choose a registered sensor from the drop-down option
Sensorson the right. Drag the sensor and drop it on the areaPlease drop events here.
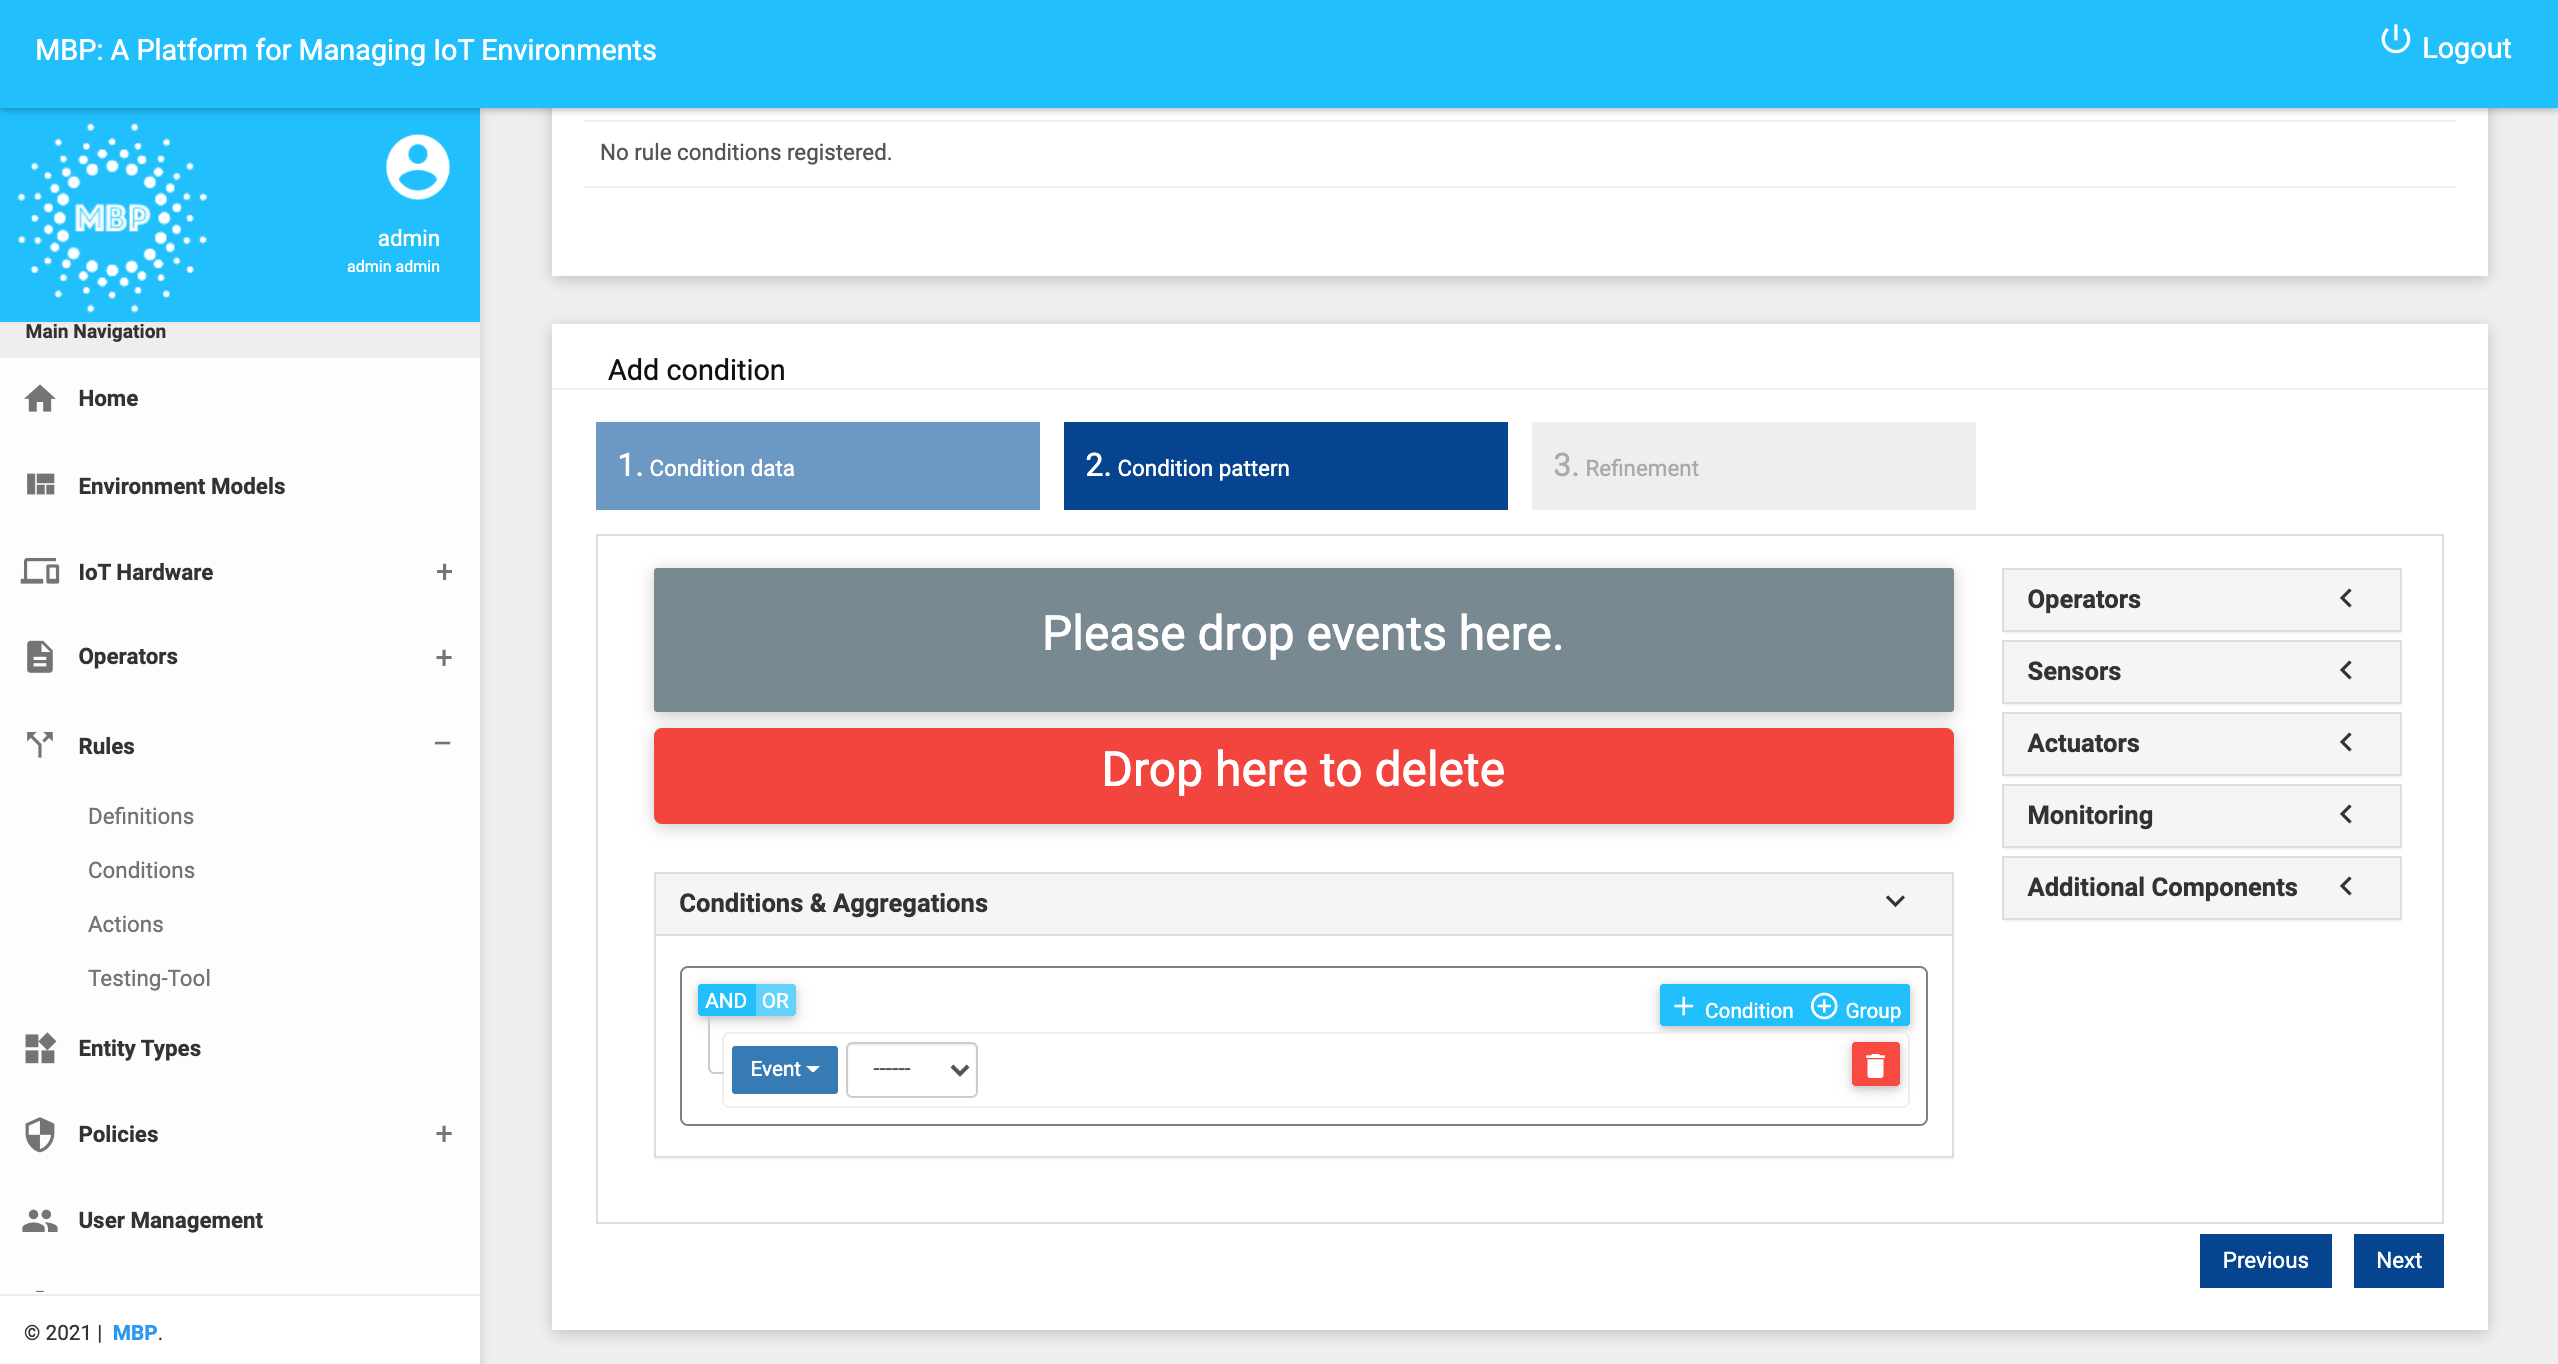
- in the box
Conditions & Aggregation, chooseEventand the available eventevent_0. Click on the=sign to change to the desired operator (e.g.,=,>,<). Then choose the name of the data field of the sensors value which should be used for this condition. Finally, provide the value to be compared and pressnext.
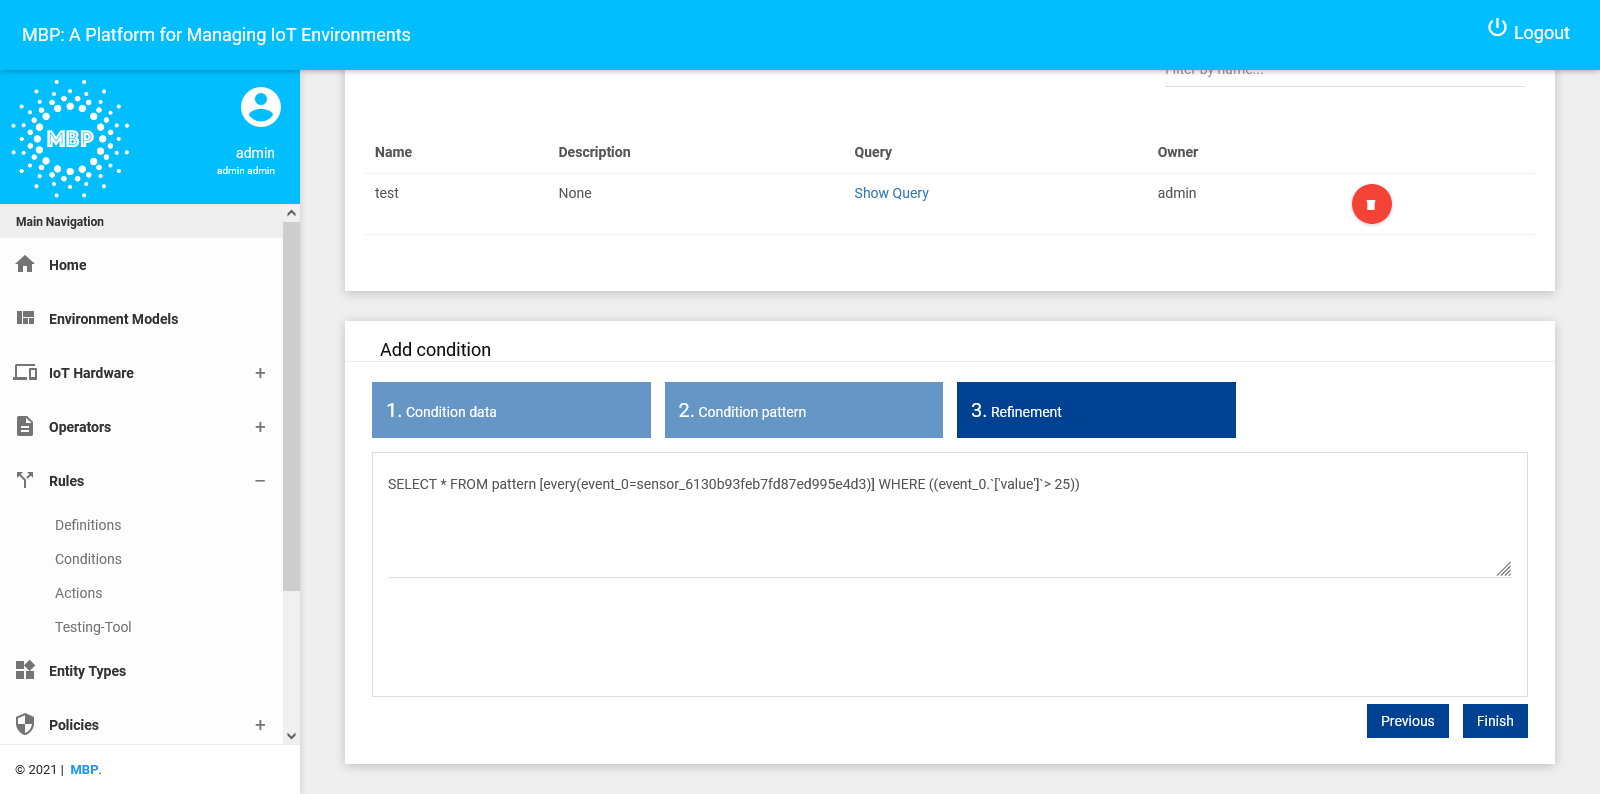
- in
Refinement, the generated CEP query is shown, which will be evaluated by the Esper CEP engine. If necessary, you can refine the query as you wish. PressFinish.

Currently, there are three types of actions available:
- an actuator action: in case a rule is triggered, a registered actuator execute an action.
- an IFTTT webhook: in case a rule is triggered, the MBP send a message to IFTTT, trigger the webhook (https://ifttt.com/maker_webhooks), and the action specified on the IFTTT platform is executed.
- a component deployment: in case a rule is triggered, an actuator or a sensor defined is installed.
Once you have registered at least an actuator, you can create a rule action of type actuator action as follows.
- in the
Main Navigation, selectRules > Actions, and press the ➕button. - select action type
Actuator action, fill in the attributes and pressRegister. - Test action by pressing
Test Actionbutton. This triggers the actuator by sending the following message to the actuator's topic:
{
   "data": "",
   "rule_id": "",
   "rule_name": "",
   "rule_action_id": "",
   "action": "",
   "cep_output": {},
   "actuator_id": "",
   "rule_action_name": ""
}After creating rule conditions and rule actions, the rule definitions can be defined, which connect conditions to one or more actions. The rule definitions are created as follows.
-
in the
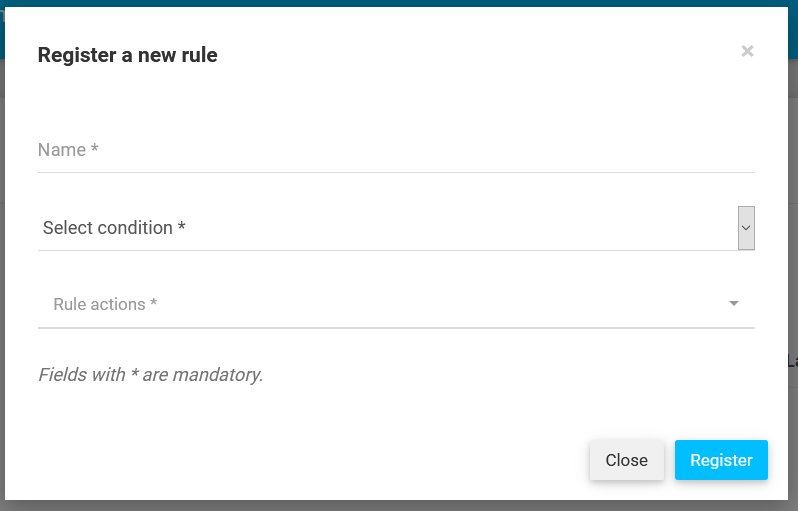
Main Navigation, selectRules > Definitions, and press the ➕button. -
give a name to the rule, select the condition to be used and one or more actions that should be triggered once the condition evaluates to true. Multi-selection is possible in the drop-down menu.
-
Activate the rule by toggling the
Activebutton. -
Once a rule is triggered, the counter
Runsis incremented.