If you have trouble with the tutorial you can contact me on discord Konijima#9279 or open an issue.
If you have suggestion you can fork and create a pull request.
Hopefully I made this as easy as possible to understand.
- Easy and fast source decompilation
- Intellisense using global libraries
- Easy source update
- Quick search Java and Lua source
| Windows | MacOS | Linux |
|---|
Install the IDE on your computer. Find resource online how to install on your specific OS if needed.
Install Capsid and run the configuration.
2) Setup the new project
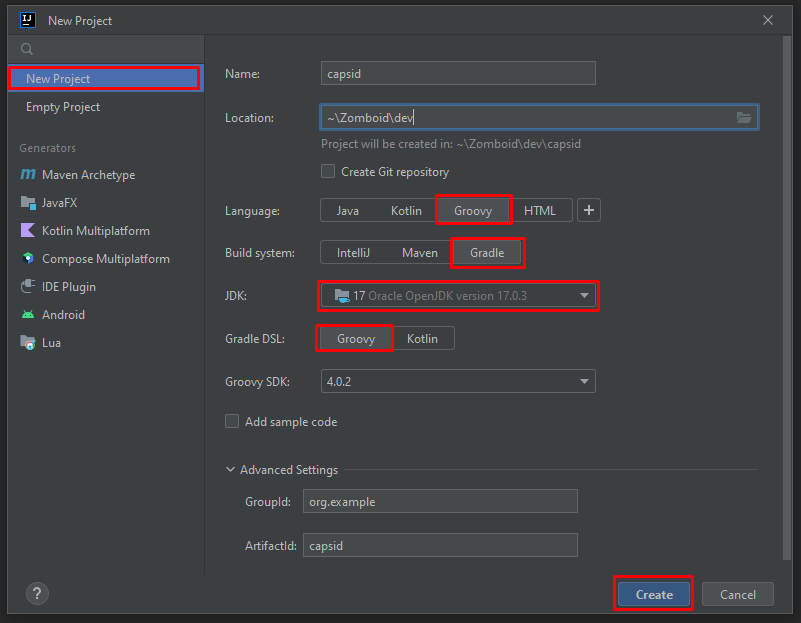
We will install Capsid in this new project to get the jar libraries and decompiled source.So first, select Groovy & Gradle. Then make sure to use Java 17, it should be default when installing IntelliJ.
3) Installing Capsid with build.gradle
Once the project is set, it should automatically open build.gradle.Add this line to the plugins table
id 'io.pzstorm.capsid' version '0.4.2'

Then click on the Load Gradle Icon or press Ctrl + Shift + O to apply the changes.
5) Create Run Configurations
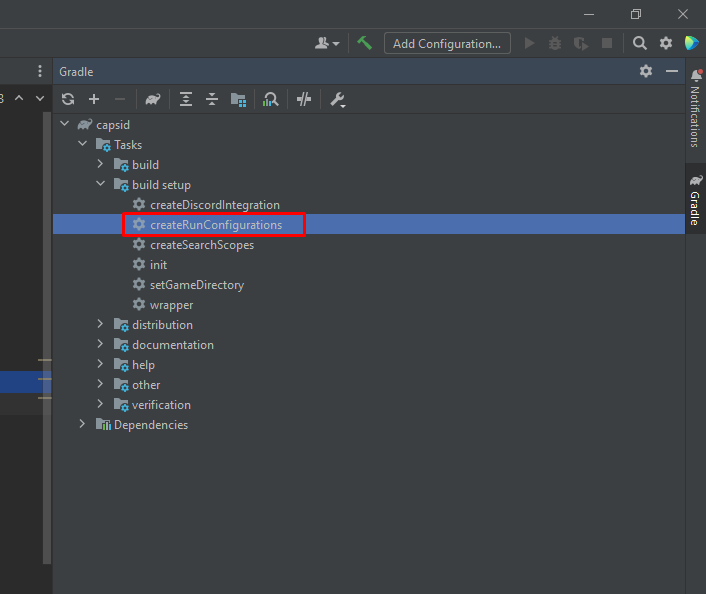
Expand the Tasks > build setup in the tree view.Double click createRunConfigurations task to execute it.
6) Enter path to game installation directory
During the create run configuration you will be prompt to enter the game installation directory.Find and paste the full path to where the game is installed on your machine.
This should be the same directory that contains the executable to run the game.

Then press enter and wait for the task to complete.
BUILD SUCCESSFUL in 9s
2 actionable tasks: 2 executed
1:50:45 PM: Execution finished 'createRunConfigurations'.
In the case that you made a mistake, you can delete the file local.properties and run the task again.
7) Install Emmylua plugin
Select File > Settings...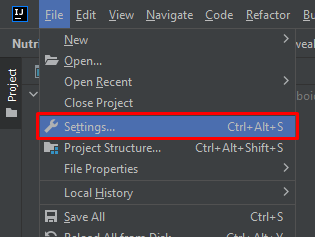
Then go to Plugins and search for Emmylua.
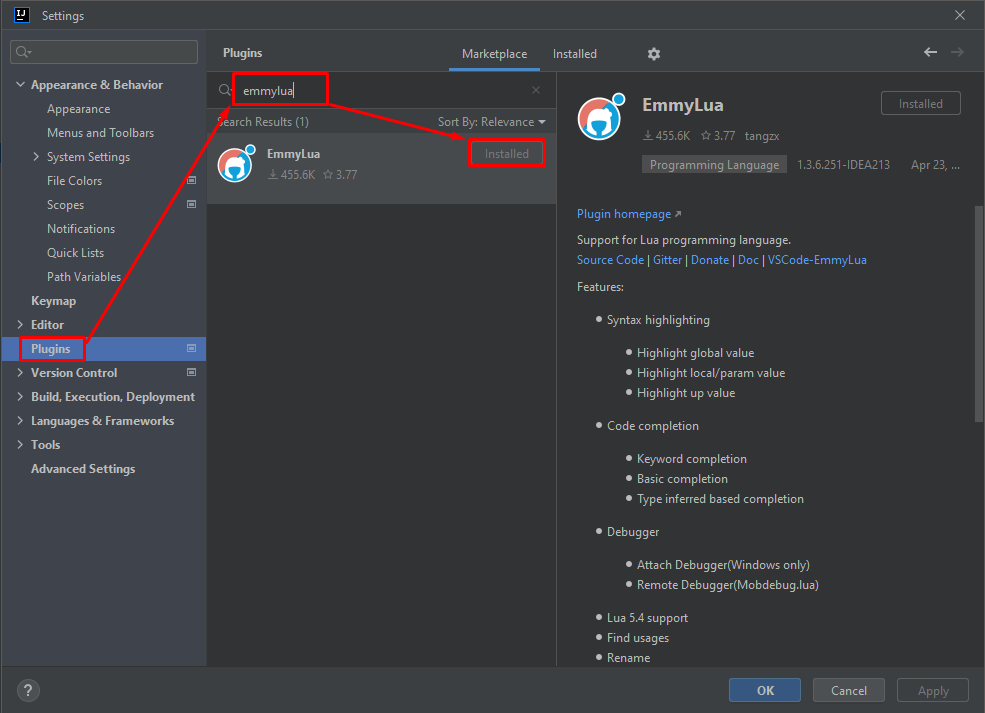
Install it and check the documentation to learn how it work
Let's get decompiling in a single step.
1) Run Setup Workspace config
Select the new configuration setupWorkspace created from the previous step then Run it.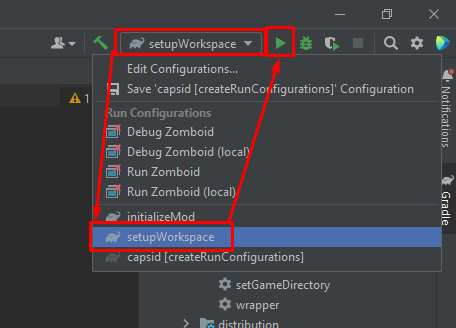
This step will take some time (a couple minutes), it will decompile, annotate and create everything we need to start making mods.
It will run these tasks in this order
zomboidJar, decompileZomboid, annotateZomboid, compileZomboid, zomboidLuaJarWhen everything is complete you should see
BUILD SUCCESSFUL in 217ms
1 actionable task: 1 executed
2:06:28 PM: Execution finished.
Let's organise a little bit before we get to modding.
1) Know the stuff that you need
So first of all, there is a couple things that we will need.
build > generated > sources
This directory contains both the java and lua source code. We don't need it but we might want it to do quick search using any search tools that we prefer.
lib
This directory contains the 3 jar files that we will need to get the full power out of IntelliJ while developping mods.
2) Create a directory to keep it organized
Anywhere in your computer, create a directory named zomboid-decompiled.In that directory create a new directory named with the current version of the game.
Copy the 3 jar files into that new directory and optionally copy the build/generated/sources directory.
You can rename the files to append the version for later.

Alright we are almost there, you will be typing code soon i swear.
1a) Create a new mod
Select File > New > Project...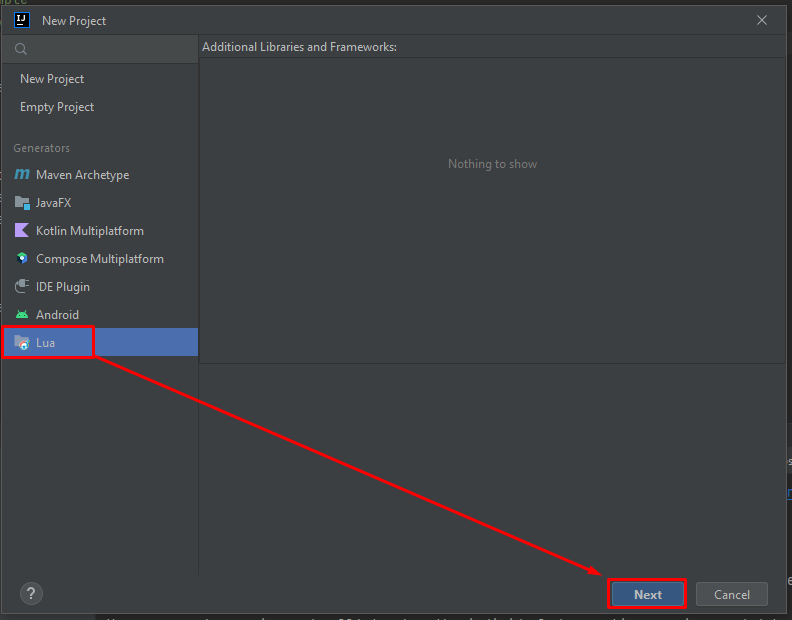
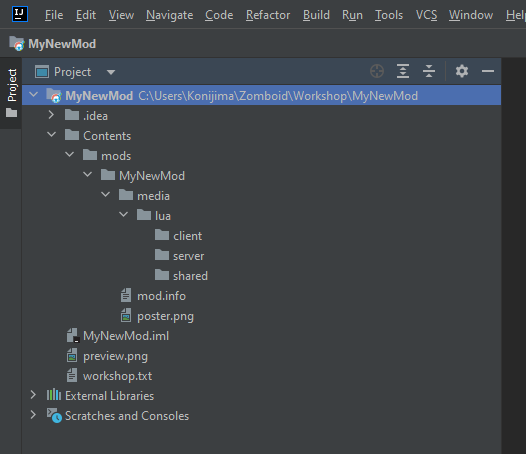
Now select the zomboid local workshop directory and enter your new mod name.
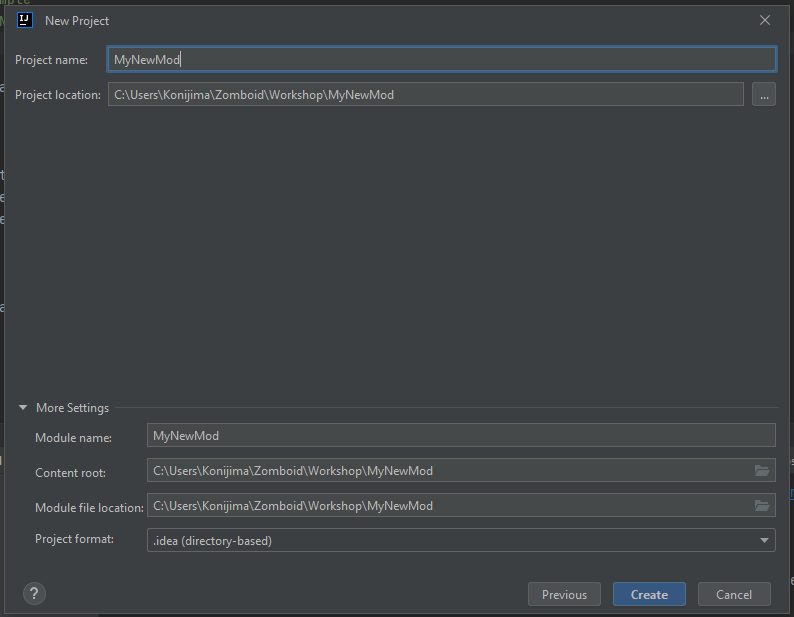
You should now have an empty project ready to be setup.
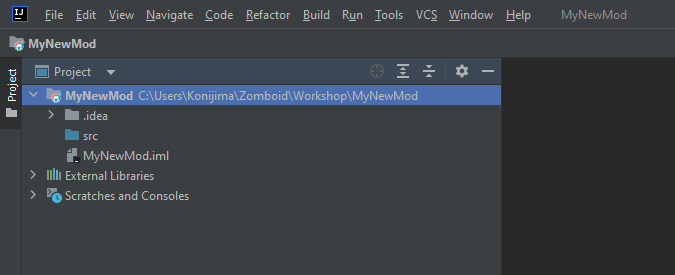
You can delete the src directory and create your default workshop mod structure.
1b) Use an existing mod
Select File > Open...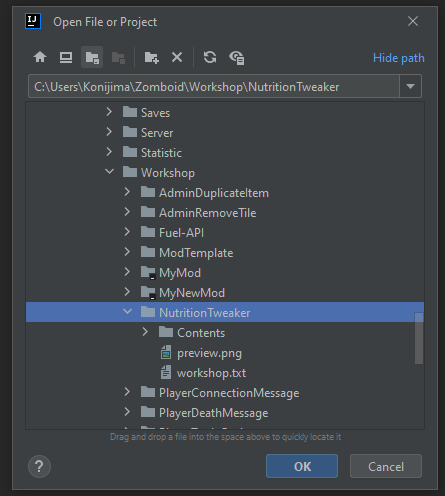
Select the mod you want to open with IntelliJ and click Trust Project when prompted.
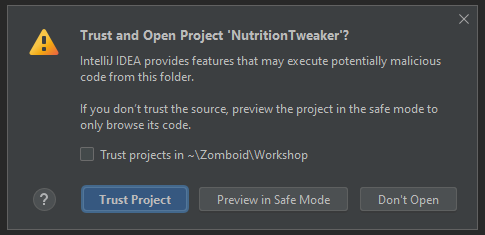
Press Ctrl + S to save the project and you are ready for the final step.
2) Setup the global libraries (per version)
Select File > Project Structure...
Then select Platform Settings > Global Libraries

Press the + icon and add both zdoc-lua.jar and zomboid.jar to your global libraries.
Then select zomboid.jar and press the other + icon and add zomboid-sources.jar.

3) Setup the mod project modules
Select File > Project Structure...
Then select Project Settings > Modules then Dependencies tab.
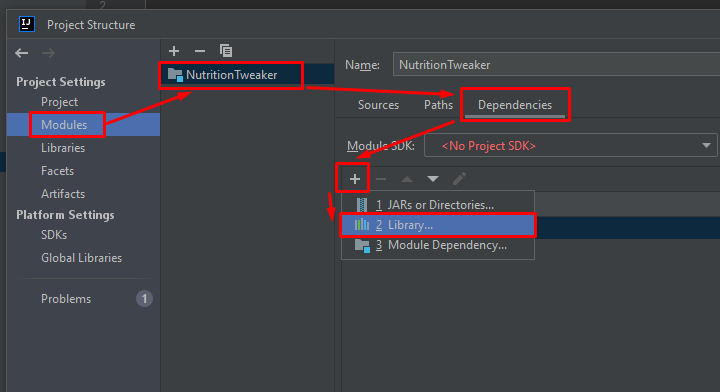
Add both global libraries.
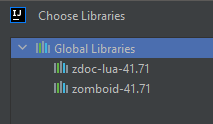
Check both library boxes and apply.
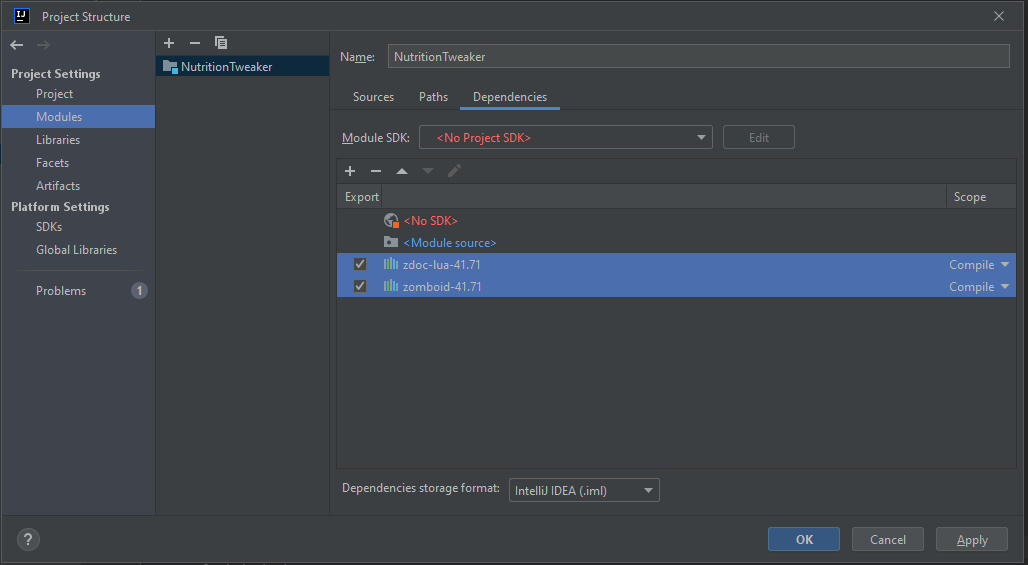
You now have intellisense working in your project.

Now you can search into the source and figure for yourself how things work.
Search in the Java source code
Right-click the zomboid.jar root library in the external libraries part of your project file tree.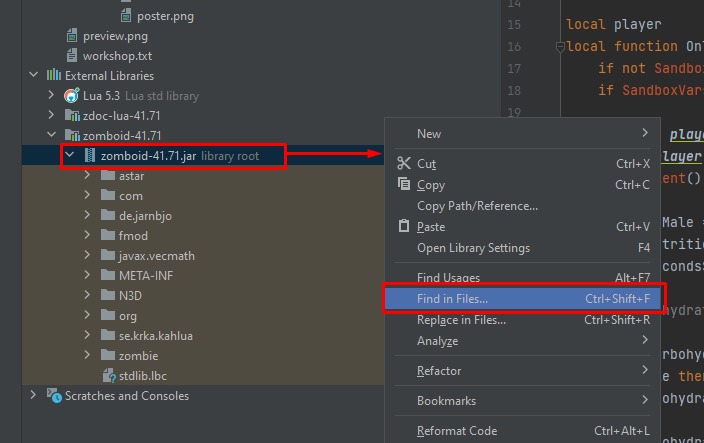
Then click Find in files
Search in the Lua source code
Right-click the zdoc-lua.jar root library in the external libraries part of your project file tree.
Then click Find in files
But what if PZ updated to a new version?
Decompiling a new PZ version
Make sure your Project Zomboid game has been updated.Open the capsid project we used for decompiling the first time.
Run the setupWorkspace configuration again.


