This project is meant to help you start creating mods for the game Oxygen Not Included.
It will provide basic needed information and examples of some mods.
All information is given assuming you are running Windows, for Mac and Linux paths and some other technical informatiom may differ.
C# development experience, basic knowledge about reverse engineering
- Visual Studio 2019 (https://visualstudio.microsoft.com/vs/),
- Resharper (https://www.jetbrains.com/resharper recommended)
- One of reverse engineering software: dotPeek (https://www.jetbrains.com/decompiler/) or IL Spy (https://github.com/icsharpcode/ILSpy)
- HarmonyLib: a patcher which made the modding for this Unity game possible (https://github.com/pardeike/Harmony)
Most .dll you would need located in game subfolder. Locate your game using Steam:
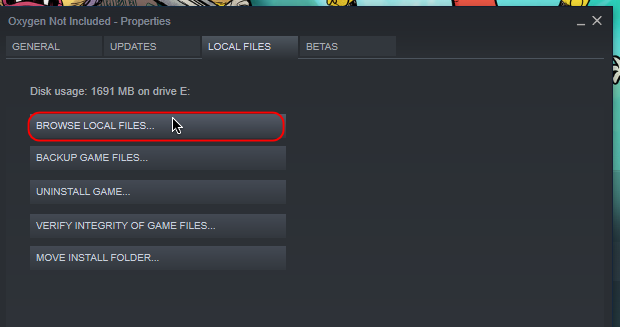
You path would look something like:
E:\Steam\steamapps\common\OxygenNotIncluded
Move 2 steps down into subfolder:
E:\Steam\steamapps\common\OxygenNotIncluded\OxygenNotIncluded_Data\Managed
all .dll we need located in Managed subfolder.
If you planning to add some external .dll to your projects, for example using one core library for all your mods, you would need Il Merge. You can get it from nuget packages (https://www.nuget.org/packages/ilmerge) or from gihub (https://github.com/dotnet/ILMerge).
I am using version 3.0.29 for .net 4.0
Let us start making our first mod (code will be available in this repository: https://github.com/O-n-y/OxygenNotIncludedModTemplate/tree/main/ModsGuide/ModTemplate).
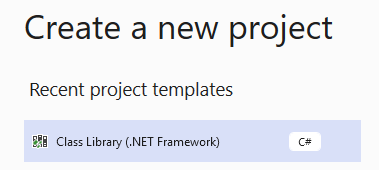
To do so we create new project .Net 4.0, C# Class Library .Net Framework:
Once project created, we adding refferences to minimum count of .dll we could need:
- 0Harmony.dll
- Assembly-CSharp.dll
- Assembly-CSharp-firstpass.dll
- UnityEngine.dll
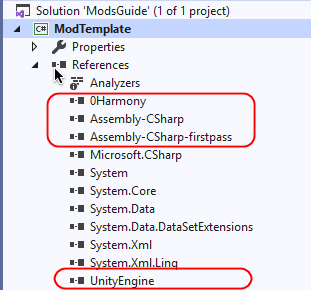
All other we could add later as we need those.
Now we can add Loader (https://github.com/O-n-y/OxygenNotIncludedModTemplate/blob/9a0c54d6cd5d7fee3c8735420ec8ea1bcb134fba/ModsGuide/ModTemplate/Loader.cs) - class which will be loaded first once our mod consumed by the Game.
using System;
using System.Reflection;
using Harmony;
using UnityEngine;
namespace OxygenNotIncluded.Mods.ModTemplate
{
public static class Loader
{
public static AssemblyName AssemblyName => Assembly.GetExecutingAssembly().GetName();
public static Version Version => AssemblyName.Version;
public static string Name => AssemblyName.Name;
public static void OnLoad()
{
// Called before any other mod functions (including patches), when Mod is loaded by the Game
Console.WriteLine($"Mod <{Name}> loaded: {Version}");
}
}
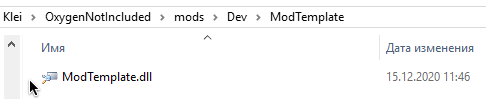
}We can compile and copy our first mod to the game folder, so it could be loaded.
To do so, copy mod into %USERPROFILE%\Documents\Klei\OxygenNotIncluded\mods\Dev\ModTemplate folder of the game (create it, if not exist yet):
Now we can start the Game, open mods list and we shall see our new mod not activated. Activate it by checking it in mods list, then restart the game.
Our mod now loaded into the game.
But how we know it really did?
For this we can use one of my mod, made to help debugging:
Debug Console https://steamcommunity.com/sharedfiles/filedetails/?id=2041219184
Once it activate, we can see our mod information printed:
 This mean we are in the game! We are not doing anything yet, but thats a start! ;-)
Now let us create our first mod.
For it to be easer for us in future, we will use Project Template for Visual Studio. You can download it here: https://github.com/O-n-y/OxygenNotIncludedModTemplate/raw/main/ModsGuide/ModTemplate.zip
If you not sure how to install VS Project Templates, checkout information from docs: https://docs.microsoft.com/visualstudio/ide/how-to-create-project-templates?view=vs-2019
Now let us create new project using our template:
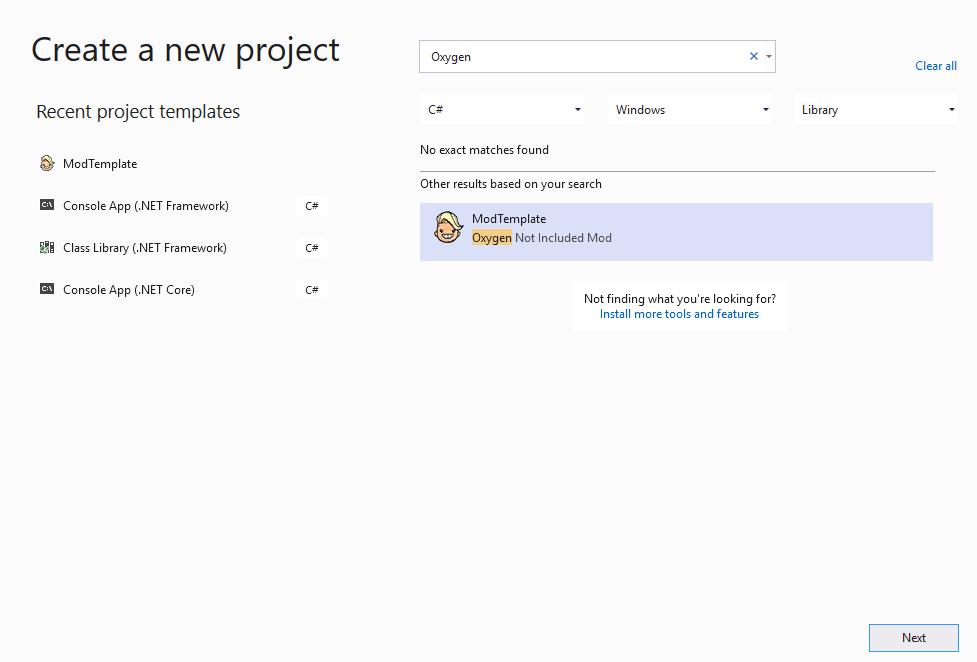
We will name it ManualGeneratorAdvanced as goal of this mod will be to change energy output for Manual Generator from 400W to 600W.
To do this we need to patch existing class ManualGeneratorConfig
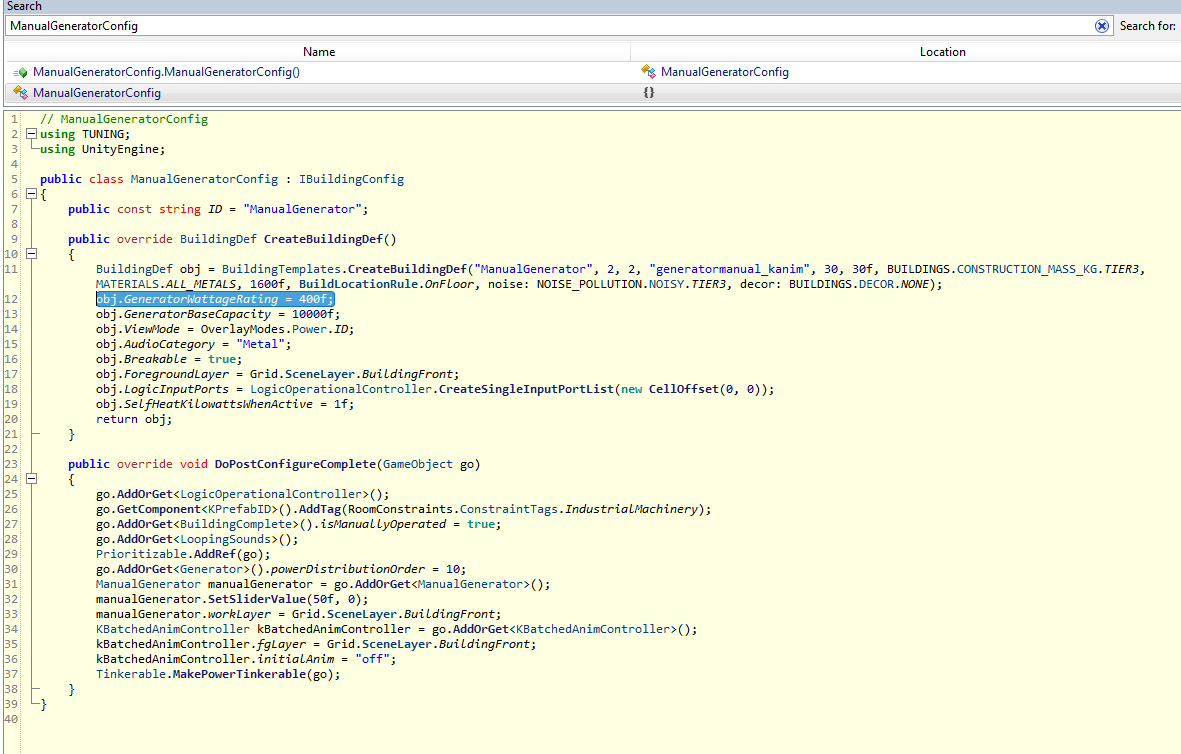
And change value of GeneratorWattageRating from 400 to 600.
For convinience let us create Patches folder and ManualGeneratorConfig_CreateBuildingDef class inside
[HarmonyPatch(typeof(ManualGeneratorConfig), "CreateBuildingDef")]
class ManualGeneratorConfig_CreateBuildingDef
{
public static void Postfix(BuildingDef __result)
{
__result.GeneratorWattageRating = 600f;
}
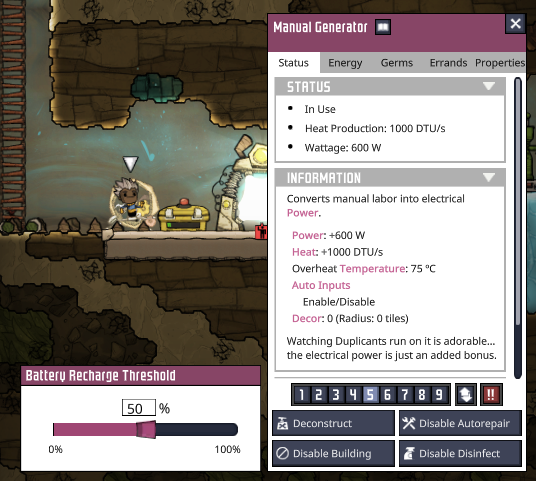
}Now if we compile and put out ManualGeneratorAdvanced.dll into /Dev folder of the /mods, restart the game and activate the mod - we will see that our Manual Generators now produce 600W energy instead of 400W. As easy as that we just made our first mod!
At this point i assume you already read about Harmony and how it works.
So we added a Postfix method, which will be consumed by Harmony and executed after original method body execution,
we were also needed to change value of GeneratorWattageRating, so we provided special variable __result (which contains result data after original method was executed) as an argument to the function and then changed value we needed.
Thats it, after this game will have updated data for the Manual Generator building.
Now as we start creating mods, we certainly will have some code, which will be needed in many of our mods, and creating duplicates is a very bad idea as it will lead to more errors in the future and hard maintenancement of the code in general.
Earliar we had added Il Merge for the purpose of adding external libraries, let us use it now to add first external library - our shared library, which will have all the common code for our mods.
As a start, let us add new Class Library (.Net Framework) project to our solution, call it SharedLib and add it as a refference to our ModTemplate.
Then we move our loader there with a few changes:
using System;
using System.Reflection;

namespace OxygenNotIncluded.Mods.SharedLib
{
	public class LoaderBase
	{
		public static AssemblyName AssemblyName => Assembly.GetExecutingAssembly().GetName();
		public static Version Version => AssemblyName.Version;
		public static string Name => AssemblyName.Name;


		public static void OnLoad()
		{

			// Called before any other mod functions (including patches), when Mod is loaded by the Game
			Console.WriteLine($"Mod <{Name}> loaded: {Version}");
		}
	}
}
Now in ModTemplate project we can change our Loader class:
using System;
using System.Reflection;
using Harmony;
using OxygenNotIncluded.Mods.SharedLib;
using UnityEngine;

namespace OxygenNotIncluded.Mods.ModTemplate
{
	public class Loader : LoaderBase
	{
	}
}
For shared library to be compiled as part of our Mod .dll we need to add changes to .csproj file for it (add it after PrepareForBuild Target containing ILMerge check):
<Target Name="AfterBuild">
<!-- the ILMergePath property points to the location of ILMerge.exe console application -->
<Exec Command="$(ILMergeConsolePath) /targetplatform:v4,"%ProgramFiles%\Reference Assemblies\Microsoft\Framework\.NETFramework\v4.0" /out:$(Configuration).Mod.$(TargetFileName) $(TargetDir)$(TargetFileName) $(TargetDir)SharedLib.dll" />
</Target>
....
</Project>p.s. If for some reason your path to .NET is not the same, you would need to make according to changes to it.
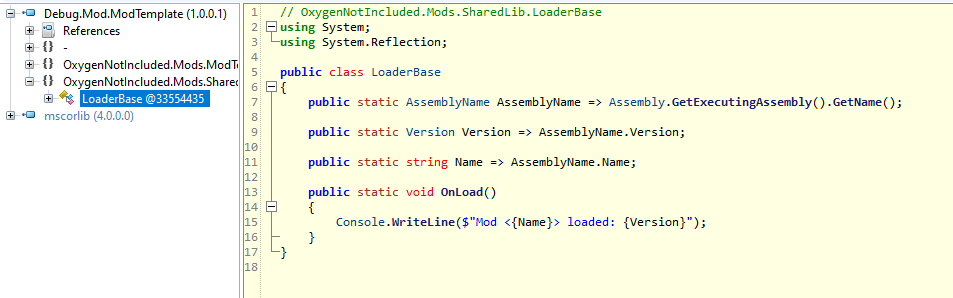
Now after compile our library will have it inside:
I also will be providing library for mod developers located in this repository: https://github.com/O-n-y/Ony.OxygenNotIncluded.Lib (it will be published with extensions over time)
Official Information for both DLC and VANILLA versions of the mod located in Klei forum (https://forums.kleientertainment.com/forums/topic/126022-setting-up-mod_infoyaml/)
For the mod to be loaded correctly in DLC version of the game, we need to add mod_info.yaml file to the mod directoy. We will assume main verion of the mod will be DLC:
supportedContent: EXPANSION1_ID
lastWorkingBuild: 449549Case 1. If out mod support both versions of the game without need to have changes in code:
supportedContent: VANILLA_ID,EXPANSION1_ID
lastWorkingBuild: 449549
Case 2. Now if out mod need additional version to support vanilla, we need to add subfolder archived_versions and there subfolder which will contain particular version of the mod, i suggest to name it like this: GAME_TYPE__GAME_BUILD. For example: vanilla_449460. Put in this subfolder .dll of the mod and mod_info.yaml :
supportedContent: VANILLA_ID
lastWorkingBuild: 449460To do so we will used my Ony.OxygenNotIncluded.Lib library (https://github.com/O-n-y/Ony.OxygenNotIncluded.Lib), overtime it will grow and will have more useful tools, we could use.
To add it we should add refference to it and change our .proj file with ILMerge rule, as we done before.
And replace our loader with a new one:
public class Engine : StartUp<Engine, TranslationMod> { }
public static class Loader
{
	public static void OnLoad()
	{
		Engine.Start();
	}
}
Here as you can see TranslationMod - our localization module, we will about it in a bit.
Engine will handle startup, logger initialization, localization and more.
We will use Localization Engine from recently added Ony.OxygenNotIncluded.Lib (OOL), to do so, let's create /Localization subfolder and a few classes in it:
Localization base class:
public class TranslationMod : TranslationBase
{
	public virtual LocalizeText CreateBuildingDef => LanguageSelection<TranslationMod>.Get().CreateBuildingDef;
}
For English localization test:
[Translation(Language = Localization.Language.Unspecified)]
public class TranslationEn : TranslationMod
{
	public override LocalizeText CreateBuildingDef => new LocalizeText( "Loading patch for CreateBuildingDef -> set output to 600", "");
}
For Russian localization test:
[Translation(Language = Localization.Language.Russian)]
public class TranslationRu : TranslationMod
{
	public override LocalizeText CreateBuildingDef => new LocalizeText( "Загрузка патча для CreateBuildingDef -> установка вывода мощности на 600", "");
}
Now to confirm it is working, let us output CreateBuildingDef property value after appling out patch:
[HarmonyPatch(typeof(ManualGeneratorConfig), "CreateBuildingDef")]
class ManualGeneratorConfig_CreateBuildingDef
{
	public static void Postfix(BuildingDef __result)
	{
		__result.GeneratorWattageRating = 600f;
		// localization test
		Engine.Print(Engine.Localization.CreateBuildingDef.NAME);
	}
}
After re-compile we can ensure it is indeed outputing this in proper language in console:
When game running in English language:

After we have switched to Russian localization:

P.S. to have this console, install my other mod Debug Console (https://steamcommunity.com/sharedfiles/filedetails/?id=2041219184)