4_Create_firmware_makeconfig_en
kiauh is helping us out here again. We move to the advanced menu
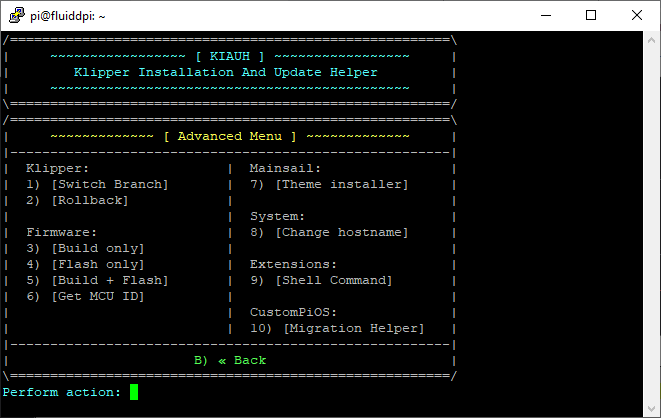
There we select "Build & flash", configure the settings according to the screenshot
 and leave the selection with Q key.
A few moments later the firmware has been built and is ready to flash.
and leave the selection with Q key.
A few moments later the firmware has been built and is ready to flash.
Then we select the options according to the next screen to flash the firmware:
Flash MCU -> 1) Regular flashing method
How is the controller board connected to the host? -> 1) USB
Make sure to select the correct MCU -> 1) /dev/serial/by-id/usb-Prusa_Research__prusa3d.com__Original_Prusa_i3_MK3-if00
Continue -> Y
The flash is now in progress and a few seconds later it´s all done and time to exit kiau.
If you plan to setup ADXL345 you have to do some work on the shell - if not just skip the next lines :)
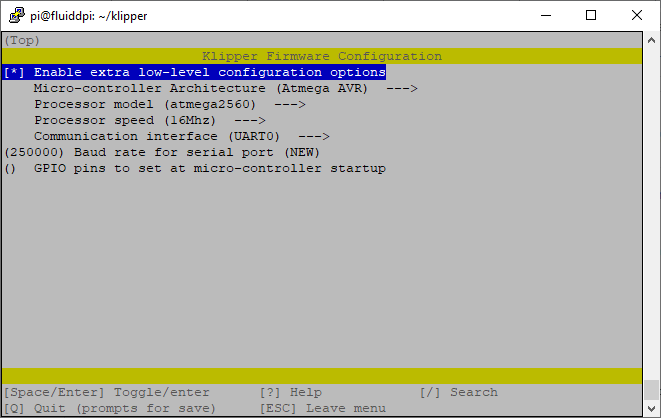
Change to the klipper directory and fire up make menuconfig
cd ~/klipper
make menuconfig
Select the setting according to the screenshot
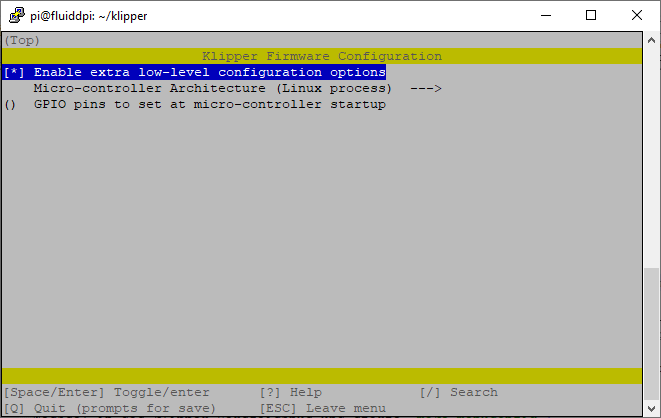 Exit with
 Q and issue the following commands to get the RPi mcu flashed:
Make sure your pi user is a member of the tty group:
pi@fluiddpi:~ $ id pi|grep tty
uid=1000(pi) gid=1000(pi) groups=1000(pi),4(adm),5(tty),20(dialout),24(cdrom),27(sudo),29(audio),44(video),46(plugdev),60(games),100(users),105(input),109(netdev),999(spi),998(i2c),997(gpio),114(mnrkrsudo)
If you don´t get an output like above issue sudo usermod -a -G tty pi and relogin to your raspberry.
On we go with installing the init script and finally flashing the rpi mcu:
cd ~/klipper/
sudo cp "./scripts/klipper-mcu-start.sh" /etc/init.d/klipper_mcu
sudo update-rc.d klipper_mcu defaults

sudo service klipper stop
make flash
sudo service klipper start
HOORAY!

- 🏡 Flash bootloader
- ⚙️ Download config files
- 🔌 Install klipper
- 🔧 Create firmware
- 🚀 Adding config files
- 💬 ioBroker integration
- 📢 PINDA troubleshooting
- 📊 Resonance compensation
- ⌨️ Sheet Manager Commands
- 👪 Wiki ToDo list
