Triggered Sweeps
Triggered sweeps are a way to measure the frequency response of a DUT that doesn't have an analog audio input. Examples include a bluetooth speaker or newer car stereos. In this cases, a frequency response measurement can be made by exporting a special WAV file from the QA40x application, playing that WAV on the DUT, and then capturing the wav via the Triggered Acquisition mode of the QA40x application
Let's look at these steps below.
You first need to decide the sample rate, chirp level and FFT size of the WAV you are going to export. The chirp level should be a level that is strong enough to elicit a measurable response, but not so strong that it might significantly distort the playback. The level is expressed in dBFS. If you aren't sure, start at -20 or 10 dBFS.
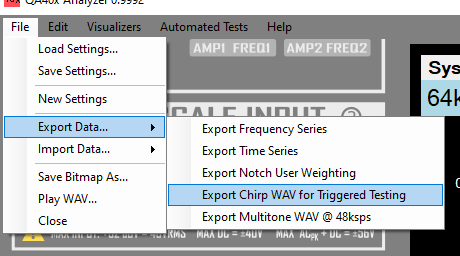
With your settings determined, the special WAV is exported in the File->Export Data->Export Chirp for Triggered Testing menu as shown below:
That brings up a dialog, where you can enter your parameters. Note the FFT Size parameter. This MUST value be used later in your testing, as you cannot mix FFT sizes.
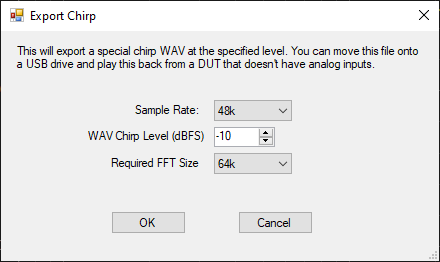
Clicking 'OK' will export the wave to the directory of your choosing (the default directory will be the QA402 data directory). The file name will appear as something like:
Chirp_Bd32f_Fs48_Le64k_Pb2k_Am-10.0dBFS.wav
The Bd indicates the bit depth. In this case, it's 32 bits and a "float" format. The Fs indicates the sample frequency. In this case, it's 48 kHz. The Le indicates the length. In this case, it's 64K, which matches the FFT size we specified. The Pb field indicates the amount of pre-buffer, which will be filled with a "comfort noise". And finally, we can see the Amplitude field, or Am, which indicates a -10 dBFS sweep.
This naming convention makes it easy to export a handful of WAVs to you a USB drive for later use in the DUT, and then you can make sure you are using the correct parameters in your QA40x setup.
We can then open the exported WAV in a tool like Audacity and we see the following:
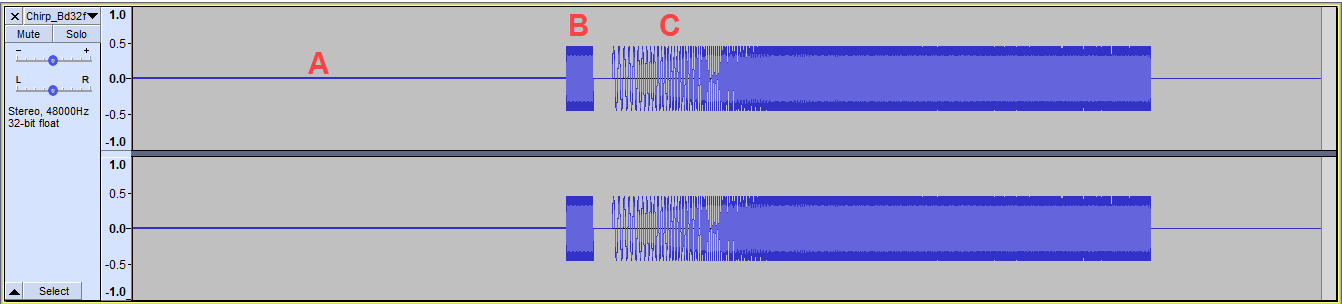
There are 3 regions of the generated WAV file. Region A is some low-level "comfort noise" that is high enough to open any noise gates on Bluetooth and other DSP-based equipment. Region B is trigger. It is a set number of cycles of a 1 kHz tone. After the trigger burst, there is a short period of silence followed by the sweep you can see in Region C.
You should be able to move the WAV onto a USB drive or the local storage on your DUT. Verify you can play the WAV and that you can hear the 3 distinct regions: Some very low level noise, followed by a loud burst/trigger, followed by the sweep.
If you just did a normal capture on the QA40x, you'd sometimes get the first part of the WAV and other times you'd capture the later part of the WAV, and the displayed results would be meaningless. The QA40x has a triggered mode of acquisition that waits until a threshold has been exceeded before capture begins. And once the capture has been triggered, the 1 kHz trigger burst is automatically skipped so that all that remains in the capture is the sweep.
Right click (or press and hold if using a touch screen) to open the context menu for the Run/Stop button. That will open the Triggered Acquisition dialog. In the image below, there are four important things to note:
A) First, make sure your FFT size is set to the same value you used in the WAV export. Above, we used 64K and we're set to a 64K FFT here too. B) Make sure you are in ExpoChirp mode. This tells the QA40x software to expect swept tones for its processing. C) Press and hold (or right click) on the "Press to Run" button to open the Triggered Acquisition dialog D) The Triggered Acquisition dialog is where you will make any needed adjustments to ensure a clean trigger
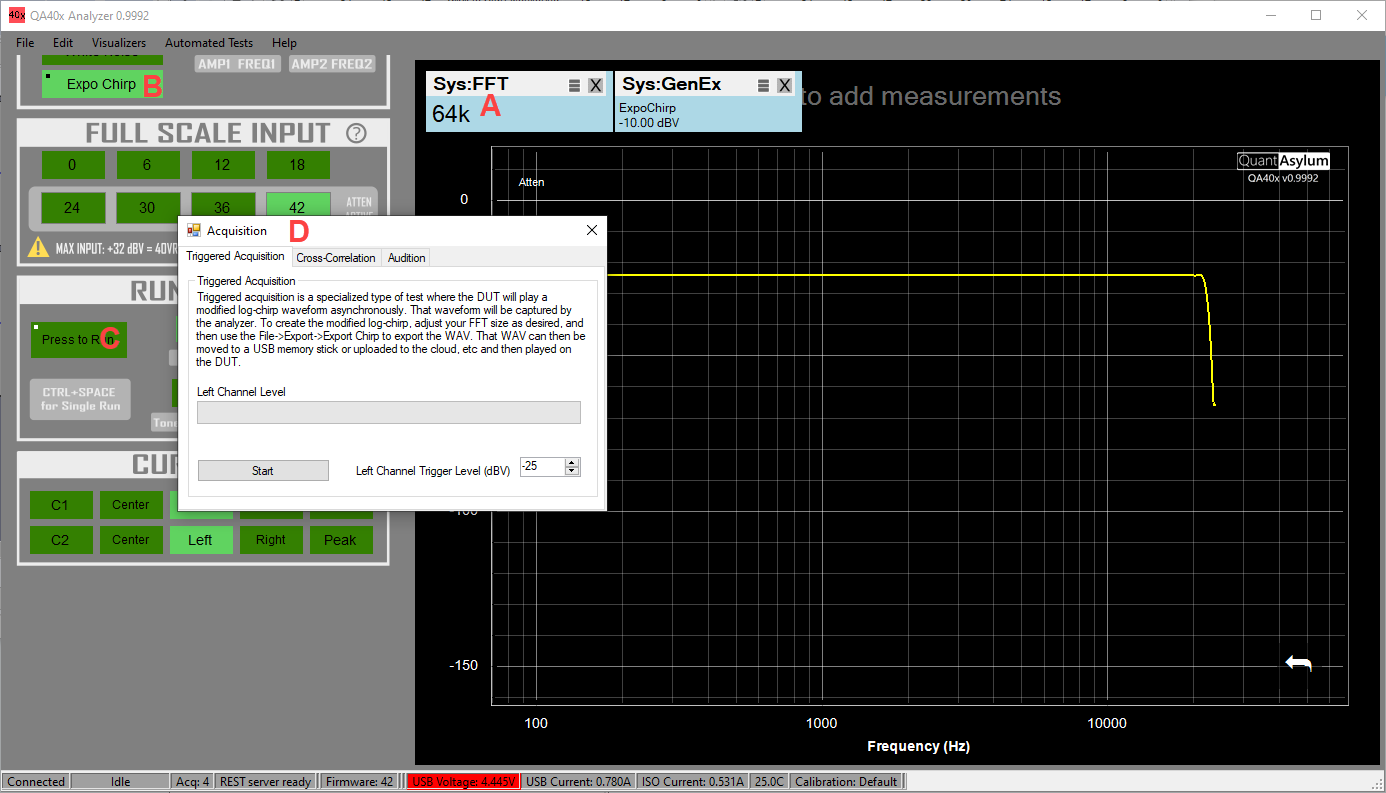
With the dialog displayed, press the "start" button and and you should see the left channel level displayed as shown below:
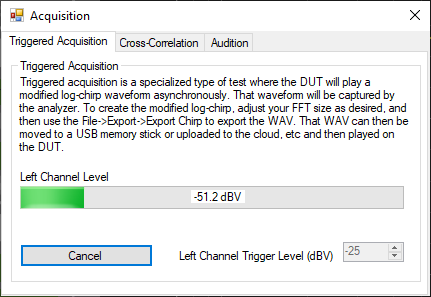
The reported level may be higher or lower, depending on your test setup. Now, playback the WAV prepared above on your DUT. You should see the Left Channel Level increase, and if it goes over the specified Trigger Level, then the capture will be successful. If it doesn't, either increase the volume of the DUT or reduce the trigger threshold in the dialog.
Once you have triggered can captured the acquisition, you'll see it immediately displayed in the main display:

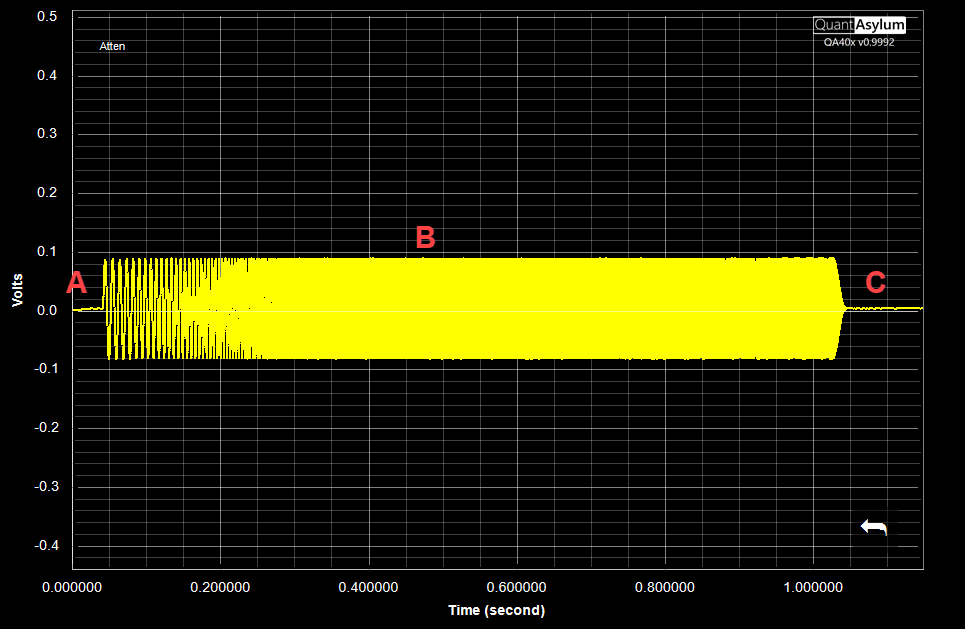
But it's important to check the time domain to see that you captured what was expected. Click the "Time" button in the Display Options:

Zooming in a bit on the captured signal shows the following with 3 distinct regions. First, note the silence gap near the beginning (region A). Second, note the sweep region B. And finally, note the silence gap at the tail end (region C). This indicates the burst was successfully captured and isolated.
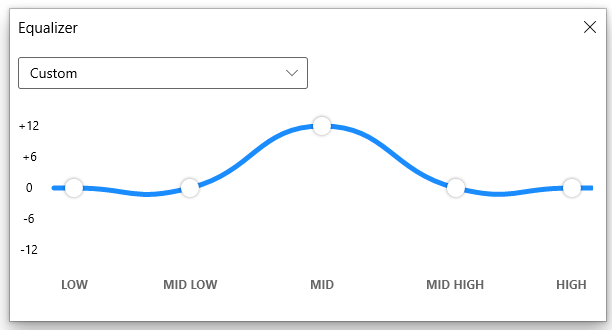
Next, let's boost in the midrange EQ in our playback application. This curve suggests at 12 dB boost to midrange frequencies. We've recorded the signal at -10 dBFS, so we'd expect 12 dB of boost might clip things. But let's see what happens:
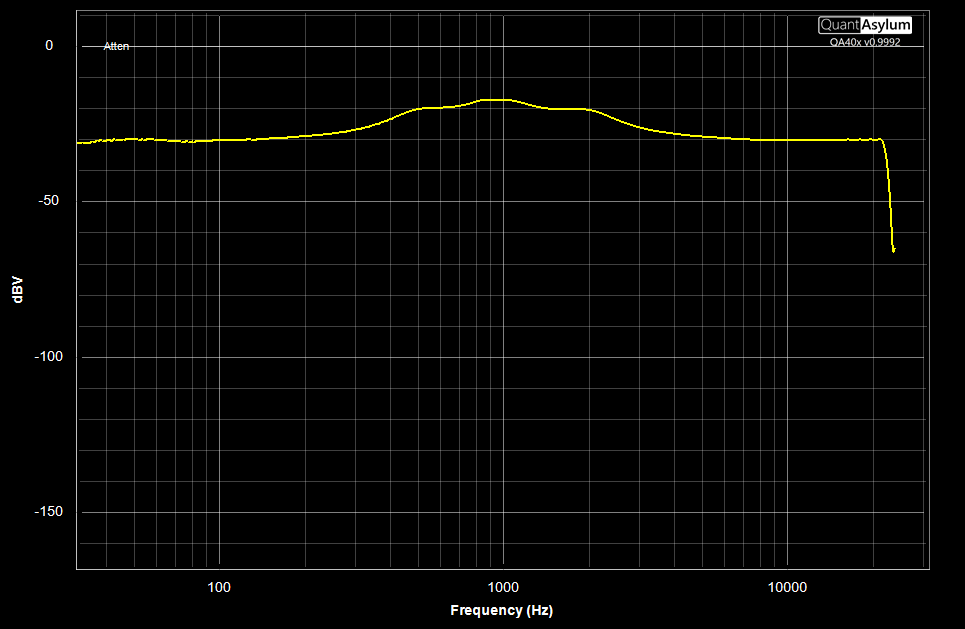
Capturing the signal again we get the following spectrum:
And in the time domain we see the following:
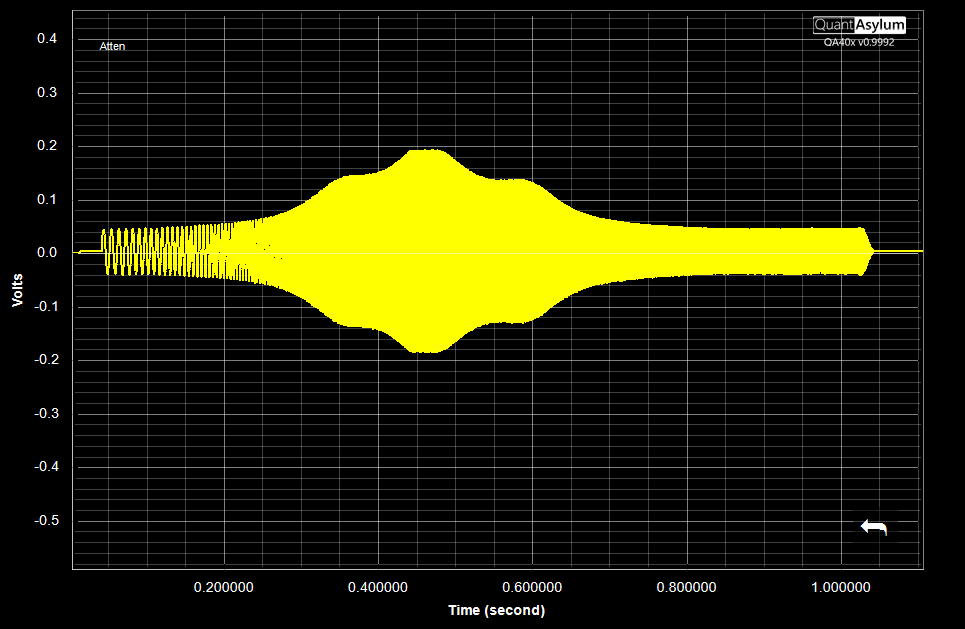
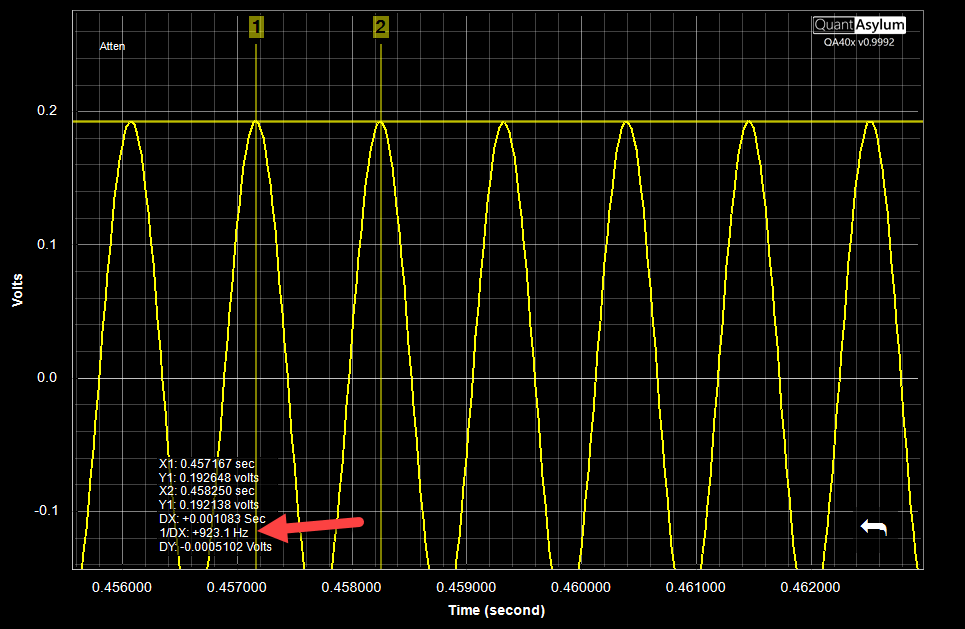
Zooming in and using the cursors, we can see the peak boost was applied around 1 kHz, and that is wasn't clipping.
The Triggered Acquisition mode, combined with exported WAV files, makes it easy to test the frequency response of your DUT.