Sparrow
Sparrow is communicating on top of IPv6/UDP and defines an encapsulation format (called encap) that encapsulates different types of payload. The most important payload is the TLV payload. This is used for all of the application data to and from IoT devices running Sparrow. TLVs consist of type, length and values and are fairly similar to OMA TLVs used in OMA LWM2M.
The application layer also defines an object model where each IoT device can present a number of object instances at runtime. There is a discovery procedure to discover the number of objects that any IoT device implements and their type. All Sparrow devices have instance 0 which is a management and discovery instance. Instance 0 includes one variable that describes the number of instances available on this device and knowing the instance count, all other instances can be discovered (e.g. read out type of object and other parameters).
Sparrow is based on Contiki OS and it is fully available in its own Sparrow Repository. Intel, SICS and Yanzi are the main supporters of Sparrow.
The Zolertia's Firefly and RE-Mote are widely used in Sparrow and well-supported, most of the examples work out-of-the-box. Additionally, Zolertia has built Antares: a 6LoWPAN outdoor Gateway, featuring an Intel Edison module as the embedded heavy-lifter, with a Firefly used as Sparrow's serial radio
The following sections are available:
- Installing and running Sparrow
- Create the Slip Radio device
- Running Sparrow in the Antares Outdoor Gateway (Intel Edison inside)
- Running the Border Router on a different device (embedded or laptop)
- Testing Sparrow
- Running the WS Sparrow demo
- Flashing a device wirelessly with OTAP

There are different recipes to start using Sparrow, depending on your available hardware. The basic 6LoWPAN architecture requires one device, namely a Border Router, as the device sitting between our 6LoWPAN wireless network and the IPv6/IPv4 network.
git clone --recursive https://github.com/sics-iot/sparrow
cd sparrow
The Border Router runs on a host, whereas we need to provide such with a 6LoWPAN wireless interface. The Firefly and the RE-Mote can be connected over USB, and act as a SLIP radio (Serial over IP) to forward messages back and forth.
Our instructions are based on Sparrow's Border Router and Serial Radio wiki page.
On the next sections we will compile the Slip Radio application and the rescue image for OTAP (Over the air programming), bundled into a single binary to be programmed to our device. The following steps assume using a Firefly, but you may also use the RE-Mote.
cd products/sparrow-serial-radio
make images TARGET=zoul-sparrow BOARD=firefly-reva
This will compile an image, the result is as shown:
  CC        instance-radio.c
  CC        transmit-buffer.c
  CC        enc-net.c
  CC        no-framer.c
  CC        sniffer-rdc.c
  CC        radio-scan.c
  LD        serial-radio.elf
serial-radio.elf  :
section                           size         addr
.text                           0xbc81     0x204000
.socdata                          0x40   0x20000000
.data                            0x230   0x20000040
.ARM.exidx                         0x8     0x20feb4
.bss                            0x32a3   0x20000270
.free_RAM_for_stack_and_heap    0x4aed   0x20003513
.comment                          0x6e          0x0
.ARM.attributes                   0x31          0x0
.debug_frame                     0x100          0x0
Total                          0x13e28

../../tools/sparrow/trailertool.py -T 70B3D57D51000004 -V now -I 0 -A 0x00242000 -P 0x0090DA0301010482ULL < serial-radio.bin > zoul-sparrow.2.flash
rm serial-radio.co obj_zoul-sparrow/startup-gcc.o
Creating image archive for serial-radio.images INC=0
The next step is to create a rescue image.
The rescue image is a piece of firmware that allows the device to be programmed remotely over the wireless network, this Over the Air Programming (OTAP) is highly desirable to update and fix deployed devices in the field, without having to physically access the devices and program over USB, specially in cases the devices are hard-to-reach (i.e mounted in a light street pole) and maintenance costs are required to be kept to a minimum.
Each device split its flash into two separate images, and the currently running image is used to flash the other image.
The following command make rescue-image will prepare the Slip Radio image for OTAP, and then with make upload-rescue-image the final image will be flashed to the Firefly:
$ make rescue-image TARGET=zoul-sparrow BOARD=firefly-reva && make upload-rescue-image TARGET=zoul-sparrow BOARD=firefly-reva

(...)
Creating binary mfg from hex
Creating cca area (serial bootloader enabled)
Adding bootloader and padding
Adding firmware image
Adding cca
Created file rescue-firefly-reva.bin

BSL_ADDRESS_ARG=0x00200000
python ../../contiki/tools/cc2538-bsl/cc2538-bsl.py -e -w -v -p /dev/ttyUSB0  rescue-firefly-reva.bin
Opening port /dev/ttyUSB0, baud 500000
Reading data from rescue-firefly-reva.bin
Firmware file: Raw Binary
Connecting to target...
CC2538 PG2.0: 512KB Flash, 32KB SRAM, CCFG at 0x0027FFD4
Primary IEEE Address: 06:0D:B1:EB:00:12:4B:00
Erasing 524288 bytes starting at address 0x00200000
    Erase done
Writing 524288 bytes starting at address 0x00200000
Write 16 bytes at 0x0027FFF0F8
    Write done
Verifying by comparing CRC32 calculations.
    Verified (match: 0xc9275a15)
We are assuming the Firefly on this example thus the BOARD=firefly-reva, if you are using the RE-Mote use BOARD=remote-revb instead.
If you try to create the rescue-image before having the slip-radio compiled the following error will be thrown:
make rescue-image
make: *** No rule to make target `zoul-sparrow.1.flash', needed by `rescue-image'.  Stop.
Now create a Border Router using either a Firefly or a RE-Mote.
If you are the proud owner or beta-tester of the Antares: a 6LoWPAN outdoor Gateway, you will need to flash the Intel Edison with our stock image. The installation script to configure your own recipes will be uploaded soon!

The Antares Gateway is a complete 6LoWPAN base on Linux on Intel Edison embedded system providing the following features:
- High-speed dual core processing unit
- Integrated dual-band 2.4GHz and 5GHz Wifi* and Bluetooth* low energy
- Yocto Linux* distribution
- 3xUSB PORTS
- RTC with Supercapacitor retention
- External uSD storage
This devices has a Zolertia Firefly on board, it provides the next features:
- Direct USB Serial communication with Intel Edison
- USB powered
- ISM 2.4GHz IEE 802.15.4 & Zigbee compliant
- ISM 868-, 915-, 920-, 950-MHz ISM/SRD Band
- On-board printed PCB sub1GHz antenna, ceramic antenna for 2.4GHz interfaz. Alternatively u.Fl for external outdoor antenna
More information about Antares available at wiki page.
As done in the previous step, now we should have a Firefly programmed as Slip Radio. Connect to the Antares Gateway over USB and continue.
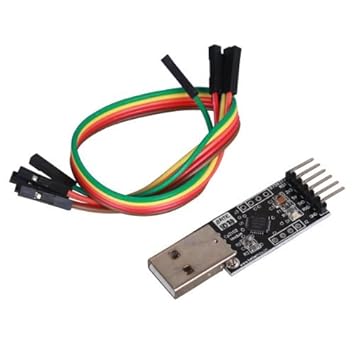
Log over a console terminal or via SSH to Antares. To access over the Edison serial port, you will need a serial to USB converter, such as the CP2102 USB 2.0 to TTL UART. Instructions on how to connect over UART are available at Antares Wiki page
Connect to the Antares as follows:

| Antares JP10 | CP2104 |
|---|---|
| GND | GND |
| TXD | RXD |
| RXD | TXD |
And enter the credentials: default are root as user, the password should be zolertia (but you are prompted to change this)
# dmesg | grep ttyUSB
[ 4536.984588] usb 1-1.3: cp210x converter now attached to ttyUSB0
And start the Border Router as follows:
root@zolertia-antares:/opt/6lowpan/sbin# ./border-router.native-sparrow -s /dev/
ttyUSB0 fd00::1/64

Contiki-3.x-2920-g0e77504 started with IPV6, RPL
Network started with ll address 1.2.3.4.5.6.7.8
MAC nullmac RDC br-rdc NETWORK sicslowpan
Tentative link-local IPv6 address fe80:0000:0000:0000:0302:0304:0506:0708
2017-01-17 13:21:33.301 [nbr] INFO  - RPL-Border router started
2017-01-17 13:21:33.301 [watchdog] INFO  - Watchdog started!
2017-01-17 13:21:33.305 [enc] INFO  - ******** started on ``/dev/ttyUSB0''
2017-01-17 13:21:33.349 [ctrl] INFO  - Started control UDP on port 47000
2017-01-17 13:21:33.350 [nbr] INFO  - Border router:
2017-01-17 13:21:33.350 [nbr] INFO  -   sw revision: Sparrow_v2.0-NBR-baselineM
2017-01-17 13:21:33.351 [nbr] INFO  -   Compiled at: Tue Jan 17 08:42:26 GMT 2017
2017-01-17 13:21:33.351 [nbr] INFO  -   System clock: clock_gettime()
2017-01-17 13:21:33.351 [nbr] INFO  - Network Configuration:
  2500 routes
  1000 neighbors
  2 default routers
  3 prefixes
  3 unicast addresses
  5 multicast addresses
  2 anycast addresses
  3600 seconds ND6 reachable
  30 default lifetime units, 60 seconds per unit, for RPL
2017-01-17 13:21:33.363 [enc] INFO  - SR: Packet input failed: -2 (len:7)
2017-01-17 13:21:33.365 [enc] INFO  - SR: Got BR API version:3
2017-01-17 13:21:33.366 [br-cmd] INFO  - Radio protocol version: 3
2017-01-17 13:21:33.394 [udp-cmd] ERROR - radio did not give any chassis capabilities (9)
2017-01-17 13:21:34.352 [nbr] INFO  - Radio sw revision: 3ab78ca1453d
2017-01-17 13:21:34.354 [nbr] INFO  -       bootloader:  0  capabilities: 0x000000000
2017-01-17 13:21:34.356 [udp-cmd] INFO  - Started UDP cmd on port 49111
2017-01-17 13:21:34.358 [server] INFO  - Started server on port 9999
2017-01-17 13:21:34.359 [nbr] INFO  - Setting prefix fd00::1
2017-01-17 13:21:34.372 [enc] INFO  - SR: radio: mode set to 1
2017-01-17 13:21:42.383 [tun] INFO  - opened tun device ``/dev/tun0''

tun0      Link encap:UNSPEC  HWaddr 00-00-00-00-00-00-00-00-00-00-00-00-00-00-00-00
          inet6 addr: fd00::1/64 Scope:Global
          UP POINTOPOINT RUNNING NOARP MULTICAST  MTU:1500  Metric:1
          RX packets:0 errors:0 dropped:0 overruns:0 frame:0
          TX packets:0 errors:0 dropped:0 overruns:0 carrier:0
          collisions:0 txqueuelen:500
          RX bytes:0 (0.0 B)  TX bytes:0 (0.0 B)

Server IPv6 addresses:
 0x80e27f8: => fd00::212:4b00:60d:b1eb
 0x80e2818: => fe80::212:4b00:60d:b1eb
We can check the interface being created:
# ifconfig
enp0s17u1u1 Link encap:Ethernet  HWaddr 72:ee:2a:38:ac:c8
          inet addr:192.168.1.87  Bcast:192.168.1.255  Mask:255.255.255.0
          inet6 addr: bbbb::70ee:2aff:fe38:acc8/64 Scope:Global
          inet6 addr: fe80::70ee:2aff:fe38:acc8/64 Scope:Link
          UP BROADCAST RUNNING MULTICAST DYNAMIC  MTU:1500  Metric:1
          RX packets:19910 errors:0 dropped:0 overruns:0 frame:0
          TX packets:731 errors:0 dropped:0 overruns:0 carrier:0
          collisions:0 txqueuelen:1000
          RX bytes:1779595 (1.6 MiB)  TX bytes:136032 (132.8 KiB)

tun0      Link encap:UNSPEC  HWaddr 00-00-00-00-00-00-00-00-00-00-00-00-00-00-00-00
          inet6 addr: fd00::1/64 Scope:Global
          UP POINTOPOINT RUNNING NOARP MULTICAST  MTU:1500  Metric:1
          RX packets:0 errors:0 dropped:0 overruns:0 frame:0
          TX packets:0 errors:0 dropped:0 overruns:0 carrier:0
          collisions:0 txqueuelen:500
          RX bytes:0 (0.0 B)  TX bytes:0 (0.0 B)

usb0      Link encap:Ethernet  HWaddr 02:00:86:5f:38:29
          inet addr:192.168.2.15  Bcast:192.168.2.255  Mask:255.255.255.0
          UP BROADCAST MULTICAST  MTU:1500  Metric:1
          RX packets:0 errors:0 dropped:0 overruns:0 frame:0
          TX packets:0 errors:0 dropped:0 overruns:0 carrier:0
          collisions:0 txqueuelen:1000
          RX bytes:0 (0.0 B)  TX bytes:0 (0.0 B)

wlan0     Link encap:Ethernet  HWaddr 78:4b:87:ac:27:f2
          inet6 addr: fe80::7a4b:87ff:feac:27f2/64 Scope:Link
          UP BROADCAST MULTICAST  MTU:1500  Metric:1
          RX packets:0 errors:0 dropped:0 overruns:0 frame:0
          TX packets:6 errors:0 dropped:0 overruns:0 carrier:0
          collisions:0 txqueuelen:1000
          RX bytes:0 (0.0 B)  TX bytes:508 (508.0 B)
The next step is to configure RADVD to advertise our IPv6 network in the LAN, this is not mandatory but it is fun :-)
First create a static IPv6 address on the preferred IP interface, I'm assuming the Antares is connected over Ethernet.
connmanctl services
*AO Wired                ethernet_72ee2a38acc8_cable
The ethernet_72ee2a38acc8_cable is my Ethernet connection, to configure:
# connmanctl config ethernet_72ee2a38acc8_cable --ipv6 manual baba::100 64
We can check out connman configuration:
# cat /var/lib/connman/ethernet_72ee2a38acc8gs ble/setting
[ethernet_72ee2a38acc8_cable]
Name=Wired
AutoConnect=true
Modified=2017-01-18T12:04:44.573520Z
IPv4.method=dhcp
IPv4.DHCP.LastAddress=192.168.1.87
IPv6.method=manual
IPv6.privacy=disabled
IPv6.netmask_prefixlen=64
IPv6.local_address=baba::100
This will create a baba:100/64 address:
# ifconfig
enp0s17u1u1 Link encap:Ethernet  HWaddr 72:ee:2a:38:ac:c8
          inet addr:192.168.1.87  Bcast:192.168.1.255  Mask:255.255.255.0
          inet6 addr: baba::100/64 Scope:Global
          inet6 addr: fe80::70ee:2aff:fe38:acc8/64 Scope:Link
          UP BROADCAST RUNNING MULTICAST DYNAMIC  MTU:1500  Metric:1
          RX packets:6480 errors:0 dropped:0 overruns:0 frame:0
          TX packets:2694 errors:0 dropped:0 overruns:0 carrier:0
          collisions:0 txqueuelen:1000
          RX bytes:547882 (535.0 KiB)  TX bytes:345664 (337.5 KiB)
Enable the IPv6 forwarding:
# sysctl -w net.ipv6.conf.all.forwarding=1
net.ipv6.conf.all.forwarding = 1
To make this change persistent after a reboot (recommended):
echo 1 > /proc/sys/net/ipv6/conf/enp0s17u1u1/forwarding
And create a configuration file for RADVD if it doesn't exists:
cat /etc/radvd.conf
interface enp0s17u1u1
{
    AdvSendAdvert on;
    prefix baba::/64
    {
        AdvOnLink on;
        AdvAutonomous on;
    };

    route fd00::/64
    {
    };
};
And start RADVD:
radvd
If everything goes OK you should see the Ethernet interface being auto-configured with the given baba:: prefix as shown next:
enp0s17u1u1 Link encap:Ethernet  HWaddr 72:ee:2a:38:ac:c8
          inet addr:192.168.1.87  Bcast:192.168.1.255  Mask:255.255.255.0
          inet6 addr: bbbb::70ee:2aff:fe38:acc8/64 Scope:Global
          **inet6 addr: baba::70ee:2aff:fe38:acc8/64 Scope:Global**
          inet6 addr: baba::100/64 Scope:Global
          inet6 addr: fe80::70ee:2aff:fe38:acc8/64 Scope:Link
          UP BROADCAST RUNNING MULTICAST DYNAMIC  MTU:1500  Metric:1
          RX packets:910 errors:0 dropped:0 overruns:0 frame:0
          TX packets:643 errors:0 dropped:0 overruns:0 carrier:0
          collisions:0 txqueuelen:1000
          RX bytes:86629 (84.5 KiB)  TX bytes:96315 (94.0 KiB)
Devices on the local area network will receive the advertisement and auto-configure their interfaces accordingly. From my office computer (running windows), this is a snippet of the ipconfig /all command (sensitive results ommited):
Ethernet adapter Local Area Connection:
   Connection-specific DNS Suffix  . :
   Description . . . . . . . . . . . : Intel(R) Ethernet Connection I218-LM
   Physical Address. . . . . . . . . : XX-XX-XX-XX-XX-XX
   DHCP Enabled. . . . . . . . . . . : Yes
   Autoconfiguration Enabled . . . . : Yes
   IPv6 Address. . . . . . . . . . . : baba::9d42:xxxx:xxxx:xxxx(Preferred)
   Temporary IPv6 Address. . . . . . : baba::e803:xxxx:xxxx:xxxx(Preferred)
   Link-local IPv6 Address . . . . . : fe80::9d42:xxxx:xxxx:xxxx%xx(Preferred)
   IPv4 Address. . . . . . . . . . . : 192.168.1.83(Preferred)
   Subnet Mask . . . . . . . . . . . : 255.255.255.0
Now ping the Border Router's interface and the slip radio:
C:\WINDOWS\System32>ping -6 fd00::1

Pinging fd00::1 with 32 bytes of data:
Reply from fd00::1: time=1ms
Reply from fd00::1: time=1ms
Reply from fd00::1: time=1ms
Reply from fd00::1: time=1ms

Ping statistics for fd00::1:
    Packets: Sent = 4, Received = 4, Lost = 0 (0% loss),
Approximate round trip times in milli-seconds:
    Minimum = 1ms, Maximum = 1ms, Average = 1ms

C:\WINDOWS\System32>ping -6 fd00::212:4b00:60d:b1eb

Pinging fd00::212:4b00:60d:b1eb with 32 bytes of data:
Reply from fd00::212:4b00:60d:b1eb: time=1ms
Reply from fd00::212:4b00:60d:b1eb: time=1ms
Reply from fd00::212:4b00:60d:b1eb: time=1ms
Reply from fd00::212:4b00:60d:b1eb: time=1ms

Ping statistics for fd00::212:4b00:60d:b1eb:
    Packets: Sent = 4, Received = 4, Lost = 0 (0% loss),
Approximate round trip times in milli-seconds:
    Minimum = 1ms, Maximum = 1ms, Average = 1ms
If you only have RE-Motes or Fireflies, you could one as Border Router connected to your laptop, or your favorite embedded device.
Pending to complete!
To test the connection between a device and the Border Router follow the next instructions:
Connect a different Firefly or RE-Mote and flash:
cd examples/zoul/remote
make IMAGE=1 && make rescue-image

(...)
  CC        ../../../dev/cc1200/cc1200-868-fsk-1-2kbps.c
  CC        ../../../dev/cc1200/cc1200.c
  CC        ../../../lib/image-trailer/image-trailer.c
  CC        remote.c
  LD        remote.elf
remote.elf  :
section                           size         addr
.text                          0x114fc     0x204000
.socdata                          0x40   0x20000000
.data                            0x89f   0x20000040
.ARM.exidx                         0x8     0x215d9c
.bss                            0x3b67   0x200008e0
.free_RAM_for_stack_and_heap    0x3bb9   0x20004447
.comment                          0x6e          0x0
.ARM.attributes                   0x31          0x0
.debug_frame                     0x3a4          0x0
Total                          0x19946

Creating binary mfg from hex
Creating cca area (serial bootloader enabled)
Adding bootloader and padding
Adding firmware image
Adding cca
Created file rescue-remote-reva.bin
Connect a RE-Mote over USB and run:
make upload-rescue-image

(...)
BSL_ADDRESS_ARG=0x00200000
python ../../../contiki/tools/cc2538-bsl/cc2538-bsl.py -e -w -v -p /dev/ttyUSB0  rescue-remote-reva.bin
Opening port /dev/ttyUSB0, baud 500000
Reading data from rescue-remote-reva.bin
Firmware file: Raw Binary
Connecting to target...
CC2538 PG2.0: 512KB Flash, 32KB SRAM, CCFG at 0x0027FFD4
Primary IEEE Address: 06:0D:B2:E2:00:12:4B:00
Erasing 524288 bytes starting at address 0x00200000
    Erase done
Writing 524288 bytes starting at address 0x00200000
Write 16 bytes at 0x0027FFF0F8
    Write done
Verifying by comparing CRC32 calculations.
    Verified (match: 0x4341ad5f)
At the Border Router we should now see our device in our PAN:
root@zolertia-antares:~# wget -qO- http://[fd00::212:4b00:60d:b1eb]/r
fd00::212:4b00:60d:b2e2
root@zolertia-antares:~# wget -qO- http://[fd00::212:4b00:60d:b1eb]
<html><head><title>ContikiRPL</title></head><body>
Neighbors<pre>
fe80::212:4b00:60d:b2e2
</pre>
Routes<pre>
fd00::212:4b00:60d:b2e2/128 (via fe80::212:4b00:60d:b2e2) 29:57s
</pre>
</body></html>
Ping the device!
root@zolertia-antares:~# ping6 fd00::212:4b00:60d:b2e2
PING fd00::212:4b00:60d:b2e2 (fd00::212:4b00:60d:b2e2): 56 data bytes
64 bytes from fd00::212:4b00:60d:b2e2: seq=0 ttl=63 time=26.525 ms
64 bytes from fd00::212:4b00:60d:b2e2: seq=1 ttl=63 time=26.001 ms
64 bytes from fd00::212:4b00:60d:b2e2: seq=2 ttl=63 time=26.135 ms
64 bytes from fd00::212:4b00:60d:b2e2: seq=3 ttl=63 time=25.709 ms
^C
--- fd00::212:4b00:60d:b2e2 ping statistics ---
4 packets transmitted, 4 packets received, 0% packet loss
round-trip min/avg/max = 25.709/26.092/26.525 ms
The following instructions assume you are running the commands from the Zolertia Antares Outdoor Gateway. If you are running the next commands from a different embedded device, or your laptop, change accordingly. The instructions were taken from the Sparrow wiki
This assumes you have already running the Border Router with the Slip Radio device connected to Antares.
The wsdemoserver identifies the Border Router and running instances, exposing the configuration and features over a web server.
# cd /opt/6lowpan/sbin/examples/sparrow
# python wsdemoserver.py
Product label: border router
instance: 1  type: 0090da0303010010   Primary firmware
instance: 2  type: 0090da0303010010   Backup firmware
instance: 3  type: 0090da0303010014   802.15.4 radio
instance: 4  type: 0090da0302010015   Routing table
	Router address: fd00::212:4b00:60d:b1eb
	Network prefix: fd00::
	Network address: fd00::1
instance: 5  type: 0090da0303010022   Border Router Management
instance: 6  type: 0090da0303010023   Network Statistics
Setting beacon with length 40 in instance 3
	fe02010a020090da0100001b5818020090da03fd000000000000000000000000000001115c000000
Starting demo server
httpd: forward prefix set to "fd00::"
httpd: serving at port 8000
WS Server state initialized.
Device server started at [fd00::1]:4444
Open the browser with the Antares URL and the port 8000 as shown in the screenshot below. The Border Router's web service will be loaded. Our previous RE-Mote device used in the last section is shown in our network:

We can ping the devices from the Web Server interface:

The Network Topology tab shows how the tree-based topology of our PAN:

The BR and Serial Radio tab has more information about the Border Router and our network, with some sweet features already built-in for our testing and administration pleasure:

In this tab you are able to:
- Ping the Border Router
- Change the channel and PAN ID of the network
- Trigger Global network repairs
- Sniff the wireless channel
- Scan the wireless media energy level (RSSI)
An example of the sniffer is shown below:

Now that we have our network up and running, let's test programming a device remotely using Sparrow's over-the-air programming. The upload of a new image use the Array TLV's described in the Encap and TLV page on Sparrow's wiki.
Go to our previous example and increment the image number:
cd examples/zoul/remote
make images INC=2
And run the tool to upload remotely using the target device address:
# make upload-fast DST=fd00::212:4b00:60d:b2e2
../../../tools/sparrow/tlvupgrade.py -b 512 -i zoul-sparrow-firmware.jar -v -a fd00::212:4b00:60d:b2e2
---- Upgrading ----
Product label: Zolertia RE-Mote revision A  type: 70b3d57d53000001 instances: 6
Booted at: 2017-01-18 16:35:07 - 12 min 5 sec 419 msec
Instance 1: type: 0090da0303010010   Primary firmware
	Version:    0090da028fc23140    untagged-20170117 inc: 0
	Image Type: 70b3d57d51000001    Status: active
Instance 2: type: 0090da0303010010   Backup firmware
	Version:    0000000000000000    0.0.0branch inc: 0
	Image Type: 70b3d57d51000001    Status: erased
Upgrading instance 2 Backup firmware with image zoul-sparrow.2.flash  (73164 bytes)
Got 143 segments.
 Upgrading  142 2 460  at  72704
New image OK. Rebooting to new image.
Note this command was executed in a different device than the Antares, a laptop in the same LAN network. As the RADVD advertises the network prefix, other hosts can auto-configure its IPv6 address and learn how to reach the Antares Gateway, and its wireless 6LoWPAN network.