***** The "Octopus" (previously Weeping Willow) affordable Rasp Pi SD Cloner / Writer *****
We (Naturebytes) had to come up with our own in-house method of mass SD card cloning / duplication to write the 300+ Kickstarter kit SD cards needed for the Wildlife Cam Kit.
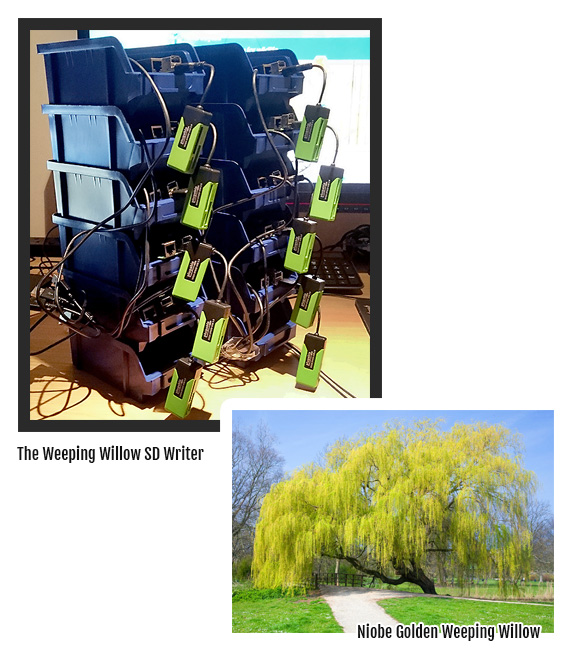
To copy a vast number of SD images we would have needed to invest in a professional SD card duplicator, but even a 1-31 machine can cost shy of £2,400, so we decided to use the humble Raspberry Pi and individual USB writers as a network, ending up with what appeared to originally look like a weeping willow SD card writer, only later to become more of an octopus – which fits into the Naturebytes family quite well we thought.
This repo is a how-to guide so you can build your own device if you ever feel the burning need to clone many hundreds of SD cards on the cheap.
***** How to guide *****
-
Hardware needed:
- Raspberry Pi (cheapest with embedded ethernet - we use the Pi Model B)
- Cat5 cables (as many pieces as you have Pis and one for your host laptop / desktop)
- Micro USB cables (for the Rasp Pis)
- Host SD cards large enough to fit your image and SD cards that you intend to write it to
- USB SD card writer (linux compatible, i.e Pluggable variety)
- Anker USB multi-port charger (i.e PowerPort 40W)
- Switch (as many ports as you need, we used a 16 port Netgear Prosafe but the 5 port TP-Link is incredibly cheap if you only need to write 4 SDs at the same time)
- Host machine (laptop, another Pi, whatever you enjoy that has ethernet)
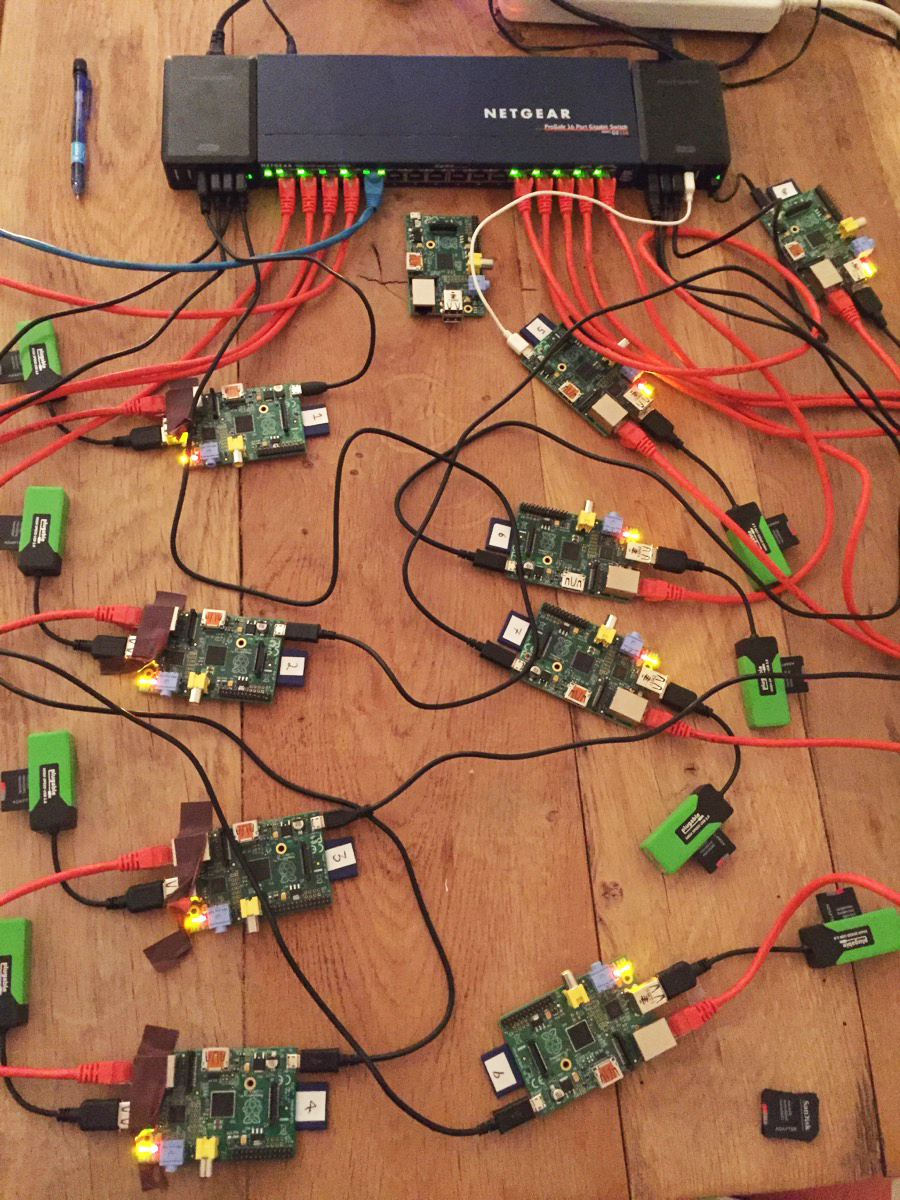
Once you've got the hardware in place, attach each Rasp Pi to the switch via the Cat5 cables and attach a USB writer to each Pi in turn. Load each writer with a formatted SD card that you indend to write to. Ensure the capacity of the card is large enough to fit the image that you are going to write to it.
Next, we need to create the host SD card that will contain the image file and an OS to boot the Pi. Download Raspbian Jessie Lite (or just Raspbian if you want, but the Lite version is fine). Write this to the host SD card. If you are burning an 7.4GB image you're going to want a card larger than 8GB to do the job, do get a 16GB to be safe for example. Write the OS to is using WinDiskImage32 if on Windows (download it and search for a guide showing you how to write an image), or the standard way if doing it in Linux.
See the official Rasp Pi instructions for help if required: https://www.raspberrypi.org/documentation/installation/installing-images/linux.md
Once you have written the OS we're going to want to copy the image you intend to write to each of the cards to it so you can access it when we login and tell each Rasp Pi to begin writing. Copy it to a folder (such as /home) on the host SD card. If on Windows, write the image to one of your SD cards and we'll read it using a Rasp Pi and save it to the host that way, but before we go, read the next section.
**** Setting up the hostname for each Rasp Pi writer ****
We're going to make life easy and use mDNS (Bonjour / Avahi) to connect to each Rasp Pi. This means we don't need a DHCP server and that each Rasp Pi will be discoverable and connectable on the same network. Avahi is pre-installed with Jessie, but if you are connecting from a Windows PC you will want to install Bonjour so yu can discover mDNS devices. Macs already have it by default as it's used by iTunes.
Once done, connect the Rasp Pi to your switch, and your PC to the switch too. Download a program called PuTTy that allows us to connect to the command line of the Rasp Pi if on Windows. The default hostname of a Rasp Pi using Jessie is raspberrypi. We can connect to it by selecting SSH in PuTTy. Change the port to 22 and enter raspberrypi.local as the host.
raspberrypi.local
Click open and a command line will load. You should see "Login as:"
Enter: raspberry
Password: pi
This is the default login for the Raspberry Pi Raspbian OS. Next, we're going to change the hostname to a unique value so we can SSH in to it and command it to write an SD card. We'll do the same for each Rasp Pi using a terminal commander, manually, or via a shell script - whatever floats your boat.
To change the hostname, SSH in and from the command line enter;
sudo raspi-config
You'll be presented with a configuration screen. Select Advanced > Hostname and you will be asked to enter a new hostname. I usually use "worker1" and continue until I've created 15 workers (for a 16 port hub). Repeat this process so you can create as many workers as you need, each one holding the image we are going to write.
Once you have your workers ready, pop them back into the Rasp Pis and boot them us with the USB writer attached. It will look something like this at this point:
**** Writing multiple SD cards ****
Now that we're all connected, you'll want to use PuTTy to command a Rasp Pi to start writing the image to an SD card placed in the USB writer. You can do this manually by logging in to the Rasp Pi via PuTTy and creating a new window / tab for each Rasp Pi, or you can use a script to SSH in to each Rasp Pi, start the writing process, then continue to the next. You can run this as a single command from your host PC / Rasp Pi if required.
To do the process manually you should connect to the first Rasp Pi using "worker1.local" (if you called it that as the hostname). Once connected, login using the default user and pass and give it a quick check to confirm that the SD card is present and to see the path. Type df and hit enter. You'll see that the card is attached and you'll see the path as something like /dev/sdb1
Make a note of the path and remove the number at the end. The number represents the partition number but we want to write to the whole SD card, not just that one partition. You should end up with /dev/sdb (or something similar). Now that we have that we are able to command Rasp Pi to write the image we left in /home to it. Change the path to your image in the code below and the of= to your exact SD path as stated when you ran df -h
sudo dd bs=4M if=[path_to_your_image.img] of=/dev/sdb
The Rasp Pi will start to write the image. Now all you need to do is repeat this for the other Rasp Pis, and when complete you'll see that it will present the time it took to write and drop back to the command line ready to run again. You can then remove the SD card and replace it with a fresh new one ready to continue the process. In this way you can replicate SDs for cheap and expand the number of SD writers to as many as required. I would advise writing a shell script or Python script to automatically command each Rasp Pi in your network to start a fresh write after you have replaced the SD when you are doing more than 10.
For help with these instructions feel free to contact me, or the Naturebytes team using info@naturebytes.org/documentation/installation/installing-images/linux

