-
Notifications
You must be signed in to change notification settings - Fork 13
Firmware compiling and installing instructions
Most of the core firmware functionality is contained within Software/firmware_main/VMETER.c. If you want to change the structure of the settings that are stored in eeprom (memory that survives power loss), you may also need to change files in Software/firmware_eeprom_writer. The eeprom writer is typically only needed to pre-load settings on a blank VMeter.
Pre-reqs (the versions of these are important):
- LUFA 110528
- AVR Toolchain ver 3.0.149
- (avr-gcc should output gcc version 4.4.3 (AVR_Toolchain_3.0_149)).
- No direct link available, unfortunately. Happy to provide if you contact. Dependency on this version is due to usage of a pre-compiled library for the capacitive sensing.
- John H just found a download link for the AVR toolchain you will need. Thanks! http://www.atmel.com/images/avr-toolchain-installer-3.0.0.240-win32.win32.x86.exe this link is not functional as of 2024.03.05
- The download link for the AVR toolchain you will need has moved. The new link is here: http://ww1.microchip.com/downloads/en/DeviceDoc/avr-toolchain-installer-3.0.0.240-win32.win32.x86.exe
- QTouch, Atmel's cap touch library. Necessary files are included in this repository.
- HID Bootloader, the program used to push new firmware out to the VMeter. Compiled versions for Windows and Mac are already included in this repository (hid_bootloader_cli).
Install the AVR Toolchain and add its bin directory to your system's path. On Windows 7, you do this by clicking start, right-clicking Computer, select properties, choose advanced system settings, and then add or prepend the Path System Variable with the bin directory. Check by opening a command prompt and typing avr-gcc -v.
Install LUFA so that it's parallel with the firmware directory:
- Software/LUFA-110528/Bootloaders
- Software/firmware_main
Open a command prompt and type make and that should be it!
To load the firmware on a VMeter, follow the instruction for firmware upgrading. This entails sending a special command to the VMeter so it resets in bootloader mode as a HID USB device.
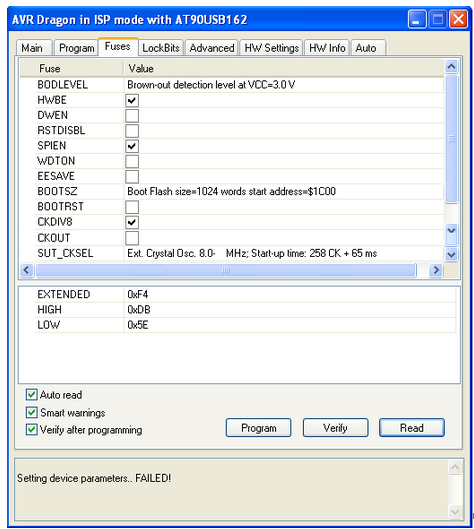
If you're starting from a completely blank chip, you'll need to set the FUSE bytes (configuration bytes) on the Atmel chip and install the bootloader using something like Atmel's Dragon (can re-write the chip after it's already soldered) along with AVR Studio. The one tricky setting in AVR Studio is to make sure the bootloader is 2kB or 1024 words. The bootloader is the HID one inside LUFA. (This bootloader was one of the smallest ones we could find for this chip, using 2kB or 12.5% of the chip's total space).
Full AVR Studio Fuse settings:

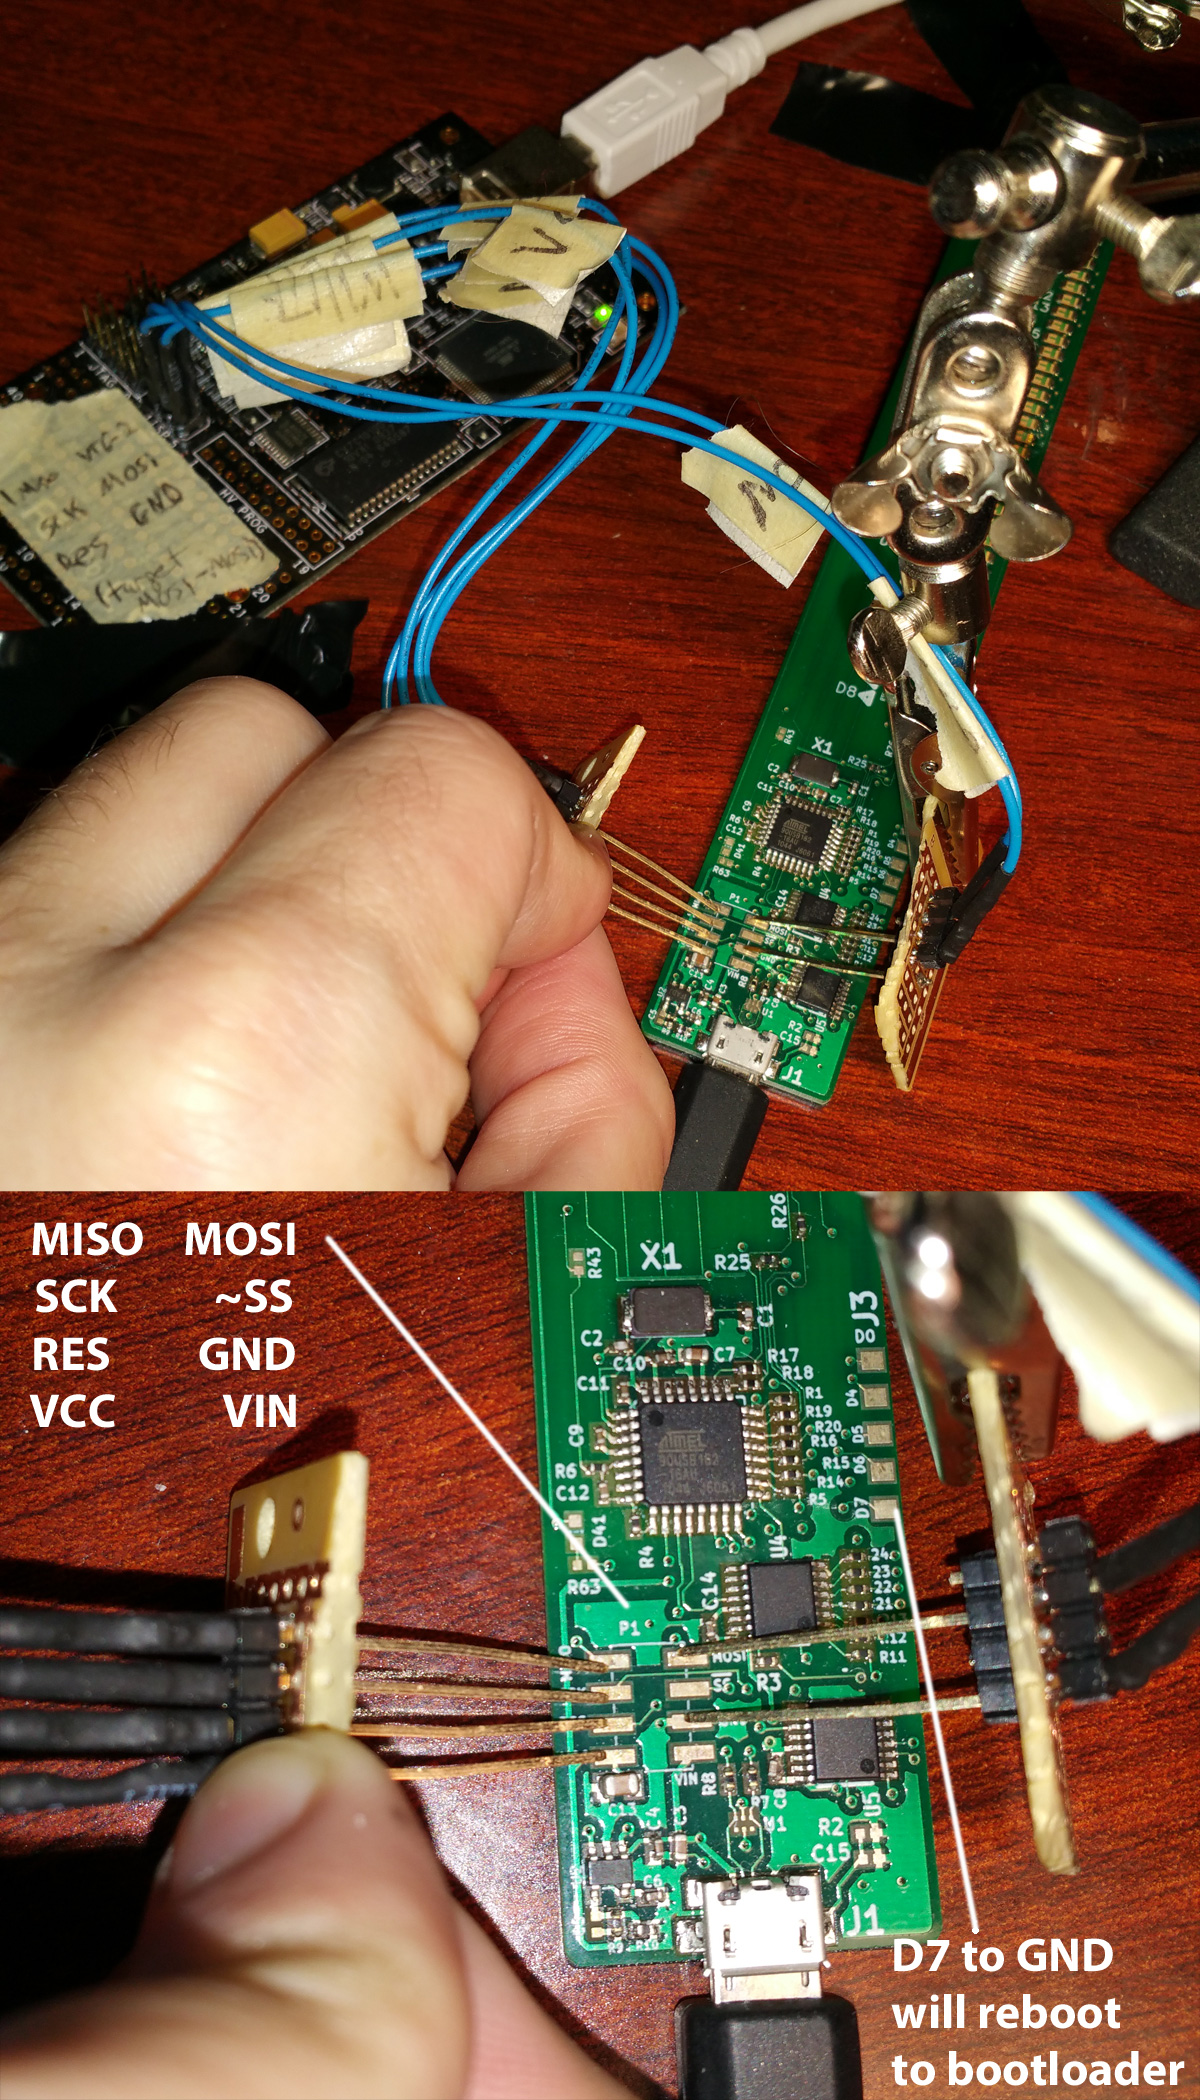
To program the Atmel chip after it's already soldered, we rigged up a jig to connect to the exposed ISP pads:

Also note the pad D7 near the right edge which if connected to GND will reset the VMeter into its bootloader if a firmware upgrade is faulty. It's possible to do this even when the entire device is glued together, although we typically test new firmware on an unassembled version.
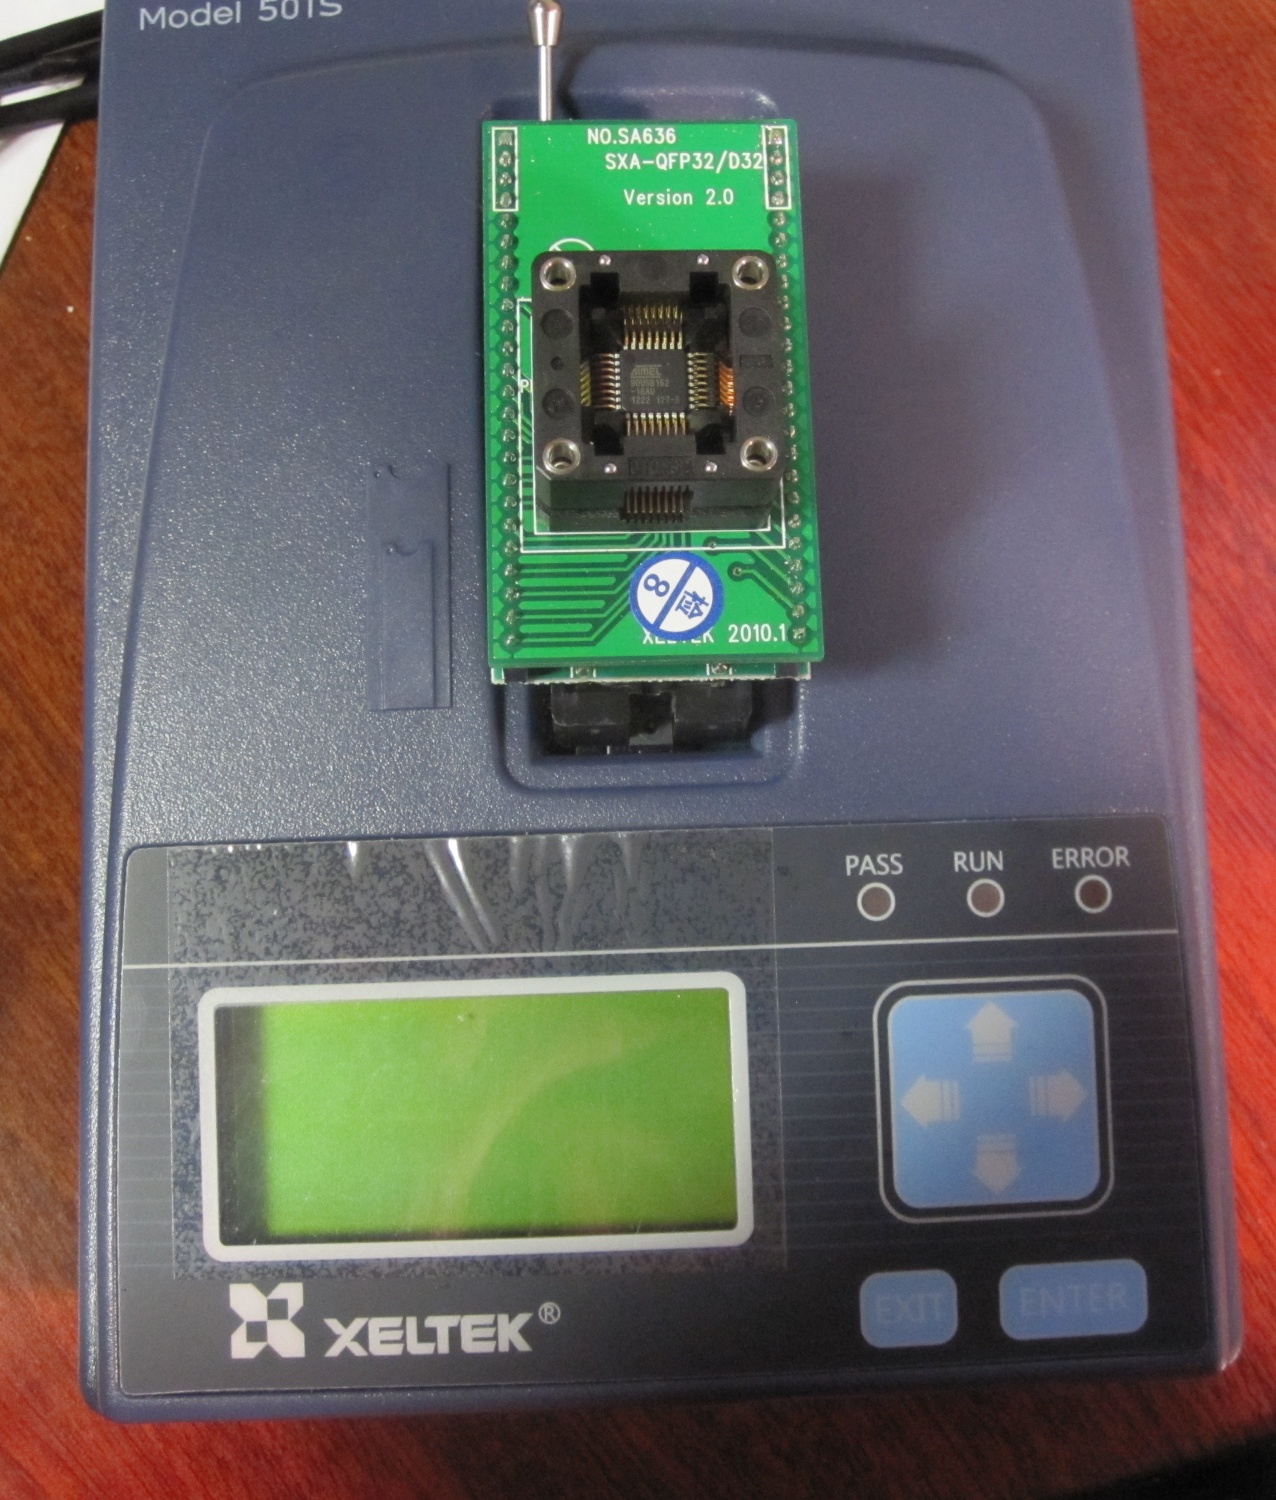
As an alternative to installing the bootloader and then using that to install the firmware, you can also just use the ELF file to load in the fuse settings, eeprom default settings and firmware in one operation within AVR studio. This is what we use in production to program the chips before soldering to the board (using the superpro 501s and TQFP32 adapter).

Returning again to the eeprom-writer, this program simply writes some values off to the eeprom and resets to the bootloader. We use this since the bootloader we're using doesn't write to the eeprom. Changing the eeprom-writer is somewhat involved, as the EEPROM .hex output from the main program is first converted from binary to hex using hex2bin, and then to a .h header file (using bin2h), and the .h file finally gets included in the eeprom-writer. An alternative approach would be to have the main firmware detect the underlying version and write default values to the eeprom if needed.