 I'm fully in love with 90's music. It's the music from my early childhood. One of my first CD was from DJ Bobo - don't worry, I'm over it now. But in some weak moments I open the website The 90's button, which contains hundreds of music videos of that age. Some months ago we planned a 90's party to get that feeling back and wanted to use that website for the music on a big beamer. There was only one thing that we was missing: A real physical button to change the song! So I build one on my own. If you want to have that button too I will show you how. It may not win the price for it's beauty but it will work. It's easy and a very basic level.
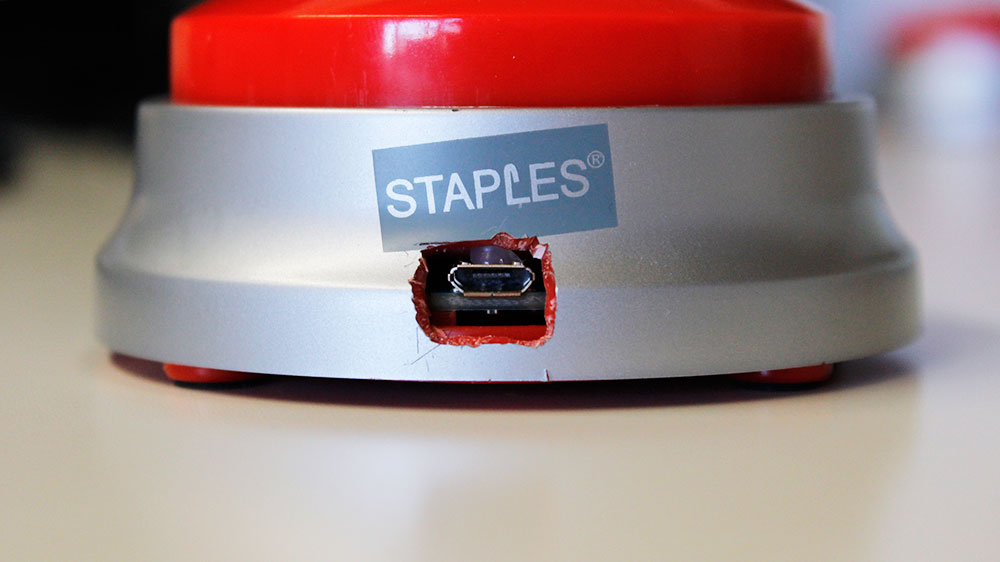
- A button of course (I used the Staples Easy Button)
- An Arduino Micro and the official software
- Two LEDs for visual feedback and a 330Ω resistance
- Some cables and tools (wrench, soldering iron)
- The Greasemonkey add-on for Firefox or Tampermonkey add-on for Chrome
- The project sourcecode from Github (download this repository as zip)
- (Some sticker of David Hasselhoff or someone else famous from the 90's for decoration)
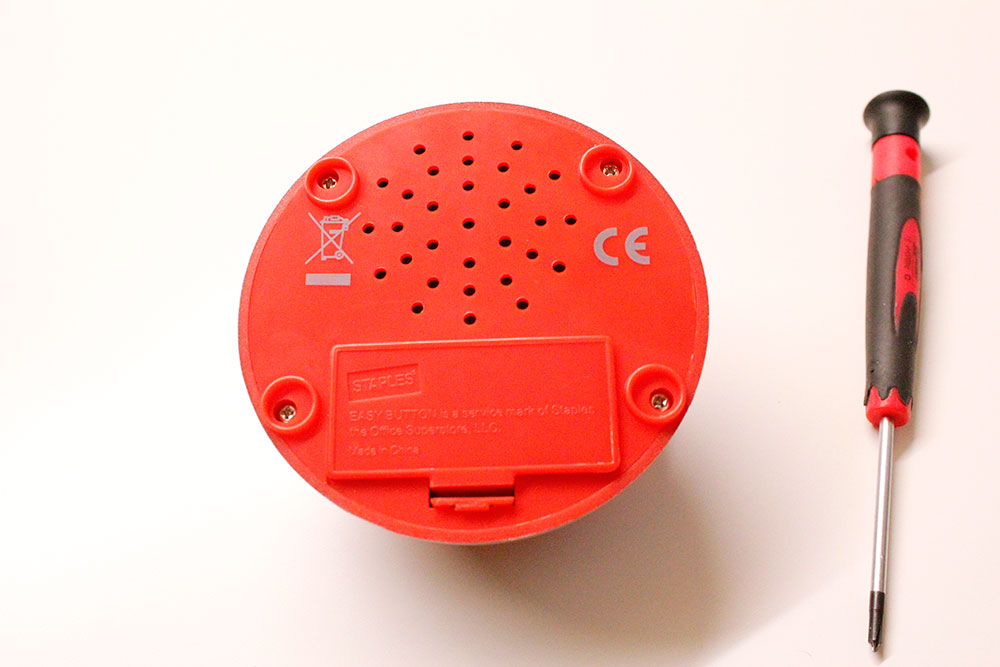
First remove the batteries and the four screws on the bottom to open the case. There are four more screws you have to remove.
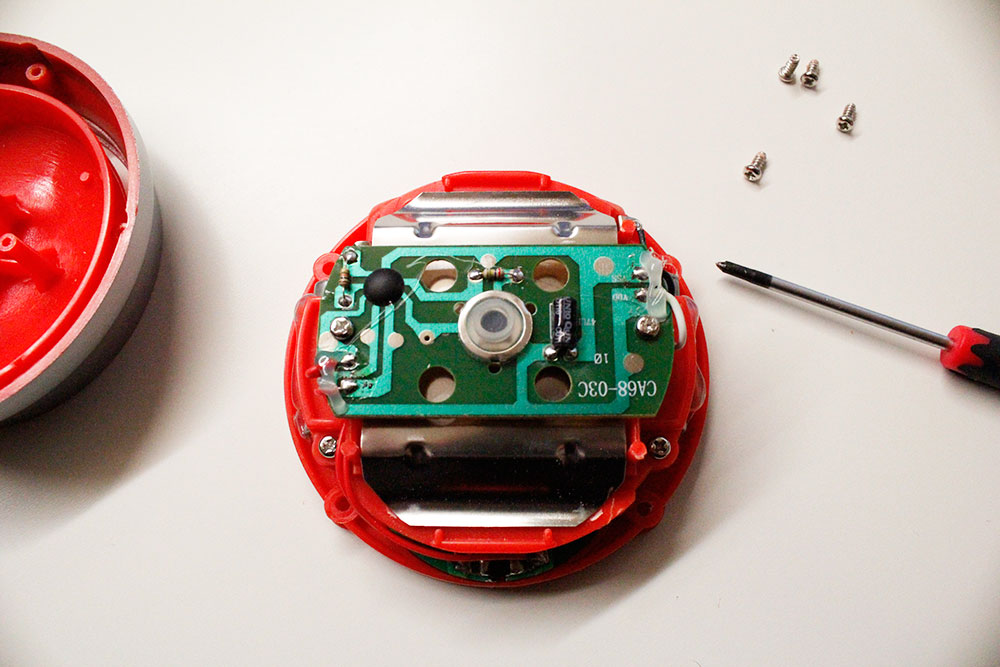
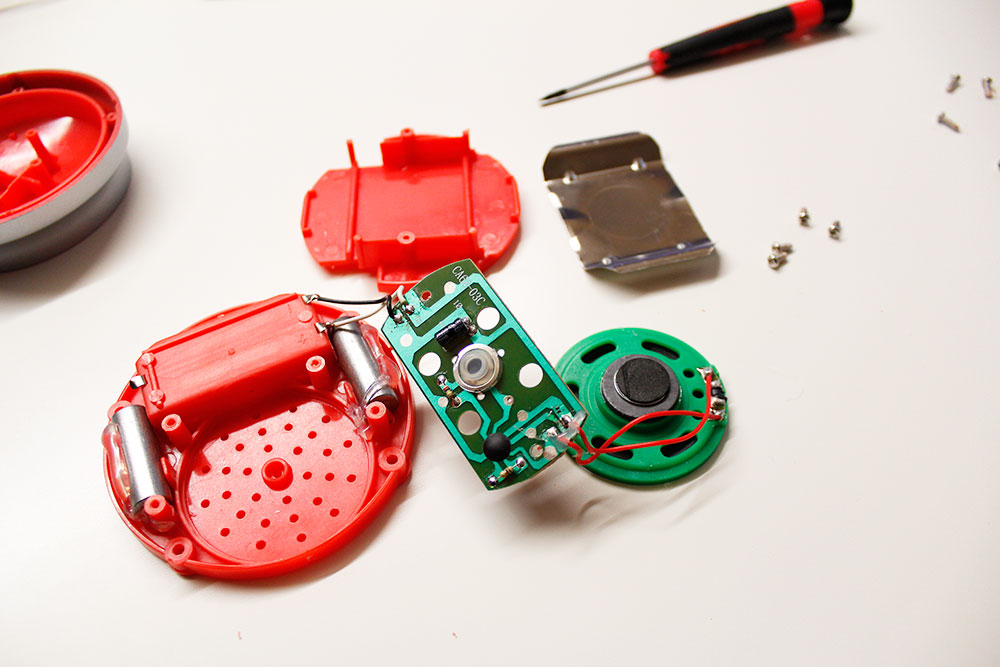
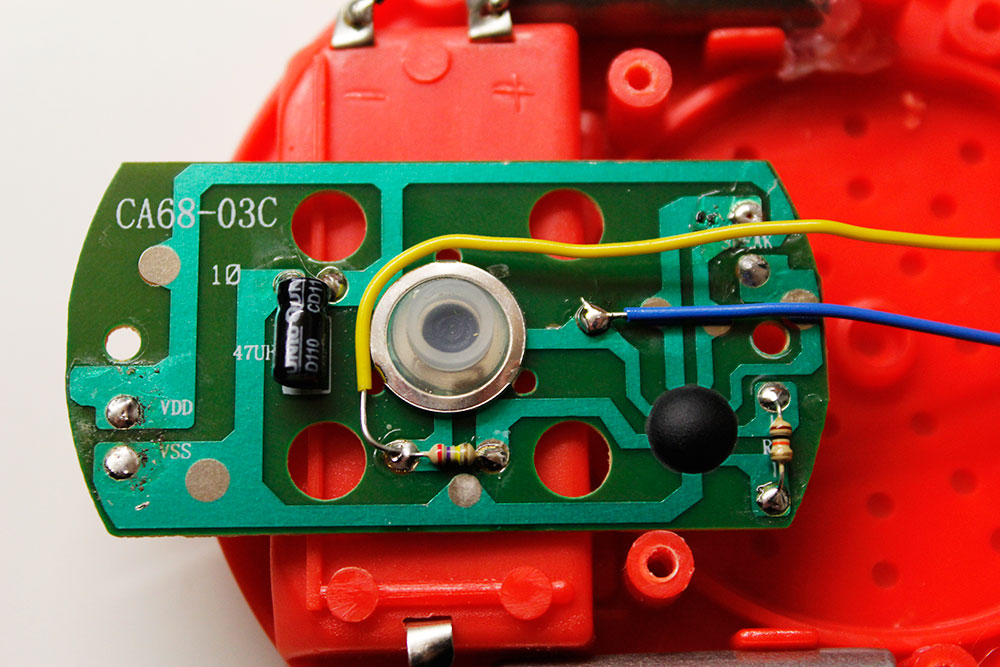
Solder the audio and the battery case from the button board to free it.
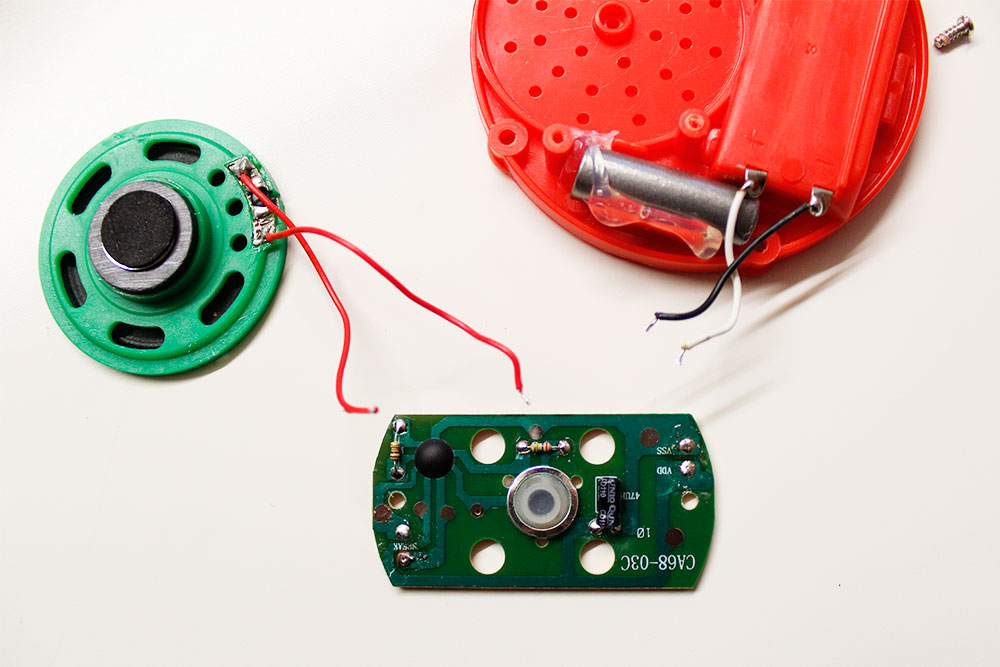
Solder two new cables in different color on the button board. You have to be very careful because the surface is getting destroyed very easy. Also watch for the right position.
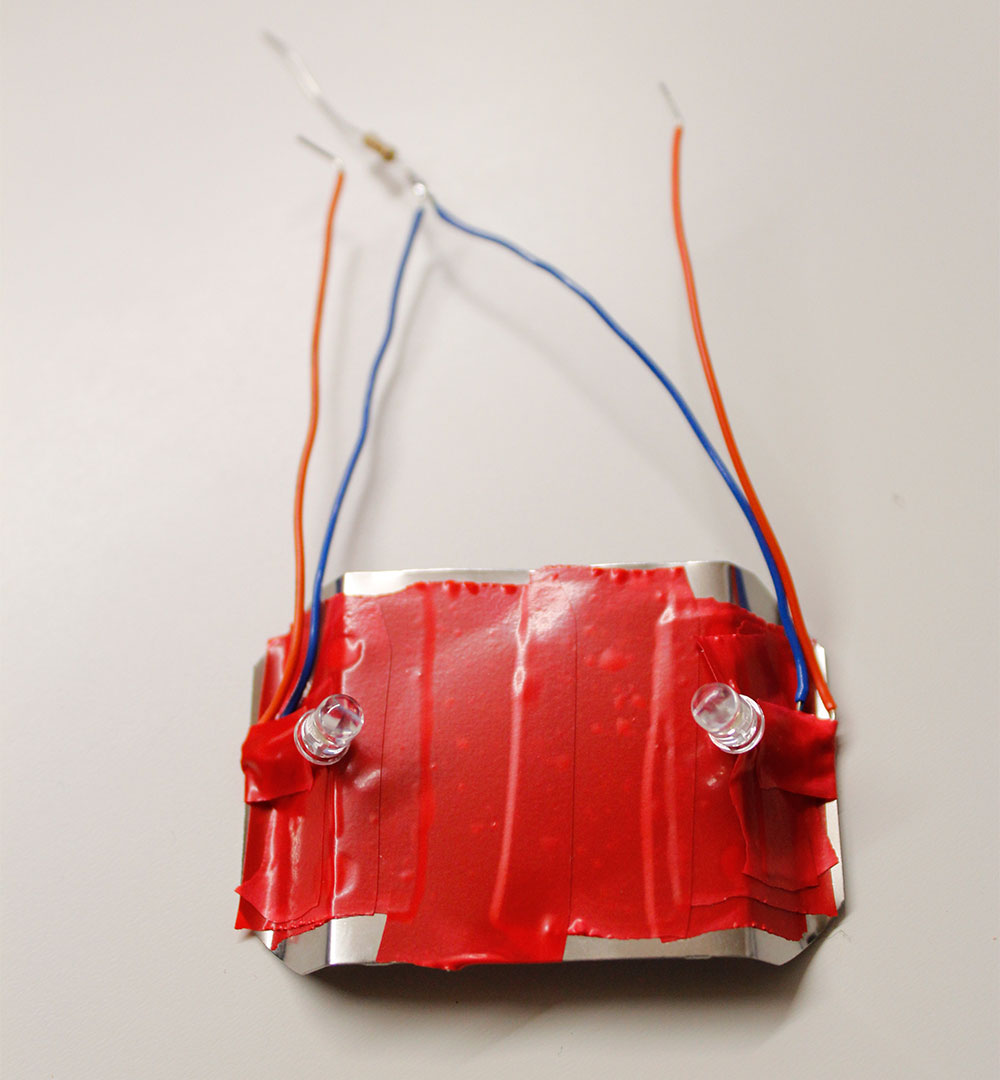
Solder the LEDs with the resistance together. Watch out for the right polarity of your LEDs. To fix it I stick everything with tape together.
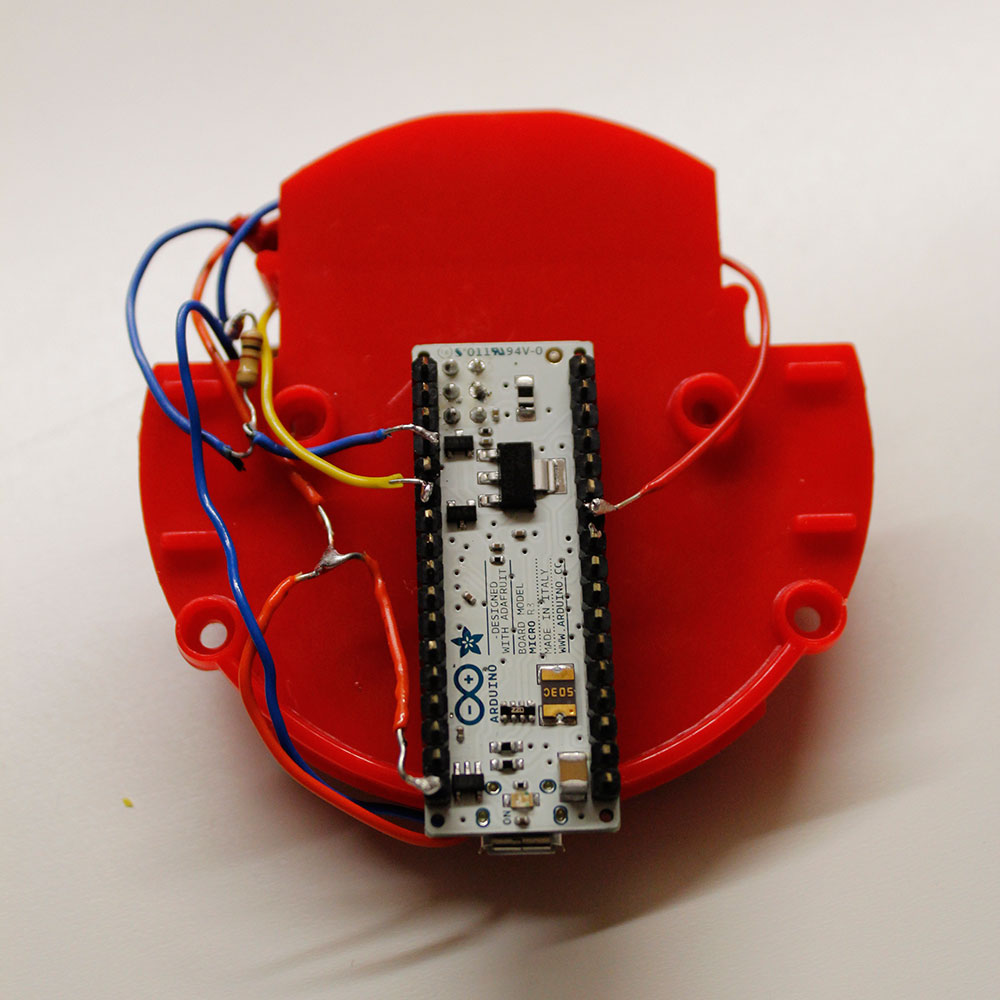
Remove the plastic parts around the Arduino pins so that you can solder the cables on the right pins. The blue and yellow cables are for controlling, the orange ones for grounding. I fixed the Arduino with hot glue.
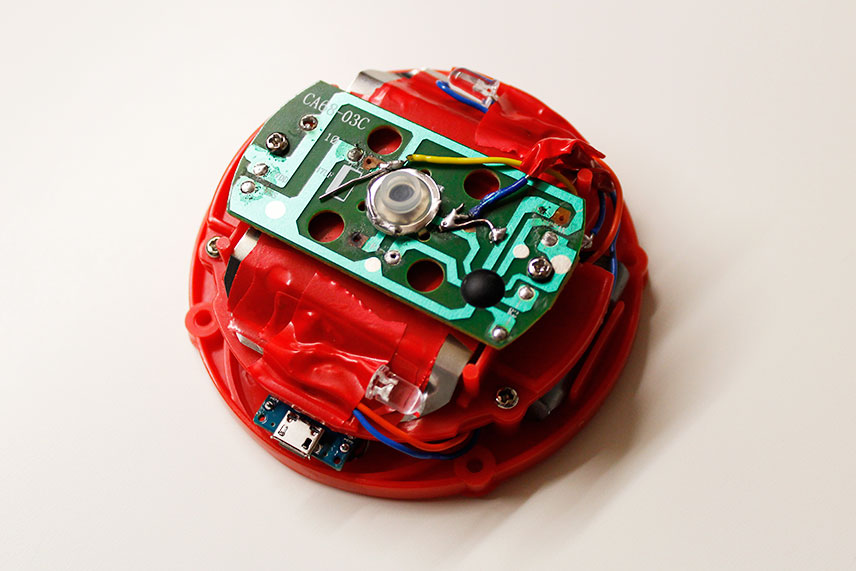
Screw everything together. You will need the USB-port of the Arduino, so free it with a knife.
Connect the Arduino with your computer, the drivers will be automatically installed. Open with the Arduino software the file red_button_pulsing.ino and upload it to the Arduino (ctrl+u).
Open your favorite Browser and install the add-on. After that you open the options of the add-on and go to manage userscript. Here you can define a new user script and copy/paste the code of the file 90s_button.user.js. This script will hide some unneeded parts of the website and allows the communication with the Arduino.
Now open the website the90sbutton.com, press the button and see what happens. If you want to plug the button in other computers you only have to install the user script. Everything else is stored on your button. If you have any questions feel free to contact me.