Description  Project Status

| NAME | RELEASE | VERSION |
|---|---|---|
| chunkwm-core | Alpha | 0.2.33 |
| chunkwm-tiling | Alpha | 0.2.25 |
| chunkwm-border | Alpha | 0.2.9 |
| chunkwm-ffm | Alpha | 0.2.2 |
chunkwm is a tiling window manager for macOS that uses a plugin architecture, successor to kwm. It represents windows as the leaves of a binary tree, and supports binary space partitioned, monocle and floating desktops.
chunkwm runs a local daemon to receive messages on a dedicated socket.
chunkc is a program that writes messages on chunkwm's socket.
chunkwm does not handle any keyboard input.
A third party program (e.g: skhd or khd) is needed to map keyboard events to chunkwm actions.
Development is happening on macOS High Sierra (10.13.0), but OSX El Capitan (10.11.6) and newer should work fine.
Older versions may or may not be compatible and will not be officially supported.

Click here for more screenshots.
The installation process consists of multiple steps, due to how chunkwm is structured.
The required steps are as follows:
- install chunkwm-core
- install desired plugins
There are currently three plugins available, developed alongside the chunkwm-core.
- chunkwm-tiling
- chunkwm-border
- chunkwm-ffm
These deliver the basic functionality expected of a window manager.
IMPORTANT:
The first time chunkwm-core is ran, it will request access to the accessibility API.
After access has been granted, the application must be restarted.
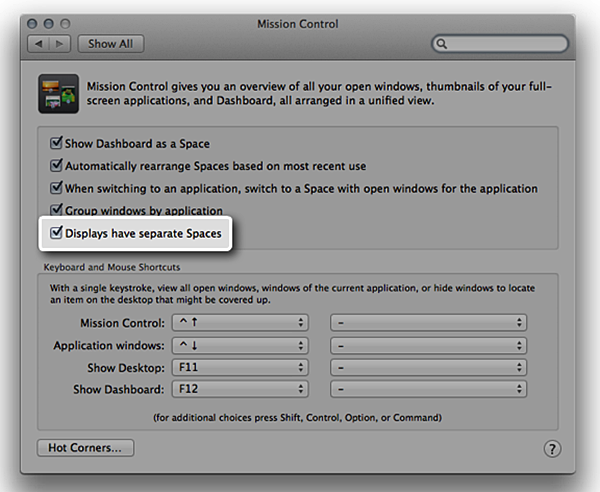
The chunkwm-tiling plugin requires 'displays have separate spaces' to be enabled.
There are no officially maintained ports in the MacPorts repository, however, terinjokes has created a port that can be added locally. If someone is interested in maintaining ports in the official repository, they are free to do so.
The chunkwm port installs chunkwm-core together with chunkwm-tiling and chunkwm-border. Plugins to install can be modified through the variants system.
git clone https://github.com/koekeishiya/portfiles /opt/koekeishiya/portfiles
# manually add /opt/koekeishiya/portfiles to /opt/local/etc/macports/sources.conf

# update the ports tree
sudo port -v selfupdate

# install latest stable version
sudo port install chunkwm
Thanks to crisidev for providing and maintaining a homebrew formulae. The repository can be found here.
The chunkwm formulae installs chunkwm-core together with chunkwm-tiling and chunkwm-border. Plugins to install can be modified through the options system.
# clone tap
brew tap crisidev/homebrew-chunkwm

# install latest stable version
brew install chunkwm

# install from git repo
brew install --HEAD chunkwm
Requires xcode-8 command line tools.
git clone https://github.com/koekeishiya/chunkwm
chunkwm-core:
cd chunkwm
make install
cp bin/chunkwm /usr/local/bin
cp examples/chunkwmrc ~/.chunkwmrc
cp examples/com.koekeishiya.chunkwm.plist ~/Library/LaunchAgents

cd chunkwm/src/chunkc
make
cp bin/chunkc /usr/local/bin

launchctl load -w ~/Library/LaunchAgents/com.koekeishiya.chunkwm.plist
chunkwm-tiling:
cd chunkwm/src/plugins/tiling
make install
mkdir -p ~/.chunkwm_plugins
cp ../../../plugins/tiling.so ~/.chunkwm_plugins
chunkwm-border:
cd chunkwm/src/plugins/border
make install
mkdir -p ~/.chunkwm_plugins
cp ../../../plugins/border.so ~/.chunkwm_plugins
chunkwm-ffm:
cd chunkwm/src/plugins/ffm
make install
mkdir -p ~/.chunkwm_plugins
cp ../../../plugins/ffm.so ~/.chunkwm_plugins
chunkwm uses a shell script as its configuration file and is located at $HOME/.chunkwmrc.
This implies that the .chunkwmrc file needs executable permissions; chmod +x ~/.chunkwmrc.
A different location can be specified with the --config | -c argument.
e.g: chunkwm --config /opt/local/etc/chunkwm/chunkwmrc.
Both the chunkwm-core and all plugins are configured in this file.
Plugin settings should be set before the command to load said plugin.
The valid options for chunkwm-core are:
chunkc core::plugin_dir </path/to/plugins>
chunkc core::hotload <1 | 0>
chunkc core::load <plugin>
chunkc core::unload <plugin>
Plugins can be loaded and unloaded without having to restart chunkwm.
See sample config for further information.
Visit chunkwm-tiling reference.
Visit chunkwm-border reference.
A sample keybinding config file for skhd is available here.
A sample keybinding config file for khd is available here.
When chunkwm detects a new window, it inserts it into a window tree at the specified insertion point, using the insertion mode specified for that insertion point.
The insertion mode tells chunkwm how it should alter the tree in order to insert new windows on a given insertion point.
The insertion point is the focused window and its default insertion mode is automatic.
If the focused window is not eligible for any reason, the minimum-depth leaf node is chosen instead.
The automatic mode, as opposed to the manual mode, doesn't require any user choice: the new window will split the focused window using the parameters set in the config file:
- bsp_split_mode
- bsp_spawn_left
- bsp_split_ratio
Consider the following scenario:
             a                          a                          a
            / \                        / \                        / \
           1   b         --->         1   b         --->         1   b
              / \                        / \                        / \
             2   3                      c   3                      c   3
             ^                         / \                        / \
                                      4   2                      d   2
                                      ^                         / \
                                                               5   4

 +-----------------------+  +-----------------------+  +-----------------------+
 |           |           |  |           |     |     |  |           |  5  |     |
 |           |     2     |  |           |  4  |  2  |  |           |-----|  2  |
 |           |     ^     |  |           |  ^  |     |  |           |  4  |     |
 |     1     |-----------|  |     1     |-----------|  |     1     |-----------|
 |           |           |  |           |           |  |           |           |
 |           |     3     |  |           |     3     |  |           |     3     |
 |           |           |  |           |           |  |           |           |
 +-----------------------+  +-----------------------+  +-----------------------+

              X                         Y                          Z
In state X, the insertion point, 2 is in automatic mode.
When we add a new window, 4, the insertion point is split, and becomes the right child of a new internal node, c.
Then the insertion of 5, with 4 as insertion point, leads to Z.
The user can specify a region in the insertion point where the next new window should appear by sending a chunkc tiling::window -i | --use-insertion-point <direction> message.
The <direction> argument specifies how the insertion point should be split (horizontally or vertically) and if the new window should be the left or the right child of the new internal node.
After doing so, the insertion point goes into manual mode.
Consider the following scenario:
            a                          a                          a
           / \                        / \                        / \
          1   b         --->         c   b         --->         c   b
          ^  / \                    / \ / \                    / \ / \
            2   3                  1  4 2  3                  1  d 2  3
                                      ^                         / \
                                                               4   5
                                                                   ^

+-----------------------+  +-----------------------+  +-----------------------+
|           |           |  |           |           |  |           |           |
|           |     2     |  |     1     |     2     |  |     1     |     2     |
|           |           |  |           |           |  |           |           |
|     1     |-----------|  |-----------|-----------|  |-----------|-----------|
|     ^     |           |  |           |           |  |     |     |           |
|           |     3     |  |     4     |     3     |  |  4  |  5  |     3     |
|           |           |  |     ^     |           |  |     |     |           |
+-----------------------+  +-----------------------+  +-----------------------+

            X                          Y                          Z
In state X, the insertion point is 1.
We send the following message to chunkwm: chunkc tiling::window -i south.
Then add a new window: 4, this leads to state Y: the new internal node, c becomes a's left child.
Finally we send another message: chunkc tiling::window -i east and add window 5.
The ratio of the preselection can be set by including the -r | --use-temporary-ratio <ratio> flag in the message.
e.g: chunkc tiling::window -r 0.3 -i east.
Both of my tiling window managers (kwm and chunkwm) have been heavily inspired by bspwm, and I'd like to thank baskerville for his project and for introducing me to an interesting tiling concept.