dsf azure sonarqube integration
The purpose of this readme is that you can configure your Azure Devops pipeline in order to be able to run a code analysis, analyse the code coverage and publish the results through the Sonar plugin.
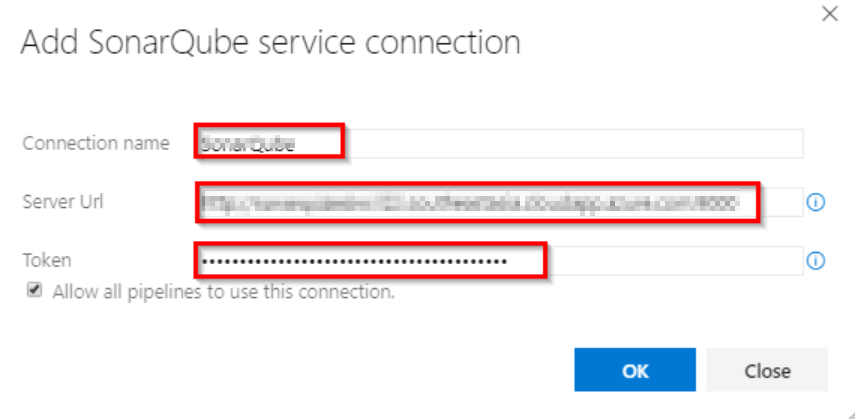
The first thing to do is to declare your SonarQube server as a service endpoint in your Azure DevOps project settings.
Go to project settings → pipelines → service connections and create and choose 'SonarQube'.
Create service connection
Specify the server url and the connection name of your SonarQube server and the token Auth Go to your SonarQube server and log in as admin, once inside, go to administration → Security → Users → Administrator → Tokens→ And generate the token. Copy the generated token(once created it will never appear again so don’t lose it) and paste it and click on save .
The service connection has been created. Once this step is done your service creation will appear now in the service connections side bar.
For more info regarding the Authentication part please read the official documentation
In order to integrate the SonarQube in the pipeline, 3 steps or tasks are required(Depending on the different solutions like .NET, Java, C..etc some of this tasks can be optional), this tasks are:
Prepare Analysis configuration Run Code Analysis Publish Quality Gate result
We can use the wizard to create this in an easy way, search "SonarQube" and let’s configure the tasks one by one.
Prepare Analysis configuration:
Fill the required fields and click on add
The prepare task will be now shown in the pipeline code:

Follow the official documentation if you have doubts while filling the fields:
Once the prepare is done, continue with the code analysis.
Run Code Analysis
Select this from the task assistant and just like happened with the first task, the code will appear in your pipeline.

Now, let’s publish the result of the analysis.
Publish quality gate result
Same as we did before, select in the display the publish extension and add it

This documentation is licensed under the Creative Commons License (Attribution-NoDerivatives 4.0 International).
