dsf mirabaud jenkins gitLab integration
The first step to have a Continuous Integration system for your development is to make sure that all your changes to your team’s remote repository are evaluated by the time they are pushed. That usually implies the usage of so-called webhooks. You’ll find a fancy explanation about what Webhooks are in here.
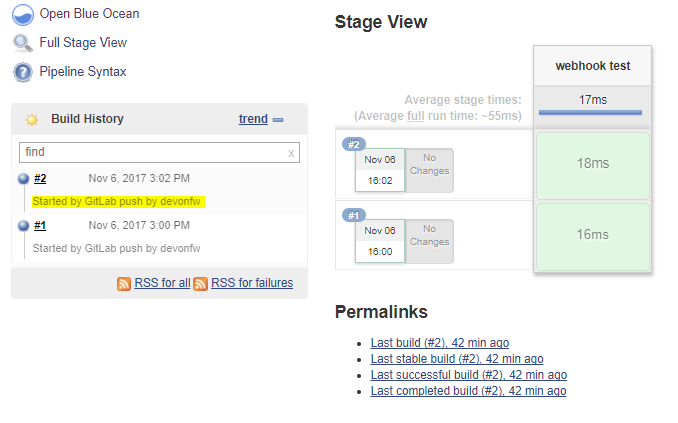
To resume what we’re doing here, we are going to prepare our Jenkins and our GitLab so when a developer pushes some changes to the GitLab repository, a pipeline in Jenkins gets triggered. Just like that, in an automatic way.
As it usually happens, some Jenkins plug-in(s) must be installed. In this case, let’s install those related with GitLab:

To communicate with GitLab from Jenkins, we will need to create an authentication token from your GitLab user settings. A good practice for this would be to create it from a machine user. Something like (i.e.) devonfw-ci/******.
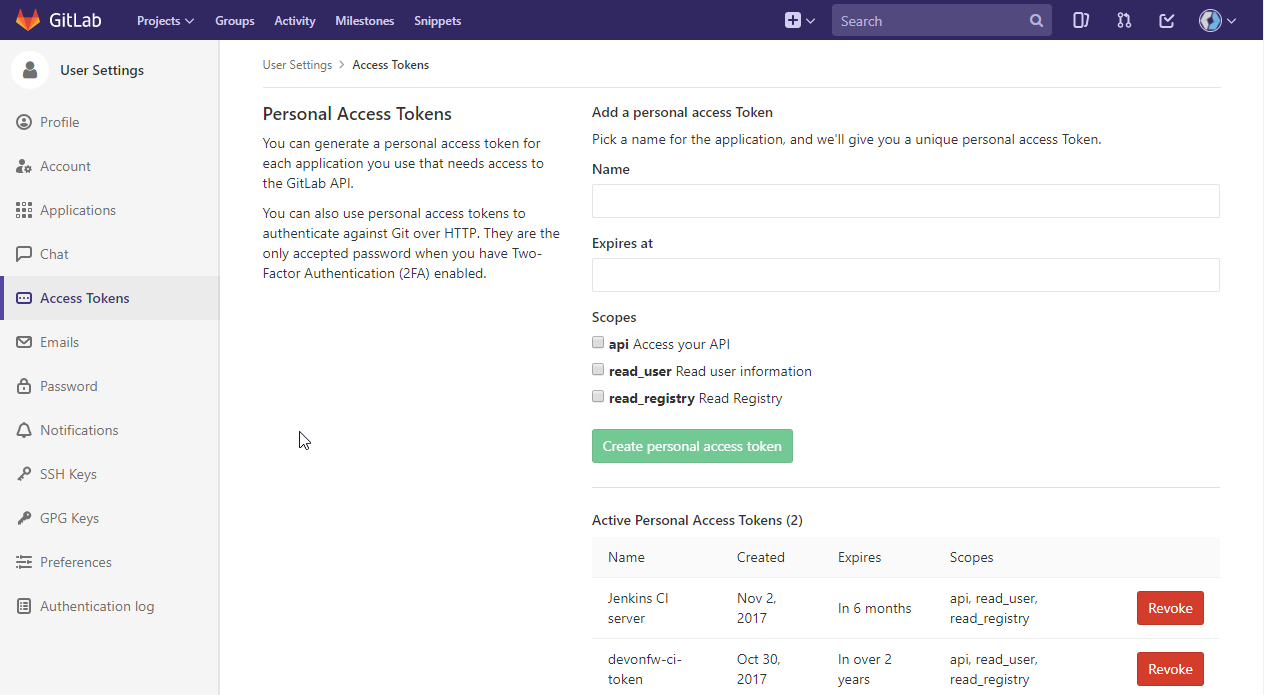
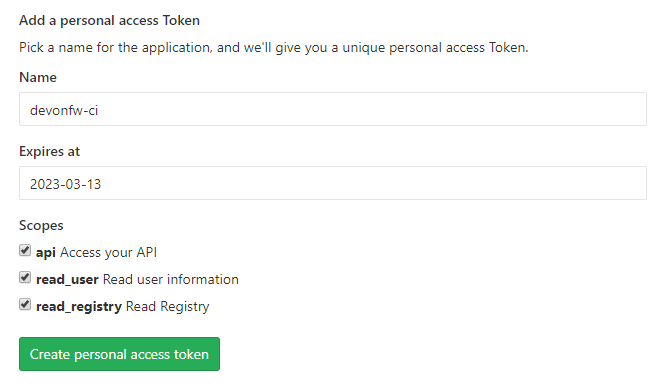
Simply by adding a name to it and a date for it expire is enough:

As GitLab said, you should make sure you don’t lose your token. Otherwise you would need to create a new one.
This will allow Jenkins to connect with right permissions to our GitLab server.
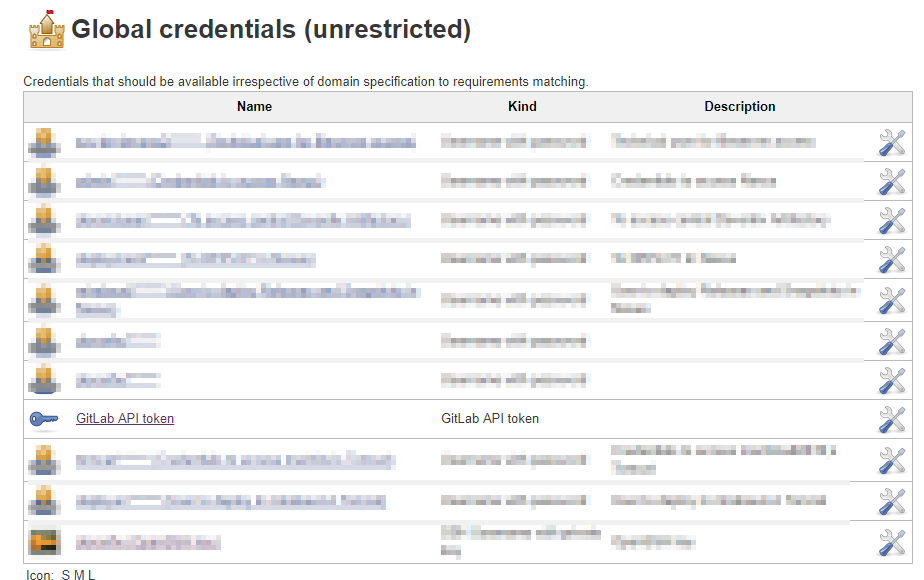
Those credentials will use that token already generated in GitLab to connect once we declare the GitLab server in the Global Jenkins configuration. Obviously, those credentials must be GitLab API token-like.

Then, we add the generated token in the API token field:

Look in your Global credentials if they had been correctly created:
Specify a GitLab connection in your Jenkins’s Manage Jenkins > Configure System configuration. This will tell Jenkins where is our GitLab server, a user to access it from and so on.
You’ll need to give it a name, for example, related with what this GitLab is dedicated for (specific clients, internal projects…). Then, the Gitlab host URL is just where your GitLab server is. If you have it locally, that field should look similar to:
-
Connection name:
my-local-gitlab -
Gitlab host URL:
http://localhost:${PORT_NUMBER}
Finally, we select our recently GitLab API token as credentials.

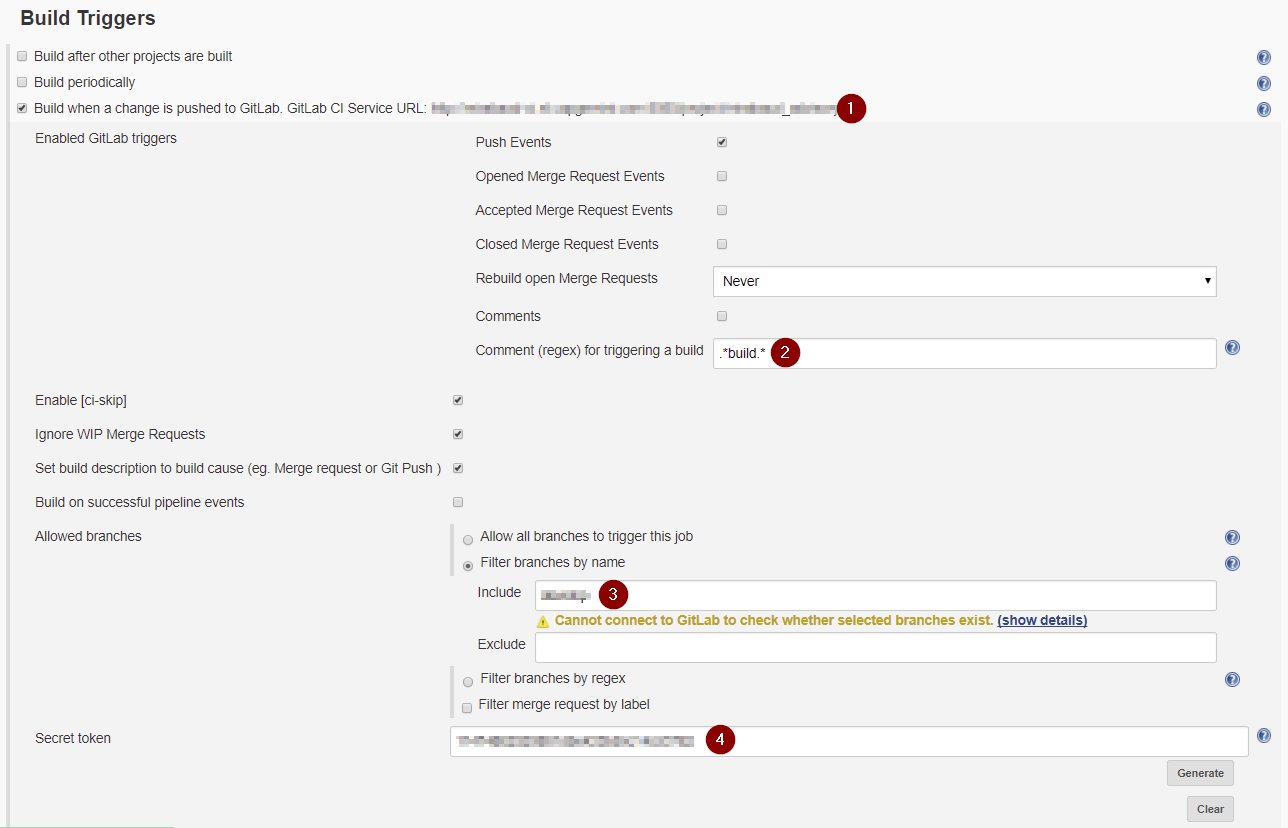
First, our pipeline should allow us to add a GitLab connection to connect to (the already created one).

In the case of the local example, could be like this:
-
GitLab connection:
my-local-gitlab -
GitLab Repository Name:
myusername/webhook-test(for example)
-
You should already see your GitLab project’s URL (as you stated in the General settings of the Pipeline).
-
Write
.*build.*in the comment for triggering a build -
Specify or filter the branch of your repo you want use as target. That means, whenever a git action is done to that branch (for example,
master), this Pipeline is going to be built. -
Generate a Secret token (to be added in the yet-to-be-created GitLab webhook).
-
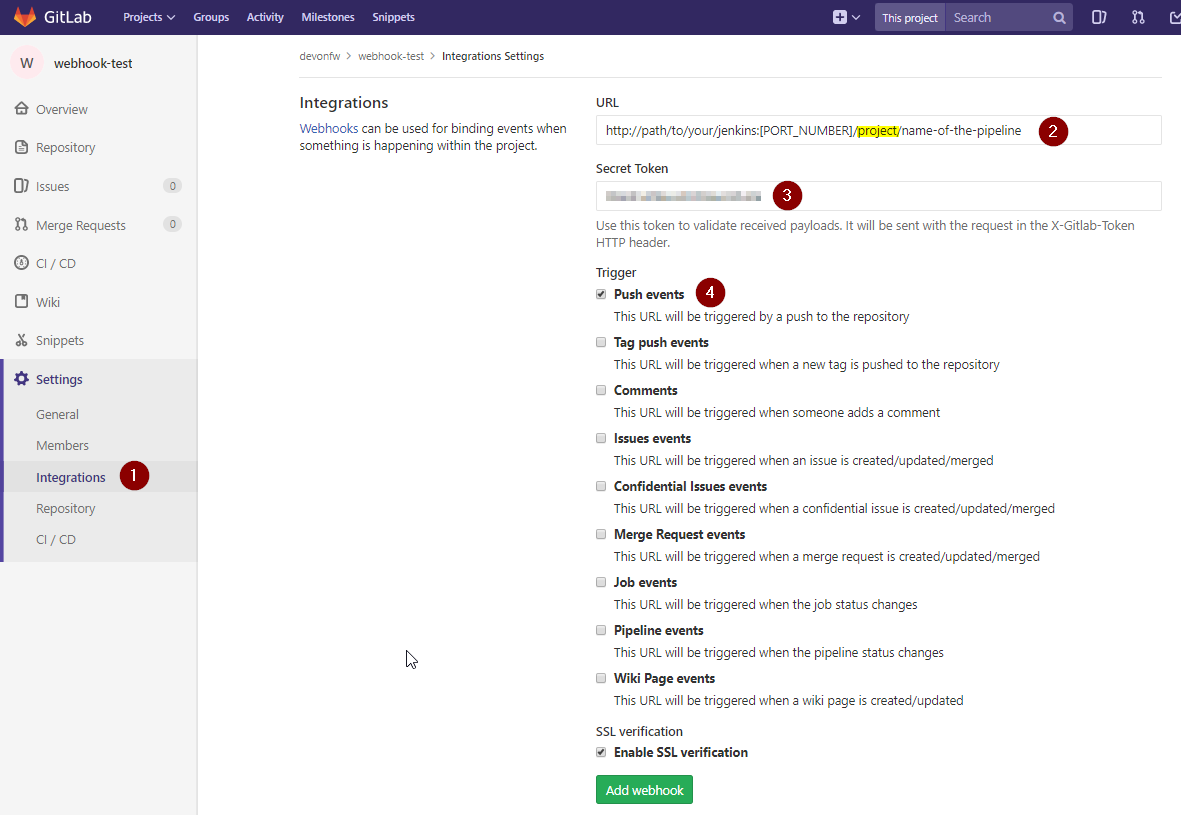
Go to you GitLab project’s
Settings > Integrationsection. -
Add the path to your Jenkins Pipeline. Make sure you add project instead of job in the path.
-
Paste the generated Secret token of your Jenkins pipeline
-
Select your git action that will trigger the build.
This documentation is licensed under the Creative Commons License (Attribution-NoDerivatives 4.0 International).
