Simple graphics engine with a friendly programming interface.
It is rather a toy than an actual 3D engine and was primarily used for learning purposes, but can still be used for simple applications.
This project uses CMake.
To configure and build the project, do the following from the root directory of the repository:
mkdir build
cd build
cmake ..
This will configure the CMake and will generate platform-specific build files.
To build, execute the following from within the build directory:
cmake --build .This will build the demo and the documentation as well (requires Doxygen). Documentation can be found in the /build/docs directory.
Make sure you have Python installed so GLAD can build successfully.
NOTE: The engine assumes that your executable is one directory deep. For example, if your executable is in the
/builddirectory, the resources will load properly, but if it sits in/build/debug- they won't.
- Define your application. It should inherit from the
Appclass. It containssetup(),loop()andcleanup()methods which can be overriden. You can use theenginenamespace in your project to speed up the process.
using namespace engine;

class Test : public App {

  void setup() override {
    std::cout << "This will print only once." << std::endl;
  }

  void loop() override {
    std::cout << "This will print every frame." << std::endl;
  }

  void cleanup() override {
    std::cout << "This will print at the exit." << std::endl;
  }
}- Set up your camera. You can set a projection type, position, speed, initial focus point etc. You can also specify, if the camera should be able to move.
Camera cam;
cam.setProjection(Camera::PERSPECTIVE, 0.1f, 100.0f);
cam.setPosition(5.0f, 5.0f, 5.0f);
cam.setSpeed(2.5f);
cam.setMovementEnabled(true);
cam.setInitialFocus(0.0f, 0.0f, 0.0f);- Build the engine. Note that the Engine instance should be accessed through the
get()method as it follows the singleton pattern. Here, you can specify all settings for your window. You should also pass a pointer to your camera and application. Every engine build operation should end with abuild()method call.
Engine::get()
.setWindowDimensions(800, 800)
.setWindowTitle("Example")
.setWindowMaximized(true)
.setMouseCapture(true)
.setApp(&app)
.setCamera(&cam)
.build(); // <--- Important!
Example program should look like this:
#include "Engine.hpp"

using namespace engine;

class Test : public App {
  void setup() override {
    std::cout << "This will print only once." << std::endl;
  }

  void loop() override {
    std::cout << "This will print every frame." << std::endl;
  }

  void cleanup() override {
    std::cout << "This will print at the exit." << std::endl;
  }
};

int main() {
  Test app;

  Camera cam;
  cam.setProjection(Camera::PERSPECTIVE, 0.1f, 100.0f);
  cam.setPosition(5.0f, 5.0f, 5.0f);
  cam.setSpeed(2.5f);
  cam.setMovementEnabled(true);

  Engine::get()
  .setWindowDimensions(800, 800)
  .setWindowTitle("Example")
  .setWindowMaximized(true)
  .setMouseCapture(true)
  .setApp(&app)
  .setCamera(&cam)
  .build();

  return 0;
}
If you did everything right, you should see the gray window screen. Let's add some objects. Add a light and load some objects along with some textures:
NOTE: Currently for 3D models only
.objfiles are supported. Also, you can only apply diffuse and specular textures at the moment.
class Test : public App {
Light light; // point light
Model model; // 3D model
void setup() override {
model.load("some_model.obj");
model.getMeshes().at(0)->setDiffuseTexture("some_diffuse_texture.png");
model.getMeshes().at(0)->setSpecularTexture("some_specular_texture.png");
light.setPosition(5.0f, 5.0f, 2.0f);
}
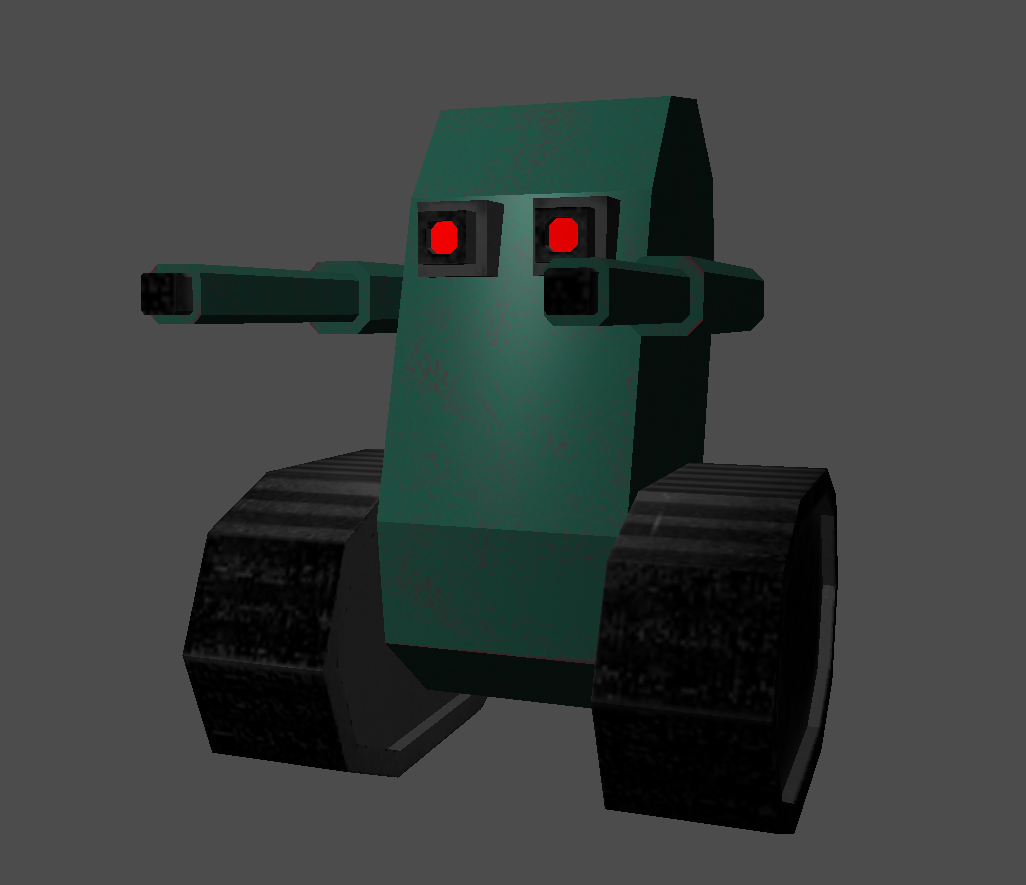
};You should see your model well-lit:
Let's apply some transformations:
class Test : public App {
  Light light;
  Model model;

  void setup() override {
    model.load("some_model.obj");
    model.getMeshes().at(0)->setDiffuseTexture("some_diffuse_texture.png");
    model.getMeshes().at(0)->setSpecularTexture("some_specular_texture.png");

    light.setPosition(5.0f, 5.0f, 2.0f);
  }

  void loop() override {
    double dt = Engine::get().getDeltaTime(); // get delta time
    model.rotate(90.0f * dt, 0.0f, 1.0f, 0.0f); // rotate the object along the Y axis
  }
};
Your model should spin 90 degrees per second along the Y axis:
example2.mp4
See the documentation to explore other capabilities.
The project is available under the MIT license.