Preliminary User Guide (July 2018)
- Overview
- Parts needed
- Adding the reset header
- Downloading the software
- Configuring the software
- Connecting everything together
- Powering on
- User interface
- Calibration
- Test programs
- Known issues
- Troubleshooting
The RGBtoHDMI interface converts the RGB video from the BBC Micro or Electron to HDMI video compatible with most modern TV/Monitors. The interface comprises a Raspberry Pi Zero and a specially designed Hat containing a small CPLD. Custom firmware on the Raspberry Pi, in conjunction with the CPLD, is able to correctly sample each of the Beeb's video modes to give a pixel-perfect rendition.
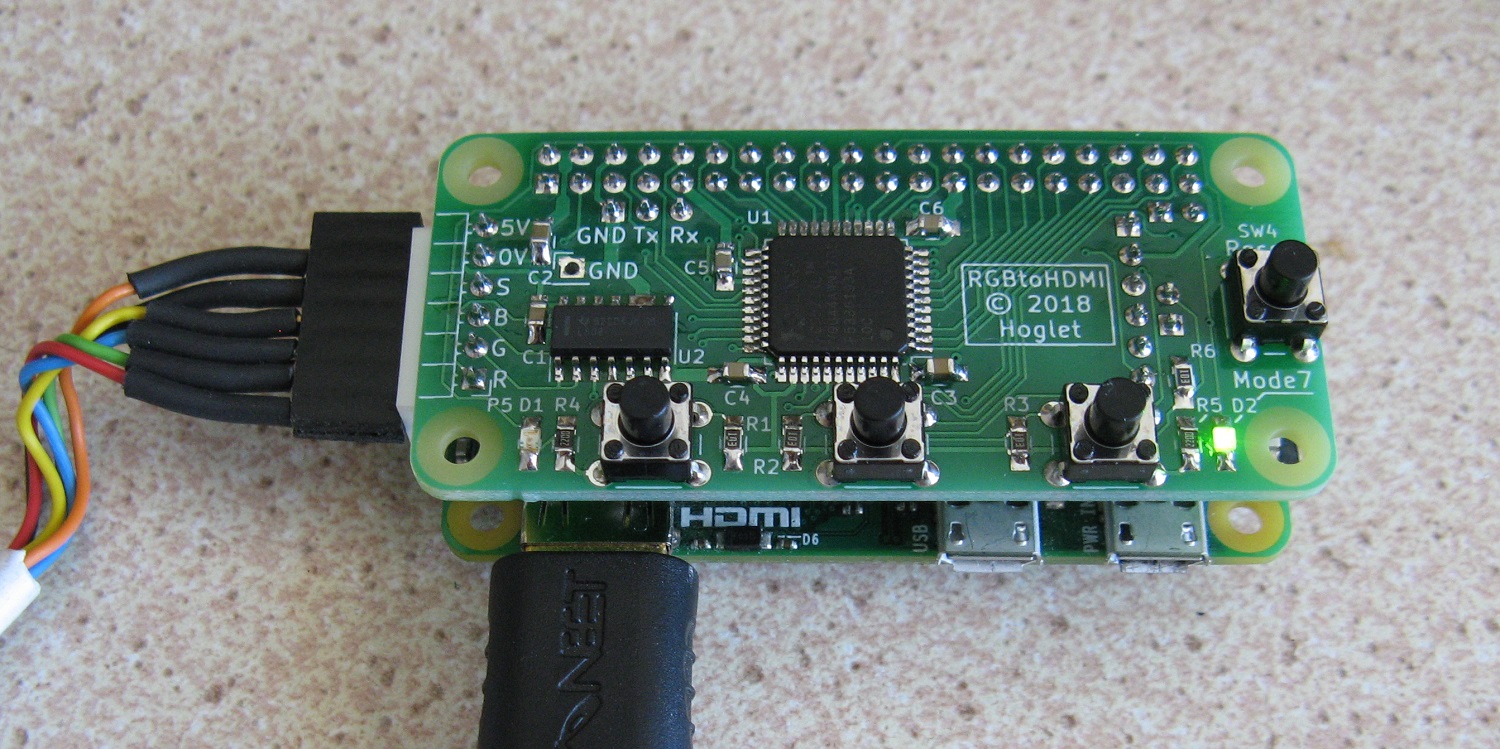
- An RGBtoHDMI hat (first 10 were made by hoglet), including:
- A 6-pin DIN to 6-pin Molex KK cable (supplied with the hat)
- 2x 11mm M2.5 spacered and 4x short M2.5 machine screws (supplied with the hat)
- A 2-pin 0.1" header for the reset pins on the Pi (supplied with the hat)
- A Raspberry Pi Zero (or Zero W, see note below) with the GPIO headers fitted (PiHut)
- A Micro SDHC Card (2GB or larger) (PiHut)
- A mini-HDMI to HDMI cable (or DVI if that is what your Monitor needs) (PiHut)
- (Optional) A USB/3.3V Serial cable for debugging (PiHut)
Note: I've done a small amount of testing of the Pi Zero W and it does seem to work.
Note: The Pi 1, 2 and 3 models will not work.
If you want the reset button on the right of the hat to work, you will need to populate the 2-pin reset header on the Pi. A suitable header is supplied with the RGBtoHDMI hat. The header on the Pi is marked "run" as can be seen below:

- Start with a blank Micro SD Card (it should be FAT32 formatted)
- Download the latest release zip file from here
- Unzip this to the SD Card (so all the files are in the root directory of the SD Card)
On the SD Card, edit config.txt and make sure the section that matches your monitor resolution is uncommented, and the remaining ones are commented.
The default if 1920x1080:
## 1920x1080 @ 50Hz
##
## Scale by 1:2 - 672x540 => 1344x1080
##   l/r overscan = (1920-1344)/2  = 288
##   t/b overscan = (1080-1080)/2  =   0
##
hdmi_group=1
hdmi_mode=31
overscan_left=288
overscan_right=288
overscan_top=0
overscan_bottom=0
If you need any additional resolutions, let me know and I'll add them.
The complete config.txt file can be seen here.
Electron users need to also edit cmdline.txt on the SD Card. Specifically:
- If you are using an Electron, set elk=1
- If the Electron is Issue 2 or 4 (i.e. with low video levels), also set mux=1
# Important: All the properties must be on a single line, and no blank lines!
#
sampling06=3 sampling7=0,2,2,2,2,2,2,0 info=1 palette=0 scanlines=0 mux=1 elk=1 debug=0
The complete cmdline.txt file can be seen here.
-
⚠️ The Pi is powered from the Beeb via the RGB Cable. Do not ever power the Pi from a separate power supply -
Plug the RGBtoHDMI hat into the Pi, making sure the connectors are aligned
-
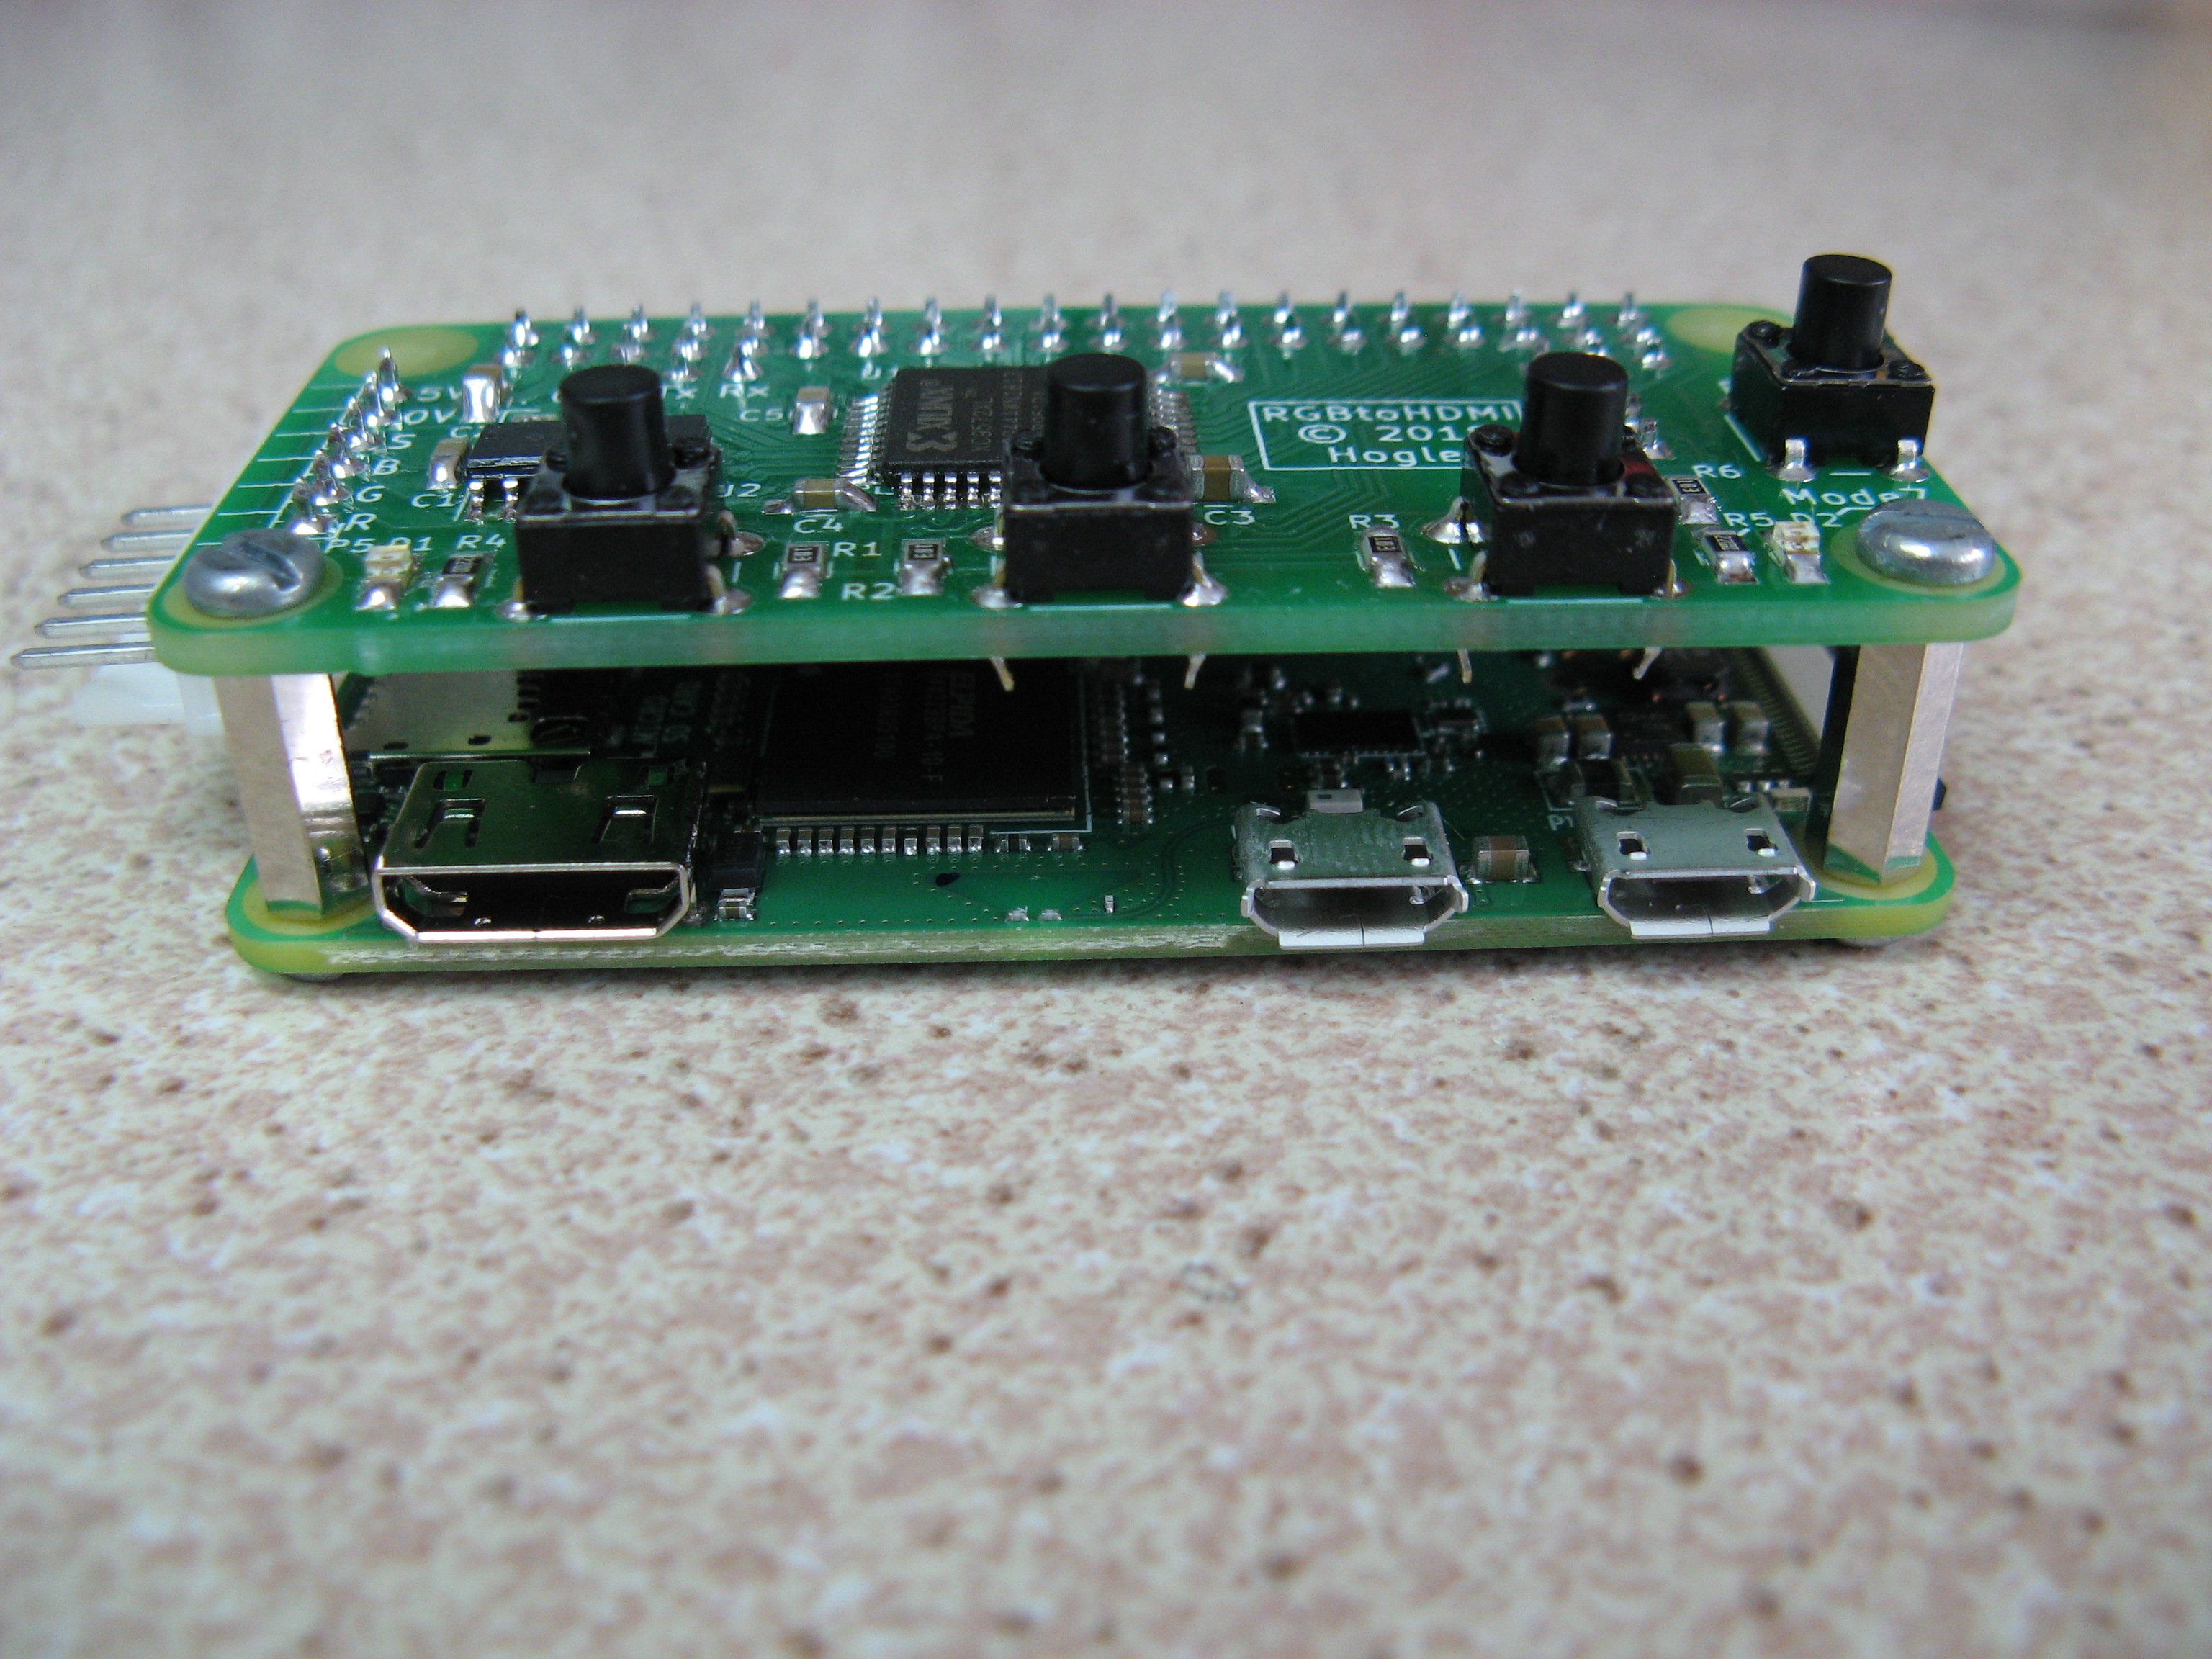
Fit the two PCB spacers to the long edge of the Pi away from the connector with the 4x M2.5 machine screws. This is important as it stops the board flexing when the buttons are pressed. If you don't do this, you risk damaging the connector:
-
Plug the Micro SD Card into the Pi
-
Connect 6-Pin DIN cable between the Beeb's RGB socket and the RGBtoHDMI hat. The connector is polarised and the red wire should be nearest the push switches.
-
Connect the the Mini HDMI cable between the Pi and the Monitor
-
⚠️ The Pi is powered from the Beeb via the RGB Cable. Do not ever power the Pi from a separate power supply -
Switch on the Monitor first and select the HDMI input
-
Switch on the Beeb
-
After about two seconds you should see the "BBC Computer" startup message (possibly slightly fuzzy)
-
Press the right most of the three buttons (SW3) to run the Auto Calibration
RGBtoHDMI has a simple user interface that supports the following:
- Selection of various features (more below)
- Manual calibration
- Automatic calibration
The three buttons support navigation through a simple menu system.
When there is no menu active the buttons have the following functions:
- left button: bring up the "Feature Selection" menu
- middle button: bring up the "Manual Calibration" menu
- right button: run the Automatic Calibration
The menu structure is as follows:
-
Feature Selection (entered menu with left button)
- Info
- (Firmware Version)
- (Calibration Summary)
- (Calibration Detail)
- Colour Palette
- (Default)
- (Inverse)
- (Mono 1)
- (Mono 2)
- (Just Red)
- (Just Green)
- (Just Blue)
- (Not Red)
- (Not Green)
- (Not Blue)
- Scanlines
- (Off)
- (On)
- Input Mux
- (Off)
- (On)
- Elk
- (Off)
- (On)
- Debug
- (Off)
- (On)
- Info
-
Manual Calibration (entered menu with middle button)
- All Offsets
- (value 0..7 in Mode 7, value 0..5 in Modes 0..6)
- A Offset
- B Offset
- C Offset
- D Offset
- E Offset
- F Offset
- (values as above, but allows individual control)
- Half
- (0..1)
- All Offsets
-
Automatic Calibration (run with right button)
When one of the menus is active, the buttons change to:
- left button: exit from menu
- middle button: move to next menu item
- right button: change the value of the current menu item (i.e. cycle through the bracketed values above)
None of the settings are persistent (see below), so don't worry about messing something up.
In addition, there are two green status LEDs:
- the left LED indicates the OSD (on screen display) is active
- the right LED indicates Mode 7 has been detected, off in Modes 0..6
Calibration is a process that allows RGBtoHDMI to optimise the precise pixel sampling offsets, resulting in as stable as possible an image. It is needed because of slight variations in timing between different machines.
The CPLD on RGBtoHDMI adjusts the pixel sampling offsets in units of 96MHz clocks (i.e. 10.4ns). Consequently, in a Mode 7 pixel (12MHz pixel clock) there are 8 possible sampling offsets, and in a Mode 0 pixel (16MHz pixel clock) there are 6 possible sample points. During calibration, the best value of these offsets is determined.
RGBtoHDMI holds two separate calibrations: one for Mode 7, the other for Modes 0..7. Whenever a mode change is detected, the CPLD is reloaded with the calibration appropriate for the mode.
When the system is initially powered up, the initial calibrations are loaded from cmdline.txt in the SD Card.
The steps involved in performing a calibration are:
- Select the screen mode on the Beeb: use either Mode 0 or Mode 7
- Bring up some static text / graphics (*HELP is usually sufficient)
- Press the Auto Calibrate button (the right button)
- Calibration takes just a few seconds
If you want to view the results of the calibration, navigate to the following pages:
- Feature menu / Info / Calibration Summary
This page shows you the results of the calibration for the current screen mode.

- Feature menu / Info / Calibration Details
The page shows you the number of errors that occurred at each of the sampling offsets tested.

You can see there are a plateau where error-free sampling occurs. The calibration should have picked a value in the middle of this plateau.
You can avoid having to perform a calibration every time the system powers up by copying the calibration results from the Calibration Summary screen into the cmdline.txt file.
There are two properties in that file that relate to calibration:
- sampling06: this holds the calibration results for Modes 0..6
- sampling7: this holds the calibration results for Mode 7
The calibration values should be in one of two formats:
- if all six offsets are the same, then a single number will suffice
- if some of the offsets are different, then the full calibration (eight numbers) needs to be entered.
Here's an example that shows both formats being used:
# Important: All the properties must be on a single line, and no blank lines!
#
sampling06=3 sampling7=0,2,3,1,2,2,2,0 info=1 palette=0 scanlines=0 mux=0 elk=0 debug=0
See the comments in cmdline.txt for further details.
A Beeb .ssd with a few test programs is available here: https://github.com/hoglet67/RGBtoHDMI/releases
Here's a quick summary of those programs:
- ASPTEST - Aspect Ratio Test, Modes 0..6, also varies sync pulse width
- COLBARS - Colour bars (useful for testing the palette feature)
- M0TEST - Mode 0 test screen, to check monitor isn't rescaling
- M7TEST - Mode 7 test screen, text in various colours (use white to calibrate)
- M7TEST1/2/3/4 - additional Mode 7 tests with "tricky" characters
- MASTCFG - restores the default configuration of a Master
Some Model B's have a truly dreadful 6MHz clock, such that sampling certain pixels reliably is impossible. The can be improved greatly by reducing the value of C48 from 270pF to 100pF. See this Stardot post for more details.
RGBtoHDMI's HDMI VSync is not currently "genlocked" to the Beeb's Vsync. This means occasionally (approx every 30s) a frame will need to be dropped or replicated. This can cause a small stutter in games that smoothly scroll.
Tricky's RallyX is a good test for this.
If you find this bothersome, you can create a custom hdmi_timings that will more closely match the timing of your specific Beeb. See this Stardot post for more details.
I have VideoNuLA installed and this doesn't work well
- RGBtoHDMI is not compatible with VideoNuLA, and probably never will be. It needs a "digital" RGB signal.
My Pi 1, Pi 2, Pi 3 doesn't work
- that is expected, you need a Pi Zero or Pi Zero W
The Reset button doesn't work
- Did you install the reset header on the Pi?
No image on the TV/Monitor:
- Check the SD Card is plugged in fully
- If pressing the right button (Auto Calibrate) causes the left LED to light for about 10 secs the Pi is running
- Check the config.txt monitor resolution setting are appropriate for your monitor
The image is wrong aspect ratio
- Check your TV/Monitor Aspect Ratio setting (on LG TVs, the JustScan setting is best)
- Check the config.txt monitor resolution setting are appropriate for your monitor
The image is jittering up and down
- Check the elk setting in cmdline.txt is set to 0 for a Beeb/Master and 1 for an Elk
After Auto Calibration there are still flickering pixels
- If this is in Mode 7 on a Model B, then try reducing C48 on the Beeb board to 100pF
- otherwise seek advise from Hoglet