Vysor Dongle
If you have a Mac (Mac Monterey and above) you will need a dongle.
Due to limitations in Windows bluetooth, Vysor needs an off the shelf USB dongle to control iOS devices. The Vysor Dongle can also be used on Mac and Linux for improved bluetooth performance, but it is not required.
There are two types of dongles with different pros and cons. You can learn more below, or if you don't care about the details, pick one of these:


- Pros
- Smaller
- No driver necessary
- Cons:
- More expensive ($10-$25)
- Some models must be manually flashed.
- Flashing Instructions
- Pros
- Cheaper ($7-$10)
- Easy to flash
- Cons
- Requires driver installation on Windows
- Flashing Instructions
These dongles have been tested and confirmed to work with Vysor. Some can plug into a standard USB port, while others will require a micro-USB cable. (Verify the linked model on Amazon, as the actual products in the links may change or become unavailable)
| NRF52840 Dongles | Flashed through Vysor | Dongle or Cabled | Price |
|---|---|---|---|
| MakerDiary (with case) | Yes | Dongle | $25 |
| MakerDiary | Yes | Dongle | $20 |
| Nordic NRF52840 | NO | Dongle | $10+shipping |
| ESP32 Dongles | Flashed Through Vysor | Dongle or Cabled | Price |
|---|---|---|---|
| VKLSVAN ESP32 | Yes | Cabled | $8 |
| JZK ESP32 | Yes | Cabled | $9 |
| HILetGo ESP32 pinless | Yes | Cabled | $13 |
Flashing of the ESP32 is done within the Vysor desktop app automatically. But, if it fails you can use esptool to flash it manually.
Partitions:
./esptool -p [serialport: eg /dev/cu.usbserial-0001 or COM4] -b 460800 --before default_reset --after hard_reset --chip esp32 write_flash --flash_mode dio --flash_size detect --flash_freq 40m 0x1000 bootloader.bin 0x8000 partition-table.bin 0x10000 vysor-dongle-esp32.binPlease be aware that the MakerDiary and official Nordic dongles have different flashing instructions.
- Unplug the dongle, press and hold the dongle button, and insert the dongle into the computer. The LED should be lit. If the dongle has no case, there are two LEDs, one of which is power, and both should be lit.
- If the LED is not lit, double click the button. The primary LED should now be lit, indicated that the device started the Bootloader.
At this point, a removable storage drive should show up on your computer, For example, MakerDiary dongles will be named MDK_DONGLE.
Copy this UF2 flash file onto the storage to flash the dongle. After copying, the dongle will automatically reboot and the drive will disconnect.
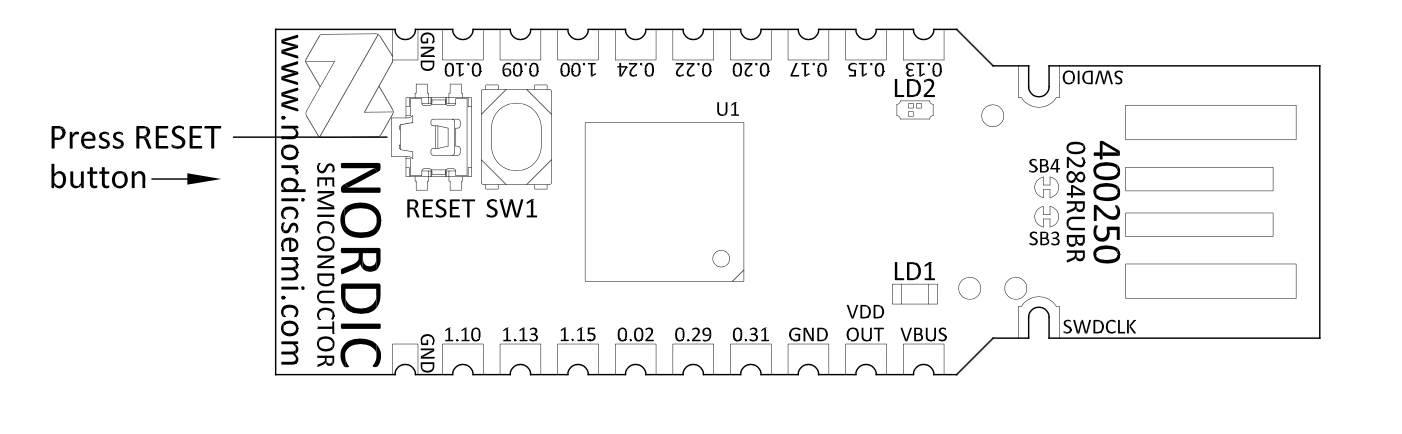
- Plug in the device. Press the Reset button to get into the bootloader. The reset button is sideways, next to the regular white switch. See diagram above.
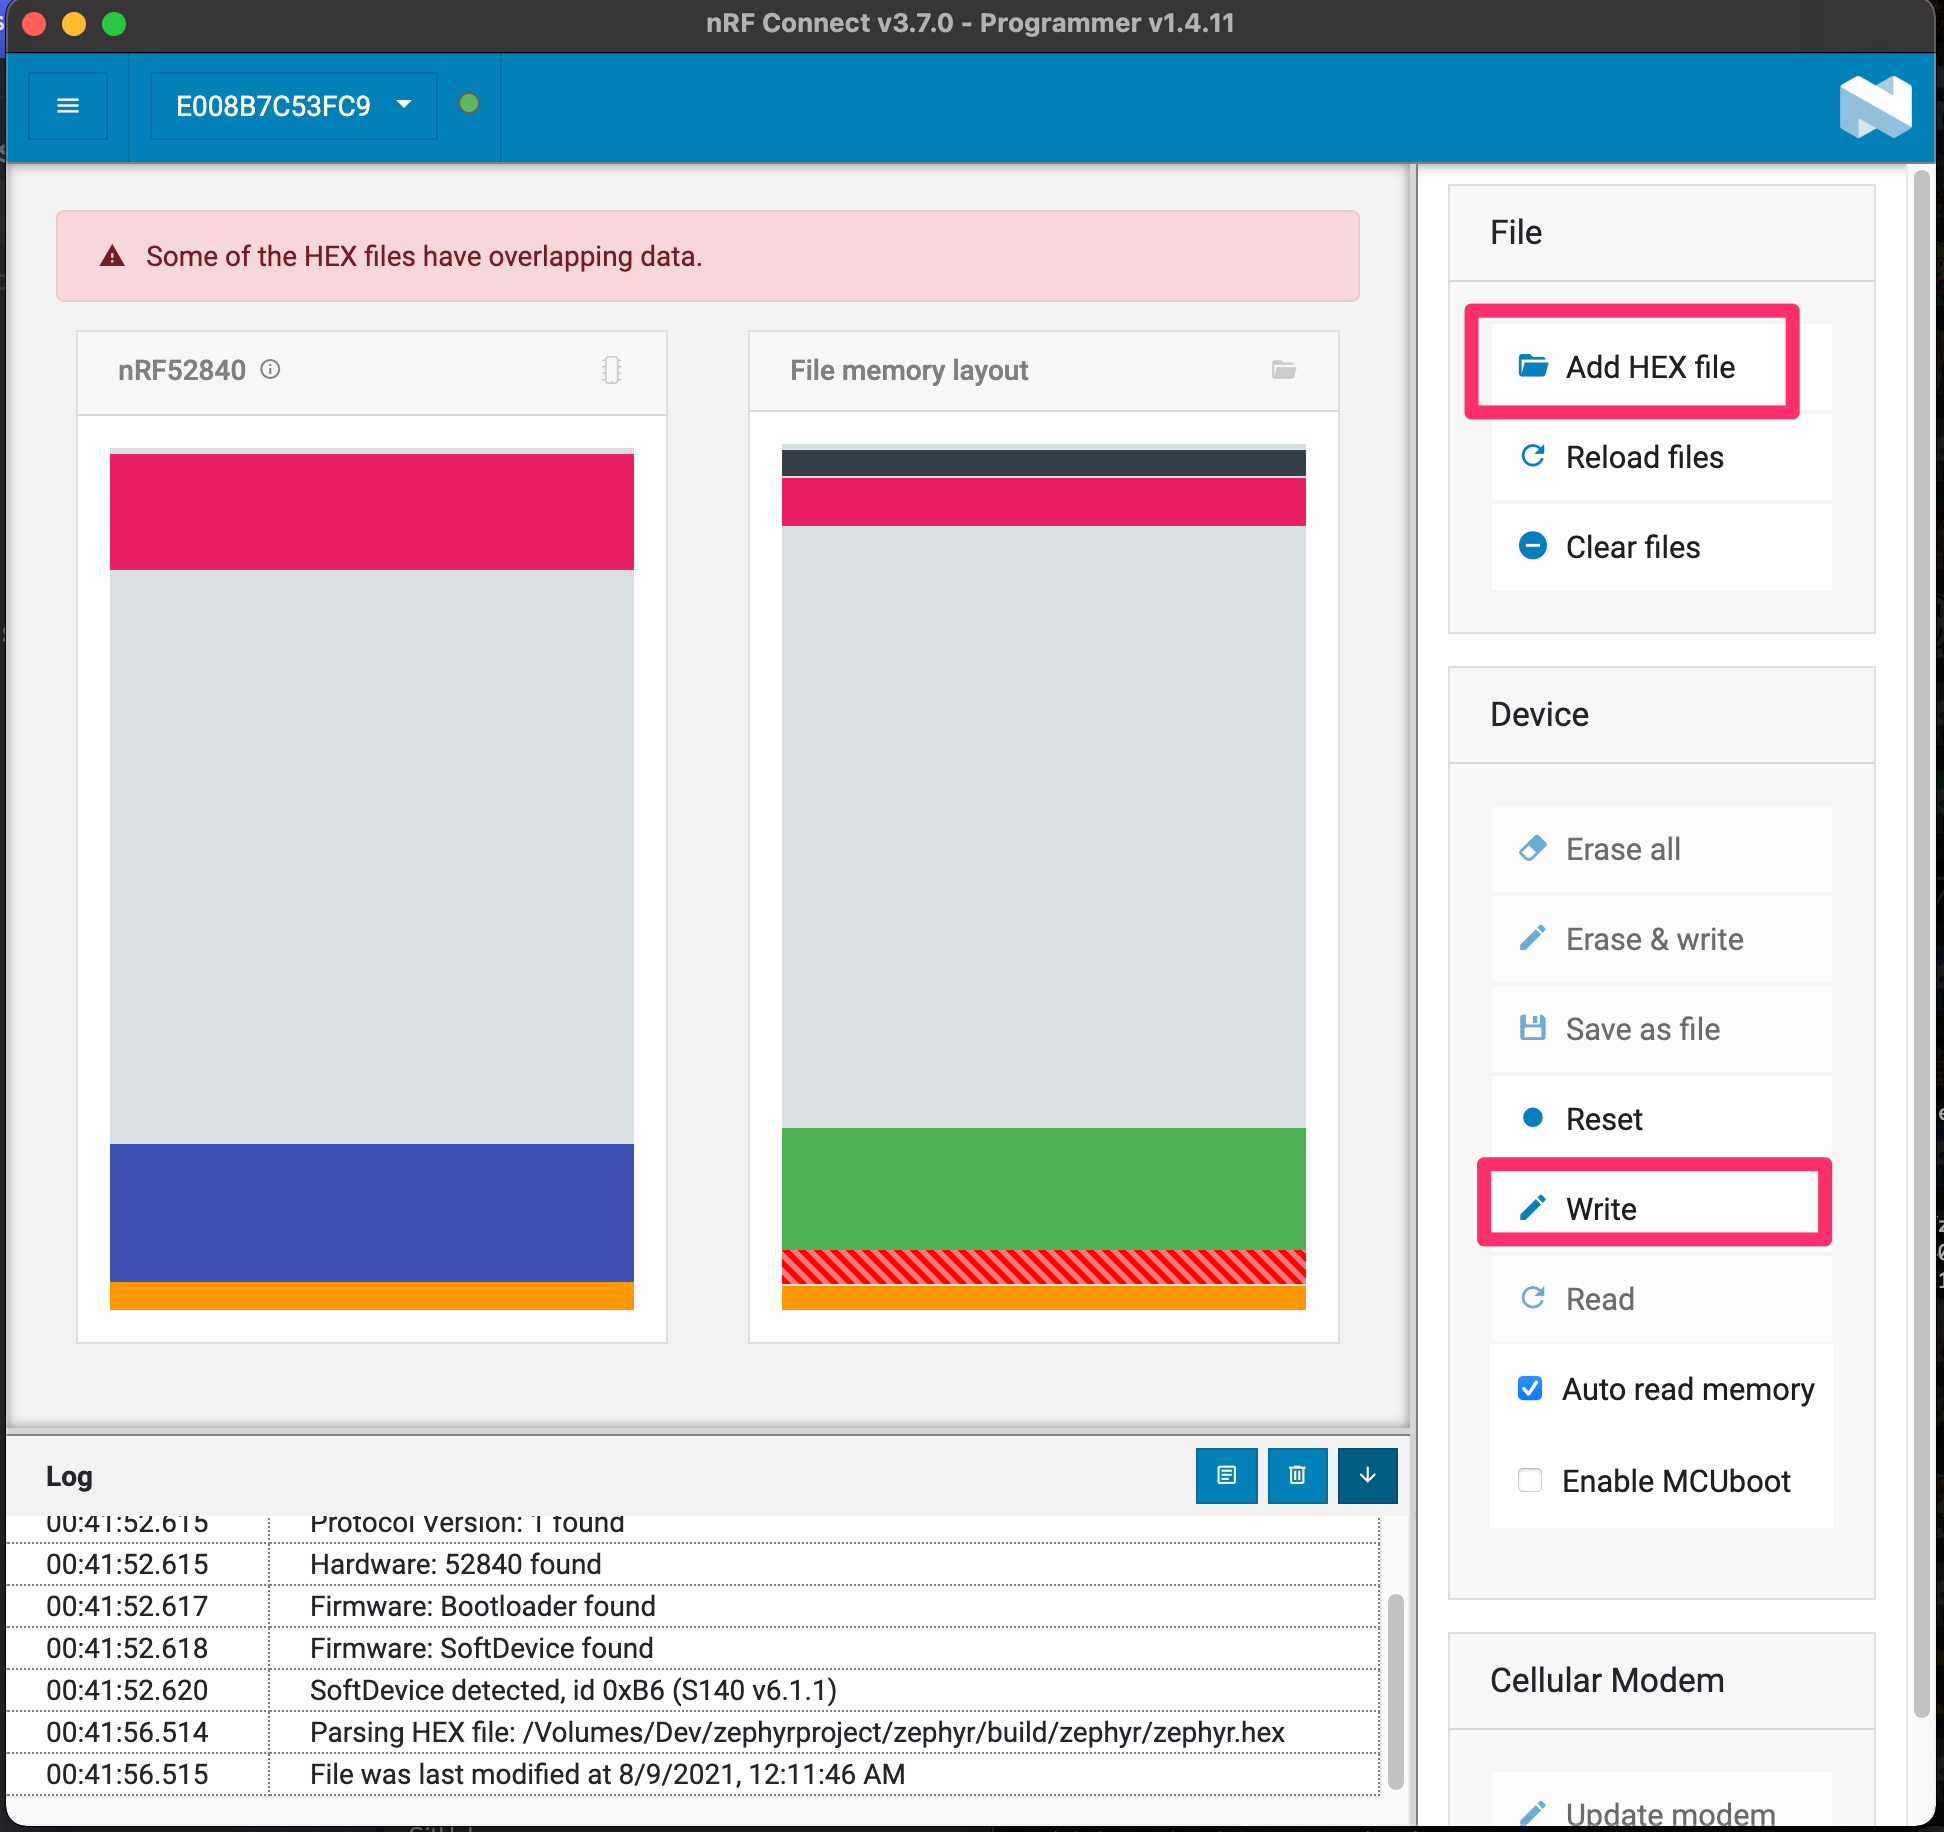
Flash this hex flash file using nRF Connect Programmer.