

Please download the latest version of the release directory. Head over to System Console and drop the latest release in plugins section. For more help on how to install a custom plugin refers installing custom plugin docs.
Currently unstable due to active development, should be used for testing purpose only, Open for bugs and improvements.
-
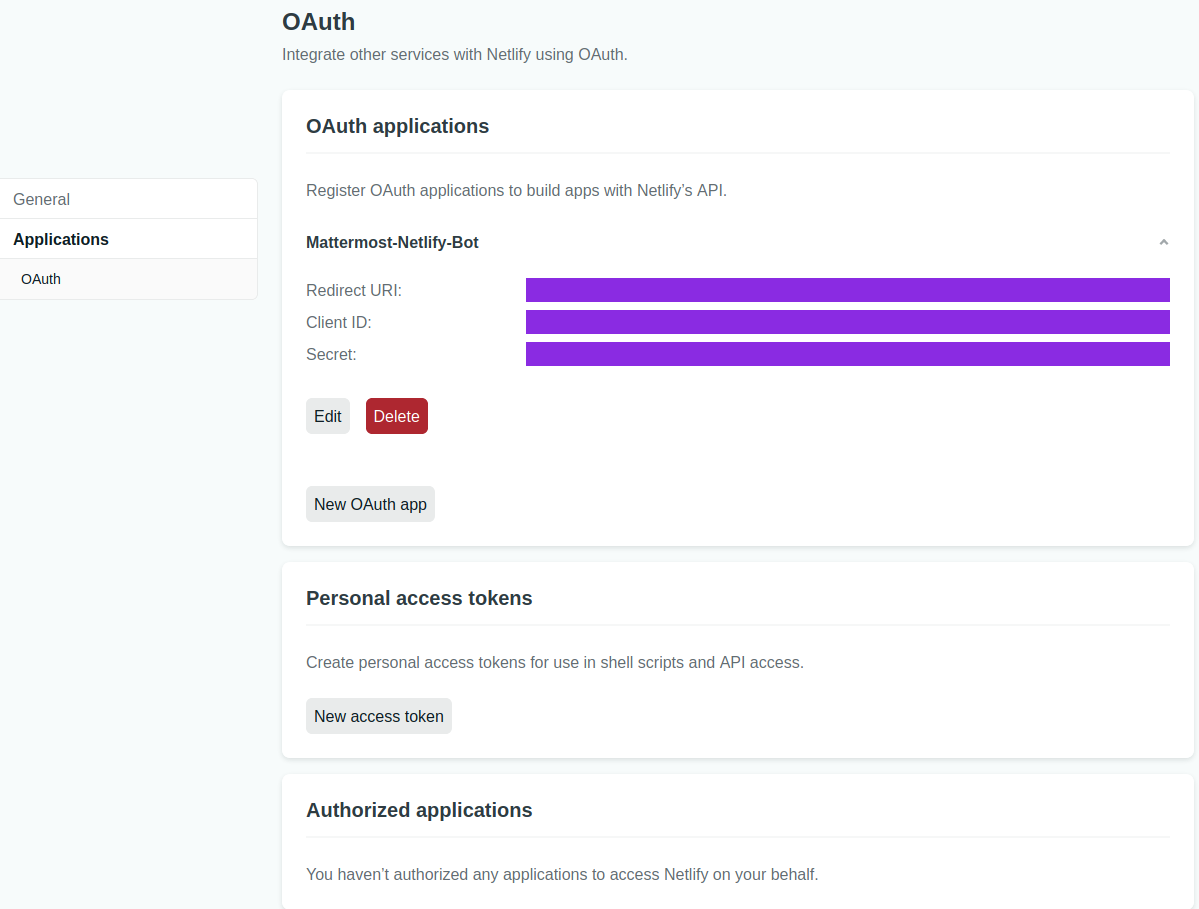
Head over to your Netlify account, and proceed to User settings. Find the tab Applications and under OAuth applications section; click on New OAuth app button.

-
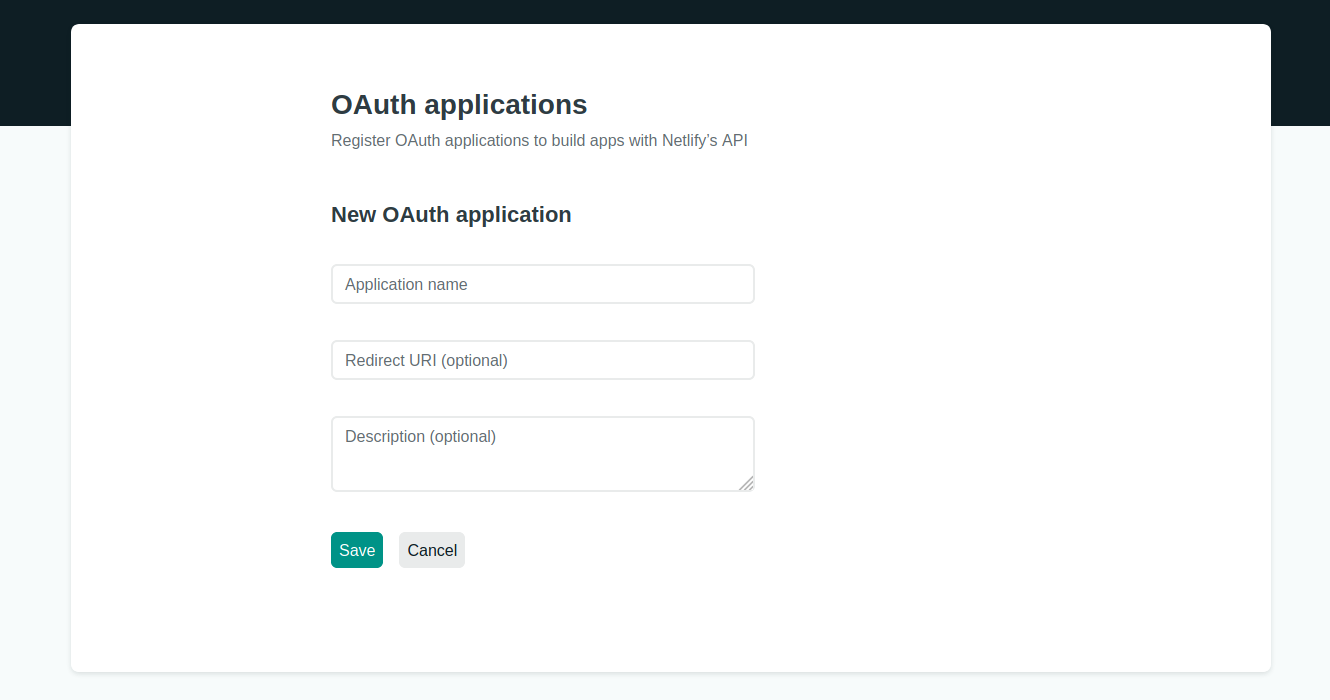
Enter the Application Name. The Redirect URI should be of /plugins/netlify/auth/redirect form. The site url is where you mattermost app is hosted. Example if you are installing it at the community the redirect url can be https://community.mattermost.com/plugins/netlify/auth/redirect . Description is optional field. Hit save button when fields are filled.
-
You can see the new oauth app of the Application Name you entered, created under OAuth applications. Expand it to view Redirect URL, Client ID and Secret.
-
Keep all the information above handy to be copied at plugin settings. ie.
- Application Name
- Redirect URI
- Client ID
- Secret
-
Head back to your Mattermost application. And open Sytem Console and select Netlify under Plugins tab on the left.

-
Copy over the fields from Netlify
- Netlify Application Name also referred as Application Name at Netlify.
- Netlify Client ID also referred as Client ID at Netlify
- Netlify Secret also referred as Secret at Netlify
- Plugin Encryption Key can be generated by hitting over Regenerate button below it.
- Webhook Secret Key can be generated by hitting over Regenerate button below it.
-
Hit Save button in the footer to save your settings.
-
Restart the plugin to propagate the effect.

-
This plugin works with the helps of simple commands and interactive dialogues. But first to be able to access any of the plugins commands, Netlify and Mattermost needs to be connected. Go to any channel and write the first slash command of netlify plugin
/netlify connect. Netlify bot then posts a link through which you can authenticate your netlify account.
-
Follow the link and you will be taken to Netlify login site. After logging in you will be presented with a permission screen. Hit approve button.

-
If successful, You will be redirected to successfully authenticated page. This page can be safely closed then.
-
A new message from netlify Bot is also posted on the DM stating the same. With this Netlify Mattermost plugin is configured and ready to use.

With the series of slash commands at its disposal, Netlify plugin can be used to manage or change resources up at Netlify account.
/netlify connect
By executing this command, the bot will post a link into the channel. Following which authentication with Netlify can be performed. Any of the belows commands requests that connection being made first before execution. After successfully authentication access token is stored in encrypted form at mattermost database. Which is then used to perform various operations via netlify api.
/netlify disconnect
This commands clears out authentication between netlify and mattermost. All the notifications are also unsubscribed from Mattermost.
/netlify list
It tabulates all the sites information of Netlify account. It lists name, url, custom domain, repository, deployed branch, managed by team, last updated of the site.

/netlify list id
This is usually a precursor command which you will be using to obtain site ids of you netlify hosted sites. It tabulates your sites along with its ids.
/netlify deploy <site_id>
It triggers a new build on your site. At a time only one site can be built. Site Id could be obtained by running list id command. When deployed through this command your netlify site deploy message will be triggered by Netlify Bot from Mattermost. It will also automatically create a build webhook in your netlify application under the name Mattermost-Netlify-Build-Hook, care must be taken not to delete it while running the Netlify bot.

/netlify rollback
It can facilitate to quick rollback to a previous stable state of the website. The latest five releases are shown for a particular site to roll back the site to. Since this is not a deploy, notification are not enabled for this operation. But the site itself it rolled back internally and can be verified by checking the site url itself.
/netlify subscribe
It subscribes sites to post build notifications on the channel from where the command was executed.
/netlify unsubscribe
It unsubscribes the channel from where command was executed from all Netlify sites build notifications.
/netlify subscriptions
Lists out all your Netlify site(s) subscribed with the channel to receive build notifications.
/netlify site
Shows in depth information of your Netlify site.
/netlify me
This commands show relevant information of the Netlify account connected to Mattermost via the plugin.

/netlify help
It shows all the commands which are available for user to interact with Netlify bot.
This plugin comes with beautiful, slick and condensed notifications for your Netlify sites. Which when subscribed can show information regarding your builds.
When enabled, this notifications pops up in your channel as soon as a new deploy is in progress for one of your sites.

When enabled, this notification informs you that the build has successfully completed for one of your site. It also gives an SSL enabled preview url of the new build along with build logs.

When enabled, this notification alerts you that the build has terminated without result. It shows the top build failure reason along with complete failure build logs.

This plugin contains only a server portion. Webapp portion at this time is not needed. But feel free to include that if need arises.
- To bundle plugin
make dist- To check for styles
make check-style- Tighten security along the lines of encrypted keys
- Add support for DNS configuration
- Add support for Forms control
- Include notifications for Forms submissions
- Enforce JWS authentication for incoming webhooks