LaCE onboarding guide
This page will help you solve common queries that you may face while working on LaCE issues. If you do not get a satisfactory explanation from this page, feel free to mention your query in the issue thread that you are working on or else make a discussion regarding this in Dicussions. If you feel that your query can be a valid addition to this page, then make sure to create a new issue here addressing your question.
| Index | Common Queries |
|---|---|
| 1. | Creating a Topic |
| 2. | Creating a Skill |
| 3. | Generating data on localhost |
| 4. | Creating a classroom |
- To create a new topic, we first navigate to the
Topics and Skill Dashboardand select theCREATE TOPICoption. To do so, you can take a look at this guide - A modal will open up with necessary details of the topic that are to be filled such as topic name, topic thumbnail, etc.
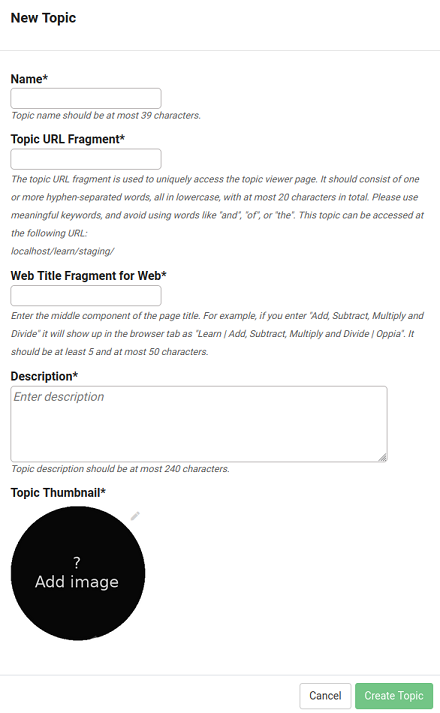
- Once this is done, the topic is created and you will be redirected to the topic editor page.
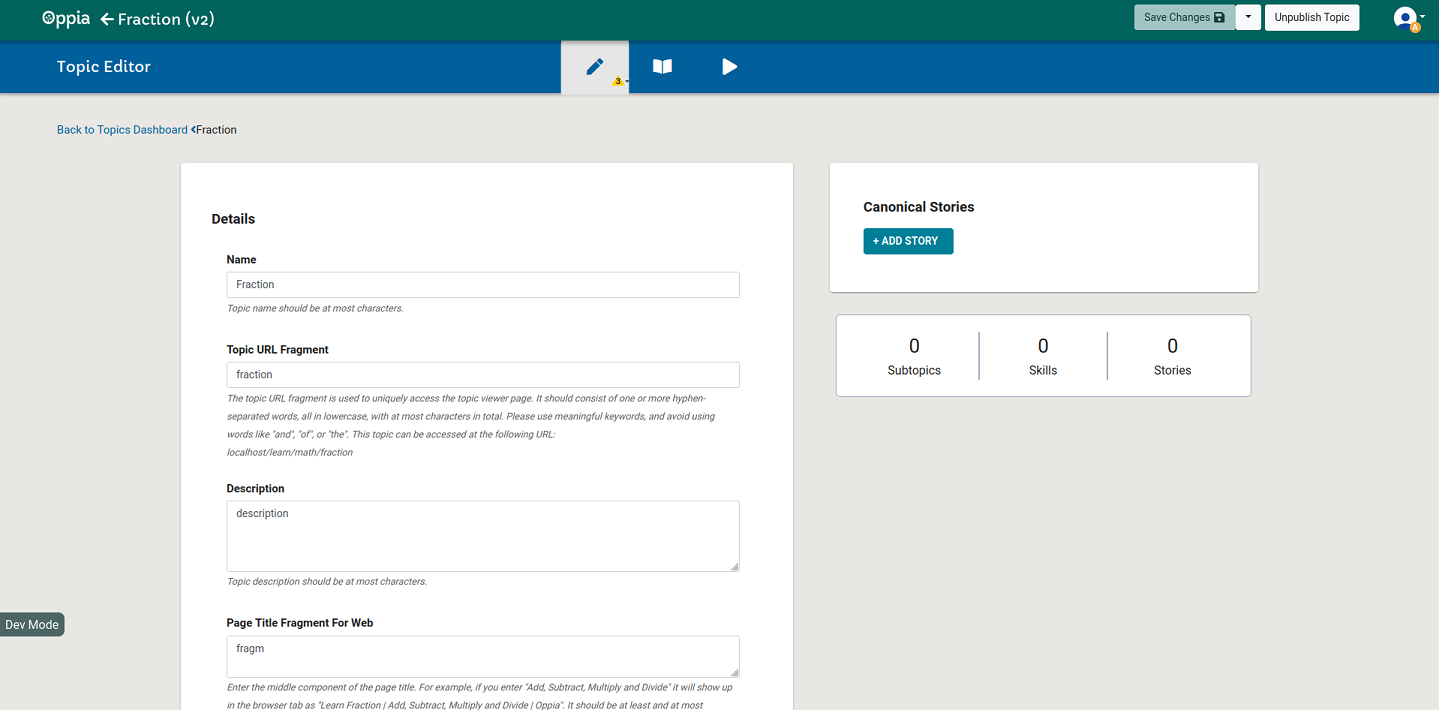
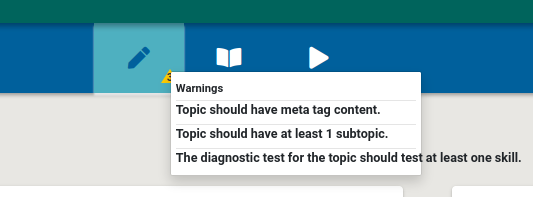
- In the main editor tab, we will be able to see the errors that are preventing the topic from being published.
-
This tab has 4 main sections:
- Details: Information related to the topic
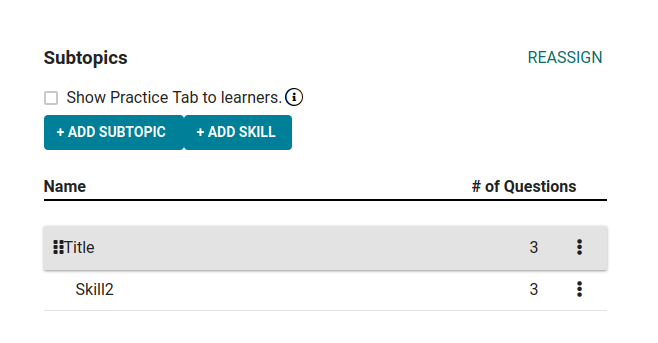
- Subtopics section: Subtopics and skills associated with the topic are listed.
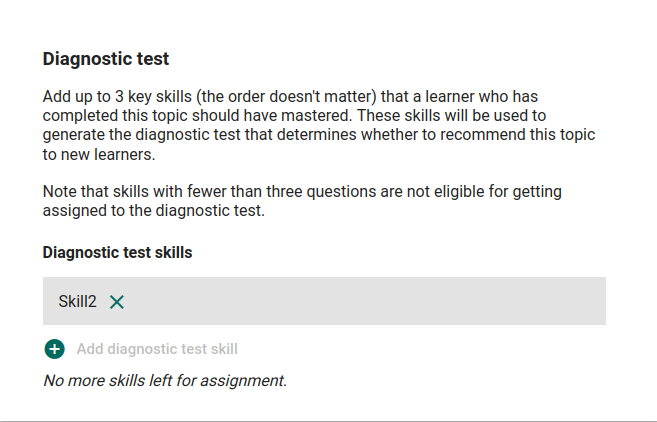
- Diagnostic Tests: Add skills that will be used to generate the diagnostic test that determines whether to recommend this topic to new learners. For a skill to qualify for this, it must have at least 3 questions and be assigned to that topic.
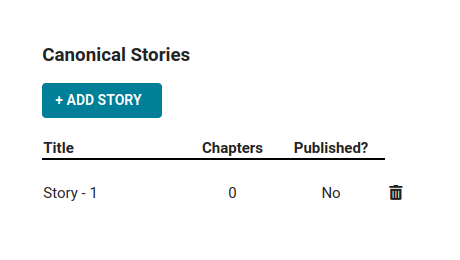
- Canonical stories: In this section, the stories belonging to the topic are listed.
NOTE: For a skill to be visible on the practice tab of a topic, it must have at least 10 questions associated with it.
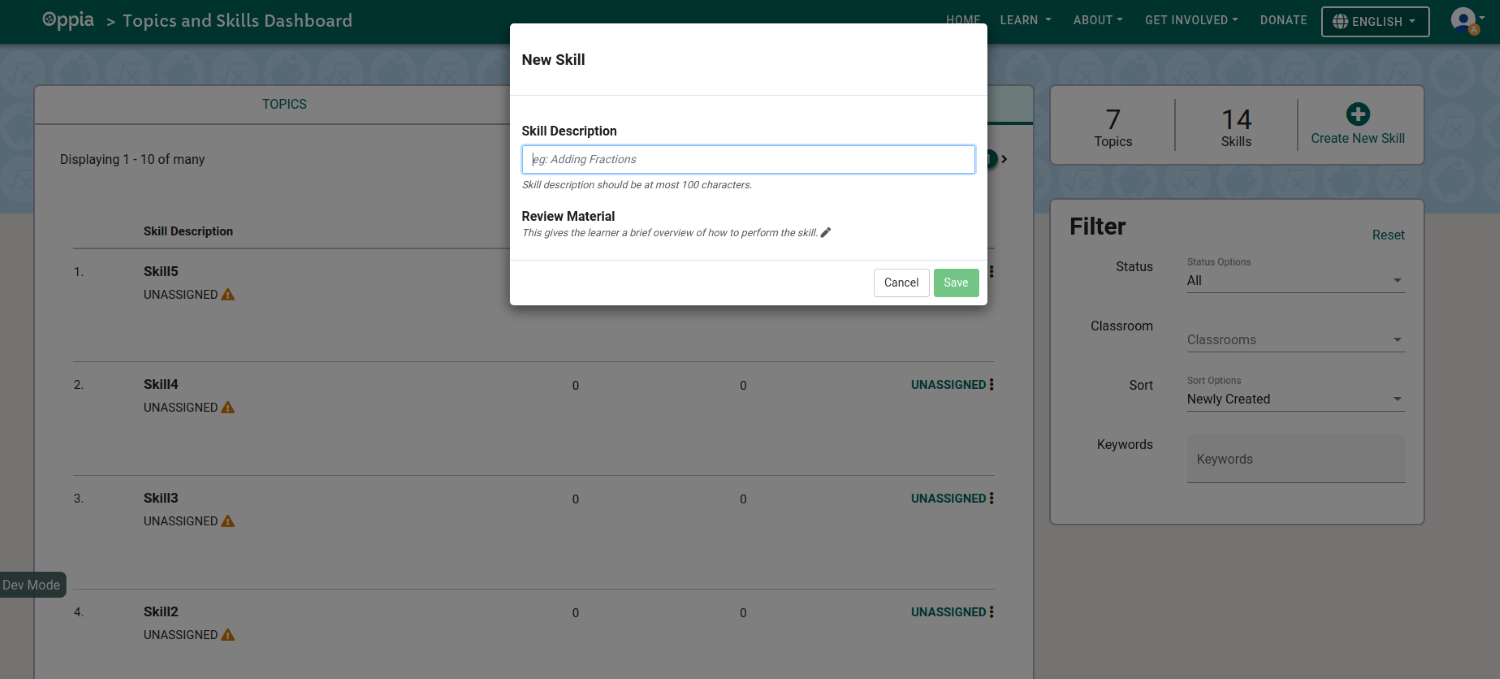
- A skill can be directly created from the topic editor by clicking the
ADD SKILLbutton underSubtopicssection of the topic editor. But in this case, the skill will be automatically assigned to that topic. - A skill can also be created from the Topic and Skill Dashboard as well but it will not be assigned to any topic.
- On clicking the
ADD SKILLoption a modal will pop up with necessary details of the skill.
-
Once this is done, the skill is created and you will be redirected to the skill editor page
-
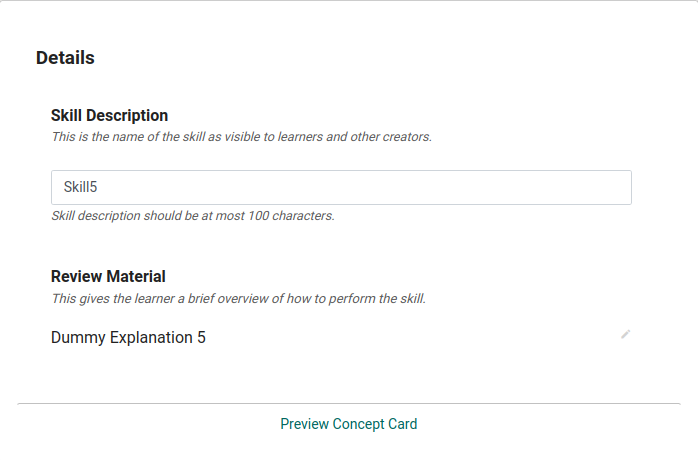
The main skill editor section has the following part:
- Details
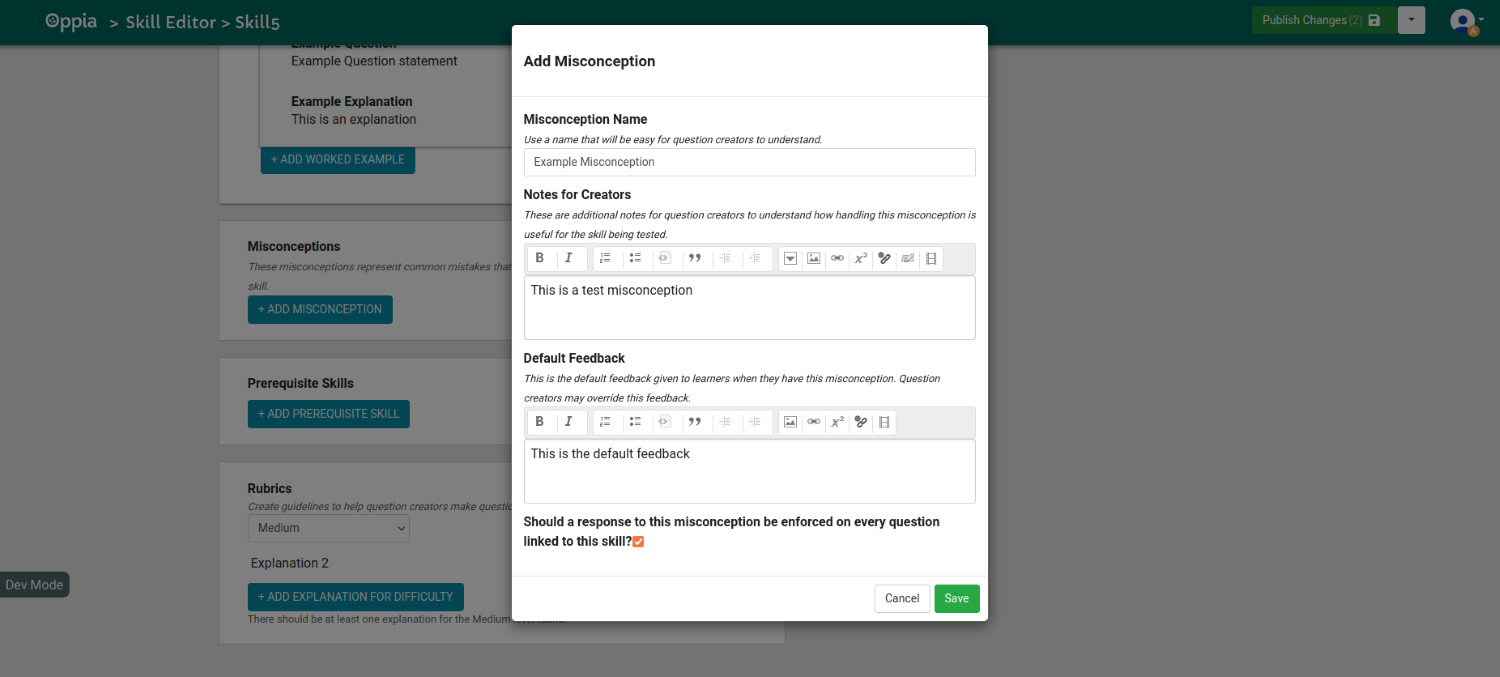
- Worked example
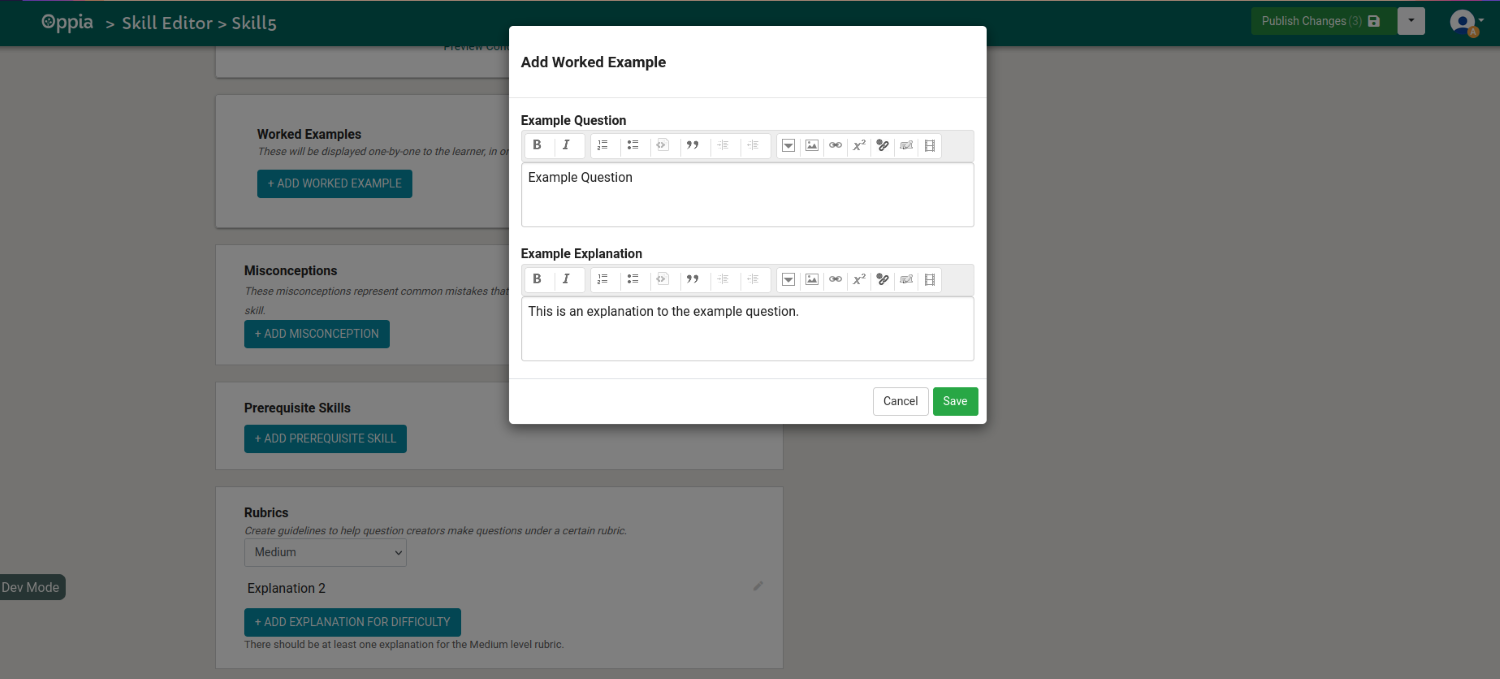
- Misconceptions: Common errors that users may have and their explanations. The creator is given the option to enforce the misconception on all question within the skill as seen in the image below.
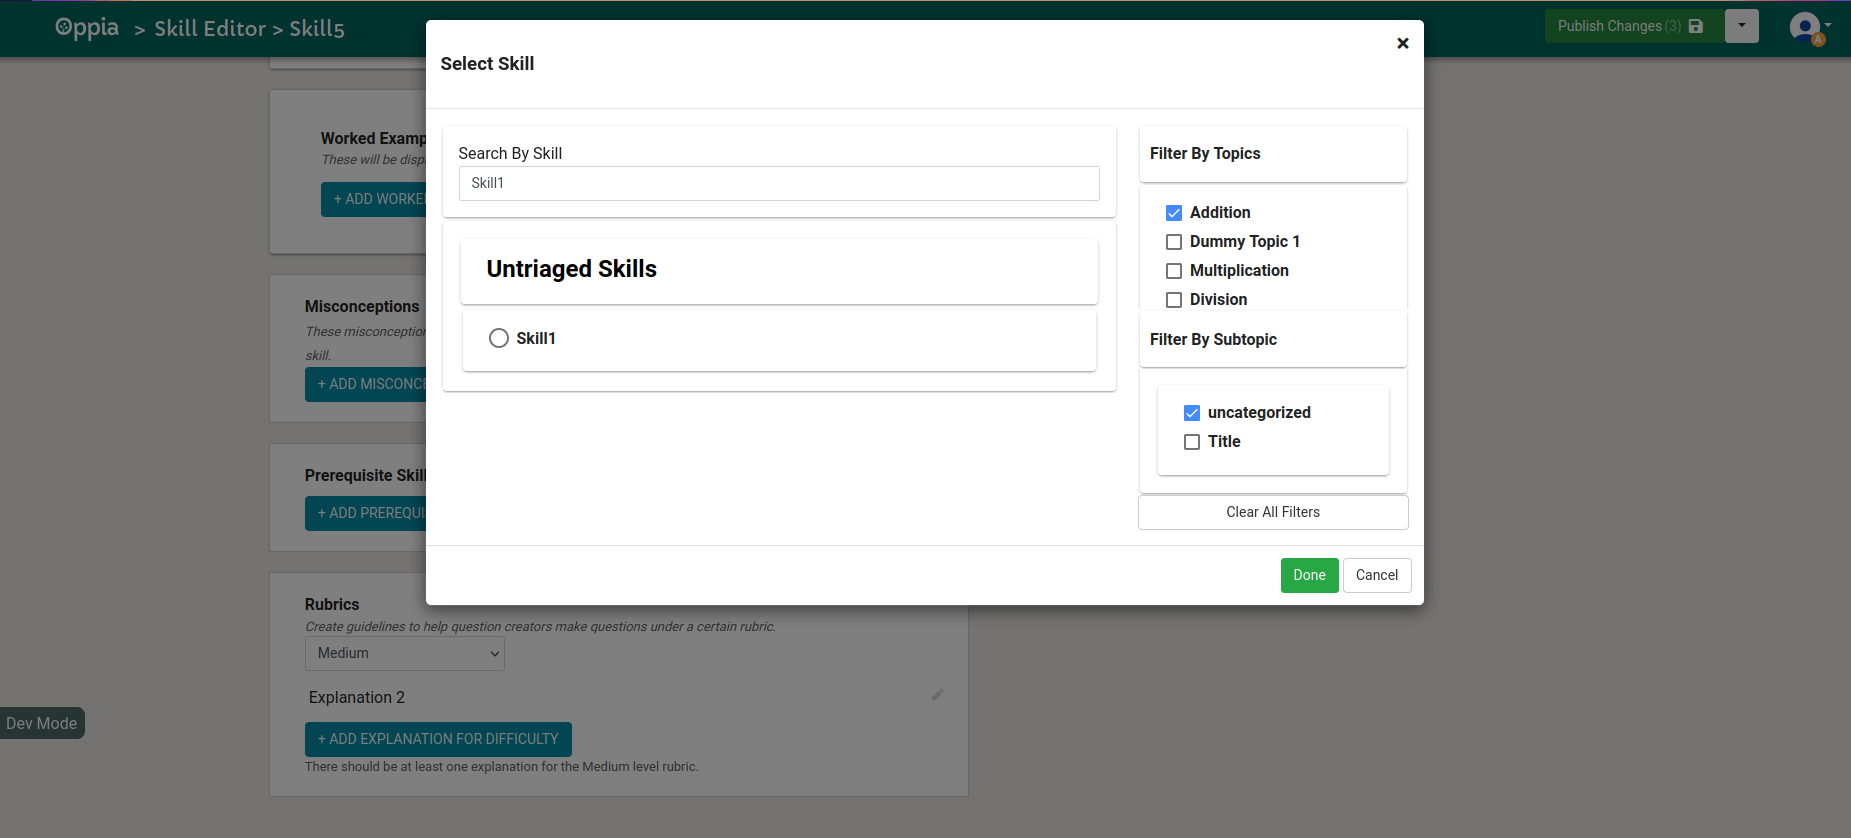
- Pre-requisite Skills: Skills that are to be completed before attempting the current skill. The prerequisite skills can be filtered by topic, subtopic and by title of the skill.
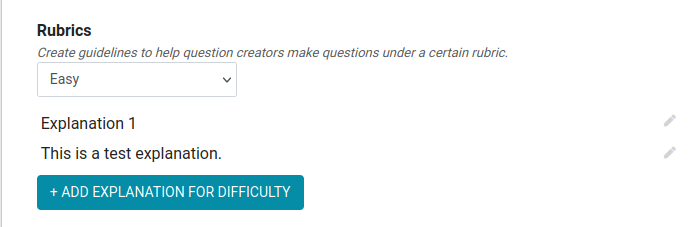
- Rubrics: This section of the skill helps question creators make questions under a certain rubric.
-
The questions section lists the questions in the skill:
-
To add a new question, select the
ADD QUESTIONoption -
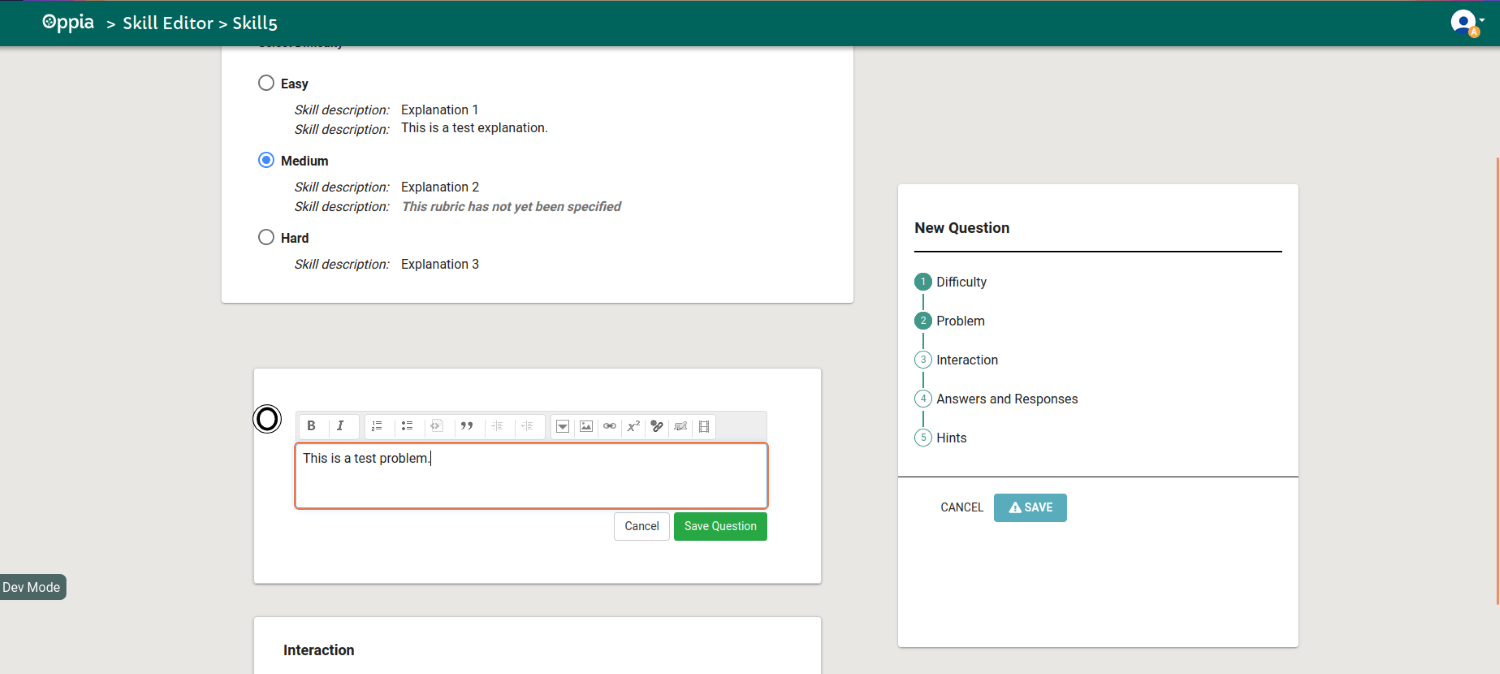
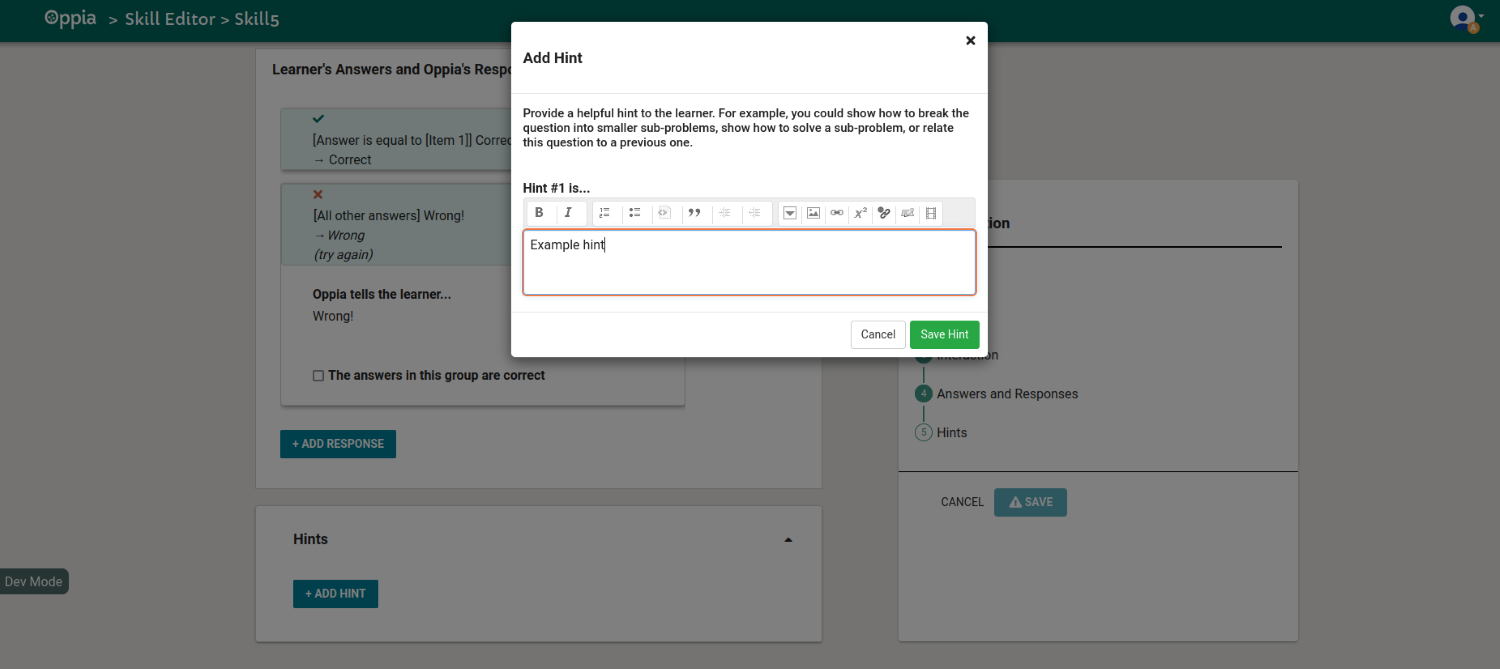
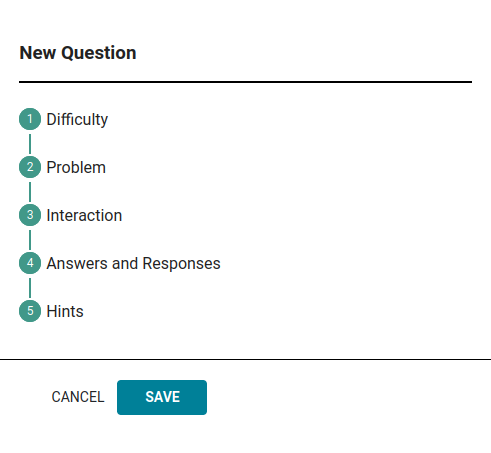
In the question editor, there are 5 sections:
- Difficulty
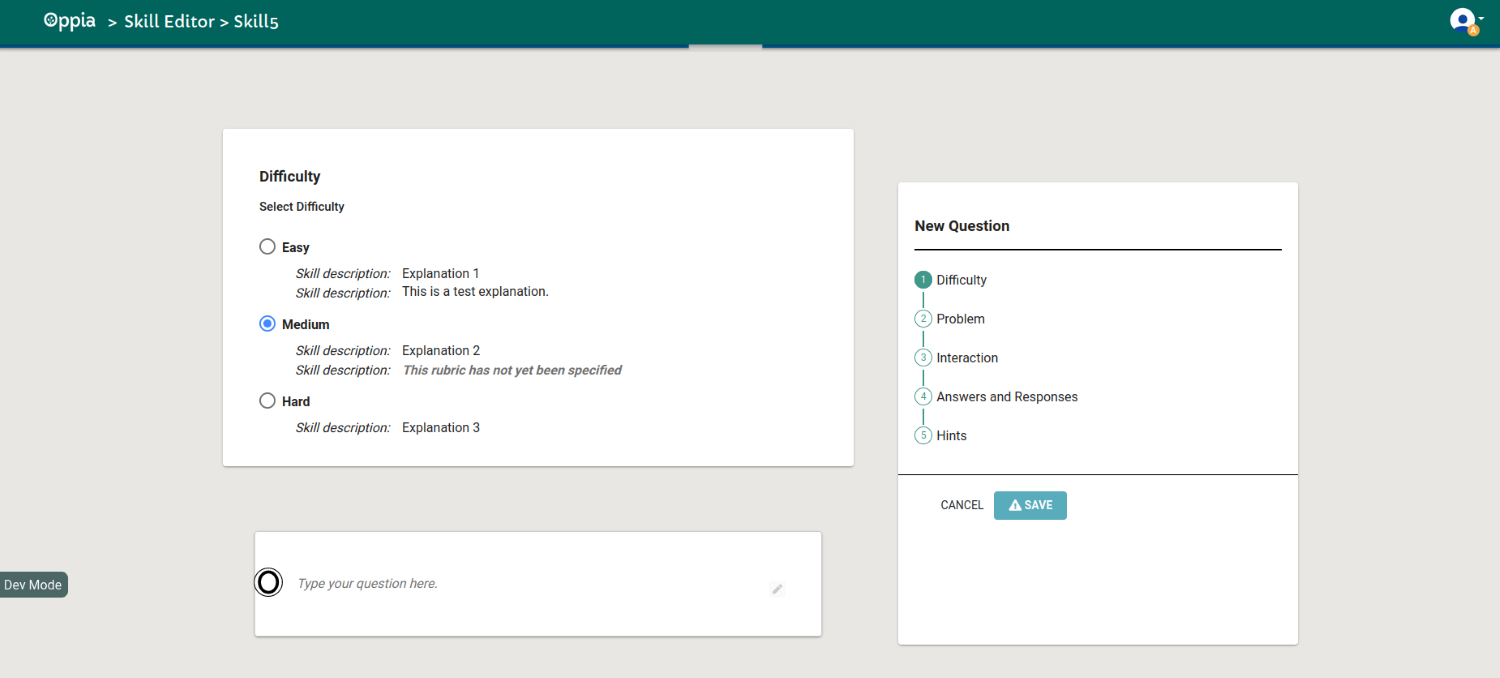
- Problem
- Interaction
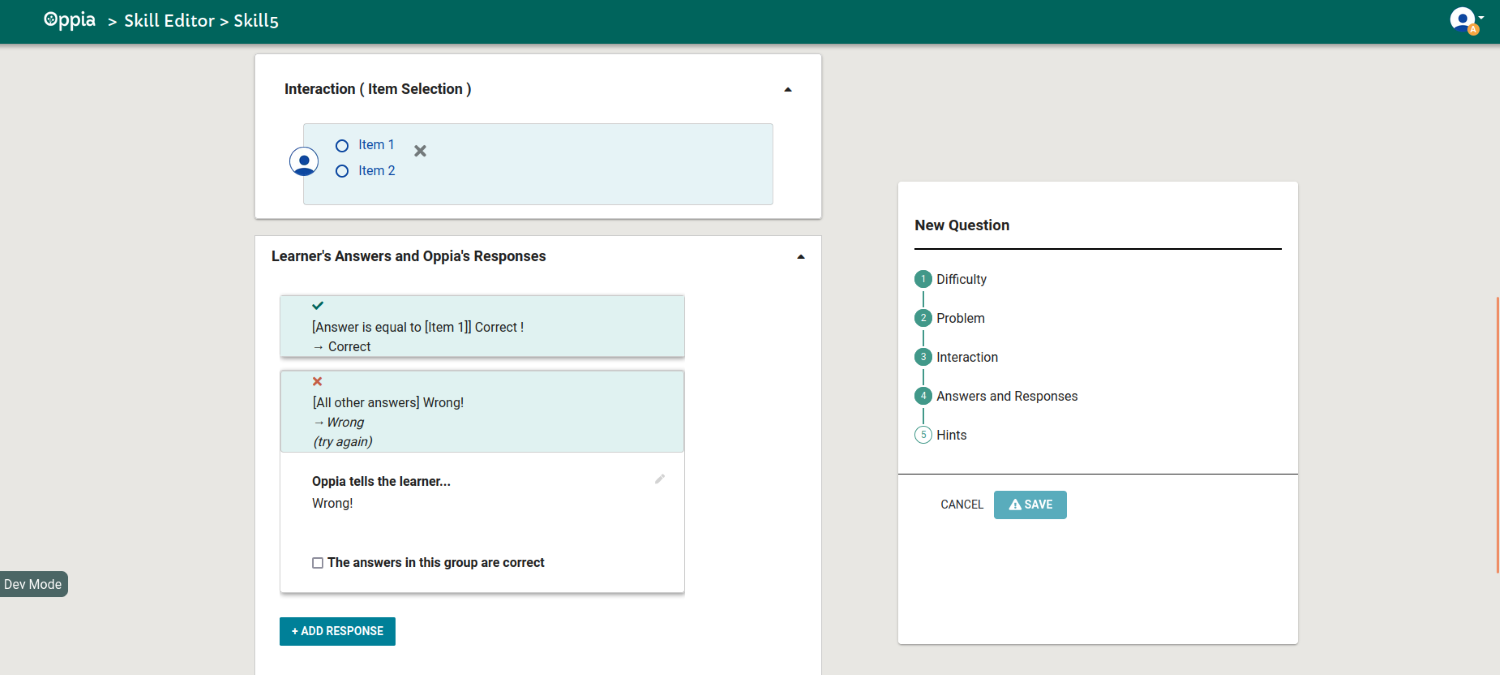
- Answers and Responses (This section can be seen in the image above)
- Hints
-
Once all these sections are filled, the question can be saved.
-
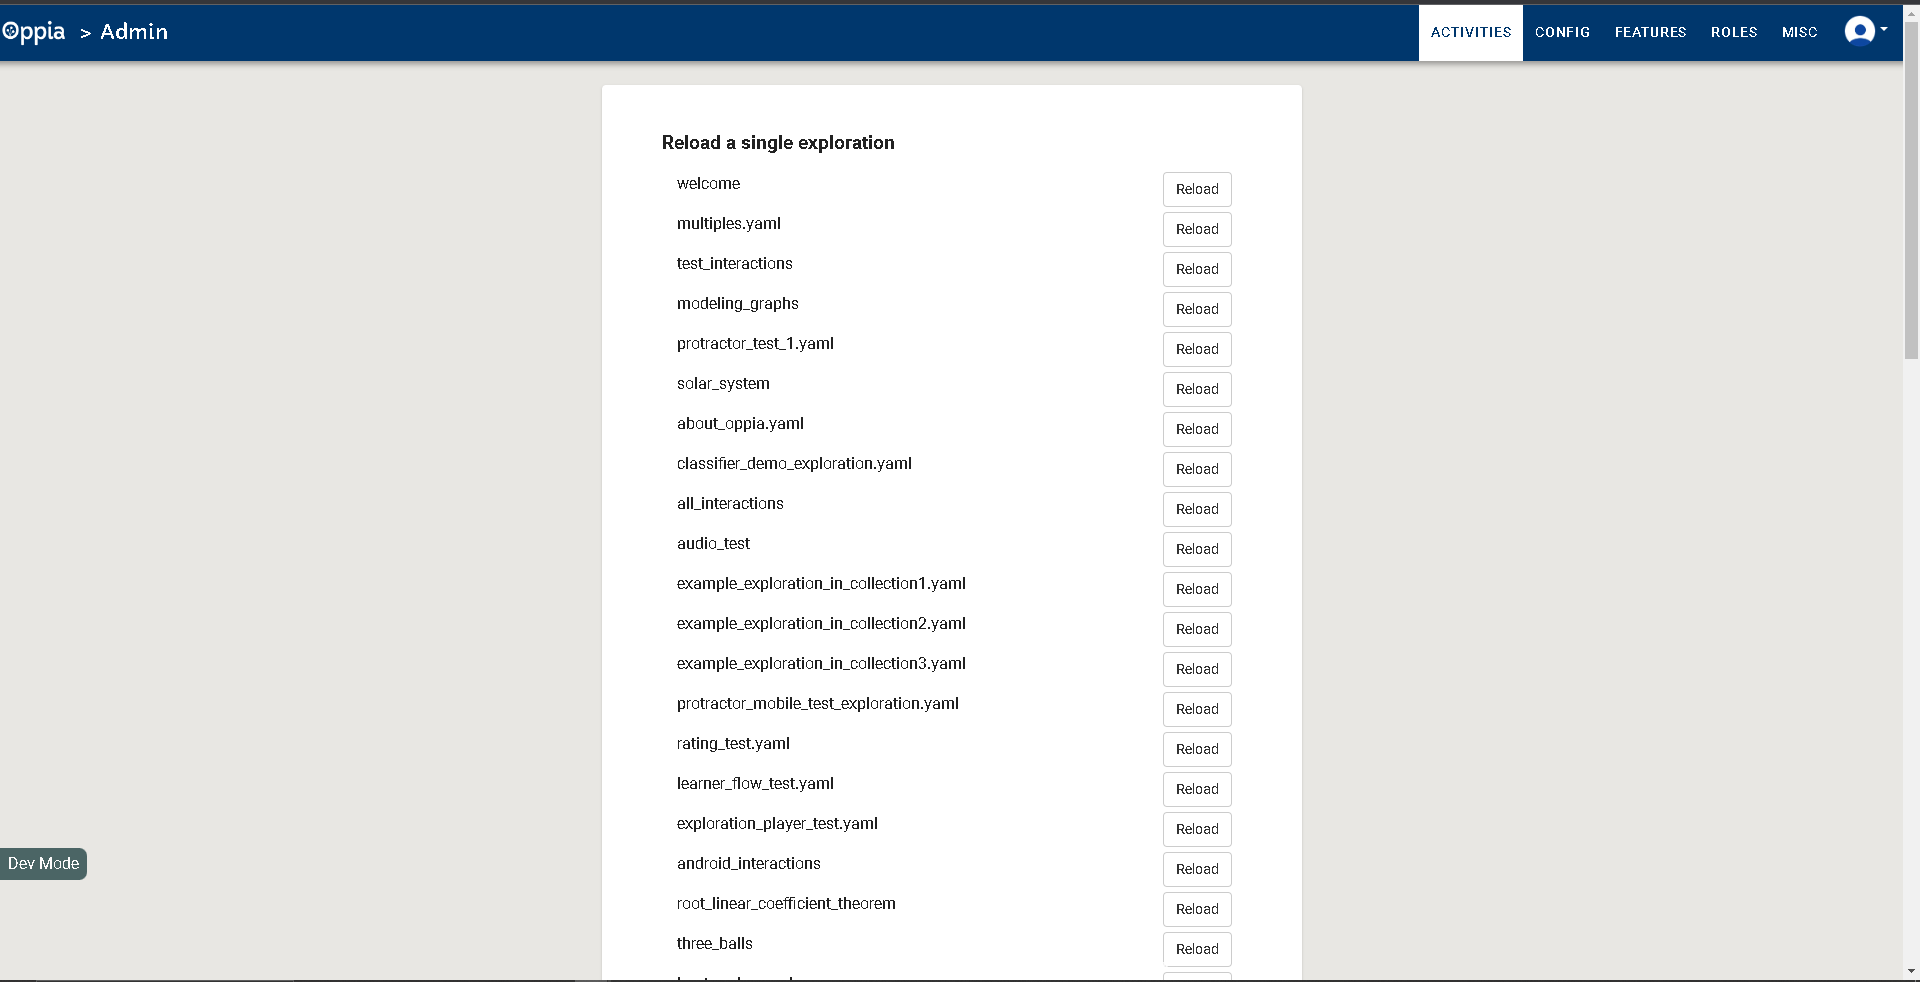
- To generate data, we must first navigate to the admin page.
We will automatically be redirected to the ACTIVITIES tab.
- This tab will have several sections:
- Reload a single exploration: This section has preloaded explorations. These can be loaded onto your local server by clicking the
Reloadbutton for each of them.
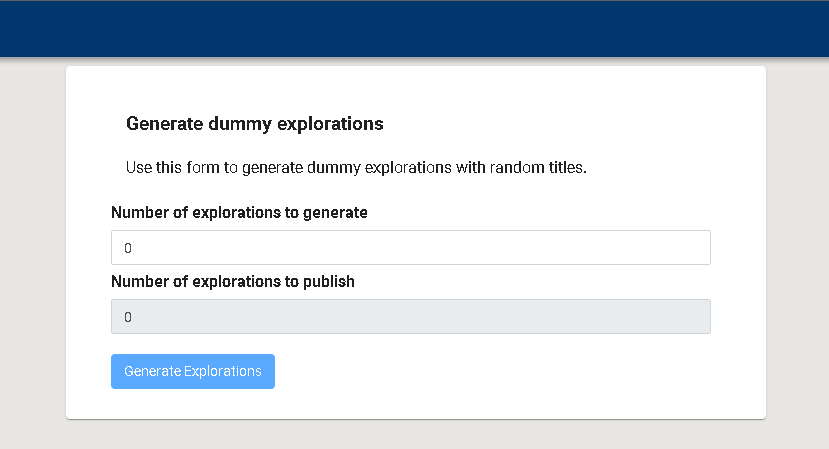
- Generate dummy explorations: Along with the option to generate dummy explorations (with no content), we can also publish a certain number of them.
- Reload a single collection: This section has preloaded collections.

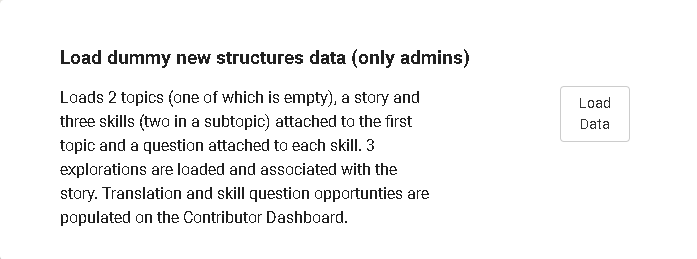
- Load dummy new structures data: This section provides a combination of topics, skills, stories and exploration.
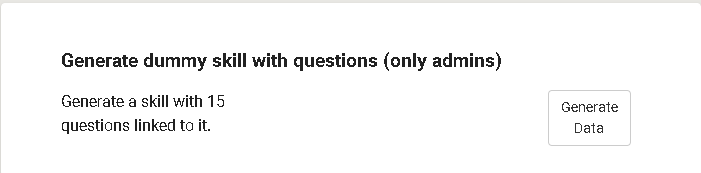
- Generate dummy skill with questions
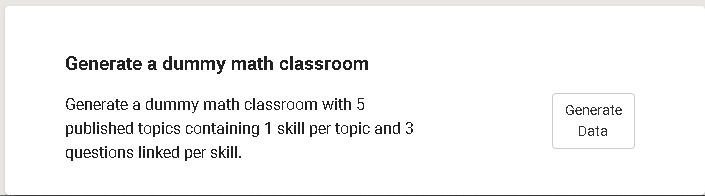
- Generate a dummy math classroom
Note: If you encounter the error Server error: 'None Type' object has no attribute 'version', do the following steps to fix it.
- Make sure the user has the release-coordinator role. If not,
- Go to the /admin page, and under the Roles tab, assign your username the "release-coordinator" role.
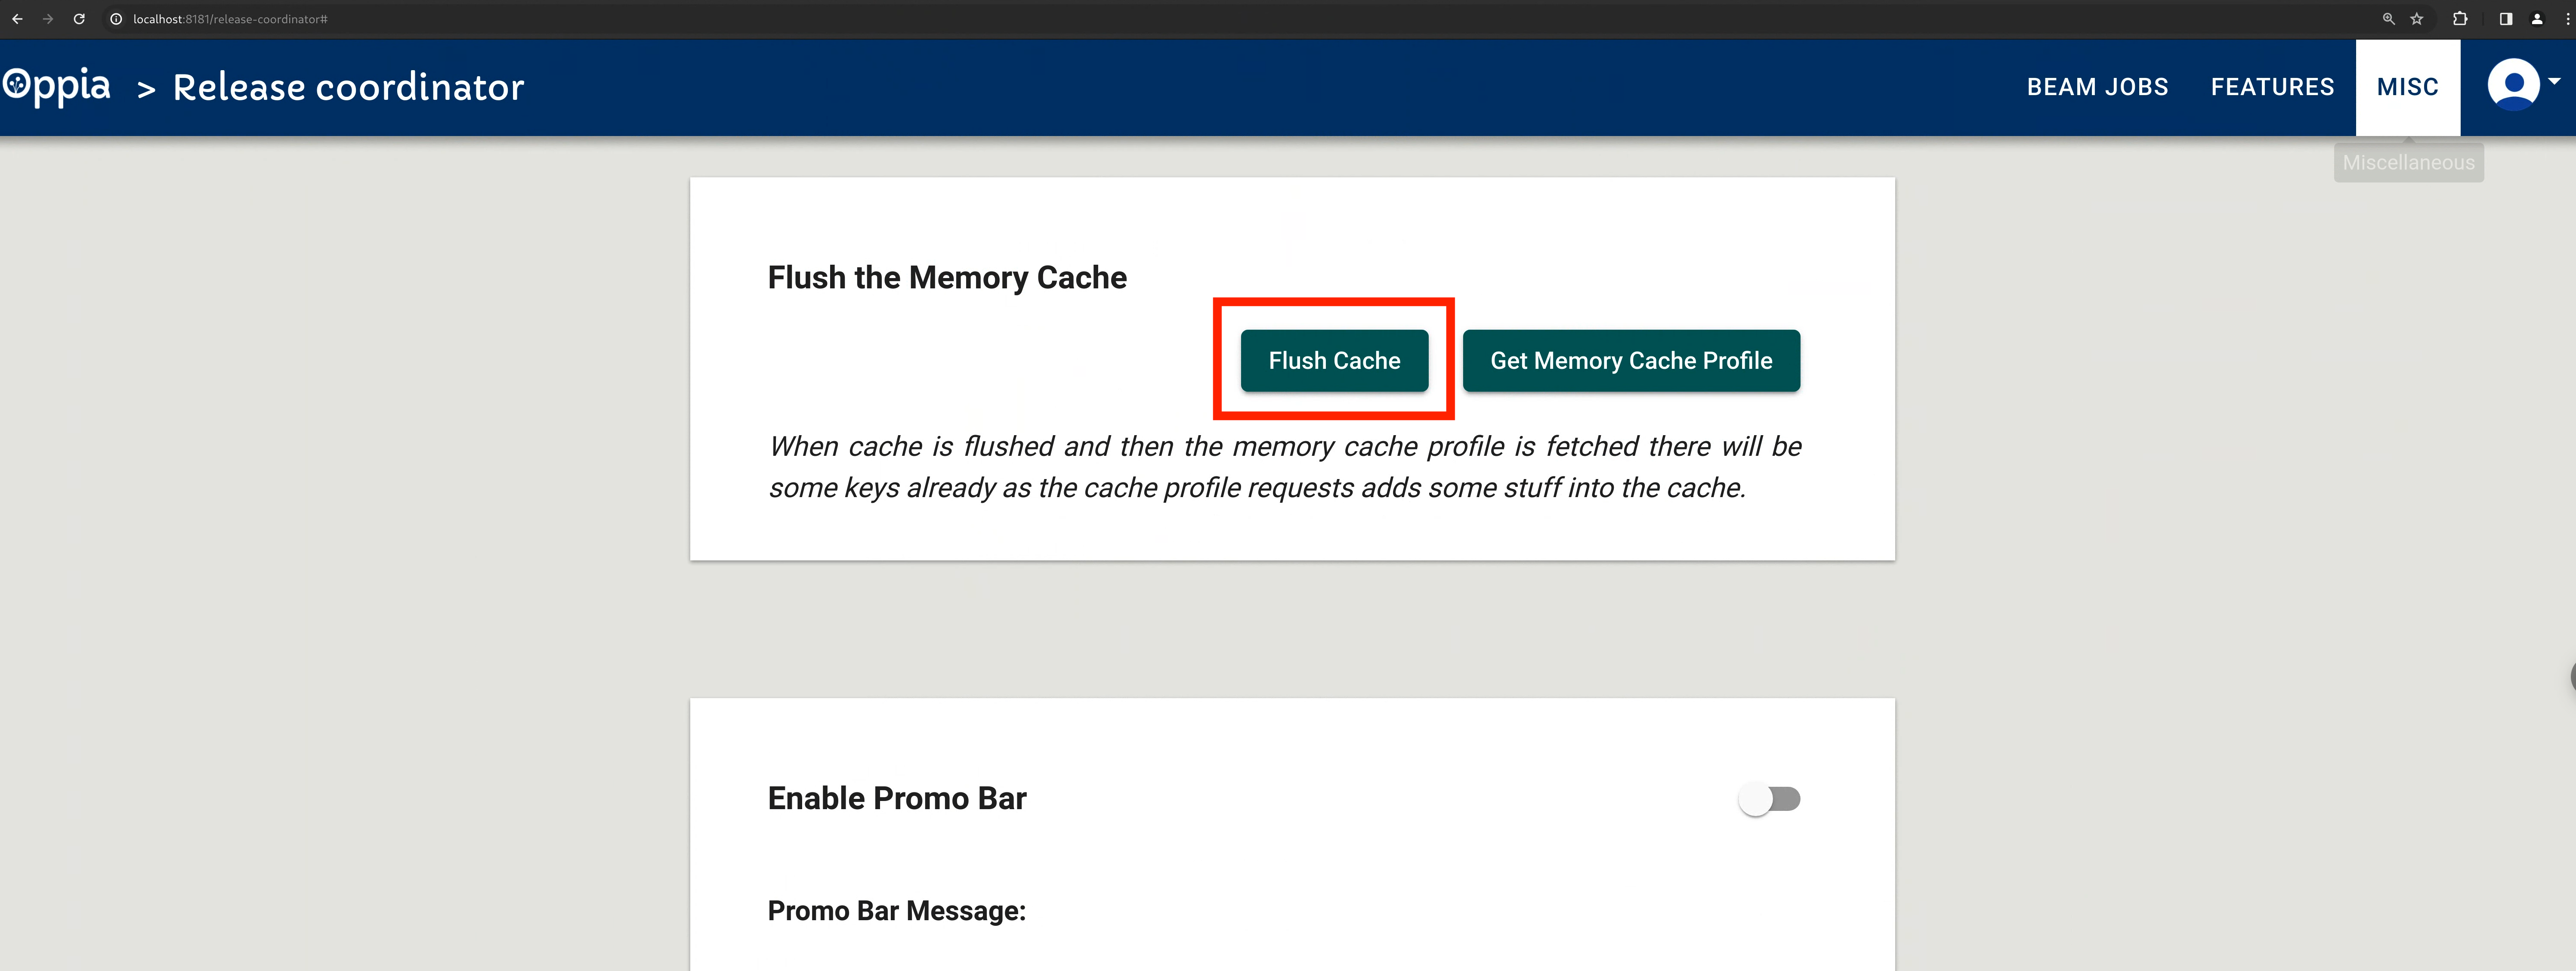
- Go to the
/release-coordinator page, and under the MISC tab, click on theFlush Cachebutton.
- Navigate to the Admin roles tab (/admin)
- Assign the curriculum admin role to yourself.
- Creating/Loading a classroom
-
Creating Custom Classroom
- Navigate to classroom admin page (/classroom-admin)
- Click on "Add New Classroom"

- Add classroom name and URL fragment

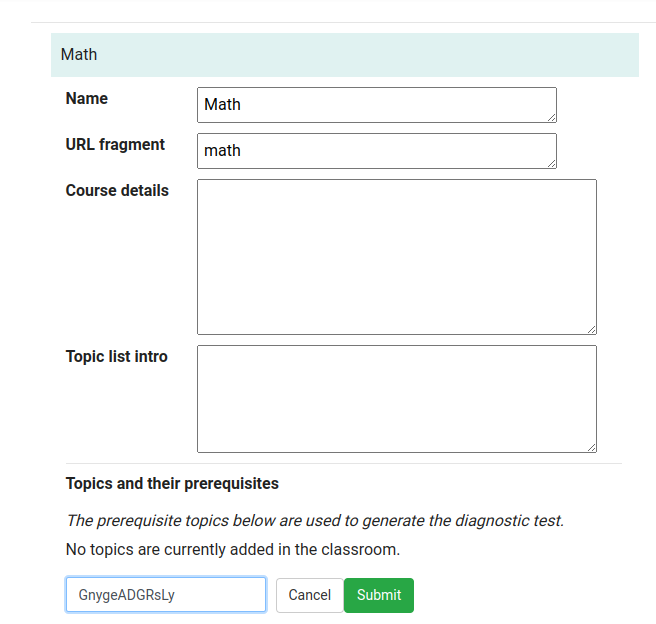
- Edit classroom details (click on the classroom name tile and then click on the pencil icon).
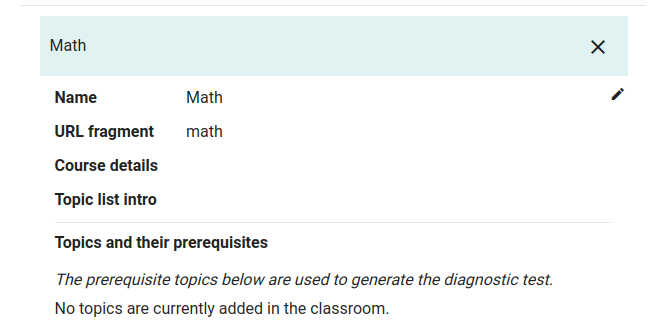
- Add course details, topic intro, and topic IDs to the classroom.
- [Optional]: Create a dependency graph for the topic i.e., making a topic prerequisite for another topic. The created dependency graph will be a DAG (directed acyclic graph).
Or,
-
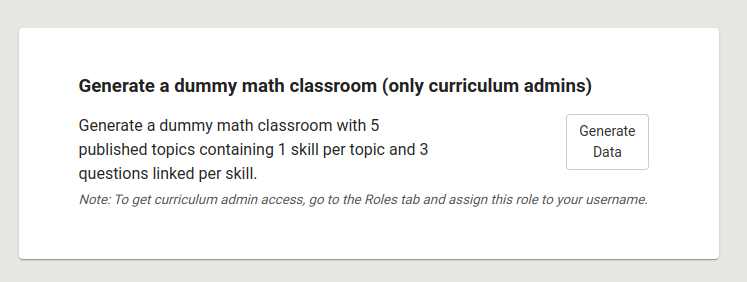
Creating a Dummy Math Classroom
- Navigate to the Admin activities tab.
- Load dummy classroom data.
-
- The newly created classroom will be visible in the Home tab of the learner dashboard page or we can directly access the classroom from the link localhost:8181/learn/<classroom_url_fragment>.