This bundle provides the use of Zend Queue from Zend Framework. It allows your Symfony application to schedule multiple console commands as server-side jobs.
See the Programmer's Reference Guide for more information.
Features:
- Manage multiple queues
- Schedule your Symfony commands
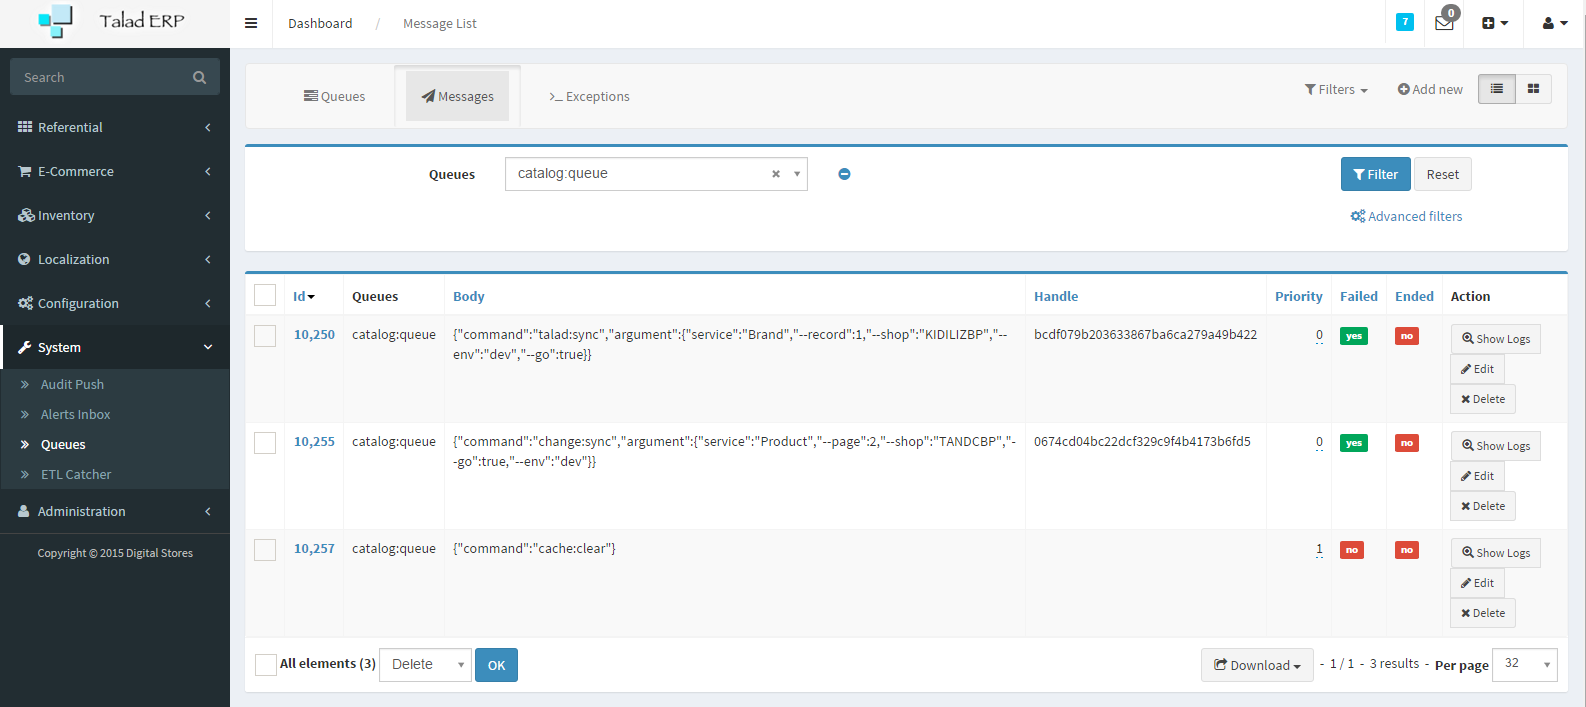
- Monitor messages and log exceptions
- Retry logic
- RabbitMQ or database support
Require heristop/jobqueue-bundle to your composer.json file:
{
    "require": {
        "heristop/jobqueue-bundle": "dev-master"
    }
}
Load the bundle in AppKernel:
$bundles[] = new Heri\Bundle\JobQueueBundle\HeriJobQueueBundle();If you use the Doctrine adapter, update your database:
app/console doctrine:schema:update --forceIf you use the Amqp adapter, you may configure the connection in this way:
    # app/config/config.yml
    heri_job_queue:
        amqp_connection:
            host: localhost
            port: 5672
            user: guest
password: guestFirst, define a message which contains the Symfony command to call. For instance, we choose to add the clear command in a queue named "queue1":
    $queue = $this->get('jobqueue');
    $queue->attach('queue1');

    $queue->push([
        'command' => 'cache:clear'
    ]);
You can also call commands with arguments:
    $queue->push([
        'command'   => 'demo:great',
        'argument'  => [
            'name'   => 'Alexandre',
            '--yell' => true
        ]
    ]);
Then, add the queue to listen in the configuration:
    # app/config/config.yml
    heri_job_queue:
        enabled:       true
        max_messages:  1
        queues:        [ queue1 ]
Note: The queue is automatically created, but you can also use the command-line interface in this way:
app/console jobqueue:create queue1To run new messages pushed into the queue, execute this command:
app/console jobqueue:listenYou may specify which queue connection the listener should utilize (skipping configuration):
app/console jobqueue:listen queue1You may also specify the number of seconds to wait before polling for new jobs:
app/console jobqueue:listen --sleep=5To process only the first job on the queue, you may use the jobqueue:work command:
app/console jobqueue:workTo see the pending jobs, run the command below:
app/console jobqueue:show queue1If a job failed, the exception is logged in the database, and the command is call again after the setted timeout (default 90 seconds):
To delete all of your failed jobs, you may use the jobqueue:flush command:
app/console jobqueue:flushJobs are executed in the order in which they are scheduled (assuming they are in the same queue). You may also prioritize a call:
    $queue
        ->highPriority()
        ->push([
            'command' => 'cache:clear',
]);If you use the Doctrine Adapter, you may use Sonata Admin to monitor your jobs:
    #
    # more information can be found here http://sonata-project.org/bundles/admin
    #
    sonata_admin:
        # ...
        dashboard:
            # ...
            groups:
                # ...
                System:
                    label:           System
                    icon:            '<i class="fa fa-wrench"></i>'
                    items:
- admin.queueThe jobqueue:listen command should be runned with the prod environnement and the quiet option to hide output messages:
app/console jobqueue:listen --env=prod --quietTo avoid a memory leak caused by the monolog fingers crossed handler, you may configure the limit buffer size on config_prod.yml:
    # app/config/config_prod.yml
    monolog:
        handlers:
            main:
                type:         fingers_crossed
                action_level: error
                handler:      nested
                buffer_size:  50
Linux ProTip:
To run the command as a service, edit jobqueue-service shell in Resources/bin.
Set the correct PROJECT_ROOT_DIR value, and copy this file to /etc/init.d.
Then use update-rc.d:
    cp jobqueue-service /etc/init.d/jobqueue-service
    cd /etc/init.d && chmod 0755 jobqueue-service
    update-rc.d jobqueue-service defaults
To remove the service, use this command:
update-rc.d -f jobqueue-service removeIf the service stopped suddenly, you may use supervisord to restart it automatically.
A sample config might look like this:
  [program:jobqueue-service]
  command=/usr/bin/php %kernel.root_dir%/console jobqueue:listen --env=prod
  directory=/tmp
  autostart=true
  autorestart=true
  startretries=3
  stderr_logfile=/var/log/jobqueue-service/jobqueue.err.log
  stdout_logfile=/var/log/jobqueue-service/jobqueue.out.log
  user=www-data
~


