Connecting Skynodes to OpenVPN

This guide assumes that you have read and understood the readme.md, downloaded the official images and do every step exactly the way it is described. Misconduct will lead to inability to connect and to potential reflashing. It is very important that there is no IP collision with your existing home router subnet. The default settings of the official images as well as the router of the Skyminer are using the 192.168.0.0/24 subnet.
Only proceed when you can access your manager after you have forwarded port 8000 in your Skyminer router and all nodes can be seen by it. Also all nodes must have the green mark next to the Discovery Addresses Status.
- Introduction
- Requirements
- Buying a VPS node
- Installing OpenVPN
- Preparing the Skynodes
- Troubleshooting
With opening up your ISP connection to the Skywire network you are vulnerable for users with bad intentions. Also some countries don't allow you to do some stuff with your connection which is allowed in other countries. By connecting your Skynodes to a VPN service you won't expose your original IP and have a much better night sleep.
After this setup your nodes are connected to an OpenVPN server (which we are going to install by our self) and reroute all your traffic through the VPN server. Note: this guide is still a work in progress and could change.
- A cheap VPS node
- Running Skynodes and manager (already accessible according to the manuals)
- Some Linux experience
- Patience
This is the most tricky and the biggest part which needs your attention. Just buying a VPS is not the way you want to go. Because the IP of the VPS will be exposed you must try to get a VPS from a bulletproof hoster (like RootVPN.eu or BadAss.Sx) of buy one somewhere where you can pay with Bitcoin. And even then you are not the safest, because your IP will be logged when buying one. As you might have noticed, this part is not easy.
Most VPS hosters will block proxies/VPN's and Tor in your request. And most of the time you will found out when you already have paid.
If you need help for getting a VPS for your VPN server, please contact @Yzord on Telegram. I host VPS without registration. But for this guide i will assume you already have one.
Now comes the fun part. I assume you already have a VPS with a minimal installation of any distro. I advise to use CentOS7, but Ubuntu is also ok. Be sure you have hardened your VPS according to this little guide.
So login into your VPS and do the latest updates. When they are done we are going to install OpenVPN by typing the following
wget https://git.io/vpn -O openvpn-install.sh && bash openvpn-install.sh
If you get an 'wget' error, please install wget.
It will ask you some question, so please read them carefully. When it asks for the IP just push enter. Also push enter for UDP. When it asks for which DNS servers you want to use press enter again. Then it will ask for a client name. Type SkyAdmin and press enter. After that it will install OpenVPN Server for you on the VPS. This is gonna take a while, so have some patience. But when it is done, it is all set. No difficult configuration issues. Your VPN server is ready.
We now need to make configuration files for all you nodes and your pc. 9 in total. We are going to do that with the following command
bash openvpn-install.sh
Choose option 1. It will ask you for a clientname and this time we type 'skynode01' and press enter. When it is done, do this 7 more times like 'skynode02', 'skynode03' etc. until 'skynode08'. When you are done, nine configuration files are ready. When you do
ls -al
you should see this
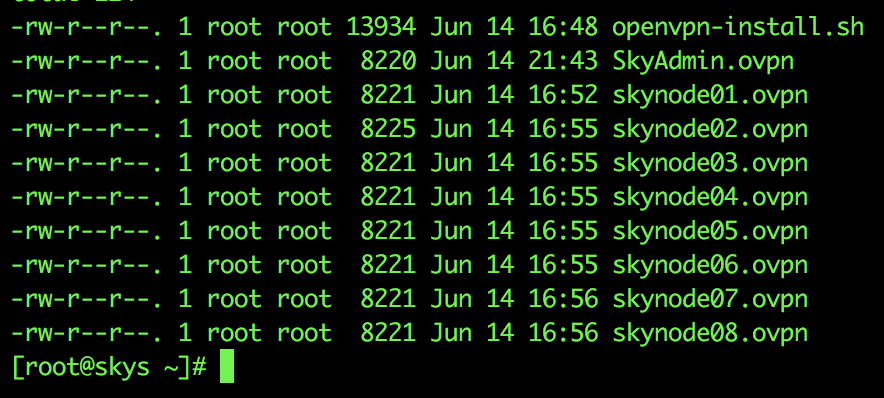
Be sure you leave the terminal open for later use!
Good, we are ready to configure our skynodes. But the default images from the Skywire github are not perfect unfortunately. We have to fix them first before we can use them properly.
Important: Before we are going to fix them, be sure you do NOT configure the manager (192.168.0.2) yet with the OpenVPN client. We do this one at the end.
Follow these steps per Skynode. After these steps go to the next Skynode and do the steps again. Until you reach Skynode08. So go to your manager page on port 8000 where you will see your 8 nodes so we can start the configuration.
The first and biggest problem we have with the Skynode default images is the time. Every time when you reboot the Skyminer the time resets itself because there is no battery on de Pi's. And to connect properly to your OpenVPN server you need the right time otherwise you get certificate issues. So let's fix this.
Go to the Skynode02 page in your manager and open up the Terminal. Let us first update & upgrade the distro. If you are using a different user instead of root place sudo before the command. But if you have created a different user you already know how this is working.
apt update -y && apt upgrade -y
Because we are working in the Terminal of the manager which can react buggy on vi (text editor) i like to install vim. You can also use nano, but i am a vim guy, so bear with me on this.
apt install -y vim openvpn
This will install vim and the OpenVPN client. Now let's fix the time for good.
vim /etc/systemd/timesyncd.conf
You will see something like this
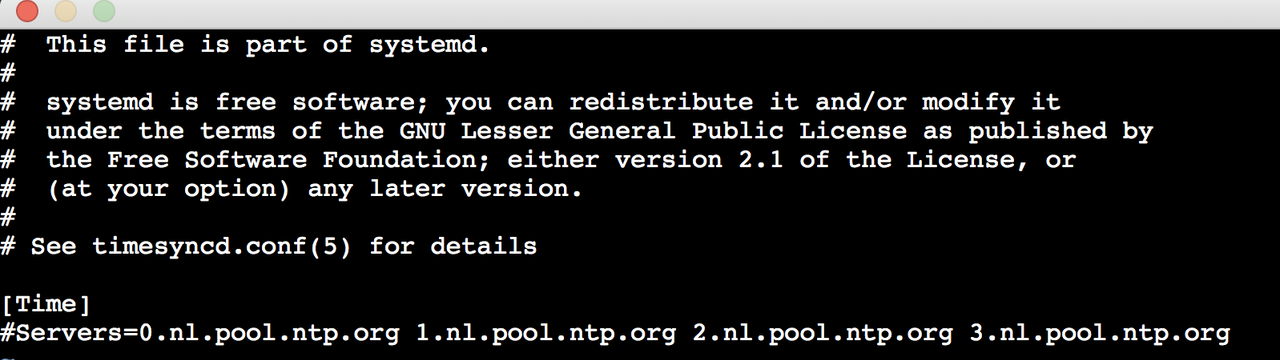
In your case there will be 0.debian.pool.ntp.org etc. instead of nl. So don't change it into nl :)
Remove the # before Servers=0.nl.pool.ntp.org 1.nl.pool.ntp.org 2.nl.pool.ntp.org 3.nl.pool.ntp.org
Now save the file and do the following
systemctl start systemd-timesyncd && systemctl enable systemd-timesyncd
To check if it is activated do the following
date
And when everything went well your time has been updated. What we did here is configuring the date and time and when the Pi's are restarting it automatically will update the date and time to the current one instead of going back to 1 January. They do need internet though!
Good, things are going into the right direction. Now it is time to configure the OpenVPN client. Do the following
vim /etc/openvpn/client.conf
This will make a new file named client.conf. What we need to do now is paste the content of one of the ovpn files into this file.
When you have read this tutorial very well then you still have your VPS terminal open. Go back to it and do the following
cat skynode02.ovpn
This will show you the content of that file. Be sure you copy EVERYTHING from it. Now go back to the terminal of Skynode02 and press
i
i means insert. Paste the content you just have copied into the file. Then push
esc
and then you type (not copy paste)
:wq!
and press enter. If everything worked out you just created the OpenVPN client config for Skynode02. Now let's enable and start it.
systemctl enable openvpn@client.service && service openvpn@client start
If you did exactly what i told you to do then you are now connected to your own OpenVPN server. You can check the ip by doing
curl ipinfo.io/ip
If this worked out for you then do above steps also for Skynode03 t/m 08. Be sure you use the corresponding ovpn file for each different node!
When you are finished with configuring Skynode02 t/m Skynode08 then you are ready to configure Skynode01 (the manager).
And here comes the tricky part. When you configure Skynode01 the same as above, you won't be able to surf to the manager page like you do now. I am still checking how i can fix that, but for now i have a solution for that. You have to install Viscosity (Win/MacOS free for 30 days) or Tunnelbrick (MacOS free) on your computer. Import the SkyAdmin.ovpn file into the program and connect. When you can connect to your OpenVPN server then disconnect it and configure Skynode01 by above instructions. When you start the OpenVPN client on Skynode01 and you can't access the manager page anymore then start the OpenVPN client on your computer and try to search for your manager page at http://10.8.0.2:8000 until http://10.8.0.10:8000. You will find your manager page back on the OpenVPN network.
Positive side of it is that you can access your Skyminer manager page from everywhere in the world as long you are connected to your OpenVPN.
- I am not familiar with Vim. What to do now?
Try this page or use Nano
- I have a question about this tutorial
Message me on Telegram @Yzord or Discord @BadAss