HTTP Proxy Service with Skywire VPN
Disclaimer: This implementation is experimental and may pose security risks since ports are open publically past the firewall. It’s important to add usernames and passwords to the
squid.conf file so that in case a client machine is compromised, the server is still safe from an attack. Additional security measures include running the CentOS system in a virtual machine for increased isolation in case of a security breach.
- Introduction
- Requirements
- Launching Skywire Nodes on the Server
- Routing Traffic Through Skywire Nodes
- Appendix
The following guide was created by Alex (@alexskyfleet) and edited by @Paperstream. It details the procedure on how to set up a remote server that takes connections to open ports and redirects them through a Skywire proxy.
This service can be used as a communication hub between machines for distributed computing or other decentralized systems. The setup was tested on a remote server running CentOS 7 with Skywire VPN configured using Docker. Connections to the server were forwarded by the caching proxy Squid to the corresponding Skywire node. Furthermore, since Skywire VPN is inherently a SOCK5 protocol, Polipo was used to map nodes to localhost for HTTP compatibility.
Install the following onto a server running CentOS 7 (or another Linux system) with the GNOME desktop environment installed. Installing Skywire is optional, since Docker pulls readymade Skywire images.
- Access the CentOS server with SSH using a program such as PuTTY or MobaXterm or your regular terminal if you're using Linux/Mac.
-
The server will be connected to the Skywire network by launching Skywire nodes in Docker containers using the tool
docker-compose. First, create a file nameddocker-compose.ymland see the Appendix for its implementation. -
Navigate to the directory that contains the
docker-compose.ymlfile and launch 5 separate Skywire nodes by executing the command:docker-compose up -d --scale swnode=5
-
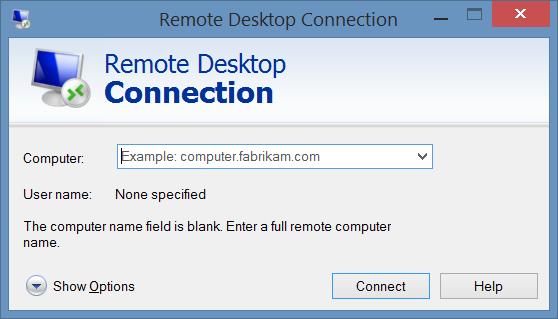
Now access the CentOS server via RDP using the program
Remote Desktop Connectionwhich is native to Windows. This may require installing the software package XRDP onto the server. See the Appendix for further details.
-
On the server, please go to the webpage located on
localhost:8000using the Firefox browser. The Skywire manager node interface will appear:
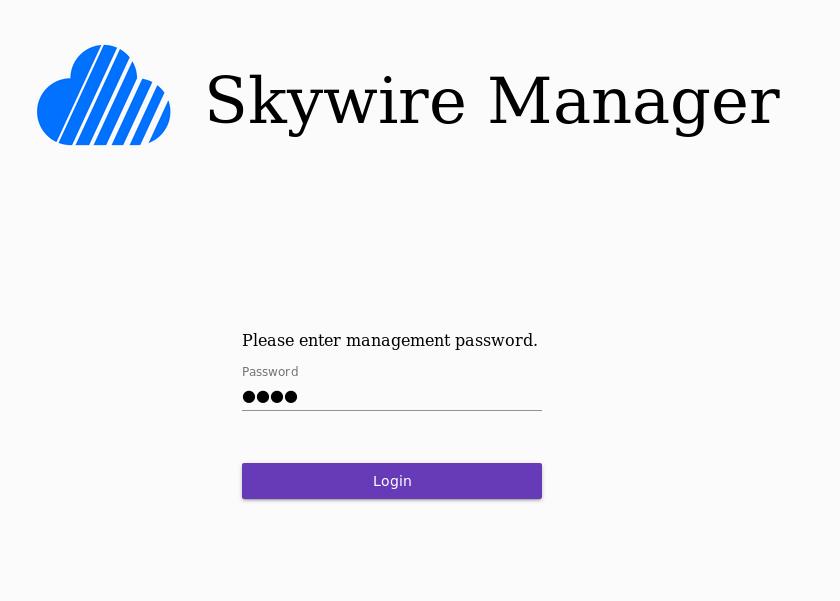
- Since this is a new manager node, input “1234” as the default login password. You will be prompted to enter a new password for the manager immediately afterward.
-
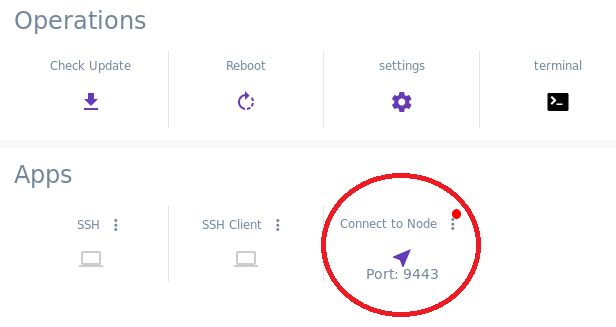
Access each node through the manager interface and connect them to other nodes in the Skywire network so that they can communicate with one another and forward traffic.
-
List and log the IP address of each Docker container using the command:
skywirerun_manager_1: 172.22.0.2skywirerun_node_2: 172.22.0.6skywirerun_node_3: 172.22.0.7skywirerun_node_4: 172.22.0.4skywirerun_node_5: 172.22.0.5
docker ps -q | xargs -n 1 docker inspect --format '{{ .Name }} {{range .NetworkSettings.Networks}} {{.IPAddress}}{{end}}' | sed 's#^/##';
In our case the IPs are as follows:
-
Map the Docker containers to a port in localhost using Polipo. This way the Skywire nodes can be accessed using HTTP.
Execute the following commands:polipo socksParentProxy="172.22.0.7:9443" proxyPort=30001 proxyAddress="127.0.0.1" &polipo socksParentProxy="172.22.0.6:9443" proxyPort=30002 proxyAddress="127.0.0.1" &polipo socksParentProxy="172.22.0.5:9443" proxyPort=30003 proxyAddress="127.0.0.1" &polipo socksParentProxy="172.22.0.4:9443" proxyPort=30004 proxyAddress="127.0.0.1" &polipo socksParentProxy="172.22.0.3:9443" proxyPort=30005 proxyAddress="127.0.0.1" &
-
Access the Squid configuration file with the command:
vi /etc/squid/squid.conf - Modify the configuration file using the implementation in the Appendix as reference.
-
Fill in the IP addresses of the client machines that will access the server in the line:
-
acl myclients src IP_ADDRESS/24
IP_ADDRESSis the address of the client machine. -
-
For each new Skywire node or connection, extend the configuration file as follows where
XXXis the port mapped by Polipo (30001-30005) andYYYis the port used by Squid to take in connections (3124-3128):
acl port_YYY_acl myportname port_YYYacl port_YYY_acl myportname port_YYYalways_direct deny port_YYY_aclnever_direct allow port_YYY_aclcache_peer 127.0.0.1 parent YYY 0 proxy-only default name=proxyYYYcache_peer_access proxyYYY allow port_XXX_aclcache_peer_access proxyYYY deny all
-
Start the Squid service and check its status using:
systemctl start squidsystemctl enable squidsystemctl status squid
-
Add an exclusion to port
XXXin the firewall with the following commands. This enables external machines to establish connections:sudo firewall-cmd --permanent --zone=public --add-port=XXX/tcpsudo firewall-cmd --reload
-
Test the implementation by opening Firefox on a client machine and configuring the network settings to use an HTTP proxy. Enter IP address of the server that is running Squid, and use port
XXXor any other configured port (3214 - 3218).
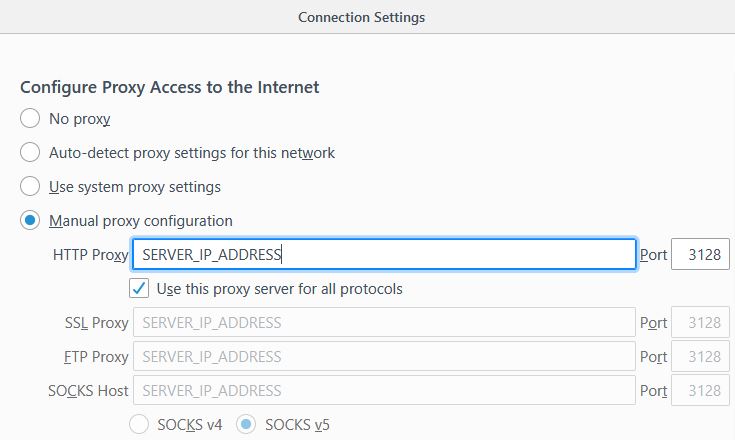
- Check your IP address in Firefox. It should be the address of a Skywire node that was connected to in the previous section.
-
Add the following two repos to the CentOS server with the following commands:
sudo rpm -Uvh http://li.nux.ro/download/nux/dextop/el7/x86_64/nux-dextop-release-0-1.el7.nux.noarch.rpmsudo rpm -Uvh http://li.nux.ro/download/nux/dextop/el7/x86_64/nux-dextop-release-0-1.el7.nux.noarch.rpm
-
Install the XRDP package and start it as a systemd service using:
sudo yum -y install xrdp tigervnc-serversudo systemctl enable xrdpsudo systemctl start xrdp.service
-
Allow the ports for XRDP through the firewall with:
sudo firewall-cmd --permanent --zone=public --add-port=XXX/tcpsudo firewall-cmd –reload
-
Configure SELinux with the commands:
sudo chcon –type=bin_t /usr/sbin/xrdpsudo chcon –type=bin_t /usr/sbin/xrdp-sesman
-
Edit the
xrdp.inifile as follows if the RDP connection is established from a Windows machine:vi /etx/xrdp/xrdp.ini
-
Comment out the line that says
Channel_code=1and save the file.
The following is the content of docker-compose.yml file used in this guide.
version: "3"
services:
    swmanager:
    image: skycoin/skywire:dev
    ports:
        - "8000:8000"
        - "5998:5998"
    swnode:
        image: skycoin/skywire:dev
        command: node -connect-manager -manager-address swmanager:5998 -manager-web swmanager:8000 -address $HOSTNAME:5000 -web-port $HOSTNAME:6001 -discovery-address testnet.skywire.skycoin.com:5999-028ec969bdeb92a1991bb19c948645ac8150468a6919113061899051409de3f243
		ports:
        - "5000"
        - "6001"
    depends_on:
        - "swmanager"
The following is the content of squid.conf file used in this guide.
#
# Recommended minimum configuration:
#

# Example rule allowing access from your local networks.
# Adapt to list your (internal) IP networks from where browsing
# should be allowed
acl manager proto cache_object
acl localhost src 127.0.0.1/32 ::1
acl to_localhost dst 127.0.0.1/8 0.0.0.0/32 ::1
acl ftp proto FTP
acl localnet src 10.0.0.0/8	# RFC1918 possible internal network
acl localnet src 172.16.0.0/12	# RFC1918 possible internal network
acl localnet src 192.168.0.0/16	# RFC1918 possible internal network
acl localnet src fc00::/7       # RFC 4193 local private network range
acl localnet src fe80::/10      # RFC 4291 link-local (directly plugged) machines
acl myclients src IP_ADDRESS/24

acl SSL_ports port 443
acl Safe_ports port 80		# http
acl Safe_ports port 21		# ftp
acl Safe_ports port 443		# https
acl Safe_ports port 70		# gopher
acl Safe_ports port 210		# wais
acl Safe_ports port 1025-65535	# unregistered ports
acl Safe_ports port 280		# http-mgmt
acl Safe_ports port 488		# gss-http
acl Safe_ports port 591		# filemaker
acl Safe_ports port 777		# multiling http
acl Safe_ports port 30001	# Skywire
acl Safe_ports port 30002	# Skywire
acl Safe_ports port 30003	# Skywire
acl Safe_ports port 30004	# Skywire
acl Safe_ports port 30005	# Skywire
acl CONNECT method CONNECT

#
# Recommended minimum Access Permission configuration:
#
# Deny requests to certain unsafe ports
http_access deny !Safe_ports

# Deny CONNECT to other than secure SSL ports
http_access deny CONNECT !SSL_ports

# Only allow cachemgr access from localhost
http_access allow manager localhost
http_access deny manager

# We strongly recommend the following be uncommented to protect innocent
# web applications running on the proxy server who think the only
# one who can access services on "localhost" is a local user
#http_access deny to_localhost

#
# INSERT YOUR OWN RULE(S) HERE TO ALLOW ACCESS FROM YOUR CLIENTS
#

# Example rule allowing access from your local networks.
# Adapt localnet in the ACL section to list your (internal) IP networks
# from where browsing should be allowed
http_access allow localnet
http_access allow localhost
http_access allow myclients

# And finally deny all other access to this proxy
http_access deny all

# Squid normally listens to port 3128
http_port 3128 name=port_3128
http_port 3127 name=port_3127
http_port 3126 name=port_3126
http_port 3125 name=port_3125
http_port 3124 name=port_3124

nonhierarchical_direct off

acl port_3128_acl myportname port_3128
acl port_3127_acl myportname port_3127
acl port_3126_acl myportname port_3126
acl port_3125_acl myportname port_3125
acl port_3124_acl myportname port_3124

always_direct deny port_3128_acl
always_direct deny port_3127_acl
always_direct deny port_3126_acl
always_direct deny port_3125_acl
always_direct deny port_3124_acl

never_direct allow port_3128_acl
never_direct allow port_3127_acl
never_direct allow port_3126_acl
never_direct allow port_3125_acl
never_direct allow port_3124_acl

cache_peer 127.0.0.1 parent 30001 0 proxy-only default name=proxy30001
cache_peer_access proxy30001 allow port_3128_acl
cache_peer_access proxy30001 deny all

cache_peer 127.0.0.1 parent 30002 0 proxy-only default name=proxy30002
cache_peer_access proxy30002 allow port_3127_acl
cache_peer_access proxy30002 deny all

cache_peer 127.0.0.1 parent 30003 0 proxy-only default name=proxy30003
cache_peer_access proxy30003 allow port_3126_acl
cache_peer_access proxy30003 deny all

cache_peer 127.0.0.1 parent 30004 0 proxy-only default name=proxy30004
cache_peer_access proxy30004 allow port_3125_acl
cache_peer_access proxy30004 deny all

cache_peer 127.0.0.1 parent 30005 0 proxy-only default name=proxy30005
cache_peer_access proxy30005 allow port_3124_acl
cache_peer_access proxy30005 deny all

# Uncomment and adjust the following to add a disk cache directory.
#cache_dir ufs /var/spool/squid 100 16 256

# Leave coredumps in the first cache dir
coredump_dir /var/spool/squid

#
# Add any of your own refresh_pattern entries above these.
#
refresh_pattern ^ftp:		1440	20%	10080
refresh_pattern ^gopher:	1440	0%	1440
refresh_pattern -i (/cgi-bin/|\?) 0	0%	0
refresh_pattern .		0	20%	4320

httpd_suppress_version_string on
forwarded_for off
always_direct allow ftp
never_direct allow all