Skywire SSH Remote Access

This guide assumes that you have read and understood the readme.md, downloaded the official images or installed Skywire from source and do every step exactly the way it is described. Misconduct will lead to inability to connect and to potential reflashing. It is very important that there is no IP collision with your existing home router subnet. The default settings of the official images as well as the router of the skyminer are using the 192.168.0.0/24 subnet.
Follow this guide only if you have a Skyminer at a remote location and want to be able to remotely manage it.
Do not share the sshs app key generated in this guide!
After finishing this guide you will be able to remotely connect to your running Skywire nodes per SSH. Your nodes need to be up and running and have a working network connection to the discovery. Check if your public keys are listed on there before you start and use the other guides and our Telegram chats to troubleshoot why they are not listed.
The instructions on how to setup the port forwarding rules can be found in the networking guide. Please note that the three specified port rules must be accessible from within the network that you're using to proceed with this guide.
- Running Skywire manager & node(s)
- Network connection, connection to the discovery
- Running SSH client on the nodes + in the managers web interface
- Installed Skywire node on the device used for remote connection or access via port forwarding to a node
As previously stated you need to have Skywire running and have access to the manager in your browser. If that is not the case please install Skywire first, you can use guides from our forum, install from source or use the official Skybian images.
The pi that is used for establishing the connection in the following guide has the local IP 192.168.0.3.
First we need to start the SSH service on your node that you later want to connect to.
Click on SSH:
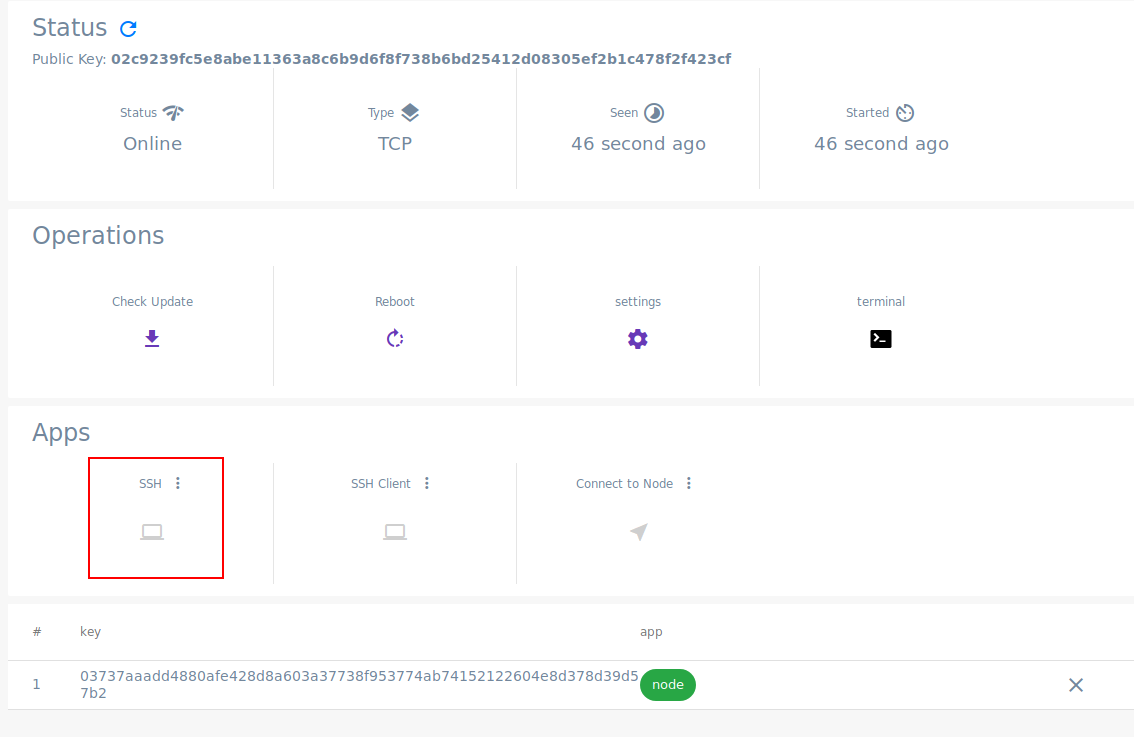
This will start the SSH server that will enable incoming connections to be established. Should look like this:
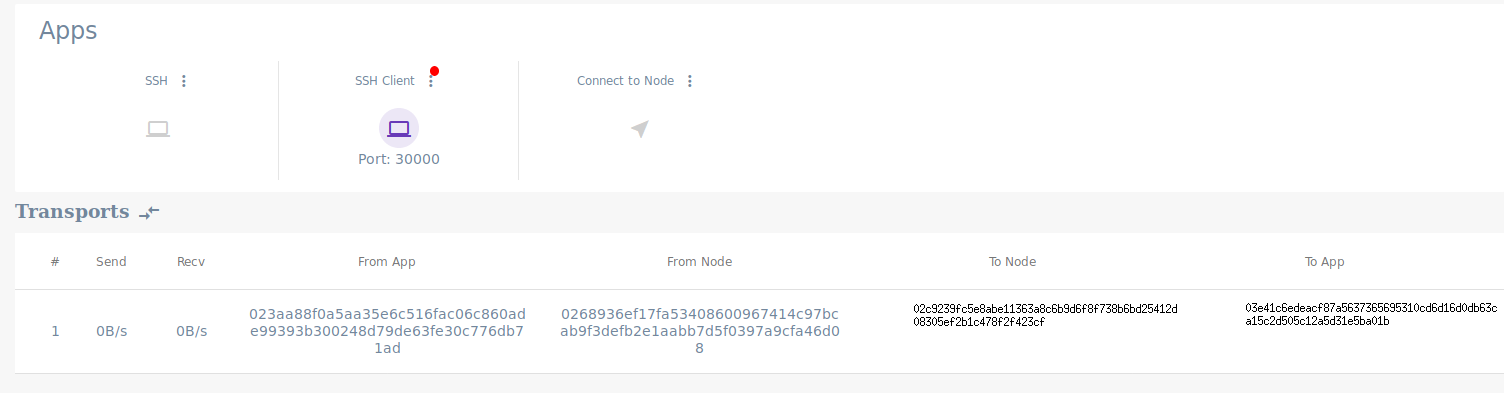
You need to note down the public key of the node, as well as the SSH key (sshs). Both are marked with a red rectangle.
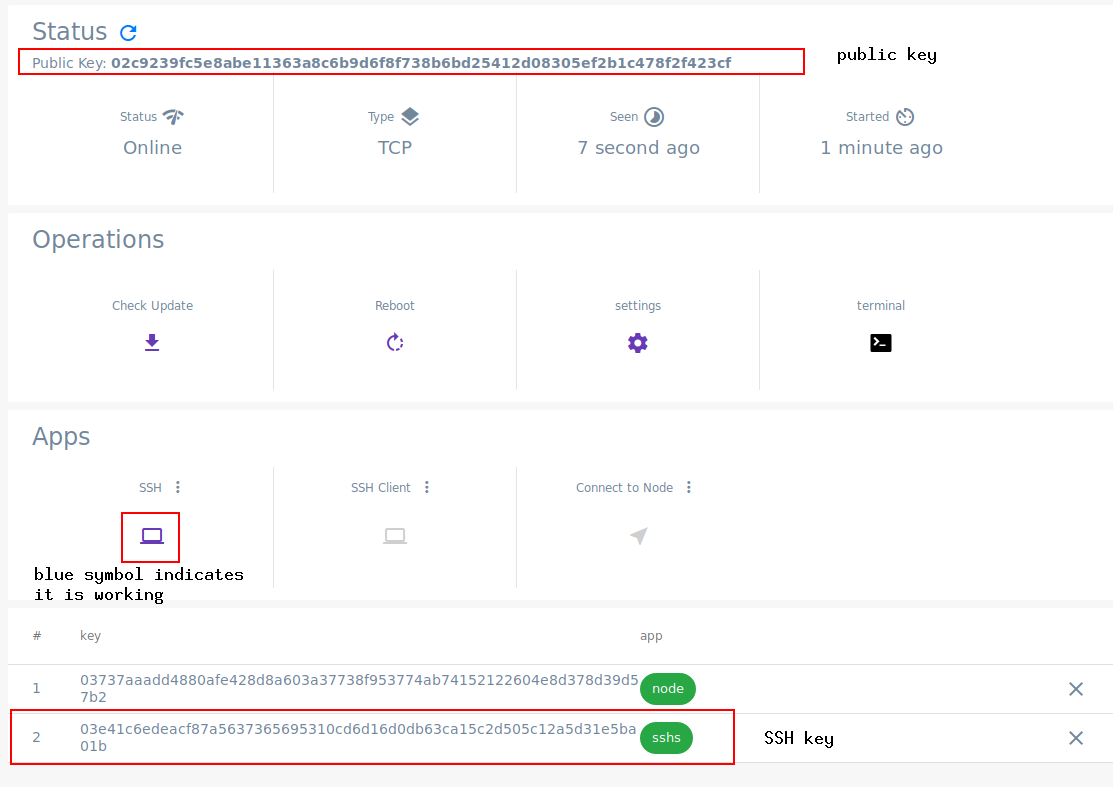
node key = public key;
in this example public key = 02c9239fc5e8abe11363a8c6b9d6f8f738b6bd25412d08305ef2b1c478f2f423cf

app key = sshs key;
in this example sshs key = 03e41c6edeacf87a5637365695310cd6d16d0db63ca15c2d505c12a5d31e5ba01b
You really need to do this process only once, since you can access the whole subnet after establishing a connection to one pi, but to be safe you should do it on at least one other node in case the pi crashes.
Best practice would be to note down the keys (public key + sshs key) of all 8 nodes and enable the SSH service on all pi's. This way you'd still be able to gain access even if 7 of the eight pi would crash.
The following steps are to be executed on another node, potentially, after testing, from a remote location anywhere in the world
Connection can only be established if the two nodes are not within the same subnet.
To do this from remote you need to have a Skywire node running on the device your using, or you need to have access to one via port forwarding. Check the linked resources if you need guidance how to do this.
Open the manager web interface and click on SSH Client.
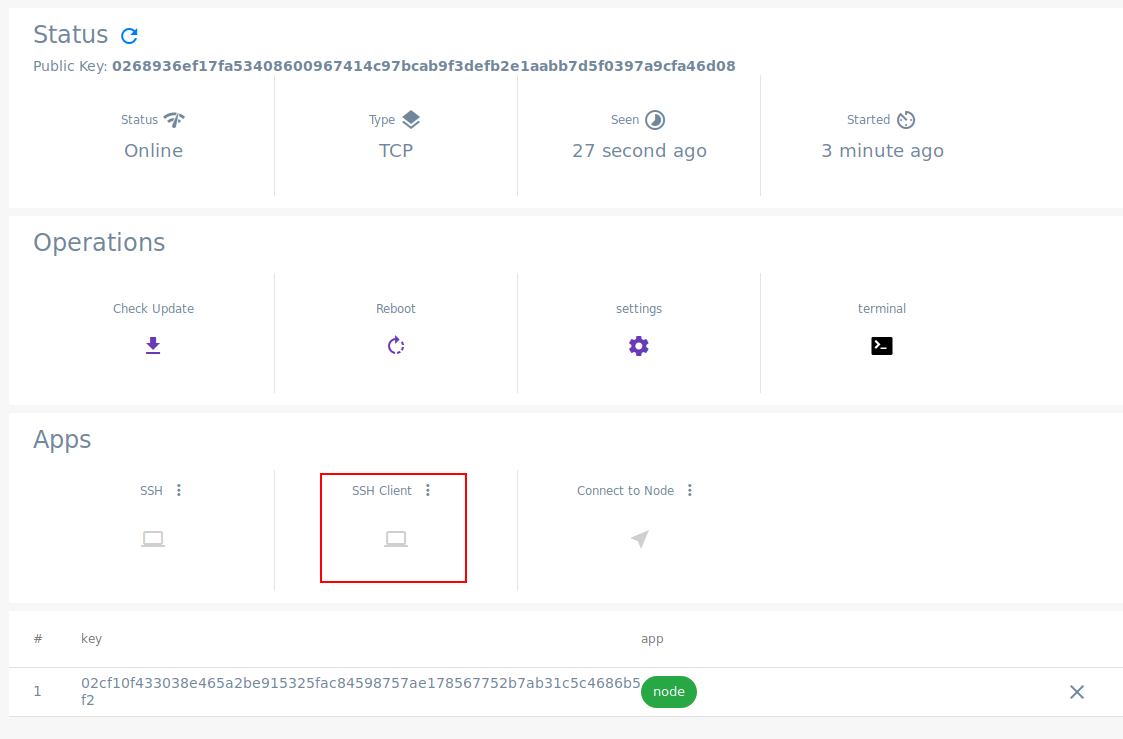
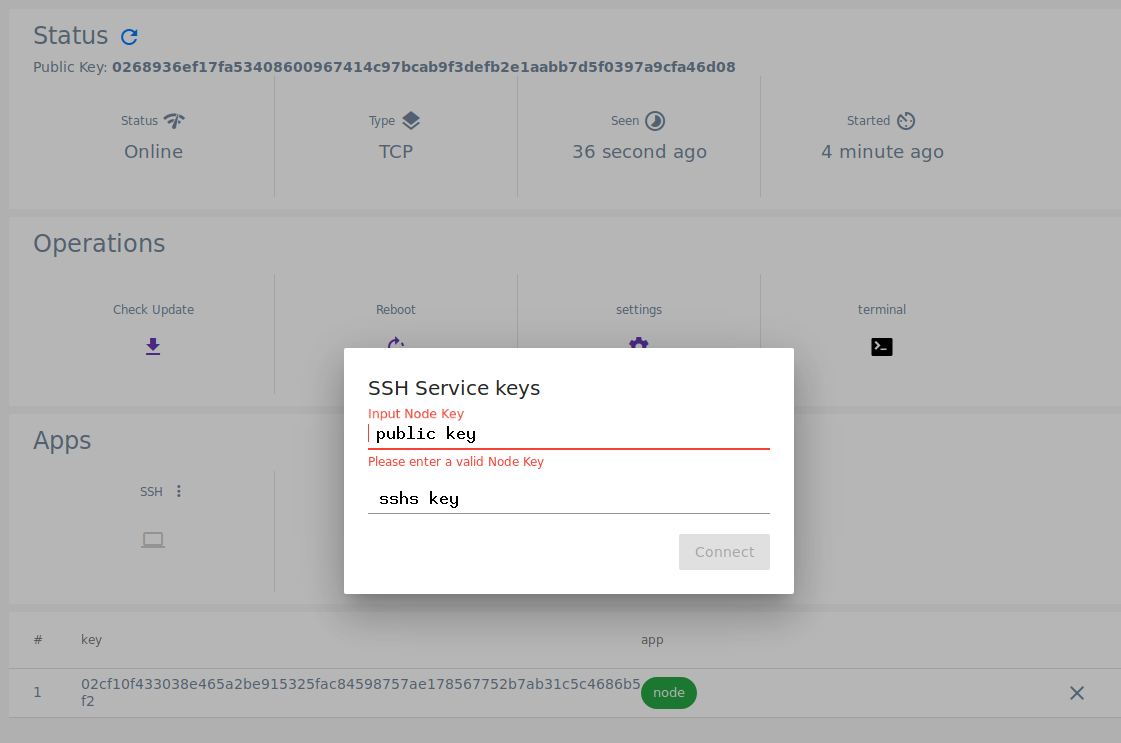
The node key is the previously noted public key and the app key is the sshs key.
Don't share the sshs key!
Enter them in the popup window and click on Connect.
A successful connection should look like this:
Please note down the port that is being displayed on which the connection was established. In this example the port is 30000.
You can obtain the node by executing netstat -tlp on the pi that established the connection.
By now you have successfully established a SSH connection to another Skywire node. Now you just need to put it to use.
First note down the local IP of the pi you're using right now by executing hostname -I. In this example the local IP is 192.168.0.5.
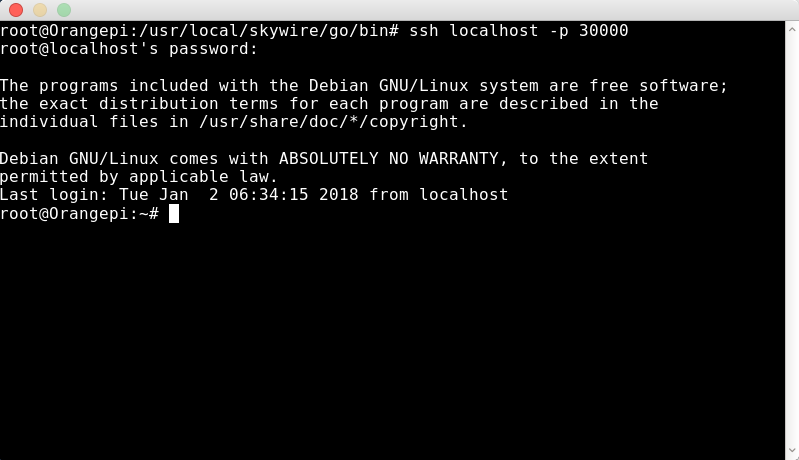
To do this, open a terminal in the manager, or connect to the node which you used for establishing the connection via SSH (Use putty if you're on windows and the terminal on mac/linux).
Then execute ssh localhost -p 30000, note that you might have to replace 30000 in case you have multiple connections established.
Option 1, login via terminal on linux:

Option 2, use the terminal inside the manager web interface:
Now you are logged into the remote pi via SSH session. You have gained access to modify the file system, reboot the pi and of course, SSH access to the whole subnet.
First obtain the local IP address of the pi you're connected to by executing hostname -I.
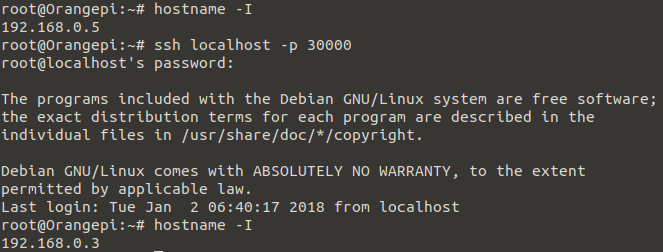
Please note that typing might suffer from a performance lag and the characters will be displayed after a short delay. As you can see the SSH connection worked, the local IP changed from 192.168.0.5 (local pi) to 192.168.0.3 (remote pi)
That's it, you are now logged into your pi from a remote location using the Skywire SSH function.
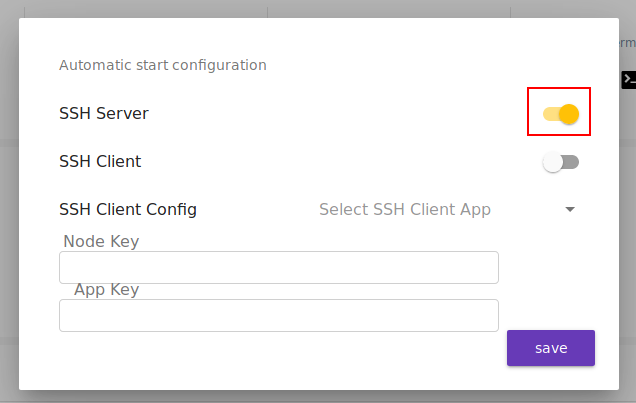
You want to have the SSH functionality autostart in case your pi needs to be restarted.
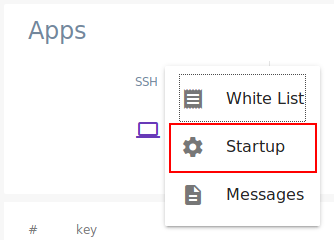
To do this, click on the three little dots next to SSH
![]()
Next click on Startup
Now you need to enable the autostart of the SSH server, the configuration file will be saved on disk so the settings will remain after turning the pi off.
Test the connection by requesting your ipv4 address via curl v4.ifconfig.co, the output should differ from the output of your actual IP address at your current location.
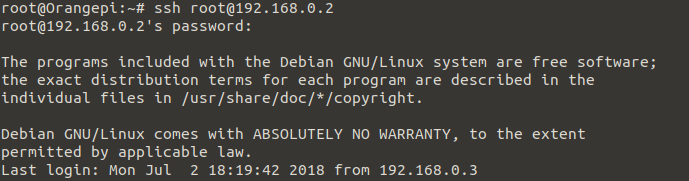
Furthermore you could try to login to the other pi's via SSH, by executing ssh root@192.168.0.2
First you need to install Skywire on the device you want to use for this. Go to the forum to find guides for windows, mac or linux.
Use the commands from github to run the manager and host a node
Establish a connection just like explained above and note down the port number. It's again port 30000 in this example.
The following is described for using the terminal on linux, it can be done using putty as well.
Open a terminal on your laptop/computer and execute
ssh -D 8123 -f -C -q -N root@localhost -p 30000
D: Tells SSH that we want a SOCKS tunnel on the specified port number (you can choose a number between 1025-65536);
f: Forks the process to the background;
C: Compresses the data before sending it;
q: Uses quiet mode;
N: Tells SSH that no command will be sent once the tunnel is up
You will be queried to enter the password of the remote pi you want to connect to. Once that's done you get no output because the process is forked to the background.
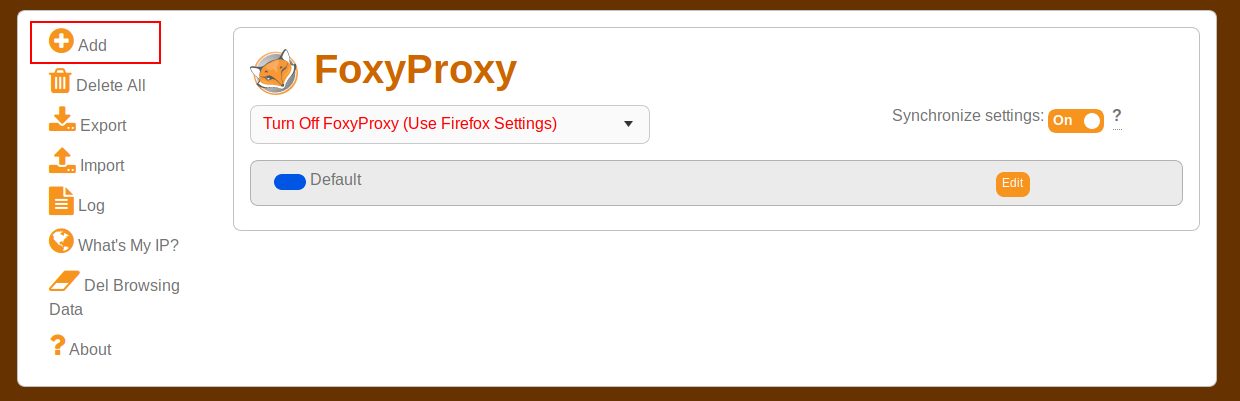
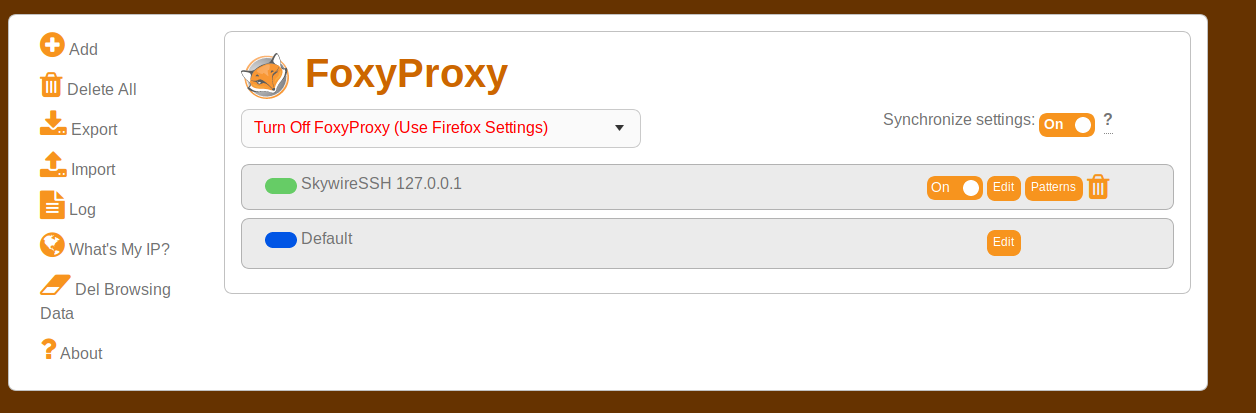
Now we need to use this connection to gain access to the web interface of the remote manager. Install a proxy app of your choice, this guide uses FoxyProxy, it's available for all major browser applications such as Firefox, Chrome, Safari etc.
Install the plugin and go to 'Options' and click on 'Add'.
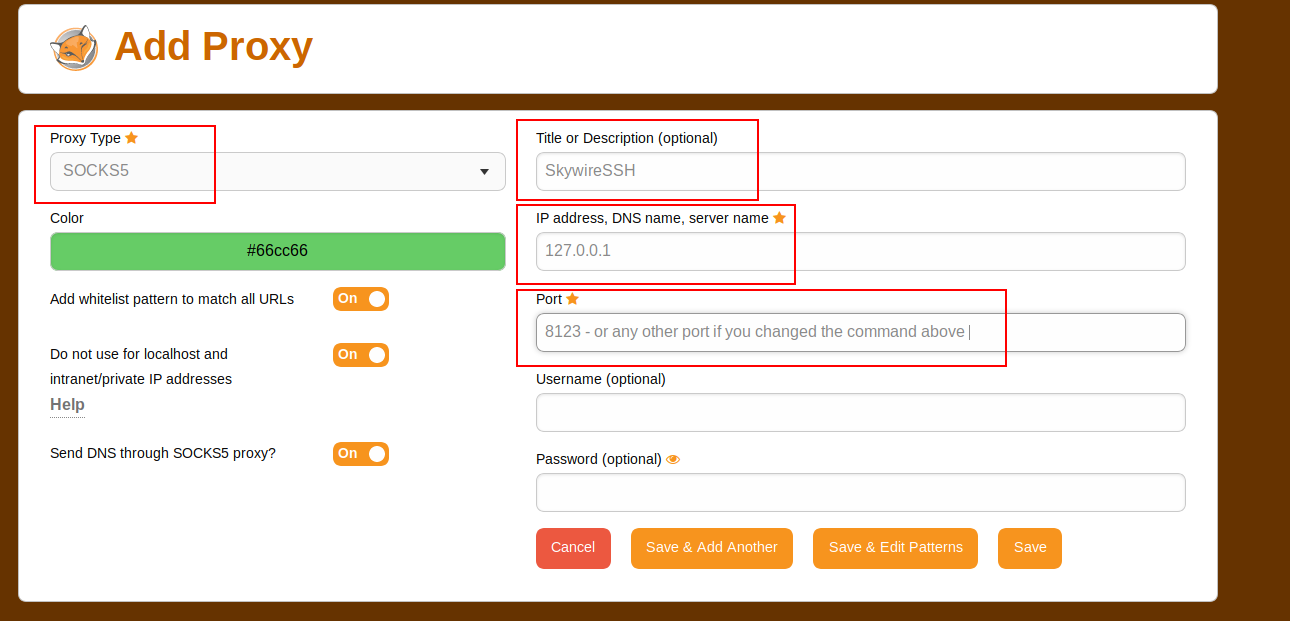
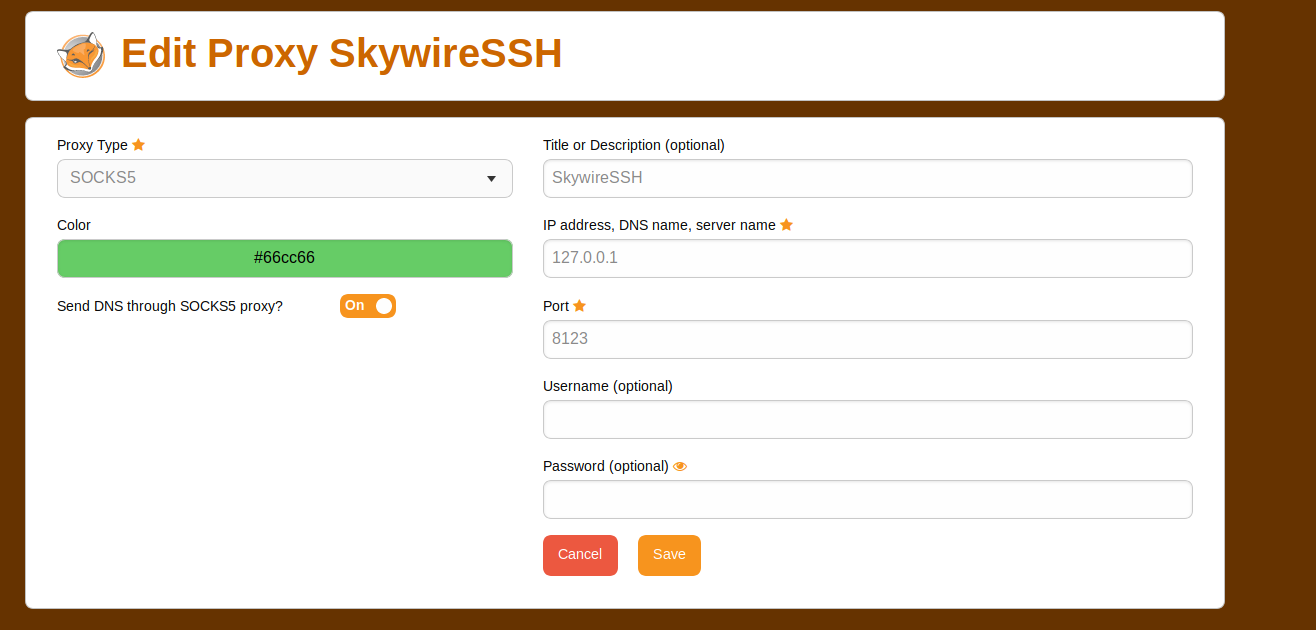
You need to change the proxy type to 'SOCKS5', put a description and add the localhost IP + the port you defined above with the -D command, in this example we use the port 8123.
Should look like this:
Save it, this should bring you to this screen.
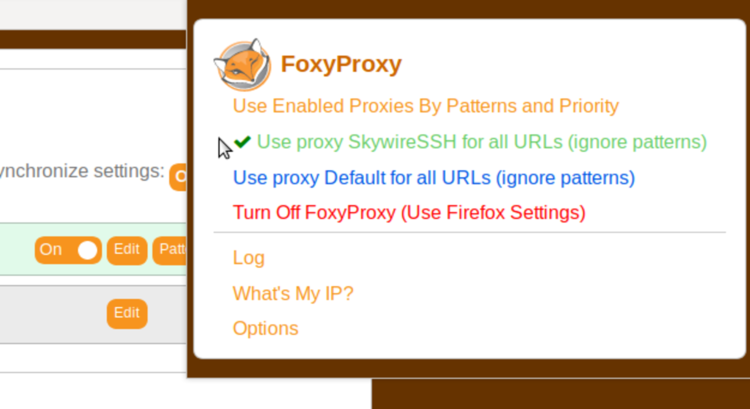
Click on the previously established proxy and check if the settings are correct.
If everything looks good enable the proxy using the plugin:
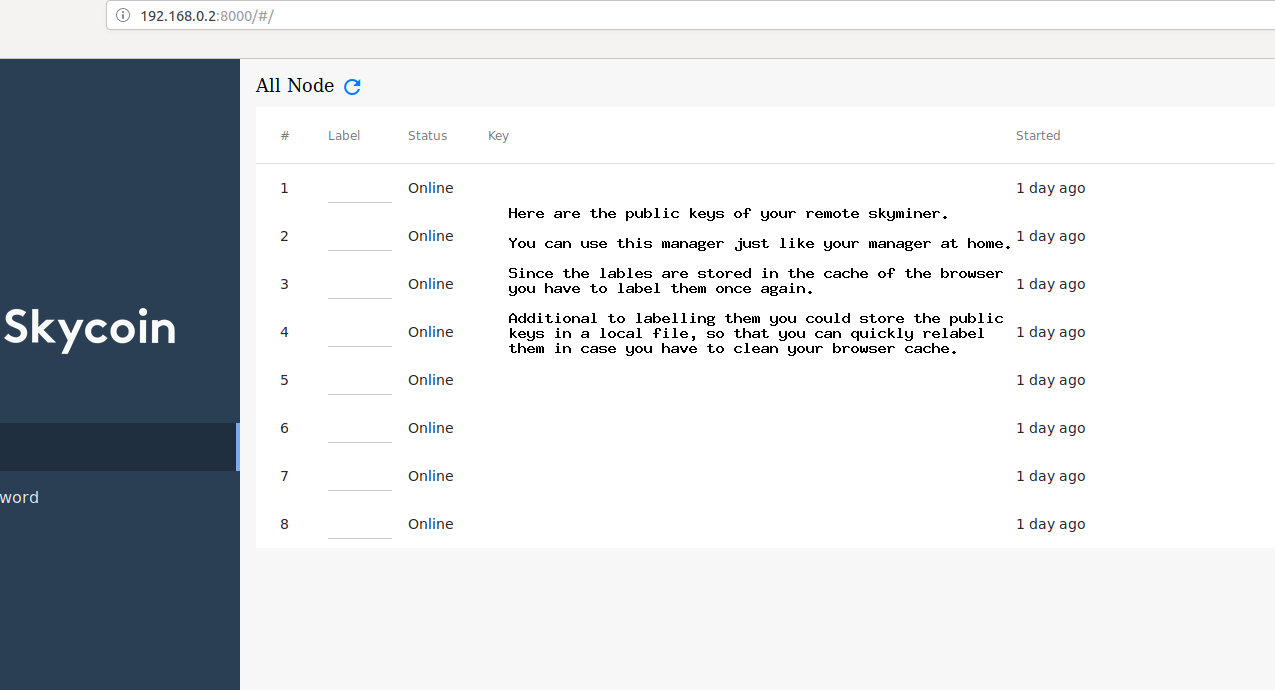
Now you should be able to view the manager web interface from remote and check if they are connected to the discovery etc.
You are in the subnet of the manager, so type 192.168.0.2:8000 to access the manager web interface
If you want to close the SSH process that was forked to the background you need to get its PID (process ID).
Execute ps aux | grep 'ssh -D' | awk '{print $2, $11}'
It will return two lines,
4365 ssh
6633 grep
As you can see the PID in this example is 4365. To close the tunnel you just need to kill the process via sudo kill 4365where you have to replace 4365 respectively for your own PID.